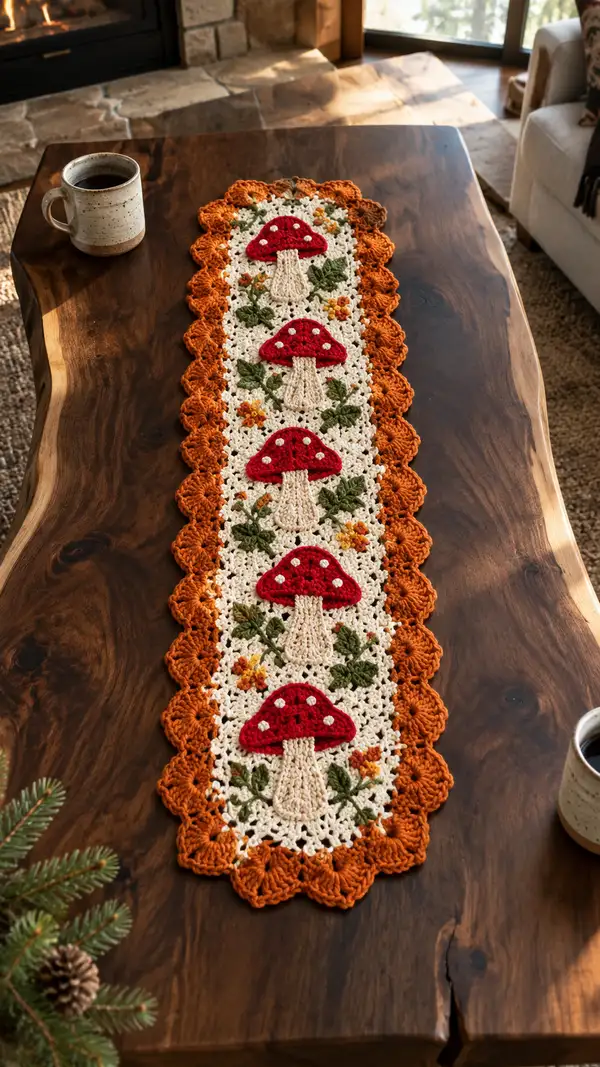
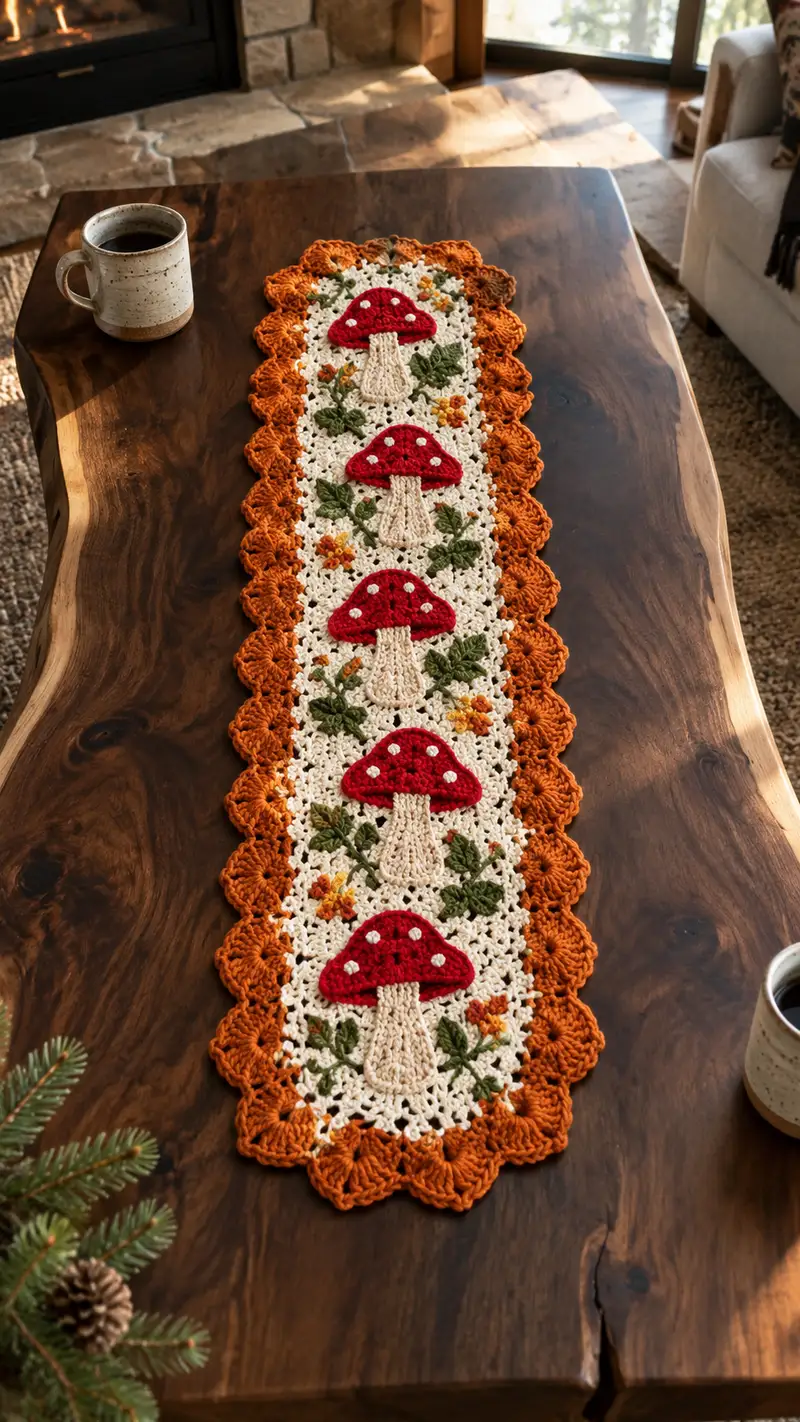
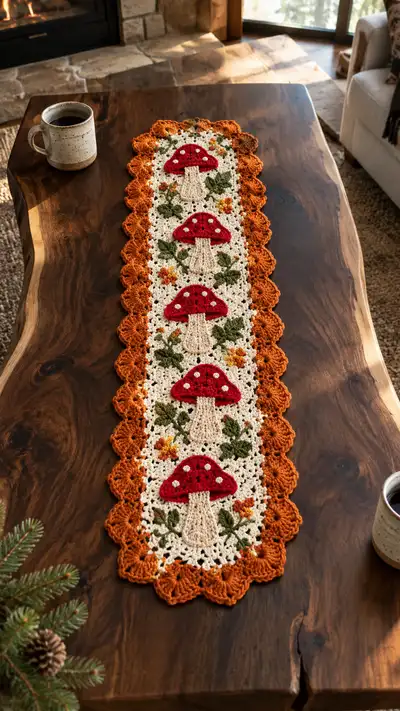
A charming, narrow table runner featuring four whimsical toadstool motifs framed by lacy cream panels and a warm pumpkin-orange scalloped border. The runner showcases textured mushroom caps in bright red, ribbed beige stems, green leaves, and tiny embroidered orange blossoms for a cozy autumn look. Perfect for a mantel, buffet, or coffee table, this pattern uses basic stitches, applique techniques, and a decorative shell edging to create a polished seasonal accent.
Progress Tracker
0% Complete
— Pattern Overview :
Info :
This runner is constructed from four repeating toadstool medallions worked flat in the round and joined vertically with lacy connector rounds. Each medallion receives three appliques: a ribbed stem, a red cap, and leaf motifs plus small embroidered flowers. After joining the four medallions with two rounds of lacy connecting stitches, the entire long panel is edged with a textured scalloped border in pumpkin-orange. Work one full medallion and all its appliques, then make 3 more identical medallions and join. Blocking each medallion before joining will greatly improve the final look.
— Toadstool Medallion (Make 4) :
Round 3 :
(1 sc, inc) x 6 (18)
Round 4 :
(2 sc, inc) x 6 (24)
Round 5 :
(3 sc, inc) x 6 (30)
Info :
Work these rounds tightly to create a firm center for the medallion. Use a stitch marker to mark the first stitch of each round. Each increase round adds 6 sts; math is consistent for later shell counts.
Round 6 :
(4 sc, inc) x 6 (36)
Round 7 :
(5 sc, inc) x 6 (42)
Round 8 :
(6 sc, inc) x 6 (48)
Round 9 :
1 sc in each st (48)
Round 10 :
Change to cream/ivory yarn. *Sk next st, (dc, ch2, dc) in next st, sk next st, sc in next st* Rep across to end, join with sl st (12 shells and 24 sc alternate spaces, 48 foundation points)
Info :
This round starts the lacy look — shells (dc,ch2,dc) create points for leaves and vines later. Keep shells evenly spaced; you will have 12 shells if your count is maintained at 48.
Round 11 :
Sl st into ch2 sp, ch3 (counts as dc), (2 dc, ch2, 3 dc) in each ch2 sp around (12 shell clusters), sl st to top of ch3 (72 dc total in cluster round if counted as 3-dc shells; working clusters keeps the lacy shape)
Round 12 :
Ch1, sc in each st and in each ch2 sp around to tidy and form a firm edge (count will approximate 12 shells + spacer scs, maintain consistent tension to keep width even)
Info :
At this point your medallion measures roughly 5.5-6 inches across (depending on gauge). If your medallion is smaller or larger, adjust hook size by 0.25-0.5mm to match dimensions. Block lightly before applique for neat joins.
Round 13 :
Ch3, dc in next 2 sts, ch2, dc cluster in next ch2 sp, *ch2, sk next 3 sts, dc in next 3 sts, ch2, dc cluster in next ch2 sp* Rep around. End with sl st to top of ch3 (this increases the overall lacy frame and provides spots to attach appliques)
Round 14 :
Ch1, sc in each dc and sc in each ch2 space around to create a tidy row for appliques to be sewn on (count will vary depending on cluster interpretation; there will be roughly 96 small stitches around)
Info :
Decide where the mushroom center will sit — mark with a removable stitch marker or an extra contrasting thread. For this design place the mushroom centered vertically with its stem beginning at the middle of the medallion so the cap sits above the center. Use a small ruler to locate center exactly.
Round 15 :
Ch4, *(tr, ch2, tr) in next cluster top, ch3, sk next cluster top, sc in next sc* Repeat around to build tall lacy arches; join with sl st at top of ch4 (arches will form delicate framework for vines)
Round 16 :
Ch1, sc in each top of arch and in chain spaces around to make an even stitching ground for embroidery and appliques (maintain stitch count around to preserve round shape)
Info :
Fasten off cream and weave tail; do not cut too short — leave enough for sewing appliques. Block the medallion flat now: pin gentle arch points to opening and spritz, allow to dry. Blocked motifs join more smoothly and lining will be even when joining medallions.
— Mushroom Stem Applique (Make 4) :
Info :
Stems are worked flat in beige/tan with a ribbed texture using alternating rows in BLO to create pleating. Each stem is slightly tapered and then flattened to attach. Make 4, one for each medallion.
Round 1 :
Ch11, sc in 2nd ch from hook and across (10) — foundation chain for stem width
Round 2 :
Turn, ch1, sc in BLO across (10)
Round 3 :
Turn, ch1, sc in FLO across (10)
Round 4 :
Repeat Rounds 2-3 two more times to build a ribbed rectangle (4 rows worked in alternating BLO/FLO gives a visible rib)
Round 5 :
Ch1, sc2tog at first two sts to begin taper, sc across until last two sts, sc2tog (8)
Round 6 :
Turn, ch1, work 1 sc in each st across (8)
Round 7 :
Sc2tog at first two sts, sc across until last two sts, sc2tog (6)
Round 8 :
Turn, ch1, sc in each st across (6)
Round 9 :
Fold stem lengthwise with RS facing out. Sl st through both layers along long edge to create a flat, slightly rounded stem. Leave long tail for sewing. Lightly stuff (optional) with a tiny bit of polyfill for gentle structure.
Info :
Shape the bottom of the stem slightly wider or pointed as you prefer when sl-stitching together. Only a very small amount of stuffing creates a natural curve without making the stem bulky under the cap.
— Mushroom Cap Applique (Make 4) :
Info :
Caps are worked in bright red with shaping to create a dome. They are slightly cupped so they sit over the top of the stem and are sewn to the medallion. White spots are worked as small french knot-style crochet dots (tiny embroidered knots) in the final assembly.
Round 1 :
With red, 6 sc in MR (6)
Round 3 :
(1 sc, inc) x 6 (18)
Round 4 :
(2 sc, inc) x 6 (24)
Round 5 :
(3 sc, inc) x 6 (30)
Round 6 :
1 sc in each st around (30)
Round 7 :
BLO: ch1, sc in each st BLO around to create a slight reverse ridge that helps cap cup (30)
Round 8 :
Work alternating sc and hdc around to start shaping the underside of the cap: *sc in next st, hdc in next* around (30)
Round 9 :
Ch1, (sc2tog, 3 sc) x 6 (24) — slight decrease to form curve under cap
Round 10 :
Ch1, 1 sc in each st around (24)
Round 11 :
Ch1, sc in next 3 sts, (hdc, ch1, hdc) in next st, sc in next 3 sts, repeat to create scalloped underside where cap will sit on stem (this forms subtle leaf-like lobes — maintain total approximate stitch count of 24 by distributing clusters evenly)
Round 12 :
Finish by slst to first sc, fasten off leaving long tail for sewing. Add small white embroidered dots (use small amounts of white yarn and a yarn needle to stitch tiny knots or french-knot-like stitches) — place 6-8 dots per cap in gently curved arrangement.
Info :
If you prefer a flatter cap, omit rounds 9-11; for a puffier cap add an extra round of inc evenly spaced. Try the cap on the medallion before final sewing to ensure correct positioning over stem.
— Leaf Appliques (Make 8 small leaves per medallion) :
Round 1 :
With green, ch8, sc in 2nd ch from hook, hdc in next, dc in next 2, hdc in next, sc in next 2 (7 sts across) — forms small leaf shape
Round 2 :
Turn, ch1, work 1 sc across, sl st at base to create slight point. Fasten off leaving tail for sewing. Make 8, arrange around stem in pairs for each medallion, leaving space for embroidered flowers.
Info :
Use a tapestry needle to curve leaves slightly when sewing so they appear to tuck under the cap. Vary direction for a natural, organic look. You can also add a single central vein with a few surface slip stitch lines in slightly lighter green.
— Tiny Flower Embroidery (Make 2–4 per medallion) :
Info :
These are worked directly onto the medallion using short surface stitch techniques with golden yellow and burnt orange yarn. Flowers are clustered near leaves; each flower is approximately 8–10mm in diameter once stitched.
Step 1 :
Bring yellow yarn up through medallion at flower center, make a tight French-knot-like loop by wrapping yarn twice around the needle and pulling through; secure with small backstitch. Make 3–4 small petals around center using small detached chain or lazy daisy technique (pull small loops and tack down with a single anchoring stitch).
Step 2 :
Add tiny orange centers or a small contrasting stitch to the middle of each blossom to give dimension. Use thread tension lightly to avoid puckering the lacy base.
Info :
Do all embroidery before joining medallions. Embroider the same arrangement on each medallion to keep the runner symmetrical. If you prefer, work flowers in two tones for extra depth.
— Assembling Appliques to Medallion :
Info :
Place the stem centered on the medallion vertical axis so the top of the stem meets the medallion center. Pin or baste the stem in place with contrasting yarn tail to check location — the cap will cover the top of the stem by approximately 6-8 stitches worth of height. Place leaves on either side of the stem at the base and slightly above the stem start to create natural growth. Flowers are stitched into remaining spaces.
Step 1 :
Sew stem in place with whip stitch using long beige tail. Use small, even stitches and hide the tail end inside the folded seam if possible. Backstitch at top and bottom for security.
Step 2 :
Position cap over the top of the stem. Using the long red tail, whip stitch cap to medallion through underside scalloped round and top of stem — catch a few stitches of the stem to anchor the cap firmly. Make sure the cap sits slightly puffed; do not pull stitches too tight or the cap will flatten.
Info :
Placement Tip :
Each cap should be centered horizontally on the medallion. Leave a gap of ~1.5–2" between caps when medallions are joined to keep spacing similar to the sample runner. Use pins to test overall spacing before stitching medallions together.
— Connector Panel Rounds (Work after making 4 medallions) :
Info :
Once your four medallions are completed with appliques and embroidery, you will join them vertically with two rounds of lacy connector stitches to create a continuous central panel. Lay medallions right side up in vertical sequence with about 1/4" gap between edges (the connector rounds will bridge them). Use locking stitch markers or pins to hold alignment.
Round 1 :
With cream yarn, join at top of upper medallion outer round. Ch3 (counts as dc), *dc in each top of arch of medallion 1 across, ch2 between medallions to span gap, then continue dc around medallion 2, ch2 to medallion 3, dc around medallion 3, ch2, dc around medallion 4. The idea is to create two long rows of dc and ch spaces linking the medallions—adjust ch2 length to make a flat join without puckering.
Round 2 :
Ch1, sc in each dc and in each ch2 space around the long joined strip to tidy and create a stable ground for outer edging. Fasten off and weave tails. The joined panel now measures approximately the width of one medallion (roughly 6-7 inches) and the length of four medallions plus gaps (~36-40 inches). Adjust by adding smaller spacer stitches if your medallions measure differently.
Info :
Check that the joined panel lies flat before moving on. If there is any cupping at joins, unpick and reduce or increase connector chain length to even tension. Blocking the joined panel flat will help prepare for border work.
— Stabilizing Row (Optional to widen runner) :
Round 1 :
To create a little more breathing room between medallions and the scalloped border, add a stabilization row: With cream, join at any stitch, ch3, (dc, ch1) across the long sides of the panel creating evenly spaced ch1 loops to accept scallops later. Work across both long sides and both short ends evenly. This does not change overall math drastically but gives a stable foundation.
Info :
If you prefer a narrower runner like the sample photo, skip the stabilization row and go directly to the shell edging attached to the medallion outer round.
— Pumpkin-Orange Scalloped Border (Entire Runner Edging) :
Info :
The scalloped border is worked in pumpkin-orange around the entire joined panel. It’s constructed in two contrasting shell rounds and a final scallop round for a deep textured edge. Work evenly and count scallops along a long edge then match on opposite side to keep symmetry.
Round 1 :
Join orange yarn at any side stitch. Ch1, sc evenly around entire runner edge including short ends and long sides, placing 1 sc into each sc or into each ch-space as needed to maintain smooth curves. If necessary add or skip a single sc every 4–8 inches to keep the border flat. This creates a foundation of sc around (stitch count will vary depending on connector choices).
Round 2 :
Ch3 (counts as dc), *sk 2 sts, work (5 dc) shell in next st, sk 2 sts, sl st into next st* Repeat around to form evenly spaced shell groups. Aim for 1 shell every ~1/2"; adjust by adding or removing shells evenly until the long sides have an even number of shells matching the opposite side. Join with sl st to top of ch3.
Info :
Count shells along one long edge and ensure opposite long edge has the same number — if necessary add one shell to each short end to balance. Use pins to mark shell placement before working round 2 if you prefer exact symmetry.
Round 3 :
Ch1, in each shell work: (sl st into center of shell, ch3, (dc, tr, dc) in shell center, ch3, sl st) to create raised scallop. In the flat spaces between shells work 1 sc. This creates a deeper scallop with a central treble for texture. Repeat around and join with sl st.
Round 4 :
Ch1, sc in each st and sl st along scallop edges to tidy and stabilize the scallops. Fasten off orange and weave ends into scallop valleys for a smooth back finish.
Info :
For a more pronounced shell, repeat Round 2 and then Round 3 to add a double-layer scallop. The sample runner shows a fairly full scallop (two layers) which you can achieve by adding an extra shell row before the final scallop finish.
— Optional Reinforced Edge (Extra Stability) :
Round 1 :
With a contrasting cream or the orange, work a final picot round: join in back loop only of scallop tip, ch3, sl st into same st to create picot, sk next st, sl st in next — repeat to create a delicate picot trim. This secures lobes and helps scallops keep their shape over time.
Info :
Picot rounds are purely decorative and optional. Test how the runner lies after the main scallop rounds; add picots only if you want a crisp decorative edge or to visually tie in the cream highlight.
— Final Finishing and Blocking :
Info :
Weave in all tails, trimming close to the work. Lightly block the entire runner on a flat surface using pins to open scallops and flatten medallions. Use a steam iron held a few inches above the dried wet-blocked piece if needed, or spritz and air dry. Blocking ensures scallops flair and medallions are even.
Step :
Check the underside for any loose seams and add extra whip stitches where appliques meet the body if needed. Secure embroidered flower knots with a small anchoring stitch on the back to avoid snags.
Info :
When storing, fold the runner gently rather than rolling to preserve scallop edges. Spot clean stains with a gentle hand wash and lay flat to dry; do not tumble dry as this can distort delicate shells.
— Alternate Lengths and Repeat Notes :
Info :
To lengthen the runner, work additional medallions and join with the same connector rounds — each additional medallion adds approximately the diameter of one medallion (roughly 8–9 inches with this gauge). To shorten, reduce to 2 or 3 medallions and work border accordingly. When changing number of medallions, recount shells and adjust scallop distribution to keep symmetrical edging.
Tip :
If you want a table runner with a wider width, create two parallel columns of medallions and join them with a wide central connector panel, then edge with a larger border. This will require recalculating shell placement but uses the same building blocks described here.
This cozy Autumn Toadstool Table Runner brings warm color and handmade charm to any surface. The playful red mushroom caps, ribbed tan stems, and tiny embroidered flowers make each medallion a little vignette of rustic fall style. The pumpkin-orange scalloped border ties the whole piece together with a vintage farmhouse feel. I hope making this brings you as much joy as placing it on your table — happy crocheting and warm gatherings ahead! 🧶🍂