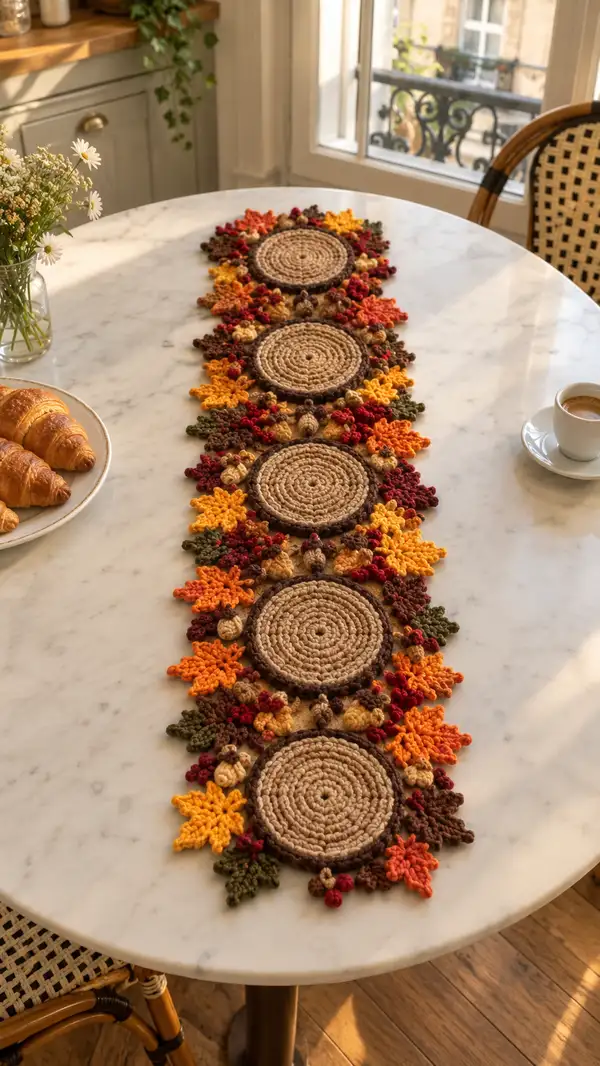
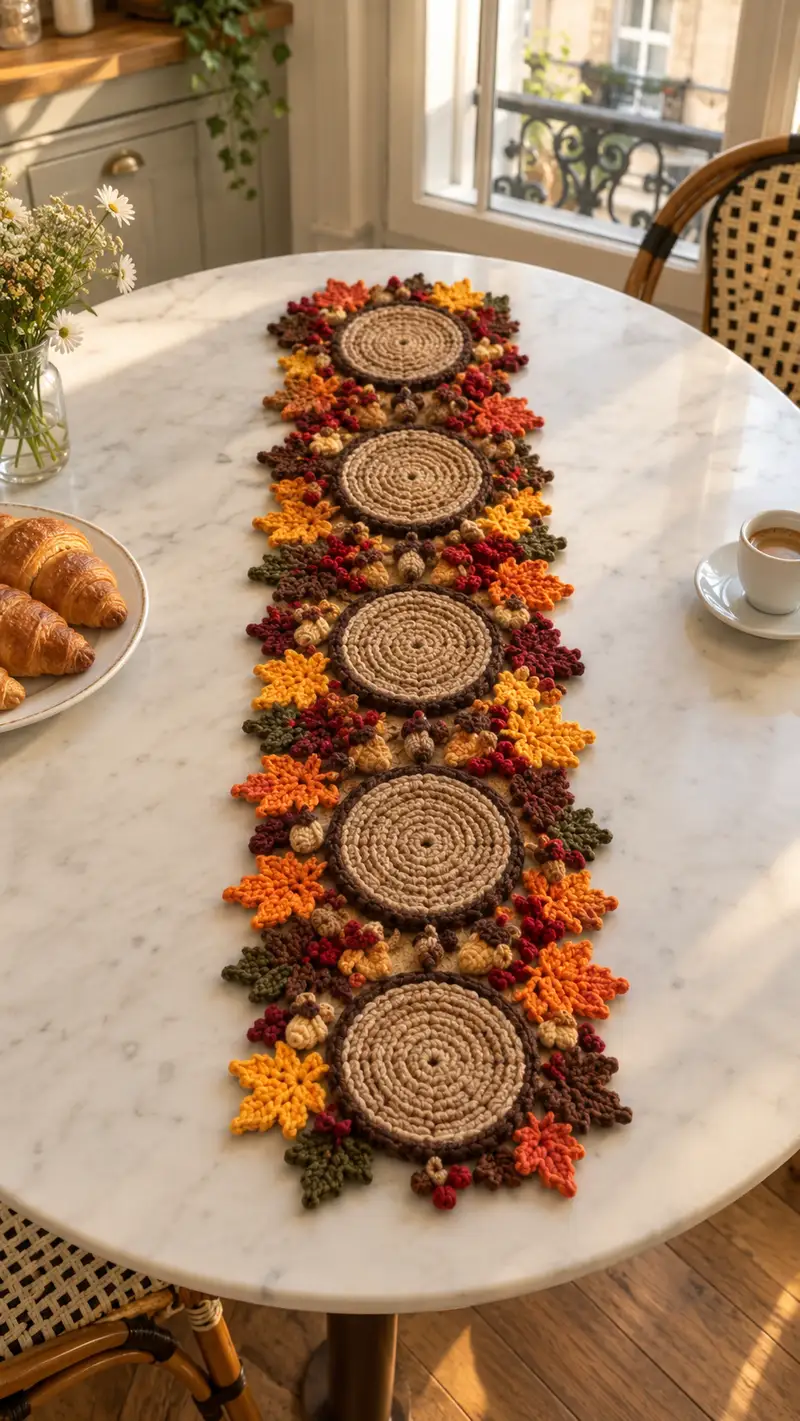
A warm, textured table runner inspired by golden autumn walks. This runner features five woven-style beige coaster circles framed with rich brown rims, surrounded by layered crochet leaves, tiny acorns and berry clusters in harvest colors. The design uses warm neutrals and seasonal reds, oranges, golds and greens for a cozy centerpiece. Detailed join-as-you-go instructions let you assemble motifs seamlessly into a long runner for a table or console.
Progress Tracker
0% Complete
— Overview & Tips :
Info :
Make five coaster-style center motifs, a selection of maple and stylized leaves, acorn bodies and caps, and small berry bobble clusters. Join-as-you-go is used to attach leaves, acorns and motifs to form a long runner. Keep consistent tension and use stitch markers to track round starts.
Info :
Suggested layout: five center circles spaced evenly. Around each circle add clusters of leaves, acorns and berries alternating left/right to create a cascading effect. Blocking flat round motifs before joining helps keep the runner neat.
— Center Coaster Motif (Make 5) :
Round 1 :
6 sc in magic ring (6)
Round 3 :
(1 sc, inc) x 6 (18)
Round 4 :
(2 sc, inc) x 6 (24)
Round 5 :
(3 sc, inc) x 6 (30)
Info :
If you prefer a tighter woven look, switch to a 3.5mm hook for rounds 6-9. Maintain even tension to keep the circle flat; avoid pulling too tight on increases.
Round 6 :
(4 sc, inc) x 6 (36)
Round 7 :
(5 sc, inc) x 6 (42)
Round 8 :
(6 sc, inc) x 6 (48)
Round 9 :
1 sc in each st (48)
Round 10 :
1 sc in each st (48)
Info :
Check for ruffling or cupping. If the circle cups, move a few increases outward in the previous round next time; if it ruffles, remove a few increases in round 8. Block flat before proceeding.
Round 11 :
Change to light tan/beige if not already. 1 sc in each st BLO (48) to create a subtle ridge and woven look
Round 12 :
Change to darker brown. Join with sl st to first st, ch1, 1 sc in each st around (48). Finish with a sl st and fasten off, leaving a 16-20cm tail for joining if joining-as-you-go.
Info :
Each motif ends with a raised dark-brown rim that frames the beige woven center. Make five identical motifs. Block flat and set aside for joining.
— Maple Leaf (Larger) (Make 20-24 total in mixed colors) :
Round 1 :
ch6, 1 sc in 2nd ch from hook, 1 sc, hdc, dc, sl st to form leaf base (5 stitches along chain)
Round 2 :
Rotate: working on opposite side of chain, dc, hdc, 1 sc, 1 sc to base, sl st to tip of leaf center to prepare for lobe clusters
Round 3 :
*Ch3, (dc, tr, dc) in next st, sl st back to base* repeat on 3 lobes around leaf mirror (creates three big lobes) (3 lobes)
Round 4 :
Work single picot edges: for each lobe work (sc, ch3, sl st into 3rd ch) to make pointed tips. Continue down to base and sl st to finish. Fasten off, leave tail for sewing.
Info :
Use mustard, burnt orange, deep red and olive. Vary orientation and slightly change chain lengths for natural variation. For a slightly smaller maple, use ch5 start instead of ch6.
Round 5 :
Optional: Add 1 sc ridge along the center by reattaching yarn at leaf base and working a row of sc toward the tip to create a raised vein.
— Stylized Five-Point Leaf (Smaller) (Make 30-36) :
Round 1 :
Ch5, join to form ring, ch1, 5 sc into ring, sl st to join (5)
Round 2 :
*Ch4, dc in next sc, sl st in the same sc; repeat from * around to make 5 points (5 points)
Round 3 :
Work 1 sc around base to tidy (5)
Info :
These little leaves act as fillers and are fast to make. Use contrasting shades for pops of color. Make more of these in warm red and rust; they sit beautifully tucked between larger leaves and acorns.
— Oak-Style Leaf (Medium) (Make 20) :
Round 1 :
mr 6, 6 sc in ring (6)
Round 2 :
(1 sc, inc) x 6 (9)
Round 3 :
Work around to create lobes: *ch5, sl st back in loop to create a lobe* repeat 3 times for a scalloped edge; sl st to base and fasten off (3 lobes)
Info :
Use olive and brown shades. These sit more flat and add variety to the silhouette around each circle.
— Acorn Body (Make 10) :
Round 1 :
mr 6, 6 sc in ring (6)
Round 3 :
(1 sc, inc) x 6 (18)
Round 4 :
1 sc in each st (18)
Info :
Begin stuffing lightly with polyester fill after round 4 so the body has slight volume but is not stiff. Acorns should be lightly stuffed to keep a natural curve.
Round 5 :
(2 sc, dec) x 6 (12)
Round 6 :
1 sc in each st (12)
Round 7 :
(1 sc, dec) x 4 (8)
Round 8 :
Dec as needed to close but leave slightly open for attaching cap (4-6)
Info :
Fasten off leaving long tail for sewing. Finish stuffing lightly so the acorn has plump rounded shape. Do not overstuff – caps are decorative and should sit snugly over the top.
— Acorn Cap (Make 10) :
Round 1 :
With dark brown, mr 6, 6 sc in ring (6)
Round 3 :
(1 sc, inc) x 6 (18)
Round 4 :
1 sc in each st (18)
Round 5 :
Work a textured row: *1 sc, 1 pst (pop stitch) in next st* repeat around (18 textured bumps)
Round 6 :
Sl st in next st, ch1, sc around edge for tidy lip (18). Fasten off leaving long tail for sewing to body.
Info :
Sew cap onto acorn body with mattress stitch, catching both cap and body rounds to secure snugly. Slightly offset for natural look. Add a tiny ch loop or single stitched stem if desired.
— Berry Cluster (Make 30-40 small clusters) :
Round 1 :
Ch2, 6 sc into 2nd ch from hook (6) - make tiny berries as single little spheres
Round 2 :
Optional: make small puff by working 3 dc together in next st then sl st to close. Fasten off leaving tail.
Info :
Group 3-5 of these tiny berries into clusters and stitch firmly to motifs and leaves to mimic berries. Vary sizes slightly for a natural look.
— Decorative Puff Berries (Alternative) :
Round 1 :
Ch2, work 5 dc into 2nd ch from hook, do not join, pull tail to close into ball, sl st to base. Fasten off (5-dc puff)
Info :
These yield a small, compact puff perfect for clustered berries. Make in deep red and burgundy.
— Joining Motifs & Assembly (Join-as-you-go technique) :
Info :
Layout your five center motifs on a flat surface in a line with approx 1.5-2cm gap between rims depending on yarn gauge. Plan leaf clusters and acorn placement by pinning pieces down with tapestry needles or pins (blocking pins do well for flat motifs).
Round 1 :
Reattach dark brown yarn to edge of first motif at a join point. Ch1, sc into same st, sc into next 2 sts, ch2, skip 2 sts on edge of next motif and sl st into rim of adjacent motif to connect; continue around using sc and occasional sl st joins where motifs should meet. (Work slowly; exact number of sts varies with spacing)
Round 2 :
When joining motif A to motif B, place leaf or acorn pieces between joins: pick up work where you want to attach leaf, sl st through base of leaf and a rim st of motif simultaneously, then continue sc around motif. Repeat to secure each embellishment.
Info :
Use the long tails from motifs and embellishments to sew down inside joins for added security. Alternate attaching leaves to left and right sides of successive motifs to create a flowing border.
Round 3 :
As you join the second motif to the first, add clusters of berries by inserting yarn tail through the rim and each berry's base, then knot on the back and weave tail in. For acorns, sew through acorn bottom into motif rim and back multiple times for secure join.
Round 4 :
When two motifs meet at a single rim point, create a small 3-ch bridge and sc into both rims for a neat connection. Continue join-as-you-go for all five motifs in sequence so there are no loose edges between centers.
Info :
Take extra care to keep the runner flat. If sections pull up, add an additional sc or sl st to reduce tension between adjacent rims. Pin and measure as you go to maintain straight line.
— Attaching Leaves, Acorns & Berries (Placement Guide) :
Round 1 :
Position 6-8 leaves around each side of a motif: 2 large maple leaves, 3 medium oak/stylized leaves, and 3-4 small five-point filler leaves. Sew bases of leaves to rim by stitching through base loops and rim stitches with long tails.
Round 2 :
Sew 2 acorns near top and bottom of each motif cluster where natural gaps appear. Secure with multiple passes, making sure caps are oriented outward. Add 2-3 berry clusters near acorns and in leaf crotches.
Info :
Cluster heavier elements (acorns) near motif edges where two leaves meet for natural anchoring; place lighter fillers (small leaves, berries) to visually link clusters between motifs.
— Final Edging & Border :
Round 1 :
With dark brown, join at one end edge of runner. Ch1, sc evenly along exposed rims and seams across the top and bottom of runner to create a tidy border. Aim for 1 sc per visible ridge approx (st count varies with runner length)
Round 2 :
Work a scallop edge for a finished look: *skip 2 sc, 5 dc in next sc, skip 2 sc, sl st in next sc* repeat across long sides. On short ends, decrease scallops to keep shape tidy.
Info :
Add a final decorative row in beige with small sl st picots set between scallops if desired. Weave in all ends on the back, then lightly block the whole runner to help shape scallops and flatten motifs.
Round 3 :
Optional extra stability: whip stitch a narrow linen stitch along the underside seam intersections to hold embellishments and rims flat. This is useful if runner will be handled frequently.
Info :
Trim any long tails by weaving them into adjacent stitches for at least 5cm before snipping short to prevent unraveling. Consider a small dot of fabric glue under heavy acorn bases for extra durability if runner will be used often.
— Finishing Touches :
Info :
Steam-block with low heat or wet block and pin flat on a blocking mat. Allow to dry fully before use. Test the runner on your table to ensure it lies flat; re-pin and re-block any areas as needed.
Info :
Arrange leaves and berries visually before fully sewing to adjust balance and color distribution. Photo reference shows alternating warm palettes so repeat warm and cool autumn shades along the runner for visual interest.
This autumn table runner celebrates texture, color and handcrafted detail in a cozy seasonal centerpiece. Each coaster-like circle surrounded by maple and stylized leaves, tiny acorns and berries will bring the warm colors of fall into your home. The join-as-you-go assembly and the layered embellishments make the process both creative and meditative. Arrange it on a dining or console table and enjoy the little seasonal details you crafted yourself. 🍁🧶