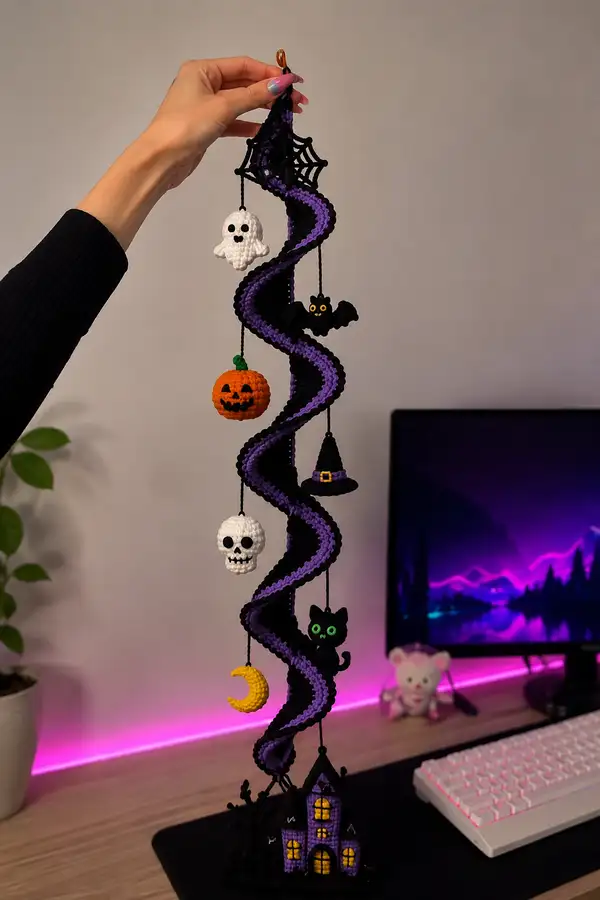
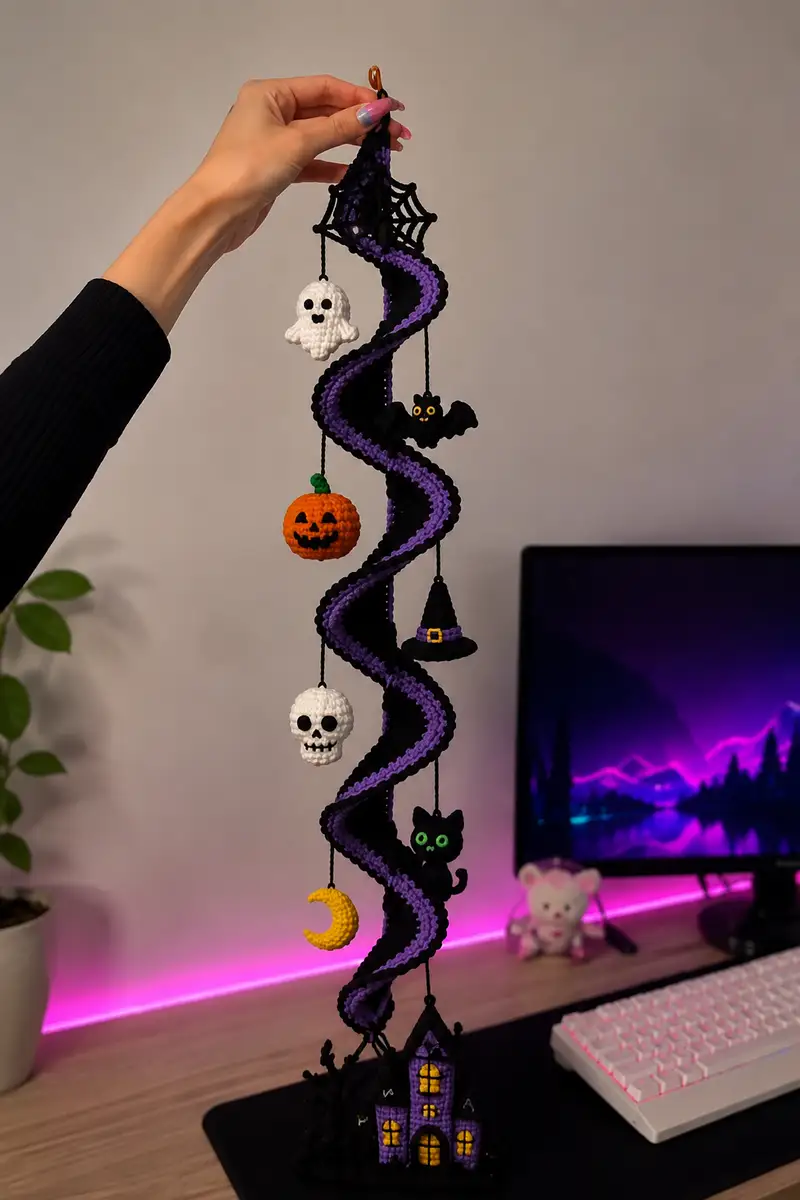
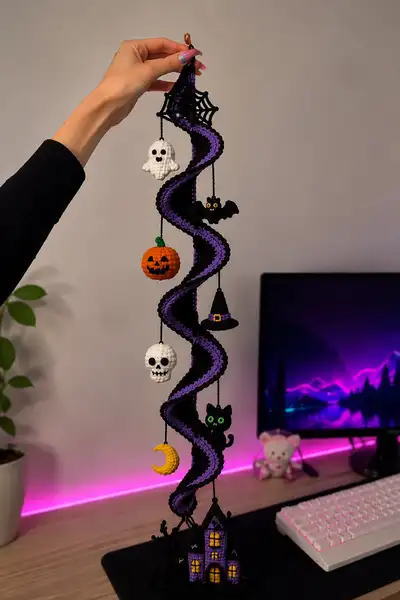
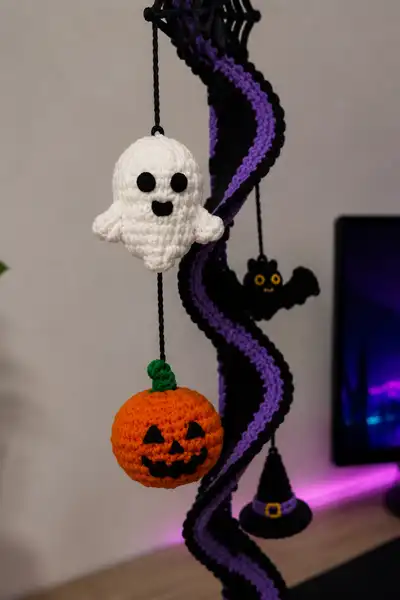
A hand-held spooky spiral garland featuring a twisting black-and-purple spiral with dangling Halloween amigurumi: pumpkin, ghost, skull, bat, witch hat, black cat, crescent moon and a haunted house base. This decorative hanging combines textured scalloped edging, tiny embroidered faces, and a spider-web topper for a perfectly eerie seasonal accent. Designed to be displayed vertically, this garland works beautifully on doorways, in windows, or as a centerpiece for Halloween decor.
Progress Tracker
0% Complete
— Spiral Ribbon (Outer Black Tube) :
Round 1 :
6 sc in magic ring (6)
Round 3 :
(1 sc, 1 inc) x 6 (18)
Round 4 :
(2 sc, 1 inc) x 6 (24)
Round 5 :
(3 sc, 1 inc) x 6 (30)
Round 6 :
(4 sc, 1 inc) x 6 (36)
Round 7 :
(5 sc, 1 inc) x 6 (42)
Round 8 :
(6 sc, 1 inc) x 6 (48)
Info :
We are creating a long tube that will later be shaped into a spiral. Stop increasing at 48 stitches; this diameter gives a narrow tube good for twisting. Use a stitch marker at the start of each round so you can work continuously without losing count.
Round 9-20 :
1 sc in each st (48)
Info :
These rounds lengthen the tube. Work evenly and do not overstuff — the tube should be hollow and flexible for shaping into a spiral later. If you want a stiffer spiral, you may insert thin floral wire now through the center as you progress, or later when assembling.
Round 21-40 :
1 sc in each st (48)
Info :
Every 10 rounds, check the length against your desired final hanging length. For the photographed version, the outer tube measures about 55-60 cm once relaxed; adjust by adding or subtracting even rounds.
Round 41-60 :
1 sc in each st (48)
Info :
When you reach around round 60, fasten off leaving a long tail for later assembly and for attaching the scalloped edging. Do not stuff — the outer tube should remain collapsed to curl smoothly into a spiral.
Round 61-80 :
1 sc in each st (48)
Info :
Finish the outer tube length to your preference. The photographed garland used approximately 80 rounds of even single crochets at this width for a dramatic tall spiral; shorter versions look great too.
Round 81 :
Fasten off and leave a long tail for assembly
— Spiral Ribbon (Inner Purple Strip) :
Info :
Make a contrasting inner ribbon that will be sewn into the inner channel of the spiral. This piece is narrower so it sits neatly inside the outer tube.
Round 1 :
6 sc in magic ring (6)
Round 3 :
(1 sc, 1 inc) x 6 (18)
Round 4 :
(2 sc, 1 inc) x 6 (24)
Round 5 :
(3 sc, 1 inc) x 6 (30)
Round 6 :
(4 sc, 1 inc) x 6 (36)
Round 7 :
(5 sc, 1 inc) x 6 (42)
Round 8 :
(6 sc, 1 inc) x 6 (48)
Info :
The purple ribbon uses the same starting width as the outer tube so edges align neatly for joining. If you want a visibly thinner inner ribbon, stop at 36 stitches instead (finish round 6) and proceed.
Round 9-70 :
1 sc in each st (48)
Info :
Make this strip the same length as the black tube; an equal number of rounds makes seam-matching simpler. Fasten off leaving long tails for sewing.
Round 71 :
Fasten off and leave long tail for assembly
— Scalloped Edging for Spiral (Black) :
Info :
Add scalloped edging to both long edges of the joined spiral to create the frilly ripple effect shown. You will join the purple inner ribbon into the black tube later, then work scallops around the seam edges.
Round 1 :
Join black yarn to one long edge (preferably at an end seam). *Skip 1 st, 5 dc in next st (shell), skip 1 st, sl st in next st; rep across edge to end. Fasten off (approx shells = length/4)
Info :
Work shells evenly so the edge ruffles neatly when the spiral is twisted. Repeat on the opposite edge, keeping shell placement mirrored for balance.
— Assembling Spiral :
Info :
Lay the purple strip along the inside of the black tube and pin into position using sewing pins. Using the long tails, mattress stitch the inner strip to the inner row of the black tube every 6-8 stitches, making sure the purple remains centered along the length. To form the spiral, gently coil the tube into a corkscrew shape and tack the seam at the top and bottom with invisible stitches; add a small loop for hanging at the top using a short chain or a sewn yarn loop.
— Spiderweb Top :
Round 1 :
ch 6, sl st to first ch to form ring (6)
Round 2 :
ch 3 (counts as long sp), *ch 3, sl st into ring; rep 5 more times (6 spokes)
Round 3 :
Working around the spokes, join yarn and sc around the ring forming a small circle to anchor spokes (6 sc)
Round 4 :
Ch 4, sl st into next spoke, ch 4, sl st into next spoke; rep around to create web loops (6 loops)
Info :
Use black yarn and make a slightly larger web if you want a wider hanger. Attach the web to the top of the spiral with several secure stitches; leave a hanging loop.
— Hanging Cord (Make Several) :
Info :
Make twisted cords by chaining a length appropriate for your ornament placement (photographed cords are about 8-12 cm each). To make a twisted cord: ch 50-80, fasten off, fold in half and twist, then knot the folded end to hold twist. Alternatively, work i-cord or simple braid.
— Ghost Ornament :
Round 1 :
6 sc in magic ring (6)
Round 3 :
(1 sc, 1 inc) x 6 (18)
Round 4 :
(2 sc, 1 inc) x 6 (24)
Round 5 :
(3 sc, 1 inc) x 6 (30)
Round 6-10 :
1 sc in each st (30)
Info :
At rnd 8 place stitch marker to note the front for face placement. Use safety eyes on rounds 8-9 spaced about 8 sts apart (or embroider felt circles for child-safe version). For the ghost, keep the body rounded and then form flaring skirt rows to create scalloped ghost bottom.
Round 11 :
(3 sc, 1 dec) x 6 (24)
Round 12 :
(2 sc, 1 dec) x 6 (18)
Round 13 :
1 sc in each st (18)
Round 14 :
(1 sc, 1 dec) x 6 (12)
Round 15 :
1 sc in each st (12)
Round 16 :
Fasten off leaving long tail for sewing; finish stuffing the ghost moderately firm and sew the opening closed
Info :
Make small arms by creating two identical mini semicircles: ch 6, sl st back along chain to create a thin cuff, then sc along edge and close. Sew them to side rounds 10-12 for a waving look. Embroider mouth with black yarn as a cute open smile or attach felt pieces.
— Pumpkin (Jack-o-Lantern) :
Round 1 :
6 sc in magic ring (6)
Round 3 :
(1 sc, 1 inc) x 6 (18)
Round 4 :
(2 sc, 1 inc) x 6 (24)
Round 5 :
(3 sc, 1 inc) x 6 (30)
Round 6-9 :
1 sc in each st (30)
Info :
To create the pumpkin ribs, work in continuous rounds — after stuffing, you will wrap thin yarn around the pumpkin and pull to make ribbing. Place a stitch marker where the front will be to align face pieces later.
Round 10 :
(3 sc, 1 dec) x 6 (24)
Round 11 :
(2 sc, 1 dec) x 6 (18)
Round 12 :
1 sc in each st (18)
Round 13 :
(1 sc, 1 dec) x 6 (12)
Round 15 :
Fasten off leaving long tail, stuff firmly then close top neatly
Info :
After closing, use scrap black yarn or felt to cut and sew on a jack-o-lantern face (triangular eyes and jagged mouth) or embroider directly. Add a small green stem: ch 6, sl st to form a tiny coil and sew to top.
— Skull :
Round 1 :
6 sc in magic ring (6)
Round 3 :
(1 sc, 1 inc) x 6 (18)
Round 4 :
(2 sc, 1 inc) x 6 (24)
Round 5 :
(3 sc, 1 inc) x 6 (30)
Round 6-10 :
1 sc in each st (30)
Info :
Place eyes on rounds 8-9 a bit lower than the midpoint so the skull looks slightly elongated. Use felt circles or embroider dark eye sockets rather than safety eyes for a more cartoony look.
Round 11 :
(3 sc, 1 dec) x 6 (24)
Round 12 :
(2 sc, 1 dec) x 6 (18)
Round 13 :
1 sc in each st (18)
Round 14 :
(1 sc, 1 dec) x 6 (12)
Round 16 :
Fasten off leaving long tail; stuff and sew closed. Embroider teeth across lower rounds, making 4-6 vertical dashes to suggest a grin.
— Bat (Flat Winged) :
Round 1 :
ch 6, join with sl st to make ring (6)
Round 2 :
Work 6 sc into ring (6)
Round 3 :
(1 sc, inc) x 3 (9)
Round 4 :
(2 sc, inc) x 3 (12)
Round 5 :
1 sc in each st (12)
Info :
The bat is worked flat to create wings. After the round 5 circle, switch to creating wing lobes: chain and work arcs on either side then join to body center.
Round 6 :
Ch 3, 5 dc in next st, sl st to next 2 sts; ch 3, 5 dc in next st, sl st across to form wings. Fasten off (wings approximate, adjust for proportion)
Round 7 :
Using black yarn, embroider two yellow eyes (small felt circles) and a tiny smile. Sew a short hanging loop to the top of the head.
— Witch Hat :
Round 1 :
6 sc in magic ring (6)
Round 3 :
(1 sc, 1 inc) x 6 (18)
Round 4 :
(2 sc, 1 inc) x 6 (24)
Round 5-9 :
1 sc in each st (24)
Info :
These rounds form the cone of the hat. Once you have the desired height, create a brim by working into the base with a wider stitch count to flare outward.
Round 10 :
Work in BLO: (1 sc BLO, ch1) around to create a firm rim (24)
Round 11 :
*2 sc in next st, sc in next 2 sts; rep around to flare brim (approx 32)
Round 12 :
1 sc in each st (32)
Round 13 :
Fasten off leaving tail; attach small purple band (ch enough to wrap) and add a tiny yellow buckle using a small rectangle of felt or embroidered square
— Black Cat (Head + Body) :
Head Round 1 :
6 sc in magic ring (6)
Head Round 3 :
(1 sc, 1 inc) x 6 (18)
Head Round 4 :
(2 sc, 1 inc) x 6 (24)
Head Round 5-9 :
1 sc in each st (24)
Info :
Place safety eyes between rnds 7-8 about 6-8 sts apart. Leave placement for embroidered nose and mouth. For child-safe, embroider eyes with neon green yarn as photographed.
Head Round 10 :
(3 sc, 1 dec) x 4 (20)
Head Round 11 :
(2 sc, 1 dec) x 4 (16)
Head Round 12 :
Fasten off leaving long tail for sewing; stuff head lightly
Ear (Make 2) Round 1 :
ch 4, turn, 1 sc in 2nd ch from hook, 1 hdc, 2 sc in last ch; rotate and work along to form triangle; fasten off (3-4 rows total)
Body Round 1 :
6 sc in magic ring (6)
Body Round 3 :
(1 sc, 1 inc) x 6 (18)
Body Round 4-8 :
1 sc in each st (18)
Body Round 9 :
(1 sc, 1 dec) x 6 (12)
Info :
Sew head to body using long tail left from head. Add a curly tail made by chaining 12 then sc back along the chain to form a tight spiral and sew to the rear of the body. Embroider bright green eyes or attach felt circles for the cat’s characteristic glowing stare.
— Crescent Moon :
Round 1 :
6 sc in magic ring (6)
Round 3 :
(1 sc, 1 inc) x 6 (18)
Round 4-6 :
1 sc in each st (18)
Round 7 :
Switch to shaping: work sl st across 6 sts to create a crescent crook then dec across to taper the ends; (1 sc, dec) as necessary until the crescent is formed. Fasten off and stuff lightly.
Info :
The moon is deliberately small and slightly squashed for a stylized look. Embroider tiny yellow highlights if desired for depth.
— Haunted House Base :
Base Round 1 :
Ch 26, join with sl st to first ch to work in rounds (26)
Base Round 2 :
Work 1 sc in each ch around (26)
Base Round 3 :
Work 1 sc in each st (26)
Info :
Create a small rectangular base. Increase height by repeating rounds 2-3 until you have a rectangle tall enough to attach the house structure — about 8-10 rounds in total for a stable base.
House Walls Round 1 :
Using purple, join at an edge, ch 1 then 1 sc in each st around making vertical walls. Repeat for 18 rounds to form a small tower height (26)
Info :
Mark window positions before embroidering. Use yellow yarn to embroider window panes by sewing small rectangles; for arched doors, leave an opening and stitch around it for definition.
Roof Round 1 :
Switch to black. Work decreases to form pointed roof: (3 sc, dec)x around to taper roof edge; repeat decreases in subsequent rounds until roof peaks. Add tiny embroidered crosses or accents with white yarn to mimic wear and tear.
Chimney & Details :
Make small rectangles for chimneys and sew in place. Embroider 'A' and 'V' shapes for shutters on purple walls using white yarn as small accents similar to the photographed house. Fasten off and weave in ends.
Info :
To stabilize the house at the bottom of the spiral, sew house to a small square of craft felt or cardboard inside the base before stuffing and closing to keep it upright as a display foot.
— Additional Tiny Accents (Buttons, Buckles, Stems) :
Info :
Make tiny embellishments like a yellow buckle for the witch hat, small green stem coils for the pumpkin, and black felt eyes for the ghost. Use fabric glue sparingly and always reinforce with a few sewing stitches for longevity.
— Finishing & Hanging Placement :
Info :
Attach hanging cords to the spiral: choose rounds along the inner curve where the ornament will hang without hitting walls. For the photographed layout, cords were attached at roughly every 10-12 cm down the spiral, alternating sides so ornaments stagger visually. Sew cords through the inner row firmly and knot from the inside for a hidden finish.
Info :
Test balance by hanging the spiral from its loop and adjusting cord lengths until ornaments hang freely and balance vertically. Use extra stitches to secure points that feel loose.
This spooktacular spiral garland combines playful amigurumi with decorative flair to create a striking Halloween accent! Each tiny ornament brings its own personality — from the grinning pumpkin to the wide-eyed cat — and the tall spiral adds a dramatic vertical element perfect for doorways or mantel displays. Enjoy the rhythmic process of crocheting long rows and tiny figures; the finished garland is a joyful reward for your careful stitching. 🧶🎃👻