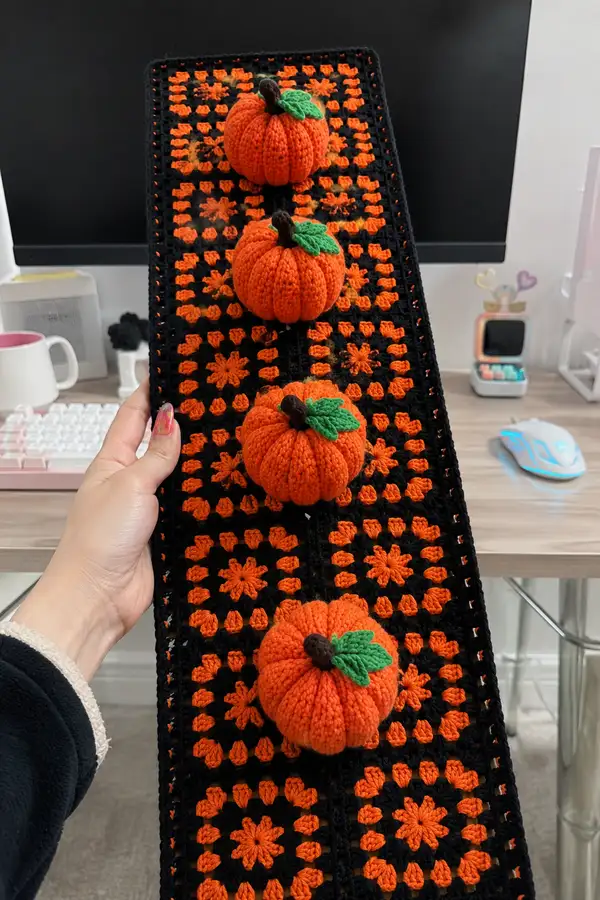
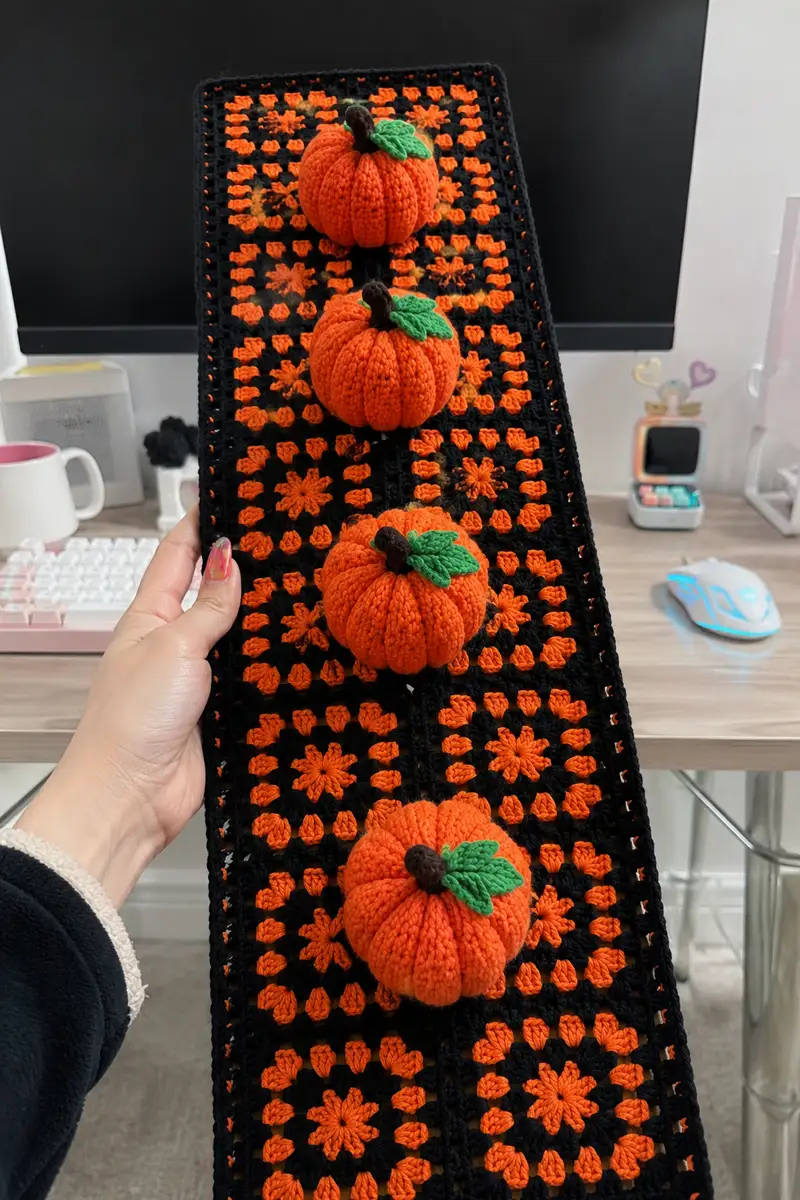
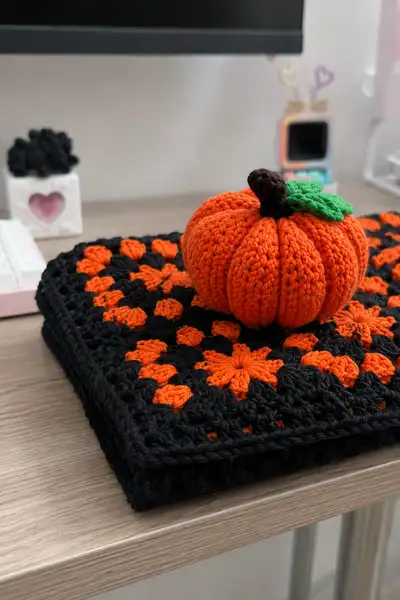
A spooky-chic table runner made from classic granny squares with bold black borders and bright orange centers, topped with four plush ribbed pumpkins. This narrow runner pairs traditional crochet motifs with 3D pumpkin accents for an autumnal centerpiece. The pattern includes granny square construction, join-as-you-go tips, pumpkin amigurumi instructions, stems and leaves, and a sturdy bordering and backing method. A perfect Halloween or harvest-season accent that looks intricate but is soothing to crochet.
Progress Tracker
0% Complete
— Materials & Gauge :
Info :
Gauge is not critical for layout but affects finished size. Using worsted weight (#4) with 4.0mm hook, one granny square (finished) measures approximately 3.5"/9cm across. Pumpkins finished around 3.5-4"/9-10cm wide when using 3.5mm-4.0mm hook and medium stuffing. If you prefer a larger runner, use thicker yarn and larger hook and increase square count accordingly.
— Granny Square Unit (Make as many as needed) :
Round 1 :
With orange, make a magic ring; ch3 (counts as dc), 2 dc in ring, ch2, (3 dc, ch2) x 3, join with sl st to top of ch3. (4 corners of 3-dc clusters with ch2 corners)
Round 2 :
Sl st into next ch2 corner, ch3, (2 dc, ch2, 3 dc) in same corner, ch1, *(3 dc) in next ch-2 sp, ch1; (3 dc, ch2, 3 dc) in next corner, ch1; rep from * around, ending with ch1 before final corner. Join with sl st to top of ch3. (You now have 4 corner clusters and side groups separated by ch1 spaces)
Round 3 :
Change to black. Sl st to corner ch-2, ch3, (2 dc, ch2, 3 dc) in same corner, ch1, *(3 dc) in each side ch-1 space across, ch1; repeat corners in each corner. Join with sl st. (Square now has a clear black frame starting, total 4 corner clusters with side clusters between corners)
Round 4 :
With black, sl st to corner, ch3, (2 dc, ch2, 3 dc) in corner, ch1, *(3 dc in each side ch-1 sp) x 2, ch1; rep around. Join. This makes a more open granny grid; counts vary by row and by number of side clusters but maintain consistent cluster pattern.
Round 5 :
With black, repeat Round 4 to build square to desired size. For this runner use 5 rounds total (including color join) to create a compact square approx 3.5" across. Fasten off leaving tails for joining. (Final square is compact and slightly open, ideal for join-as-you-go.)
Info :
Block or steam each square gently to flatten. Arrange squares into long narrow rows: typical layout pictured is 3 squares across by 12 squares long (3x12) for a long runner; you can customize to 3x16 for longer table coverage. The example photos use 3 columns across and 12 rows long with pumpkins mounted at equal intervals.
— Join-As-You-Go Rows (Joining Squares Together) :
Round 1 :
Lay out first square. Attach black yarn at a corner st on the right-hand side of your square with sl st to secure; ch1, sc evenly along side edge to join to next square edge as you place it adjacent, using sc through both loops of both squares to crochet them together. Work sl sts at corner points for neatness. Continue joining side-to-side until you have one row of 3 squares.
Round 2 :
When joining the next row, align the next row of squares beneath the first; start at leftmost corner, attach and sc through back loop only of top square and front loop only of the square beneath to produce a subtle ridge and locking seam. Work across each square joining the adjacent square sides and stitch into corners with 3 sc to anchor corners. Repeat to form long strip.
Round 3 :
If you prefer a neater look, join entire runner panels using whip stitch with matching black yarn along vertical seams, then use a row of slip stitches in black across the join to create a continuous black channel for the pumpkins to sit on top of.
Info :
Keep the join tension even—if your joins pucker, use a slightly larger hook for joining. Mark the center vertical column where pumpkins will attach before final joining so you can leave an extra row of padding or backing under each pumpkin if desired.
— Runner Base Edging & Padding :
Round 1 :
Once all squares are joined into the long strip, with black yarn, join at any outer corner. Ch1, work sc evenly along the entire outer edge of runner placing 3 sc in each corner to form a neat rounded corner. Continue sc around. (This creates the first edging row and evens the outer sides.)
Round 2 :
Work 1 sc in each st around; place stitch marker at start and work in rounds. This evens and tightens the border. (If your runner is 3x12 squares with each square approx 3.5", the border will add roughly 0.5" per edge.)
Round 3 :
For a decorative raised border, work 1 sc in each st BLO for one round to create a ridge. Then work 1 round of crab stitch (reverse sc) along the very edge for a finished look. Fasten off and weave ends on wrong side.
Info :
To make the runner sturdier and to allow pumpkins to sit more firmly, create a folded backing: cut a piece of felt or quilt batting to fit runner dimension and hand-sew along inside edge into runner pockets created by the granny openings. Alternatively crochet a thin backing panel in black matching runner size using hdc rounds until it fits snugly, then whip stitch to the runner edge.
— Pumpkin Main Body (Make 4 identical pumpkins) :
Round 1 :
With orange and 3.5mm or 4.0mm hook, 6 sc in magic ring (6)
Round 3 :
(1 sc, inc) x 6 (18)
Round 4 :
(2 sc, inc) x 6 (24)
Round 5 :
(3 sc, inc) x 6 (30)
Round 6 :
(4 sc, inc) x 6 (36)
Round 7 :
(5 sc, inc) x 6 (42)
Round 8 :
(6 sc, inc) x 6 (48)
Round 9-18 :
1 sc in each st (48) — work 10 even rounds to form the pumpkin height (48)
Info :
Work evenly for 10 rounds to create a plump pumpkin body. You may work fewer rounds for a flatter pumpkin or more for a taller pumpkin. Keep tension consistent. Begin stuffing after Round 12 with small amounts of fiberfill, shaping as you go so the pumpkin remains round.
Round 19 :
(6 sc, dec) x 6 (42)
Round 20 :
(5 sc, dec) x 6 (36)
Round 21 :
(4 sc, dec) x 6 (30)
Round 22 :
(3 sc, dec) x 6 (24)
Info :
Continue stuffing as you reduce. Add more stuffing until the body is slightly firm but still squeezable. The shape should be slightly wider than tall when finished to mimic a real pumpkin.
Round 23 :
(2 sc, dec) x 6 (18)
Round 24 :
(1 sc, dec) x 6 (12)
Info :
Fasten off leaving a long tail (approx 20-30cm) for gathering and ribbing. Stuff firmly to the closing hole. Do not fully close with sc; instead leave the long tail for the ribbing step so you can shape the segments accurately.
Round 26 :
With tapestry needle and the long tail, divide pumpkin into 8 equal segments. Thread tail through center of top opening and pull down through the bottom center, wrapping and pulling gently to form a visible seam. Repeat this pass 8 times, spacing passes evenly around the pumpkin exterior to create deep ribs. Secure and hide tail ends inside. (This is not a crochet round but a shaping step — count of segments is 8.)
Round 27 :
Optional: With same orange, work one round of sc around base of pumpkin in BLO to create a subtle foot. If base is closed, work sc into the 6 sts around and increase by 6 evenly to create a small round foot (approx 12 sc). Fasten off and weave in remaining ends.
Info :
To make deeper ribs, use a thick tapestry needle and heavy thread or doubled yarn when drawing the rib passes. Make sure to pass through the center of the top and bottom to anchor ribs and prevent slippage during handling.
— Pumpkin Stem (Make 4) :
Round 1 :
With brown, ch2, 6 sc in second ch from hook (6)
Round 2 :
(1 sc, inc) x 3 (9)
Round 3-5 :
1 sc in each st (9) — work 3 even rounds to form a short sturdy stem
Round 6 :
(1 sc, dec) x 3 (6)
Round 7 :
1 sc in each st (6) — leave tail for sewing. Fasten off leaving long tail for attachment.
Info :
For a taller, curly stem, work additional rounds increasing to 12 sts then use surface crochet to spiral the stem. The sample uses a short squat stem approx 1" tall finished.
— Pumpkin Leaf (Make 4) :
Round 1 :
With green, ch6, starting in 2nd ch from hook: sc, hdc, dc, hdc, sc (5 sts across foundation). Do not turn; work along other side of chain: sc, hdc, dc, hdc, sc back to the start. Sl st to first sc to form leaf base. (10 stitches total around leaf outline)
Round 2 :
Ch1, sc in same st, (hdc, dc, tr) in next st to create point, then mirror across other side: (tr, dc, hdc) and sc to finish. Sl st and fasten off leaving long tail for sewing. Optional: embroider central vein with a running stitch of darker green.
Info :
Make leaves slightly larger for a more whimsical look or smaller for a delicate accent. Block lightly to flatten and give crisp shape. Sew leaf to top of pumpkin before attaching the stem for a realistic layered look.
— Pumpkin Finishing & Rib Definition (Detailed) :
Round 1 :
With tapestry needle and yarn tail left after closing pumpkin, mark 8 equal points around the widest circumference. Using a doubled length of yarn, pass from center top down through a marked point at the middle of the pumpkin, then back up through the top center. Pull snugly to create a deep channel. Repeat for all 8 marks and tie off securely at the top. This creates the 8 classic pumpkin ribs.
Round 2 :
Optionally, run a contrasting slip-stitch or surface single crochet along each rib to emphasize segmentation: with right-side facing, attach yarn at base of one rib and sc along the rib line to the top, working over the same stitch path used for the tapestry needle. Repeat for every rib using the same or contrasting yarn.
Info :
When stuffing, push fiberfill into the outer lobes between pulled ribs so each lobe is plump. The ribs will compress the stuffing slightly, so overstuff a bit before closing completely to ensure the lobes remain full.
— Pumpkin Attachment & Placement :
Round 1 :
Decide pumpkin placement: measure equal intervals along center column of runner where pumpkins will sit. The sample places 4 pumpkins evenly spaced along the runner length, leaving approximately 6" between pumpkins depending on runner length.
Round 2 :
Using the long tail from each pumpkin base, thread through the underside of the runner and into a small square of backing or through several layers of granny joins. Tie a secure knot on the wrong side and sew several passes through the pumpkin base into the backing and through the runner grid for a secure hold.
Info :
To allow pumpkins to be removed for washing, sew on with a few long yarn-tied loops that can be cut to remove the pumpkin or attach with a small Velcro dot—make sure Velcro is sewn on strongly and the hook side is covered so it won't snag the granny surface.
— Runner Backing Panel (Optional but Recommended) :
Round 1 :
To crochet a backing, with black yarn ch to match the runner width plus 2, work hdc in second ch from hook and across to create a foundation row. Turn and work hdc in each st across for multiple rows until backing matches runner length. Fasten off and trim to exact runner dimension.
Round 2 :
Sew backing to runner by whip stitching along the inner edge of the border, hiding the raw edges of squares. Work evenly and keep tension slightly loose so backing sits flat without puckering the runner.
Info :
Backing provides stability for pumpkins and prevents stuffing or stitches from catching on tabletop items. If you prefer a reversible runner, make a second strip of joined squares and sew both strips right sides together, leaving an opening to turn and stuff lightly with thin batting before final closing.
— Final Border & Finishing Rounds :
Round 1 :
With black, join at any corner; ch1, sc evenly around entire runner placing 3 sc in each corner. Work tightly enough to create a clean edge but not so tight that the runner curls. Join with sl st and continue.
Round 2 :
Work 1 sc in each st BLO for one round to create a raised inner ridge that frames the entire runner. This helps mask any join imperfections and creates a ledge for pumpkins to rest on.
Round 3 :
For the outermost decorative finish, work a round of crab stitch (reverse sc) around the edge to give a rope-like final border. Fasten off and weave in ends securely.
Info :
Steam-block the runner lightly after finishing the edge to flatten and sharpen corners. Use pins to hold shape while drying if possible. Attach any final embellishments like small buttons or embroidered vines with matching yarn sewn securely through backing.
— Alternate Pumpkin Scale & Rib Variations :
Info :
To make miniature pumpkins for a smaller runner or garland, use 2.75mm hook and work fewer even rounds (R9-R12 only) and create 6 ribs instead of 8. For oversized pumpkins, use thicker yarn or a larger hook and add extra rounds at the even section to increase diameter and height (work R9-R24 as needed).
— Troubleshooting, Tips & Techniques :
Info :
If pumpkin seams look uneven after ribbing, re-thread ribs one notch to adjust tension. When joining squares, keep the right side facing up and check each join row against a pinned layout to ensure consistent alignment. For a cleaner look, weave ends into the inside of a square rather than trimming close to the surface.
Info :
When stuffing pumpkins, use small tufts of stuffing inserted with a stuffing tool or chopstick to fill small nooks between ribs. Compress stuffing with every few passes to get a round shape. For long-term firmness, insert a small disk of cardboard or plastic at the base before final stitches (wrap in scrap yarn to prevent sharp edges contacting stuffing).
Info :
To speed up work, make all pumpkins first, then all leaves and stems, then all squares, then join and finish borders. This assembly-line approach saves hook changes and reduces time spent gathering materials between steps.
This bold black-and-orange runner brings instant Halloween and autumn charm to any tabletop. Each square and pumpkin is made with care and the ribs on the pumpkins add delightful tactile detail. Whether you make one as a mantel accent or a long table centerpiece, the modular design means you can tailor the size and pumpkin count to your space. Enjoy the cozy, handmade warmth and happy crafting! 🎃🧶