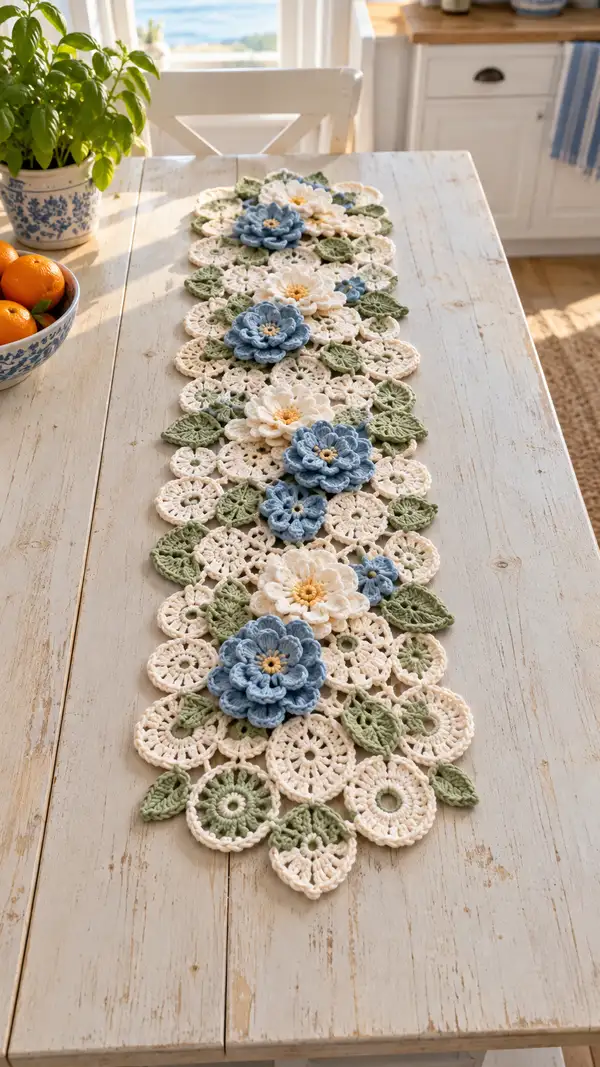
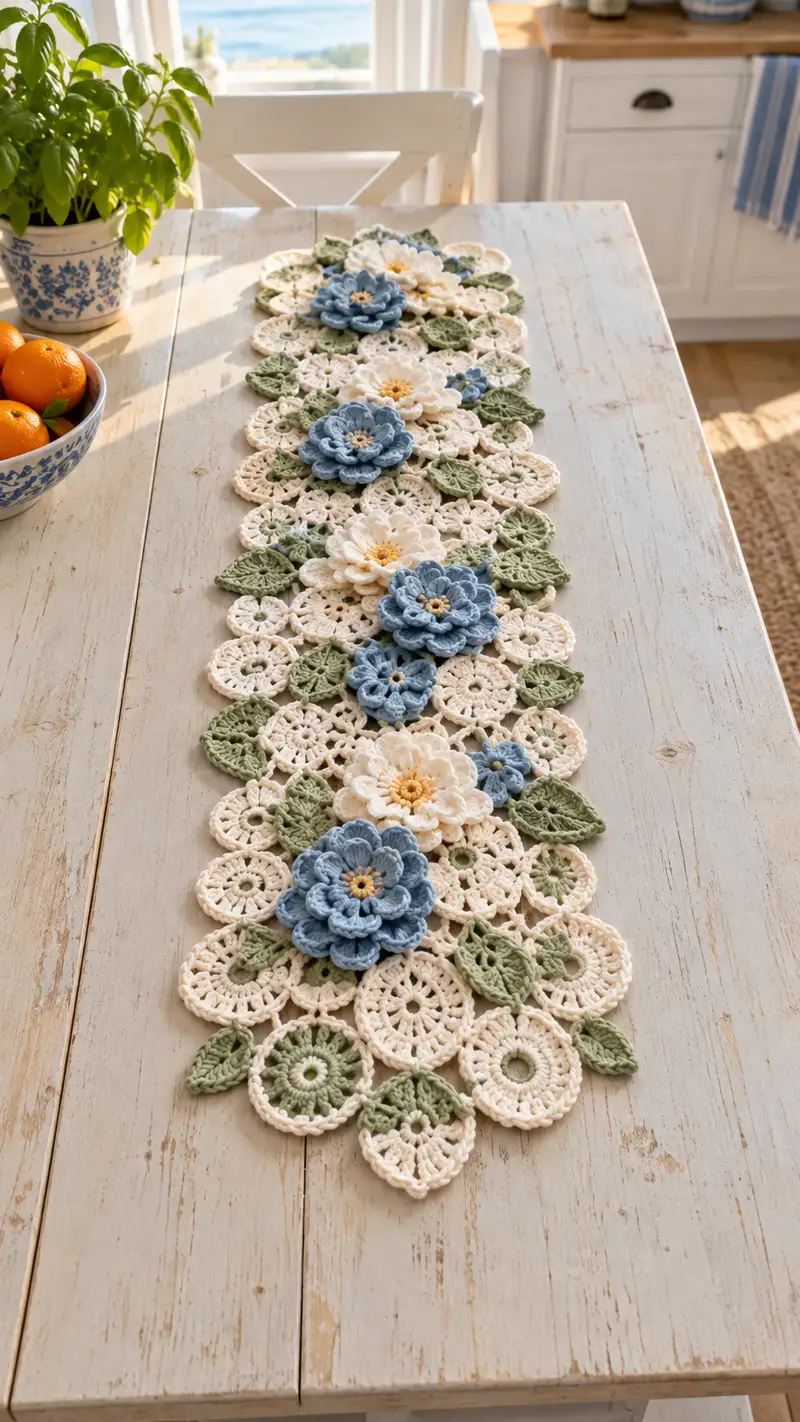
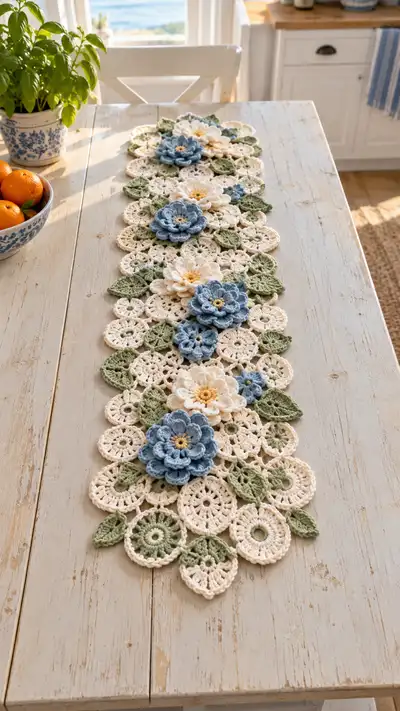
Create a romantic vintage-style table runner made from delicate lacy motifs, soft cream medallions, sage green leaves, and layered 3D flowers in pale blue and cream with sunny yellow centers. This pattern uses a repeatable circular motif combined with leaf and layered flower components joined as-you-go for an airy, textured runner that drapes beautifully down a table.
Progress Tracker
0% Complete
— Overview :
Info :
This runner is built from modular motifs: Lacy Medallion (base), Leaf motif, Small Rosette, Medium Layered Flower and Large Layered Flower. Make specified counts of each motif and join as-you-go to create the long runner pictured. Block all motifs to the same measured size before final finishing when possible. Use worsted-weight cotton yarn and a 3.5mm hook for crisp stitch definition.
Info :
Gauge is motif-dependent; a finished medallion should measure approximately 3 1/4" (8.5 cm) across when blocked if using the yarn and hook suggested. Adjust hook size if your motifs run too large or small. Carry tails neatly and weave in as you go for a clean back.
— Lacy Medallion (make many) :
Round 1 :
Make a magic ring. Ch3 (counts as first dc), 11 dc into ring, sl st to top of ch3 to join (12)
Round 2 :
Ch4 (counts ch1+dc), *skip next st, dc in next, ch1* around to create 6 ch1 spaces; sl st to join (12 dc, 6 ch-1 spaces visual)
Round 3 :
Ch3, 2 dc in same st, *(ch2, sk next ch-1 sp, 3 dc in next dc) x5, ch2, sk next ch-1 sp, sl st to top of ch3 to join
Info :
This round creates 6 clusters of 3 dc separated by ch-2 loops. Keep clusters even and count cluster tops; you should have 6 cluster groups.
Round 4 :
Ch1, sc in same st, *ch5, sk next cluster (the 3-dc group), sc in top of next cluster* repeat around to create 6 ch-5 loops and 6 sc joins; sl st to join (12 joins, 6 loops)
Round 5 :
Working into ch-5 loops: *(sc, hdc, 5 dc, hdc, sc) in each ch-5 loop* around; sl st to first sc to join. This forms fan arches; count 6 fans (6)
Info :
Block this round gently to open the fans so your motifs match size. Use pins to set fan arcs evenly — this ensures a neat lace texture when joined.
Round 6 :
Ch3, dc in next 2 sts, *ch3, sk fan apex (center dc of fan), dc in next 3 dc across next fan* around; sl st to join. You should have 6 ch-3 loops and groups of 3 dc between loops.
Round 7 :
Into each ch-3 loop: *(ch1, sc, ch4, sc, ch1) in each ch-3 loop* around to make delicate chain arches; sl st to join. (6 arches)
Round 8 :
Ch2, *(3 dc, ch2, 3 dc) worked into the center of the fan beneath between chain-arches creating a small picot shell. Work shells evenly between the sc joins so there are 6 shells; sl st to join.
Info :
At this point each medallion should have a round of fans, arches, and small shells creating a lacy disc. Trim and weave ends later or leave a long tail for join-as-you-go.
Round 9 :
Ch1, sc in each st and into the top of each ch-1 space around to create a defined round edge; (approx 36 sc depending on previous spacing) - maintain consistent stitch count by placing 3 sc into shell valleys if needed to keep edge smooth.
Round 10 :
Ch3, dc in each sc around, placing 1 dc in each sc and 3 dc in each shell valley to maintain circular expansion; join with sl st to top of ch3. (approx 36-42 dc)
Round 11 :
Ch1, sc in first 2 dc, *ch5, sk 2 dc, sc in next 3 dc* around to create small looped border; sl st to join (12 small loops)
Round 12 :
Into each ch-5 loop: sc, hdc, 7 dc, hdc, sc to form a lacy petal-like scallop; sl st to join and fasten off leaving a 12-14" tail for join-as-you-go if you plan to connect motifs now. (6 scallops)
Info :
Fasten off and weave in tail if not joining immediately. Block each medallion to measure approximately 3 1/4" (8.5 cm) across. Make the number of medallions needed for your runner length — for a long runner like pictured plan for 28-38 medallions depending on the layout of flowers and leaves.
— Small Rosette (accent flower, make several) :
Round 1 :
Make a magic ring. Ch1, 8 sc into ring; sl st to first sc to close (8)
Round 2 :
*(sc, ch2) into next st, repeat around to make 8 sc with ch-2 loops; sl st to join (8 loops)
Round 3 :
Into each ch-2 loop work: sc, hdc, 5 dc, hdc, sc (8 petals). Sl st to join; fasten off leaving a long tail for sewing. These small rosettes are used between larger flowers to add dimension.
Info :
Work these in pale blue or cream depending on placement. If you want extra height, add a second round of smaller petals worked behind the first by joining into back loops.
— Leaf Motif (make many) :
Round 1 :
Ch8. Sc in 2nd ch from hook, hdc in next, dc in next 2, tr in next 2, dc in last ch; turn, work on opposite side of foundation ch: dc in next 2, tr in next 2, dc in next 2, hdc in next, sc in last; sl st to first sc. (leaf shaped oval)
Round 2 :
Ch1, sc in first 2 sts, *hdc, dc, tr, dc, hdc, sc* down the opposite side, placing stitches into stitch tops to form a neat leaf shaping; sl st to join. (approx 18 sts depending on shaping)
Round 3 :
BLO: ch1, 1 sc in each stitch BLO around to create a ridge down the center if desired; sl st to join and fasten off leaving tail for sewing. Make leaves in sage green. For a more sculpted leaf, work 1 sc in tip and taper the counts so the leaf narrows at the ends.
Info :
To emphasize vein detail, use surface slip-stitch or embroidery with a single strand of yarn in slightly darker green along the center from base to tip after blocking.
— Small 3D Flower (make multiple for accents) :
Round 1 :
Make magic ring. Ch2 (counts as hdc), 11 hdc into ring; sl st to join (12)
Round 2 :
Ch1, sc in same st, *ch3, sk 1 hdc, sc in next hdc* around to create 6 ch-3 loops; sl st to join. (6 loops)
Round 3 :
Into each ch-3 loop: (sc, hdc, 5 dc, hdc, sc) to form small petals. Sl st to join; fasten off leaving long tail for sewing. Optional: add a tiny yellow french knot (embroidered) or small round of yellow yarn in the center for contrast.
Info :
This little flower tucks nicely between medallions and under larger flowers. To add height, make two identical small flowers and sew one on top of the other, rotating petals to fill gaps.
— Medium Layered Flower (make 4-6) :
Round 1 :
Make a magic ring. Ch3 (counts as dc), 11 dc into ring; sl st to join (12)
Round 2 :
Ch2, *2 dc in next st, ch1* around to make 12 pairs with ch-1 spaces; sl st to join (24 dc with ch-1 spaces)
Round 3 :
Ch1, sc in same st, *(ch4, sc in ch-1 sp) repeat around to create 12 ch-4 loops; sl st to join (12 loops)
Round 4 :
Into each ch-4 loop: sc, hdc, 9 dc, hdc, sc to form 12 outer petals on Round 4; sl st to join. Fasten off and change to same color or contrasting shade for round 5.
Info :
Block each petal slightly to shape. For layered look, make a smaller petal round to stack inside: return to the center and work an inner petal round directly on top before fastening off.
Round 5 :
Rejoin in center with slip stitch. Ch3, dc in next st, *(ch2, skip petal, dc in next two stitches at center) around to create 6 ch-2 loops for inner layer; sl st to join (6 loops)
Round 6 :
Into each ch-2 loop: (sc, hdc, 5 dc, hdc, sc) to create 6 larger inner petals. Position petals slightly above outer petals to create depth. Fasten off leaving long tail for sewing to medallions.
Info :
If you want extra height on petals, work petals in 2 rounds: a shorter inner fan then a longer outer fan. Make sure each petal base is sewn securely to the center to prevent sagging.
— Large Layered Flower (Feature flower, make 3-4) :
Round 1 :
Make magic ring. Ch3 (counts dc), 15 dc into ring; sl st to top of ch3 to join. (16)
Round 2 :
Ch2, (inc in next 1 dc) repeat evenly around to double to 32 dc total. A consistent inc pattern such as (1 dc, inc) x16 gives smoother expansion. (32)
Round 3 :
Ch1, sc in same st, *ch5, sc in 3rd dc of next group* repeat around to create 16 ch-5 loops; sl st to join (16 loops)
Info :
These loops will become the base for large sculptural petals. Use a slightly smaller hook (3.25mm) for petals if you want more definition and lift.
Round 4 :
Into each ch-5 loop work: sc, hdc, 11 dc, hdc, sc to form 16 full petals (outermost layer). Sl st to join and fasten off. (16 petals)
Round 5 :
Rejoin at center with contrasting yellow or cream for the flower center. Ch1, work 24 sc in center circle to create a firm disc. (24)
Round 6 :
Ch2, *2 dc in next st, ch1* around to increase the center disc height if desired creating more loft for petals; sl st to join. (approx 32 dc)
Round 7 :
Make an inner layer of petals: rejoin base color in a smaller ch-3 loop made by placing *(ch3, sc in center between two sc) repeat 16 times*—then into each ch-3 loop work (sc, hdc, 5 dc, hdc, sc) to add a second tier of 16 inner petals. Position inner petals so they peek from under outer petals.
Round 8 :
Optional third tier: Make 8 ch-4 loops closer to center and work smaller petals (sc, 5 dc, sc) to build a dense looking bloom. Fasten off and weave in ends. Add small amount of fiberfill under the center disc if you want puffed center, then sew center closed. (This enhances 3D look)
Info :
To keep petals upright, you can steam-block or star-block petals individually, or baste the petal bases onto the center disc with a few tight stitches so they stand up. Use a long tail to sew securely through the center disc and tie off on the back.
— Flower Centers (yellow) :
Round 1 :
With yellow, make magic ring. Ch2, 8 hdc into ring; pull closed and sl st to first hdc (8)
Round 2 :
Ch1, sc in each st around to tidy the disc (8). Fasten off leaving a long tail to sew center to the layered flower. For a touch of texture embroider a few french knots or surface stitches in darker yellow or orange.
Info :
Sew the yellow center onto the layered flower securing through the center disc and through several petal bases to hold layers together. Weave tail through several times and knot on the wrong side.
— Joining Motifs and As-You-Go Join Method :
Info :
Layout your medallions on a flat surface in the desired runner plan before joining — alternate medallions, leaves and flowers to mirror the photo. The runner alternates columns of medallion clusters with interspersed leaves and flowers to create an elongated organic shape.
Info :
Join-as-you-go method: when working the final round of a medallion, place it on top of the previously blocked and arranged neighbor motifs. For every joining point, replace the sl st in the pattern with: sl st to join into corresponding stitch or ch-space on adjacent motif, then continue the round. This creates invisible joins and saves sewing time.
Round J1 :
Position new medallion edge to overlap existing medallion. When reaching a join location on final round, ch1, insert hook into joining stitch on adjacent motif and sl st, then continue to complete edge stitch on current motif. Repeat at all corresponding join points (typically 3-6 sl st joins per motif edge depending on layout).
Info :
Keep join tension moderate to keep the runner flat — too tight will pucker, too loose will create holes. Use pins to stabilize motifs during the first few joins until the pattern holds shape.
Round J2 :
When joining leaves, align leaf base to medallion scallop and sew with mattress stitch or use slip-stitch join through top loops for secure attachment. Space leaves evenly to create the scalloped outer edge shown in the photograph.
Round J3 :
To attach layered flowers: stitch the back of the flower center to the medallion center or to the junction of several medallions depending on placement. Use the long tail from the flower to bring the center through the medallion and knot on the underside so the flower sits flush and secure.
Info :
When joining across seams with different thicknesses (flower vs. medallion) use extra small stitches and hide them by sewing through petal bases and the medallion edge rather than pulling from the main flower body to avoid visible large knots.
Round J4 :
After joining rows of medallions, run a neat sc or reverse single crochet (crab stitch) border around the entire runner optionally to unify edges. Work one round of sc in cream for tidy finish, working evenly around scallops and placing 3 sc in sharp curves to maintain shape.
Info :
For an extra refined edge, block the entire assembled runner and then work a second decorative round: ch3, sk 1 sc, shell into next valley (5 dc), sk 1 sc, sl st in next sc to create small scallops on the outer edge.
— Edging and Final Finishing :
Round E1 :
Join cream yarn at one end; ch1, sc evenly along outermost stitches, placing 2 sc into each deep valley and 3 sc into tight corners; sl st to join. (edge length varies)
Round E2 :
Optional decorative round: *(ch3, sl st in next sc) repeat to create picot-style small loops; or work crab stitch (reverse single crochet) around for a rope-like edge for a neat finished look.
Info :
Weave in all remaining tails securely on the wrong side using a yarn needle. Use small, even stitches to hide tails within the joins. Block final piece gently to shape and set stitches, pinning scallops and petals to achieve the photographed soft, open look.
Round E3 :
Final optional step: attach a few more tiny rosettes or leaf tips with invisible ladder stitch to fill any perceived gaps once runner is laid flat on your table. Trim any excess yarn and press gently if needed to shape petals.
Info :
For a runner like the photo, plan your motif count and layout before starting: approximately 30-36 lacy medallions, 18-24 leaf motifs, 3-4 large layered flowers, 4-6 medium layered flowers and several small rosettes will create a similar length and fullness. Adjust quantity to fit table length and desired density.
— Blocking and Care Instructions :
Info :
Block motifs individually by pinning to measurement on blocking mat and spraying lightly with water or using steam. Allow to dry completely. Blocking evens motif shapes and makes joins precise. Finished runner: gentle hand wash in cool water with mild detergent and reshape while damp. Lay flat to dry to preserve shape and avoid stretching.
Info :
To get the vintage soft look, use mercerized cotton or a soft cotton blend; avoid yarns that pill. Store the runner flat or rolled to avoid creases in the layered petals.
Bringing this runner together is pure joy — the lacy medallions paired with sculpted flowers create a soft, cottage-style centerpiece you'll treasure. The as-you-go joining keeps assembly satisfying and tactile, while blocking and finishing make the final piece sing. 🧶 Spread it on your table, share as a thoughtful handmade gift, and enjoy the gentle floral charm it brings to any room. 🌸✨