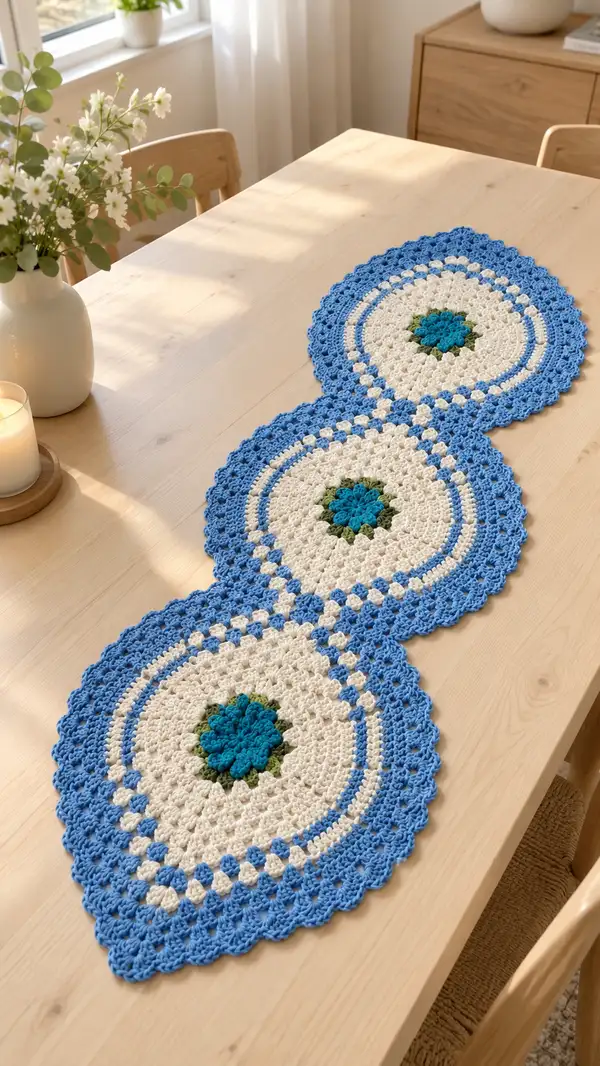
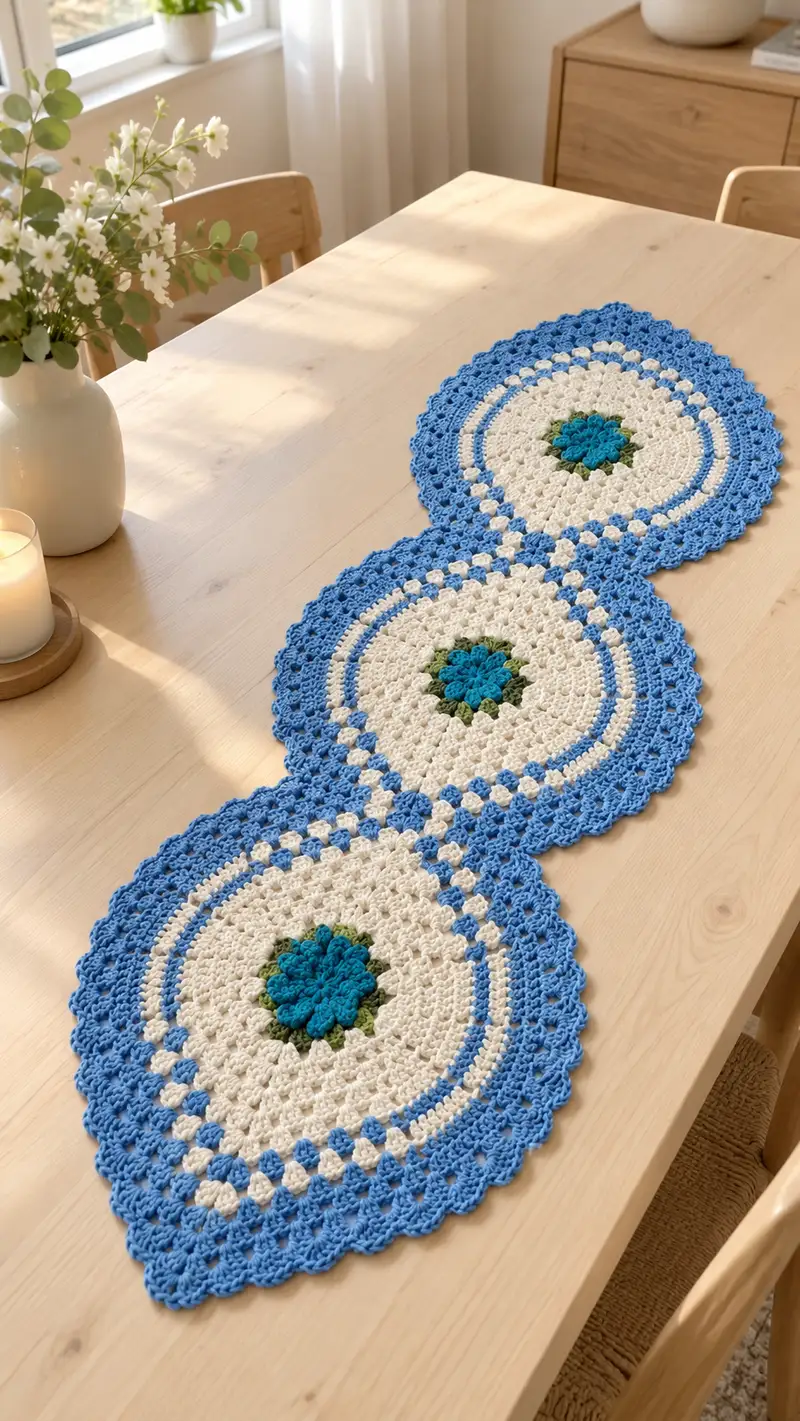
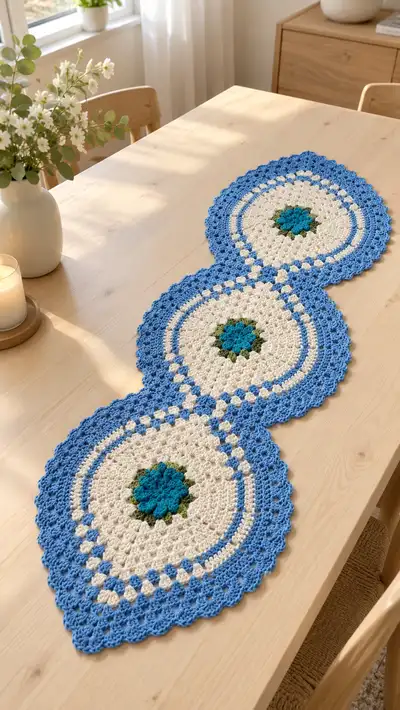
A pretty triple-circle table runner featuring floral centers, soft cream body rounds and a bright blue scalloped border. Each round motif is crocheted individually and joined-as-you-go to form an elegant runner perfect for dining tables or sideboards. The pattern uses textured puff and shell stitches to create a gentle vintage-meets-modern look. Includes detailed round-by-round instructions, color-change tips, and a join-as-you-go edging.
Progress Tracker
0% Complete
— Notes & Gauge :
Info :
This runner is worked in separate round motifs using a 12-segment increase pattern so each motif grows evenly and lies flat. Gauge is flexible for this decorative piece; with worsted yarn and 4.0mm hook each finished motif in this pattern measures approximately 28-30cm (11-12 inches) across after blocking. Blocking will help shells open and rounds lie flat.
Info :
Puff stitch: yarn over, insert hook, yarn over, pull up loop; repeat the last two steps 3 times total (4 loops on hook), yarn over, pull through all loops, ch1 to close puff unless specified otherwise. Each puff counts as one stitch unless noted.
— Motif (make 3 identical motifs) :
Round 1 :
Make a magic ring. Ch1. Work 12 sc into ring. Pull ring closed. (12)
Round 2 :
Inc in every st: (inc) x12. (24)
Round 3 :
(1 sc, inc) x12. (36)
Info :
Change to olive green for a contrasting inner ring here if you want a small leaf ring. To do a color change, finish last sc of previous round with new color and join with sl st.
Round 4 :
Change to olive green. 1 sc in each st around, working 36 sc (36). This forms a tidy round to build the flower base.
Round 5 :
Change to teal/turquoise. Work 12 puff clusters: *Puff stitch in next st, skip 2 sts, sl st in next st*; rep across placing 12 puffs evenly. Finish with slip stitch to first puff. (12 puffs counted as 12 textured petals; total stitch openings remain 36 equivalent)
Info :
Puff placement: place puffs so they sit on top of every third stitch from round 4 to create a 12-petal center. If you prefer a fuller center, work puff in each of 12 grouped positions as described.
Round 6 :
Change to olive green. Working behind puffs: ch1, sc in each stitch around including working 1 sc between puffs to maintain 36 sc. (36)
Round 7 :
Change to cream. (2 sc, inc) x12. (48)
Round 8 :
(3 sc, inc) x12. (60)
Info :
These increases set up a 12-segment structure that will make subsequent shellwork land evenly. Keep stitch counts exact: all increase rounds use repeats of 12 segments so math is consistent.
Round 9 :
(4 sc, inc) x12. (72)
Round 10 :
(5 sc, inc) x12. (84)
Round 11 :
(6 sc, inc) x12. (96)
Round 12 :
(7 sc, inc) x12. (108)
Info :
At rounds 9-12 you will see the motif take a nice circular shape. Keep tension steady; if the center cups or ruffles slightly, you can block to flatten later or adjust by adding one even round (sc in each st) before the next increase.
Round 13 :
(8 sc, inc) x12. (120)
Round 14 :
(9 sc, inc) x12. (132)
Round 15 :
1 sc in each st around. (132)
Info :
Want a more lacy look here? Substitute an even round in BLO with sc BLO to create a faint ridge that will catch the shell rounds later.
Round 16 :
Switch to cream if not already. 1 sc in each st. (132)
Round 17 :
Start subtle texture: *ch3, skip 2 sts, sc in next 2 sts, ch1* rep around making 44 groupings. Work pattern to end and sl st to first sc. Count remains (132 equiv. group structure)
Info :
This round sets up ch-spaces for later shell stitches. The total stitch equivalents still reflect 12-segment math; if you prefer not to use chain spaces, you can simply do 1 sc in each st instead.
Round 18 :
Shell foundation: *in the ch3 space: (2 dc, ch2, 2 dc)*, sl st into next sc; rep 44 shells evenly around. After last shell, sl st to top of first shell. Total shells = 44 (each shell occupies space created earlier)
Round 19 :
1 sc in each dc and in sl st spaces between shells to tidy: total equivalent count = 132. (132)
Info :
When working shells, keep a loose tension so shells sit open. If you pull tight, the motif will pucker. Slip stitch joins between shells should be snug but not stretched.
Round 20 :
Change to cream or keep cream. *Ch1, sc in top of shell (between clusters), ch2, sc in next shell top*; rep around to form delicate picot-like spacing. This creates 44 ch2 spaces along the round for decorative later joining. (132 equivalent)
Round 21 :
Switch to sky blue (border color). Work in each ch2 space from previous round: (sc, ch3, sc) to form small arches; sl st to first sc. There will be 44 arches. (132 equivalent)
Info :
These arches form the decorative chain that will visually connect motifs later. If you plan to join motifs by slip stitch at arch points, make sure all motifs are worked to the same round and orientation.
Round 22 :
Shell round in blue: In each arch work (3 dc, ch2, 3 dc) making 44 larger shells that create the scalloped look. Sl st to join. Each shell is worked into each ch3 arch. (Each shell counts as cluster; total equivalent stitch count relates to 44 shells)
Round 23 :
Between shells: sl st into the ch2 of each shell, ch1, 1 sc into ch2, ch1; sl st to next shell – creating small connectors; rep around. This tidy round keeps shell spacing uniform. (44 connectors)
Info :
At this stage your motif should measure approximately 28-30cm across. Block motifs on a flat surface if you want each motif perfectly round before joining.
Round 24 :
Final wide border rounds: *Into each large shell: (1 sc, ch3, 3 dc, ch3, 1 sc) in same shell; sl st into connector; rep around for a layered scallop. Finish with slip stitch to join.* (This accent round expands edge width and creates the finished scalloped edge)
Round 25 :
Edging refinement: in front loops only of outermost dc rows do 1 sc in each FLO to create a subtle ridge that frames the scallops. Work evenly around. (Edge count remains consistent with shells)
Info :
Fasten off leaving a 30cm tail for joining if this is motif 1 or 2. For the final motif, leave longer tail to sew into runner base if you prefer sewing over join-as-you-go. We will show join-as-you-go method next.
— Join Motifs (Join-As-You-Go) :
Info :
This runner joins three motifs along their edges so they overlap slightly creating an elegant flowing line. Work motif 1 completely and block if desired. When you start motif 2, complete rounds up to and including the large shell round (Round 22 above). On Round 23 of motif 2, when you reach the shell that will meet motif 1, join with slip stitch through the corresponding outer connector point of motif 1 instead of completing the connector. This creates a flat seamless join.
Join Round 1 (motif 2) :
Work motif 2 through Round 22 normally. Begin Round 23: when you reach the tenth shell (approximate quarter point) locate the corresponding connector on motif 1 and sl st into its connector ch2, then continue sl st into motif 2 and proceed. Continue joining at each intended contact point—space joints evenly across 4-6 join points depending on how snug you want motifs attached.
Info :
For three motifs, you will join motif 2 to motif 1 along about 6-8 connection points along the overlapping shells, then join motif 3 to motif 2 in the same way. Pin motifs together first to find the most attractive, flat join line before working sl st joins—this avoids puckering or misalignment.
Join Round 2 (motif 3) :
Complete motif 3 through Round 22. On Round 23 (connector round) join motif 3 to motif 2 using the same method. If you wish a continuous chain with slight overlaps, join motif 3 only on the inward-facing shells so the outer scallops remain free and decorative.
Info :
If you prefer sewn joins, use mattress stitch/sewing through both motifs with matching yarn tail and hide ends in the connector stitches. Sewing yields a flatter seam but a slip-stitch join keeps the front neat and is faster.
— Outer Edging & Finishing :
Round 1 :
After all three motifs are joined, work a final unifying edging around the entire outside edge: with blue yarn, join to any outer shell opening and ch1, *1 sc in each outer dc across until you reach the next shell valley, then in valley: (ch3, 2 dc, ch3) making a shallow shell; continue* around work. This rounds and evens the outer silhouette.
Round 2 :
Work scallop finish: *In each shallow shell: (sl st, ch2, 3 dc, ch2, sl st)* to make soft shells in the outer valleys. Keep shells proportionate so the three motifs read as a continuous runner not three separate round plates.
Info :
Check join seams: flip runner over and check for gaps. Use yarn needle and whip stitch to tidy any gaps when necessary. Tidy and weave in all ends on the reverse of the runner so the front remains clean.
Round 3 :
Edge refinement: Work one round of sc in FLO of outermost shells to create a shallow ridge, then finish with a reverse crab stitch (reverse sc) around the entire runner for a neat hand-stitched look. Fasten off and weave tails thoroughly. Block the finished runner for best presentation.
Info :
Blocking tips: spray with water and pin each scallop to a flat mat, adjust scallop spacing gently, allow to dry completely. Proper blocking gives the scallops a crisp, professional finish and helps all motifs sit level.
— Optional Variations & Tips :
Info :
If you want a longer runner, make more than three motifs and join them in the same way. For a table topper central cluster, arrange motifs in a triangle or six-motif hex layout rather than a line. Alternate border colors for seasonal versions and use a cotton-wool blend yarn for a more rustic look. To tighten texture, drop hook size by 0.25-0.5mm on puff rounds.
Info :
Care: Hand wash gently in cool water and lay flat to dry. Cotton yarn versions can be machine washed on gentle if ends are secured, but hand washing preserves color and shape best.
You've created a timeless table runner that blends floral charm and airy shellwork into a calming home accent. Each motif joins into a flowing chain of color and texture, bringing a handmade touch to your table settings. Display it proudly at brunch, use it as a centerpiece base, or gift it to someone who loves cozy home details. 🧶🌼✨ The careful blocking and finishing make every scallop and petal sing — enjoy the glow every time you place it on your table!