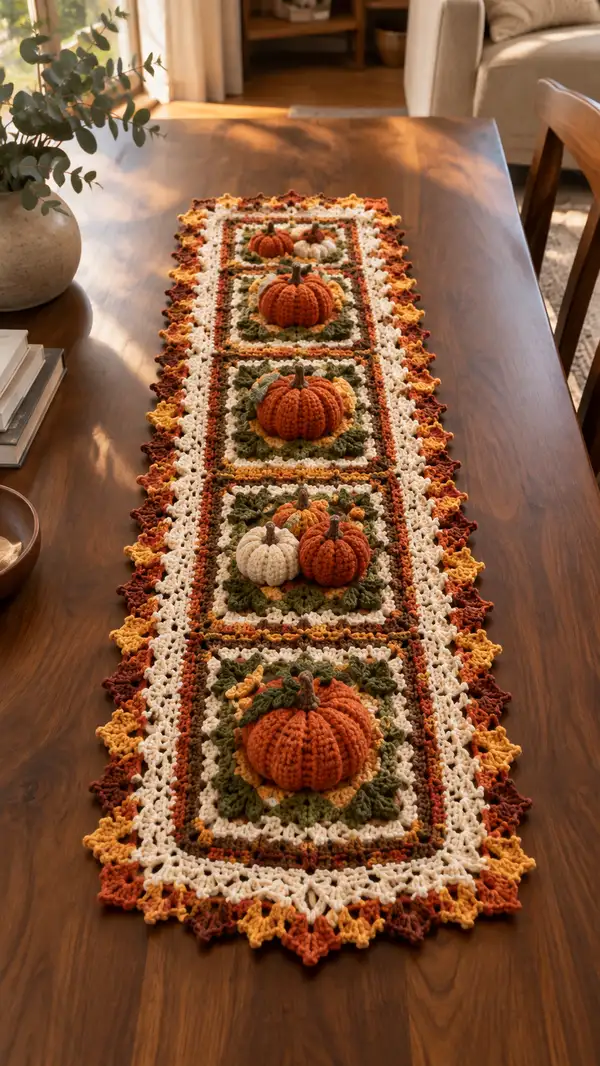
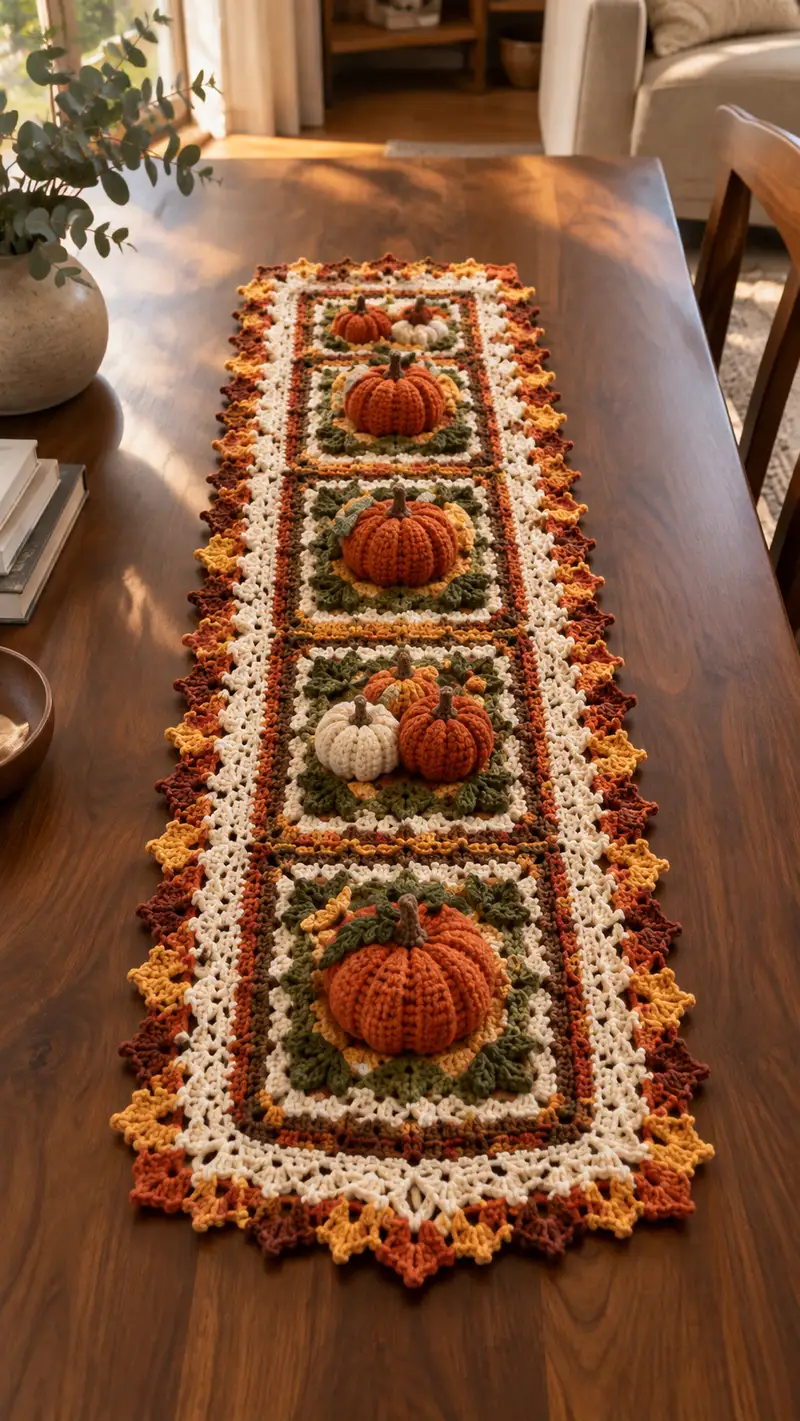
A cozy, autumn-inspired table runner featuring four ornate crochet squares, each topped with a dimensional pumpkin and leafy accents. Rich burnt orange, cream, gold and olive tones combine with lacy borders for a vintage harvest feel. The design is modular—make the full runner or shorten it to fit your table. Detailed stitch counts, assembly notes, and finishing tips make this pattern approachable for experienced crocheters.
Progress Tracker
0% Complete
— Overview :
Info :
This pattern is written in rounds and joined rows where appropriate. All pumpkins are made in continuous rounds (do not join unless instructed). Squares and border rounds are worked in joined rounds for clean corners. Gauge will vary by yarn; work tightly for pumpkins so stuffing doesn't show, and a standard gauge for the lace sections for drape.
— Materials & Prep :
Info :
Make 4 identical square motifs (approx 6.5"/16.5cm each after blocking) and assemble in a column. Each square will be topped with one large pumpkin (or cluster of small pumpkins for variety). Block squares before joining to square up edges.
— Square Motif (Make 4) :
Round 1 :
Make a magic ring, ch 3 (counts as first dc), 11 dc into ring, pull tight, join to top of ch 3 with sl st (12 dc) (12)
Round 2 :
Ch 3, dc in same st, 2 dc in each st around, join with sl st to top of ch 3 (24)
Round 3 :
Ch 3, dc in same st, *dc in next st, 2 dc in next st* rep around, join (36)
Round 4 :
Ch 1, sc in same st, ch 3, skip 2 dc, sc in next dc, ch 3, *sc in next dc, ch 3, skip 2 dc* rep around, join (12 ch-3 spaces)
Info :
These ch-3 spaces will become corner points when we start square shaping. Keep tension even so corners lay flat.
Round 5 :
Join Rust yarn in any ch-3 sp, ch 3 (counts as dc), 2 dc in same sp, ch 2, 3 dc in same sp (first corner made), *3 dc in next ch-3 sp, ch 2, 3 dc in same sp* rep around, join (4 corners)
Round 6 :
Ch 3, dc in each dc around until corner, in ch-2 corner work (2 dc, ch 2, 2 dc), continue, join (count will vary, approx 48-56 depending on increases)
Round 7 :
Change to Olive in last pull through. Ch 1, sc evenly around on top of dc stitches and across corners (work 1 sc in each dc and 3 sc in each corner ch-2), join (st count matching previous round)
Round 8 :
Change to Golden Yellow. Ch 3, *dc in next 3 sts, ch 1* rep around placing dc groups across sides and 3 dc in corner ch-3 spaces, join (creates textured frame)
Round 9 :
Change to Olive. Ch 1, sc around in each st and 3 sc in each corner, join and fasten off cream for contrast border next rounds (even edge prep)
Info :
At this stage each square has a framed center ready for the pumpkin base. Block now for best centering and to flatten corners.
Round 10 :
Join Cream yarn. Ch 1, sc evenly across edge, working 3 sc in corners, join (square edge stabilized)
Round 11 :
Ch 3, dc in next 2 sts, *ch 1, skip 1, dc in next 3* rep across each side, work 3 dc in corner ch-1, join (creates mesh edge for later pumpkin attachment)
Round 12 :
Ch 1, sc in each dc and ch-1 space around, 3 sc in each corner, join (neat base row for attaching pumpkin)
Round 13 :
Change to Rust. Ch 1, sc around in BLO for a subtle ridge, join (gives definition to inner square frame)
Round 14 :
Change to Burnt Orange. Ch 3, 1 dc in next 2 sts, *(1 dc, ch 2, 1 dc) in next sc to create a small loop, continue across* join (creates small decorative loops behind pumpkin)
Round 15 :
Change to Cream. Ch 1, sc around covering loops and side stitches evenly, 3 sc in corners, join and fasten off. Leave long tail for sewing pumpkin base if preferred.
Info :
Repeat motifs making four identical squares. If you want a shorter runner, make 2 or 3 squares; for a longer runner, make additional squares and adjust border length accordingly.
— Pumpkin - Large (Make 4) :
Info :
These pumpkins are worked in continuous rounds using the smaller hook (3.25mm) for a tight fabric. Work with Burnt Orange for the large pumpkins. We will create a spherical pumpkin with vertical ribs using post stitches later.
Round 1 :
Make a magic ring, ch 1, 6 sc in ring, pull tight (6)
Round 2 :
Inc in each st around (12)
Round 3 :
(1 sc, inc) x 6 (18)
Round 4 :
(2 sc, inc) x 6 (24)
Round 5 :
(3 sc, inc) x 6 (30)
Info :
Now we have a small flat disc - this will be the bottom dome of the pumpkin. Continue increases to reach approx 36-40 sts for larger pumpkin base.
Round 6 :
(4 sc, inc) x 6 (36)
Round 7 :
(5 sc, inc) x 6 (42)
Round 8 :
1 sc in each st around (42)
Round 9 :
1 sc in each st around (42)
Round 10 :
1 sc in each st around (42)
Info :
Rounds 8-10 build height for the pumpkin body. Work evenly and check size against your square center; adjust number of rounds for your desired pumpkin height.
Round 11 :
(5 sc, dec) x 6 (36)
Round 12 :
(4 sc, dec) x 6 (30)
Round 13 :
1 sc in each st around (30)
Info :
Begin stuffing lightly through the opening. Stuff until firm but still slightly compressible so the ribs will shape well.
Round 14 :
(2 sc, dec) x 6 (24)
Round 15 :
(1 sc, dec) x 6 (18)
Info :
Do not close completely. Fasten off leaving a long tail for sewing the pumpkin top closed to the square. Finish stuffing as needed to form a domed shape.
Round 17 :
Using long tail, sew opening closed with ladder stitch and weave tail through center to create a small gather. Secure and fasten off.
Round 18 :
Using a second piece of yarn (same color), create 8 evenly spaced vertical ribs by inserting a yarn needle at top center, pulling yarn through to bottom center and back up, repeating around pumpkin. Pull slightly to create defined ridges then tie off and hide ends (no numeric stitch count required; 8 ribs evenly spaced).
Info :
For raised ribs, you can also work fpdc and bpdc columns. Insert hook at top and work fpdc down the side, but the sewn rib method is quickest and produces crisp sections.
— Pumpkin - Medium (Optional, Make 2) :
Round 1 :
Magic ring, ch 1, 6 sc (6)
Round 3 :
(1 sc, inc) x 6 (18)
Round 4 :
(2 sc, inc) x 6 (24)
Round 5 :
1 sc around (24)
Round 6 :
1 sc around (24)
Round 7 :
(2 sc, dec) x 6 (18)
Round 8 :
(1 sc, dec) x 6 (12)
Round 10 :
Sew closed leaving a small gather. Add 6 ribs sewn from top to bottom evenly spaced. Fasten off.
Info :
Medium pumpkins are used in small clusters on some squares for added interest. Adjust rounds for a slightly taller or flatter pumpkin as desired.
— Pumpkin - Small (Make 4-6 for clusters) :
Round 1 :
Magic ring, ch 1, 6 sc (6)
Round 3 :
1 sc around (12)
Round 4 :
(1 sc, dec) x4 (8)
Round 6 :
Sew to close and add 4 sewn ribs or stitch small surface lines to mimic ribs. Fasten off and hide tails.
Info :
Small pumpkins sit beside larger pumpkins and create a natural cluster. Stuff very lightly or leave unstuffed for a flatter look.
— Pumpkin Stems & Leaves :
Stem Round 1 :
With Brown, ch 7, sl st in 2nd ch from hook and next 5 chs (5), fasten off leaving long tail to sew; roll or spiral the chain into a small stem and sew to pumpkin top for rustic look.
Stem Option :
Alternatively work 6 sc in magic ring, work 4 rounds in continuous sc to make a tiny tube, stuff lightly and secure; fasten off leaving long tail for sewing.
Leaf Round 1 :
With Olive, ch 7, sc in 2nd ch, hdc in next, dc in next 2, hdc in next, sc in last, sl st to starting ch to form leaf shape; fasten off leaving tail to sew. Make 2-4 leaves per pumpkin as seen.
Info :
Position leaves around stem when sewing pumpkin onto square so that they sit naturally and cover stitching. Block leaves flat for crisp edges.
— Attaching Pumpkins to Square :
Info :
Place pumpkin on square center; the square center should have a slightly raised flower-frame to nest the pumpkin. Pin pumpkin at equal intervals (4 pins around) to keep centered. Use mattress stitch or whip stitch to attach using long tail from pumpkin round-off. Hide knots under leaves or stem.
Step :
Thread long tail through yarn needle and sew through cream base round at evenly spaced points around pumpkin base (approx 8-10 attachment stitches) taking care to pull snug but not flatten pumpkin. Secure and weave ends into the bottom of pumpkin.
Info :
For small clustered pumpkins, sew the largest first and then sew small pumpkins beside it using the same technique. Use leaves to camouflage joins and make clusters appear natural.
— Joining Squares into a Runner :
Round 1 :
Lay all four squares in desired order. Using Rust yarn and whip stitch or slip-stitch join, join squares along one edge by matching sts; for slip-stitch join: attach yarn to last round edge, sl st through both loops of corresponding st across for neat join. Join long edges first to create a column.
Round 2 :
Once squares are joined, sc around the entire long edge seam on both sides in Cream to even out join and create a base for the lace border. Work 1 sc in each stitch and 3 sc in each corner to maintain shape.
Info :
When joining, ensure pumpkins face upward and seams sit flat between squares. If edges ripple, block again after joining and before adding outer border.
— Outer Lace Border :
Round 1 :
With Cream, join at any point on outer edge, ch 1, sc evenly around, placing 3 sc in each corner to stabilize, join (count will equal the total stitches around runner)
Round 2 :
Ch 3, *dc in next 2 sts, ch 1, skip 1* repeat around with 3 dc in corners to create open lacy effect, join
Round 3 :
Change to Rust. Ch 1, sc in each st around and 3 sc in corners, join
Round 4 :
Change to Golden Yellow. Ch 3, (2 dc, ch 2, 3 dc) in every fourth ch-1 space along sides to form decorative shells, join (creates repeating shell border)
Info :
These shell groupings will later support scalloped picot rounds; keep tension relaxed for lace movement.
Round 5 :
Change to Burnt Orange. Ch 1, sc in each dc and ch space around, 3 sc in corners, join
Round 6 :
Change to Cream. Ch 4 (counts as tr+ch1), *tr in next shell center, ch 1* repeat around placing 3 tr in corner shells, join
Round 7 :
Change to Rust. Ch 1, sc in each stitch, join
Round 8 :
Change to Golden Yellow. Picot scallop round: *ch 3, sl st in 3rd ch from hook (picot), sc in next 3 sts, ch 3, picot, sl st in 3rd ch from hook, skip 2 sts* repeat to form pointed scallops; join
Info :
Work border on a flat surface, pin scallops to blocking mats before final weaving of ends. This helps scallops lay evenly and maintain shape.
Round 9 :
Change to Rust. Work a final round of sl st into inner loop behind picots to create a tidy finish; weave in all ends.
— Optional Decorative Embellishments :
Info :
Add small crocheted acorns, tiny leaves, or embroidered veins on leaves. Use contrasting thread to stitch small veins on pumpkin segments if desired. Tiny beads or wooden twig stems can be added for a rustic finish—secure with hot glue if needed.
— Finishing Touches :
Info :
Block and steam the entire runner lightly. Ensure pumpkins are secured and leaves arranged. If storing, keep the runner flat to avoid flattening pumpkins. Spot clean as necessary with gentle detergent—do not machine wash stuffed pumpkins unless you remove them first.
Info :
To shorten or lengthen the runner, add or remove square motifs before joining and repeat outer border rounds to fit the new length.
This Burnt Orange Pumpkin Lace Table Runner brings the warmth of fall to any table with its charming 3D pumpkins, leafy accents, and delicate lace border. Each square is lovingly crocheted and topped with a sculpted pumpkin for a nostalgic harvest look. Whether finished as a short runner or full-length centerpiece, it’s a handmade treasure that will delight guests and family alike. 🧶🍁🧡