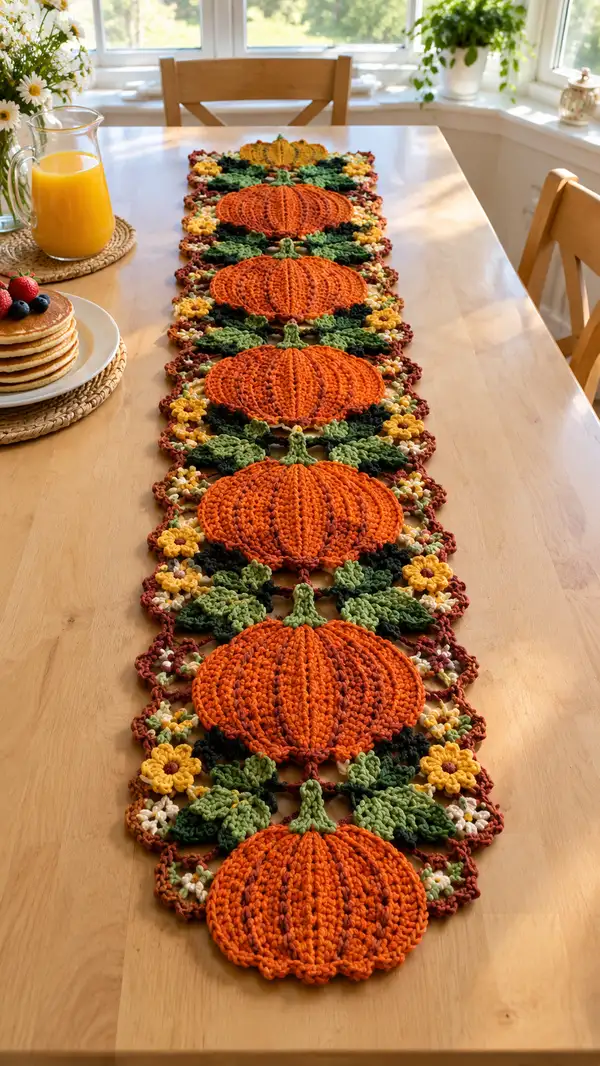
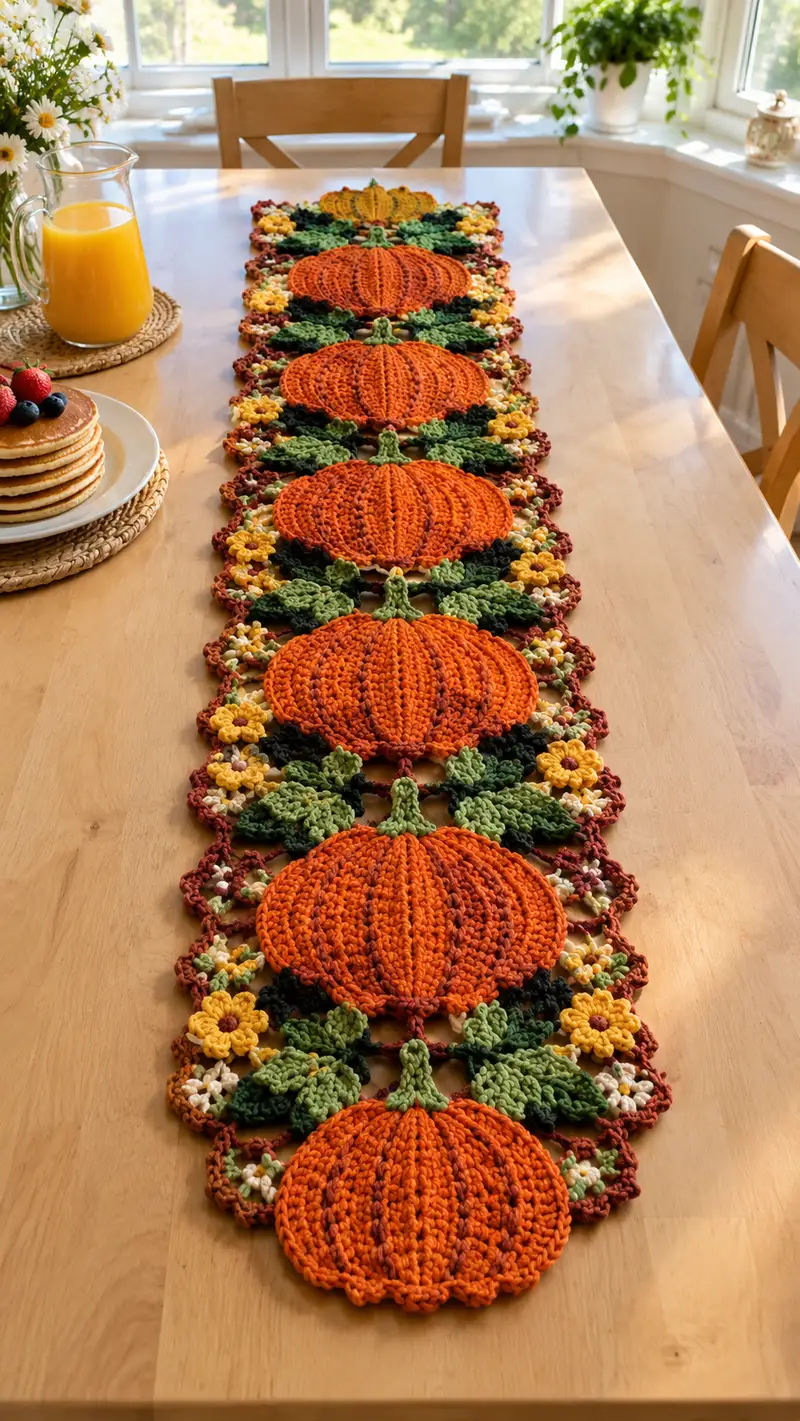
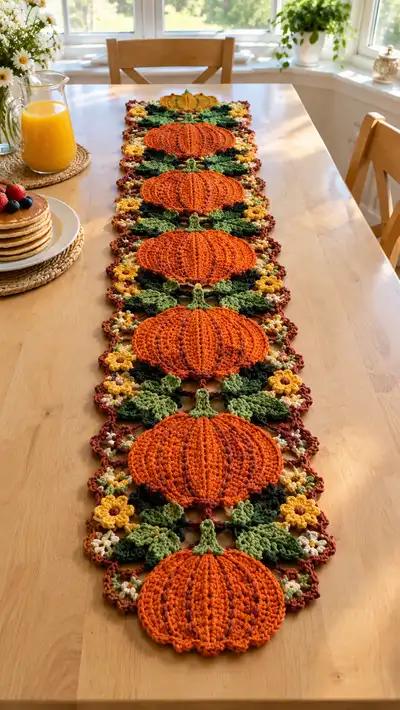
A warm, autumnal table runner featuring a repeating pumpkin motif framed by layered green leaves and tiny sunny flowers. Each pumpkin has deep ribbing created with post stitches for realistic texture and a short, stemmed top. The motifs are joined with an open lacy mesh and finished with a scalloped autumn border in rich brown tones. Perfect for seasonal decor, centerpieces, or a cozy harvest table display.
Progress Tracker
0% Complete
— Pumpkin Motif :
Round 1 :
6 sc in magic ring (6)
Round 3 :
(1 sc, 1 inc) x 6 (18)
Round 4 :
(2 sc, 1 inc) x 6 (24)
Round 5 :
(3 sc, 1 inc) x 6 (30)
Round 6 :
(4 sc, 1 inc) x 6 (36)
Round 7 :
(5 sc, 1 inc) x 6 (42)
Round 8 :
(6 sc, 1 inc) x 6 (48)
Info :
Change to pumpkin orange if you began with a different test color. For subtle tonal variation, use two strands of orange (one slightly darker) held together at rounds 9-12 for depth
Round 9 :
1 sc in each st (48)
Round 10 :
1 sc in each st (48)
Round 11 :
1 sc in each st (48)
Round 12 :
1 sc in each st (48)
Info :
Begin the ribbing sequence: this pumpkin motif will have 8 ribs. We will create vertical rib impressions using fpdc clusters placed at even intervals. Mark every 6th stitch now so you can easily find rib placement later
Round 13 :
(5 sc, fpdc around next st) x 8 (48)
Round 14 :
(5 sc, fpdc around post of fpdc from previous round) x 8 (48)
Info :
Keep the fpdc tension slightly looser than your sc tension to allow the ribs to sit raised. Use a stitch marker at the start of each rib and check placement visually
Round 15 :
(5 sc, fpdc around same column) x 8 (48)
Round 16 :
1 sc in each st (48)
Round 17 :
(4 sc, fpdc) x 8 (48)
Round 18 :
1 sc in each st (48)
Info :
To add 3D puff between ribs, we will work raised clusters that slightly lift the pumpkin surface. This is optional but recommended for realistic pumpkins
Round 19 :
(3 sc, (ch1, 3 dc cluster in next st, ch1), 1 sc) x 8 (48)
Round 20 :
1 sc in each st (48)
Round 21 :
(5 sc, fpdc twice into the rib post) x 8 (48)
Round 22 :
(4 sc, fpdc) x 8 (48)
Info :
If you want deeper grooves, work bpdc on the rounds immediately adjacent to each fpdc column to accent the valley between ribs
Round 23 :
(3 sc, bpdc around post between rib columns, 2 sc) x 8 (48)
Round 24 :
1 sc in each st (48)
Round 25 :
(2 sc, fpdc) x 16 (48)
Round 26 :
(1 sc, fpdc) x 16 (48)
Info :
Start to shape the pumpkin edge slightly so it doesn't lay perfectly flat; the next rounds will introduce a gentle scallop on the outer edge
Round 27 :
(3 sc, 1 hdc, 1 dc in same st, 1 hdc) x 12 (48)
Round 28 :
(2 sc, 1 hdc, 1 dc, 1 hdc) x 12 (48)
Round 29 :
1 sc in each st (48)
Round 30 :
(1 sc, dec) x 16 (32)
Info :
The decrease here pulls the outer edge slightly in to create a pumpkin silhouette. Maintain even tension and count carefully — decs are placed evenly across the round
Round 31 :
(6 sc, 1 dec) x 4 (28)
Round 32 :
1 sc in each st (28)
Round 33 :
(3 sc, 1 dec) x 7 (21)
Round 34 :
1 sc in each st (21)
Round 35 :
(2 sc, 1 dec) x 7 (14)
Round 36 :
1 sc in each st (14)
Info :
Fasten off leaving a 20-25cm tail for joining to the mesh and border. Lightly block the pumpkin flat to even out ribs and scalloped edge. Repeat this motif for each pumpkin you want on the runner (six were used in the pictured runner)
— Pumpkin Stem :
Round 1 :
6 sc in magic ring (6)
Round 3 :
1 sc in each st (12)
Round 4 :
(2 sc, 1 dec) x 3 (9)
Round 5 :
1 sc in each st (9)
Round 6 :
Work 3 rows of BLO sc around to create a ridged stem: 1 sc in each st BLO (9) x 3 rounds
Round 7 :
Fasten off leaving long tail for sewing. Stuff lightly with fiberfill only if you want a plump stem (optional)
Info :
Sew stem to the top center of each pumpkin using the long tail. Place stem so its base hides the central top stitches and sew with small, close stitches for stability
— Large Leaf Motif (Make 2 per pumpkin) :
Round 1 :
6 sc in magic ring (6)
Round 3 :
(1 sc, 1 inc) x 6 (18)
Round 4 :
(2 sc, 1 inc) x 6 (24)
Round 5 :
1 sc in each st (24)
Round 6 :
BLO 1 sc around (24)
Round 7 :
ch 1, 1 sc in next 4 sts, (hdc, dc, tr, dc, hdc) in next st (leaf tip), 1 sc in next 4 sts, sl st to base to form one side of leaf. Turn and mirror over remaining sts to create second side: 1 sc in next 4 sts, (hdc, dc, tr, dc, hdc) in next st, 1 sc in next 4 sts, sl st to join (24)
Round 8 :
Working around the outer edge only: (sc, hdc, dc, hdc, sc) across the leaf edge to even and shape (24)
Round 9 :
1 sc in each st (24)
Round 10 :
ch 1, fpdc across every 3rd st to create central vein: (2 sc, fpdc) x 6 (24)
Round 11 :
1 sc in each st (24)
Round 12 :
sl st around base to create a neat join edge and fasten off leaving a 20cm tail for sewing (24)
Info :
Lightly block leaves and pinch the central vein to give a three-dimensional fold. Add a very small amount of stuffing at the base if you want the leaf to stand slightly away from the mesh
— Small Leaf / Filler Leaf :
Round 1 :
6 sc in magic ring (6)
Round 3 :
(2 sc, 1 inc) x 4 (16)
Round 4 :
ch 1, sc 3, (hdc, dc, hdc) in next st, sc 3, sl st to join (16)
Round 5 :
1 sc around (16)
Round 6 :
Fasten off leaving tail to sew into the mesh as filler between larger leaves (16)
Info :
Make small leaves in both light and dark greens to create depth. Sew them so they slightly overlap larger leaves and pumpkin edges
— Small Flower Motif :
Round 1 :
6 sc in magic ring (6)
Round 2 :
ch 1, (sc, ch 2) x 6 around to make tiny loops, sl st to join (6 loops)
Round 3 :
Into each loop: (sc, hdc, dc, hdc, sc) x 6 — 6 petals (30 sts worked as petals, enjoy the texture)
Round 4 :
Fasten off leaving tail for sewing. Add a small french knot with matching yarn (or a small yellow bead) to the center if desired
Info :
These small flowers are used as bright accent points between leaves and along the mesh. Make in yellow and cream for the pictured look
— Join Mesh Square (Join-As-You-Go Connector) :
Round 1 :
With border or connector color, ch 10, sl st to form ring (or mr) then ch 2 (counts as first hdc)
Round 2 :
Work (hdc, ch2) x 8 into the ring to form 8 spokes with ch-2 gaps (16 hdc separate by ch-2 spaces)
Round 3 :
Into each ch-2 space: (2 dc, ch2, 2 dc) to create small shells; sl st to join (8 shells)
Round 4 :
Round of sc in each st and sc in shell centers: 1 sc in each dc and sc in the center ch-2 space to create a flat square edge
Round 5 :
(sc, ch3, sc) in each corner space to enlarge to a lacy square; sc across edges with ch-1 loops between shell arcs
Round 6 :
1 sc in each st around to neaten (count will vary by your tension); fasten off leaving long tail for join-as-you-go
Info :
Make enough mesh connectors to space pumpkins evenly. The pictured runner uses alternating connectors and clusters to create a continuous lacy strip. Use join-as-you-go to attach pumpkin edge tails to the connectors
— Border / Scalloped Edge :
Round 1 :
With border color, 1 sc around the entire runner edge where motifs and mesh meet. Work evenly and place 2-3 sc in corners or scallop points to maintain shape
Round 2 :
(ch 3, skip 1 st, sl st) repeat around to create picot spacing for scallops; adjust ch count to match your tension
Round 3 :
Scallop round: Into each picot loop work (5 dc) to create full scallops along the edge; place (sc, picot loop) between scallops where needed
Round 4 :
Fasten off and weave in ends. Block the entire runner flat to align scallops and even motif joins
Info :
To frame the runner like the photo, use a warm rust/brown for the border. Work the scallops loosely so they lay neatly over the table edge if desired
— Assembly & Repeat Notes :
Info :
Make one full pumpkin motif set consisting of: 1 Pumpkin Motif, 1 Stem, 2 Large Leaves, 3 Small Leaves, 2 Small Flowers, and 3 Mesh connectors (or however many connectors you prefer between pumpkins). For the pictured long runner, repeat the pumpkin set 6 times and join motifs as you go using the long tails and the join mesh squares
Round 1 :
Place first pumpkin face-up on blocking mat. Position 2 mesh connectors at its sides and sew the pumpkin tail to the connectors with mattress or whip stitch through the outermost rounds of the pumpkin
Round 2 :
Attach leaves: position one large leaf to the left and one to the right of the stem area; sew using the long tail and invisible stitches through base rounds 7-9 of the leaf and the connector shells
Round 3 :
Sew small leaves and small flowers into the mesh clusters between pumpkin and connector edges, using short, hidden stitches; stagger the colors for visual interest
Round 4 :
Repeat motif units, joining each new mesh connector to the previous connector using sl st join-as-you-go across corner loops or with a linking chain and whip stitch
Info :
Keep motifs oriented consistently so that stems point in the same direction for a harmonious repeat. Pin heavily before sewing to ensure even spacing and symmetry
Round 5 :
After all motifs are joined in a straight line, work the border round around the outer edge of the entire assembled runner, following scalloped instructions above
Info :
Block the finished runner again after border is attached. Use steam or wet-block method appropriate for your yarn type to shape the scallops and flatten joins
This pumpkin table runner brings autumn warmth to any table with textured pumpkin ribs, layered leaves, and cheerful little flowers. Each motif feels like a tiny harvest vignette; assembling them into a runner is a relaxing, rewarding experience. I love how the colors pop against a simple wooden table — it immediately creates a cozy seasonal focal point. Enjoy making a runner to fit your space and watch it brighten your home this season! 🎃🍁