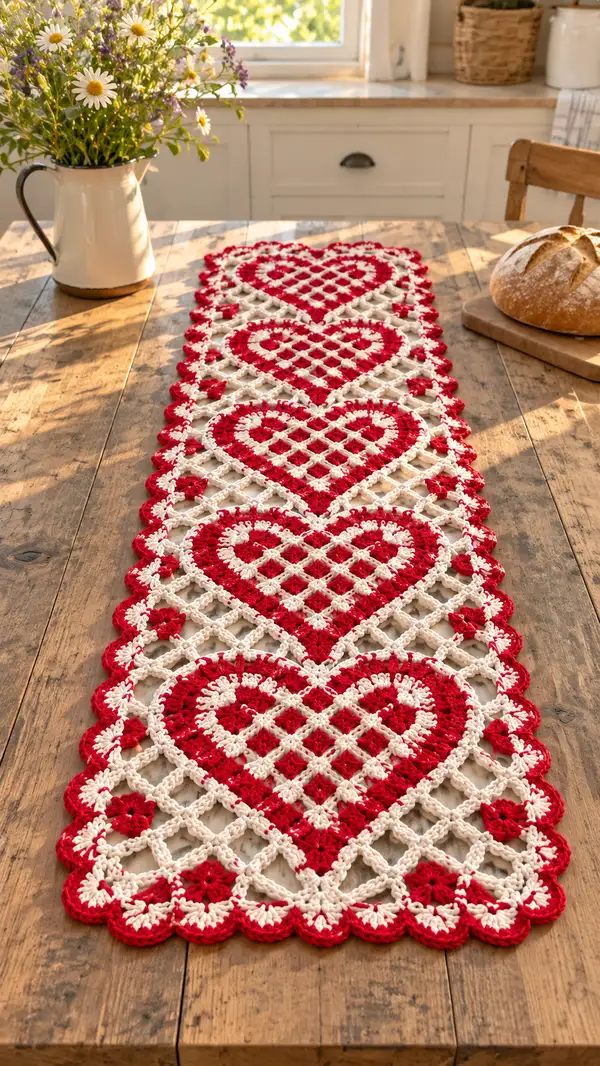
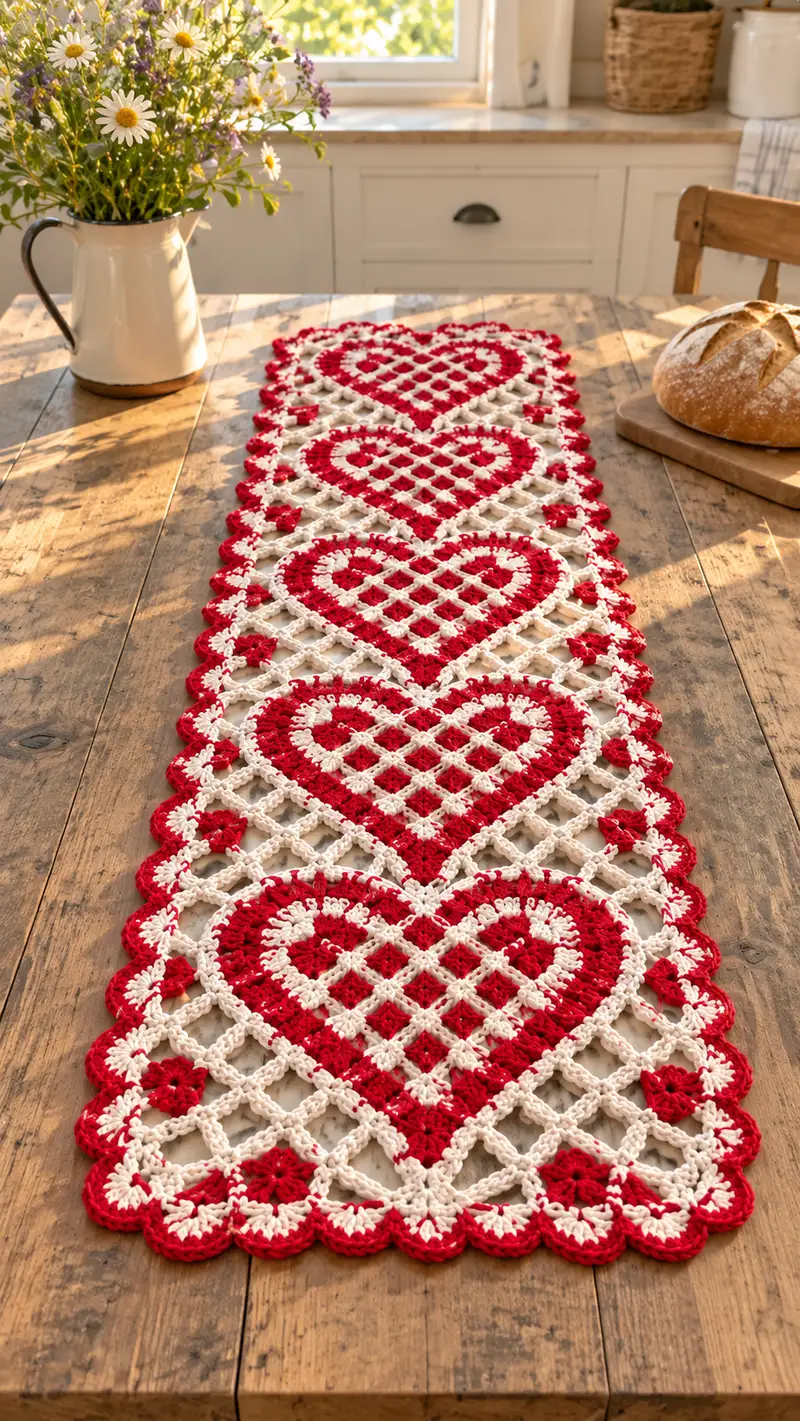
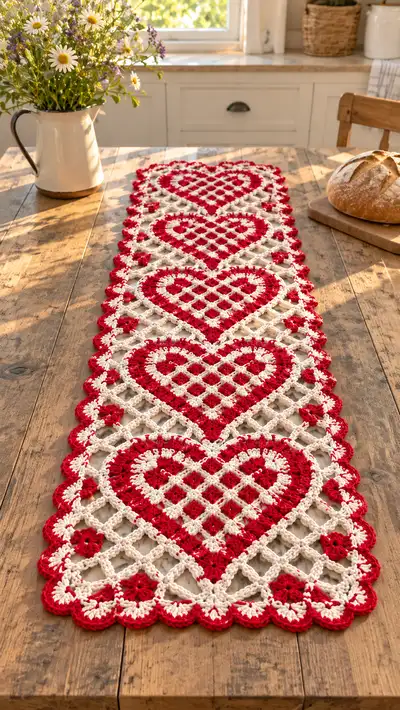
Create a charming Candy Cane Heart Lattice Table Runner worked in classic red and cream. This lacy runner features repeating heart medallions linked by open latticework and finished with a scalloped candy-cane edge. Perfect for holiday tables or romantic decor, the pattern uses simple clusters, chains and picot edging to achieve an elegant, airy look.
Progress Tracker
0% Complete
— Pattern Overview :
Info :
This table runner is assembled from modular heart medallions and open lattice panels. Each heart is worked flat in rounds and finished with a round of lattice connection points. After making the required hearts (five in the sample runner), you will work connecting lattice strips that join hearts edge-to-edge, then add a scalloped candy-cane border in red. Work in two colors: Cream (C) for lattice and Red (R) for heart motifs and edging. Use a 4.0mm hook for balanced drape.
— Heart Motif (Make 5) :
Info :
Make 5 heart medallions. Each heart is worked flat from the center out; rounds are shown below. Use Red (R) for Rounds 1-6, switch to Cream (C) for lattice connector rounds, and alternate as noted. The flat medallion will measure approximately 9.5cm (3.7in) across at widest point unblocked; block motifs square for consistent joins.
Round 1 :
With R: ch4, join with sl st to form ring. ch3 (counts as dc), 11 dc in ring. Join with sl st to top of ch3 (12)
Round 2 :
ch3, (dc, ch1, dc) in same st (creates first lobe), sk1, [dc in next 2 sts, ch1, dc in next st, sk1] x3, (dc, ch1, dc) in next st to form second lobe, join with sl st to top of ch3. Maintain 12 dc points and 6 ch-1 lobe gaps for shaping (12 dc, 6 ch-1 loops)
Round 3 :
ch2 (does not count), in each ch-1 loop across: (2 dc, ch2, 2 dc) in each loop, and dc in remaining dc points between loops where indicated, ending with dc to complete round. This expands the lobes and starts forming heart curve. Aim for (6 lobe shells + 12 dc) total. Join with sl st. (Approx 48 sts after shells)
Info :
At this point the motif begins to resemble two circular lobes; pay attention to shell placement to keep lobes rounded and center opening clear for lattice later.
Round 4 :
ch3, dc in next 2 sts, (2 dc, ch2, 2 dc) in each lobe ch-2 space, dc across bridge sts; increase where the lobes meet to create the point between them. Join with sl st. (Maintain overall stitch repeat symmetry)
Round 5 :
ch2, [hdc in next 2 sts, dc in next 4 sts, hdc in next 2 sts] across curved edges to smooth lobe edges; in the center bottom tip area, work (sc, hdc, dc, hdc, sc) clustered to start forming the heart point. Join. (Use counting to preserve the same number of sts on both lobes)
Round 6 :
ch3, *(dc in next 3 sts, inc (2 dc in same st) in next st)* across top lobe arcs to round out the heart top; at the very center between lobes make a small 3-dc cluster to deepen the dip. Continue around and join. (This round emphasizes red heart body; target approx 80-92 sts depending on increases)
Info :
Check symmetry often. Lay motif flat and adjust by undoing last shell if one lobe sits higher than the other. Blocks and pinning will help even out the shape.
Round 7 :
Change to C. ch3, *sk 1, (3 dc) shell in ch-1 or ch-2 space to create lattice anchor points; ch2 between shells at regular intervals to prepare for lattice mesh. Continue around to shape outer heart edge with regularly spaced shells. Join with sl st. (This round creates regular lattice anchor points — count shells; aim for 24-28 shells around heart edge)
Round 8 :
ch1, sc evenly around in each dc and shell edge, placing 1 sc into the top of each shell and 3 sc across small dc groups to produce uniform base for next lattice round. Join. (Even stitch count across both sides is important for lattice alignment)
Round 9 :
ch6, sk 2 sc, sl st in next sc; *ch6, sk 2 sc, sl st in next sc* along the curve creating evenly spaced long chain loops all the way around. Join. (These ch-6 loops become lattice join points — count loops; aim for 24-28 chains)
Info :
If your ch-6 spacing yields slightly too many or few loops, you can adjust by changing to ch5 or ch7 in small amounts, but keep consistent across all heart motifs so joining lines are even.
Round 10 :
With C: Into each ch-6 loop: (sl st, ch3, 3 dc, ch3, sl st) forming a small decorative arch (arch = sl st at base, ch3, 3 dc, ch3, sl st at base). Work this into every loop to create lattice anchor arches. Join. (This gives firm points for lattice ties)
Round 11 :
ch1, sc in top of each arch and sc between arches to create a neat rim. Join. (Neat rim preserves heart silhouette when lattice is attached later)
Info :
At the end of Round 11 your heart motif is ready to be connected into the runner. Make sure all 5 hearts are worked and blocked to identical size before assembling. We will use the ch bars on the heart rim to join into the lattice net.
— Lattice Mesh Panel (Make connecting strips) :
Info :
The lattice panels are worked as long strips of open diamond mesh. Each strip will connect hearts side-to-side and form the background cream lattice. Work panels in cream (C). You will make 6 lattice strips for runner shown: one between each pair of hearts (4) plus top and bottom border strips (2). Each strip length should match the runner width; you may adjust stitch count to ensure hearts align with diamond intersections.
Round 1 :
With C: ch 60 (or measured to match runner width), sc in 2nd ch from hook and across (59 sc). Join with sl st to first sc to form a long loop if working in rounds, or leave as a long strip in rows. For convenience work lattice in rows (back-and-forth) for flat joining.
Round 2 :
ch5 (counts as tr+ch2), sk 2, *tr in next st, ch2, sk 2* across, ending with tr in last sc. Turn. This creates the first row of tall posts that will become diamonds when crossed with subsequent rows.
Round 3 :
ch5, tr in top of tr from previous row, ch2, repeat across to form evenly spaced verticals. Turn. (Keep tension even; count tr posts to match previous row.)
Info :
The lattice diamond shape forms when rows of tall treble posts are offset and connected with ch-1 or ch-2 crossbars. Ensure your turning chain height is consistent and that the number of tr posts across each row matches the number of desired diamond columns.
Round 4 :
ch1, sc in top of each tr and in ch-2 spaces across. This creates a low anchoring row to connect horizontal crossbars. Turn. (You should have approximately 19-20 tr posts depending on starting ch count — these become diamond columns.)
Round 5 :
ch7, sl st in 3rd tr below to create a crossing link (work behind the work if possible so the net stacks neatly), *ch7, sl st in next 3rd tr below* across. Turn. This row creates the diagonal crossbars for diamond formation.
Round 6 :
Repeat Round 4: ch1, sc across in top of tr posts and crossbar anchors to stabilize row. Turn. Continue alternating tall-tr rows and short sc anchor rows until lattice strip reaches the height necessary to align with heart edges (approx 18-20 row repeats for typical runner height).
Info :
Measure against blocked heart motifs regularly so that the diamond intersections fall at the ch-3 arch points on the heart rim. Adjust lattice row count to make intersections match motif anchor points exactly.
Round 7-24 :
Repeat Round 2-6 pattern: alternating tall tr rows with sc anchor rows and diagonal crossbar rows until your lattice strip height matches the space between heart rows. For the runner sample the lattice strips are tall: you will repeat this sequence 9 times resulting in a mesh of approx 18-24 rows total. End on an sc anchor row for easy joining to the heart rim. (Maintain even count of diamond columns to align with heart anchors.)
Info :
When working long lattice panels, use stitch markers to mark every 10th diamond column to make counting and joining easier. Keep the mesh flat by blocking after finishing strips.
— Small Star/Flower Connectors (Make many) :
Info :
Small 6-petal connectors in red fill the lattice intersections along the runner sides and add a sweet motif at each heart corner. Make as many as needed to fill intersections; sample uses 18 small flowers. These are fast 5-7 round motifs sewn into lattice before final edge.
Round 1 :
With R: ch4, join to form ring. ch1, 6 sc in ring. Join. (6)
Round 2 :
ch3, in each st around: (dc, ch1, dc) in same st to form 6 petals. Join with sl st. Fasten off leaving a long tail for sewing. (6 petals)
Info :
Sew these connectors into diamond centers where the lattice meets the heart rim or into the side diamonds to create the dotted red pattern seen in the image. Place them evenly for visual balance.
— Assembling Motifs and Lattice :
Info :
Lay out all hearts and lattice strips on your blocking mat in final order before joining: top lattice strip, heart, lattice, heart, lattice, heart, lattice, heart, lattice, heart, bottom lattice strip in sample. Use pins to hold positions. Joining will be done by slip stitch or whip stitch through the heart rim sc row into lattice sc anchors to achieve neat, flat joins.
Round 1 :
Position first heart on lattice strip: align heart ch-6 arches and arch anchors to chosen lattice diamond intersections. With C, starting at a convenient sc on the lattice strip, work sl st through the sc of lattice and corresponding sc on heart rim; continue to join along one side with sl st every 2-3 sc to create secure, even attachment. Do not pull too tightly. (Join entire side.)
Round 2 :
Attach opposite side of heart to the second lattice strip in the same way so the heart sits snugly between two lattice strips. Repeat for all hearts. For the small flower connectors, sew into diamond centers using tail and tapestry needle.
Info :
For stronger joins, you may use a yarn needle and mattress stitch style sewing through the sc base, then pass a few extra stitches through the lattice post for added security. Keep stitches small and even to avoid visible bulk on the front.
— Joining Rows & Runner Length Adjustment :
Round 1 :
Once hearts are joined to lattice strips, join lattice strips together along their long edges where required to make the runner long; use sl st or whip stitch through adjacent sc anchor rows. Overlap 1-2 sts to avoid visible gaps. Continue until runner length reaches desired measurement.
Round 2 :
Check for gaps at heart corners: add extra small flower connectors or a small picot sl st to fill holes where the heart meets lattice. Add one or two sl st anchors at high-tension points for reinforcement.
Info :
Because this runner is modular, you can add or remove heart medallions to change the length. Keep the building blocks (heart size and lattice repeat) consistent if you want uniform spacing.
— Candy-Cane Scalloped Border (Edging) :
Info :
Work edging in alternating stripes of Red (R) and Cream (C) for a candy-cane effect. Edge worked around full runner perimeter; if you prefer a single-color edge use Red. For best result pick one hook size slightly smaller for edging to keep scallops firm.
Round 1 (Border start) :
With R: Join yarn at a corner sc. ch1, sc evenly around entire runner working 1 sc in each sc and 3 sc in each corner to keep corners flat. Join with sl st to first sc. (Count total sc to plan scallop repeats; make sure count divisible by scallop repeat number, adjust if necessary.)
Round 2 :
Change to C: ch3, *skip 2 sc, (5 dc in next sc) (scallop shell), skip 2 sc, sc in next sc* repeat around. Work 3 dc shells into corner sc groups to keep edge even. Join. (This round creates the candy stripe scallops in cream)
Round 3 :
Change to R: ch1, sc in each dc and sc across, placing 3 sc in the center of each large shell to create a raised red scallop. Join. (Red overlay gives the candy-cane alternating scallop effect)
Round 4 :
Change to C: ch3, in each red scallop do (sc, ch3, sc) to create small picot points between scallops. In corner shells work (sc, ch3, sc, ch3, sc) to round out corner. Join. Fasten off and weave ends. (This finishes decorative candy-cane border.)
Info :
Alternate the last two rounds if you want a stronger raised scallop or apply a light steam block focusing on scallops to open and shape them. Use a narrow gauge hook on the edging if scallops appear loose.
— Finishing & Blocking :
Info :
After joining and edging, wet-block the runner to final dimensions. Pin scallops and heart curves carefully to preserve shape. Spray with water and let dry completely. For stiffer look use a light starch or blocking spray sparingly. Weave all tails into the backside of the stitches and trim flush.
Round 1 :
Inspect runner edges and intersection points. Add a few strategic reinforcement stitches along joins on the backside using matching cream yarn: run a small whip stitch every 6-8 sts where lattice meets heart to prevent stretch over time.
Info :
Press gently with a warm iron on low if needed; never place iron directly on cotton yarn without a damp cloth in between to avoid shiny spots.
— Optional Variations & Tips :
Info :
Scale runner up by using sport or aran yarn and a larger hook; adjust heart and lattice counts proportionally. For a more delicate look, use a finer cotton thread and a 2.5-3.5mm hook, and adjust motif counts to keep proportions consistent. To make a placemat version, work only one heart with lattice surround and a full border.
Info :
If you prefer a seamless look, join hearts as you finish Round 11 by slip-stitching into lattice posts on the previous motif; this crochet-as-you-go method saves later sewing but requires careful placement and matching loop counts.
This Candy Cane Heart Lattice Table Runner brings classic holiday charm to your table with handcrafted lace hearts and a delicate scalloped edge. Working through the modular hearts, airy lattice panels, and candy-cane border is a rewarding project that results in a beautiful, giftable home accent. Block, trim, and place it proudly down the center of your table — it's the handmade touch that becomes a conversation piece. Happy stitching and enjoy the cozy, festive glow of your finished runner! 🎁❤️🧶