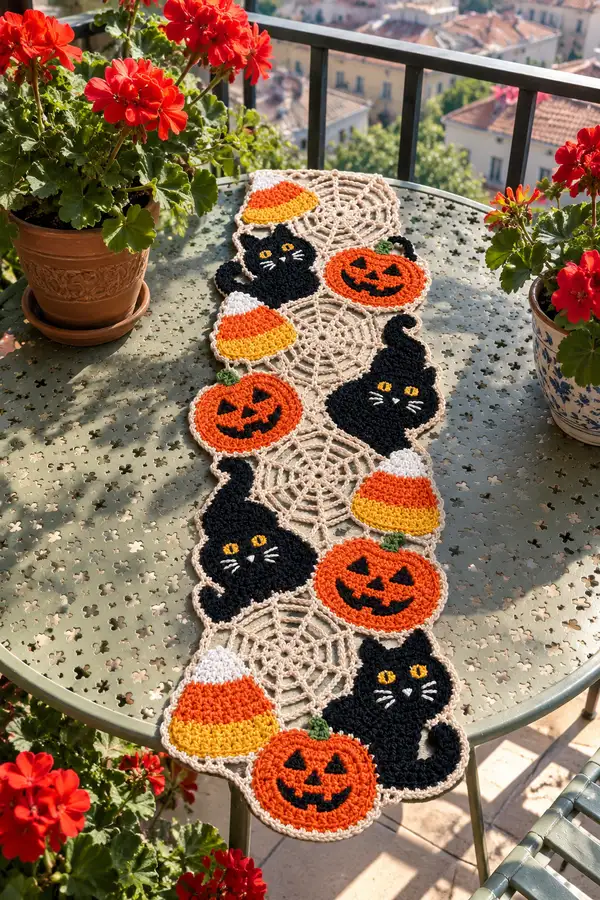
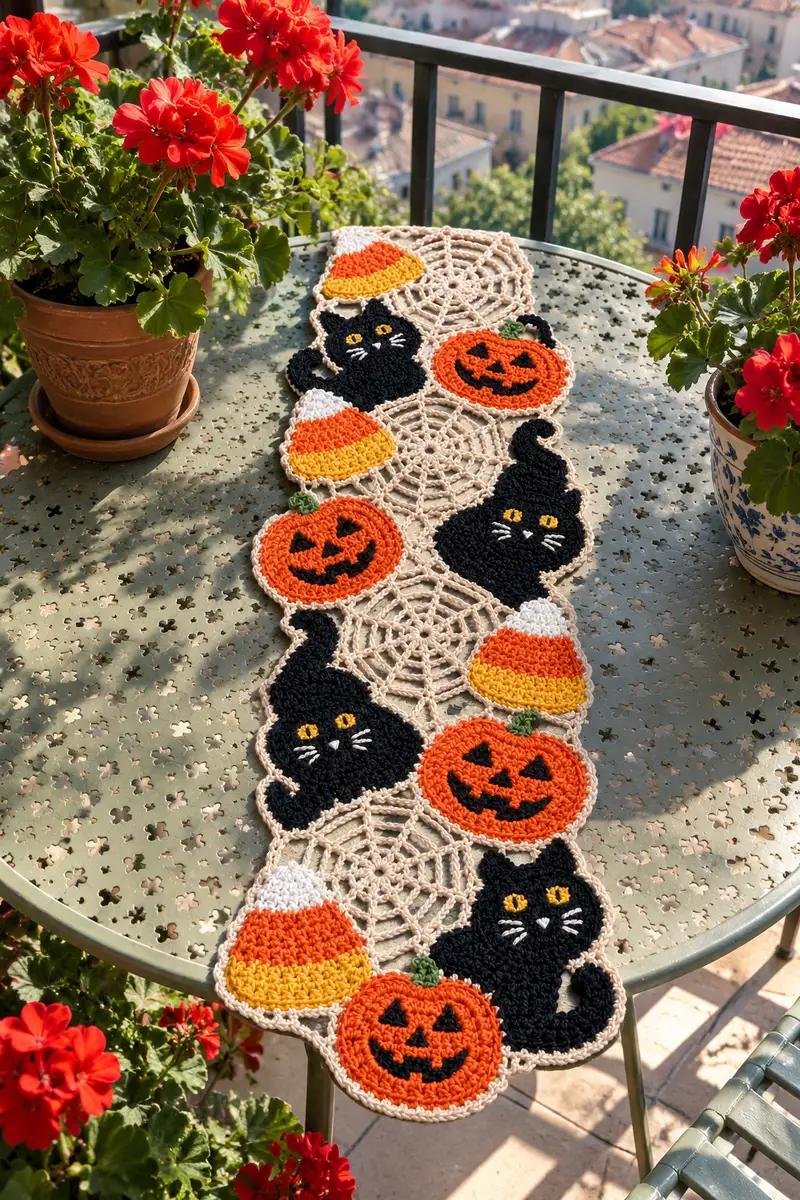
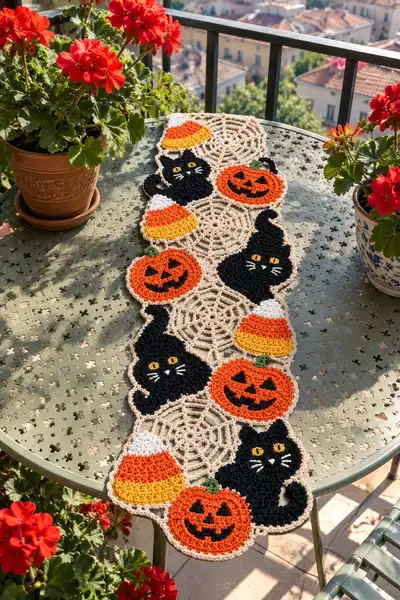
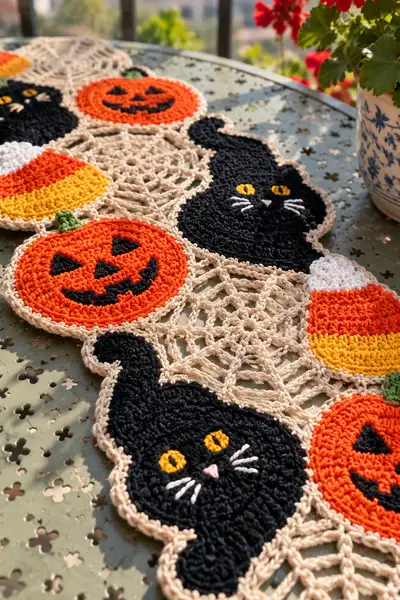
This festive Halloween table runner combines whimsical black cats, smiling jack-o-lanterns, candy corn wedges and elegant spiderweb medallions worked in warm autumn tones. The motifs are crocheted separately and joined to create a long, airy runner perfect for a porch or dining table. Finished with a delicate scalloped edge in neutral beige, this runner brings charming seasonal style and playful texture to your home.
Progress Tracker
0% Complete
— Spiderweb Medallion :
Round 1 :
6 sc in magic ring (6)
Round 3 :
(1 sc, 1 inc) x 6 (18)
Round 4 :
(2 sc, 1 inc) x 6 (24)
Round 5 :
(3 sc, 1 inc) x 6 (30)
Info :
Work these first rounds tightly to create a firm center. Use neutral beige yarn as shown in image. Place a stitch marker at the beginning of each round to help with later anchoring of web spokes.
Round 6 :
(4 sc, 1 inc) x 6 (36)
Round 7 :
1 sc in each st (36)
Round 8 :
Ch 6, skip 2 sc, sl st in next sc; *ch 6, skip 2 sc, sl st in next sc* around creating 12 loops (36)
Info :
These chains create the radial spokes for the web. Count carefully: with 36 sts you anchor every 3rd stitch to make 12 spokes. Keep chains loose so they lay flat; do not tighten too much on the last slip stitch.
Round 9 :
Working into each ch-6 loop: *(sl st in ch-3, 3 dc in next ch, ch 2, 3 dc in same loop, sl st into base anchor)* repeat around (12 petal clusters). Finish with sl st to join to initial round.
Round 10 :
Ch 3 (counts as dc), *ch 4, dc into center join between spokes (use slip-stitch anchors of previous round), ch 4, dc into center* repeat 12 times to form inner web spiral. Join with sl st (36 dc anchors)
Round 11 :
Ch 1, sc in each dc and ch-space around, spacing evenly (48 sc) - this evens the row and creates a solid ring before more openwork
Info :
At this stage you have an inner ring that stabilizes the web. Keep tension consistent to avoid puckering. If a spoke seems twisted, tug gently to align before proceeding.
Round 12 :
Ch 6, sl st into next sc; *ch 6, sl st into next sc* around, creating 48 chains anchored every sc to build the larger web (24 loop anchors)
Round 13 :
Into each ch-6 loop: *(sl st, ch 3, 2 dc, ch 3, sl st) in center of loop* repeat 24 times forming linked arches (this forms the decorative rings of the web)
Round 14 :
Ch 1, sc in each stitch and into chain spaces around to tidy and even the motif (72 sc)
Round 15 :
Switch to open web spokes: *working in FLO of the latest round, ch 8, sl st into the outermost chain arch at regular intervals* repeat to make a tall open spine for each web arm (24 chains)
Round 16 :
Sl st around to secure and form picot joins: *(sc, ch 3, picot, sc) into the base of each long ch-8 loop* repeat 24 times to create decorative points (72 total smaller anchors)
Round 17 :
1 sc in each st around forming a tidy border that will be used for joining motifs (72 sc)
Info :
Fasten off leaving a 20-25 cm tail for joining motifs later. Block each medallion flat: pin a circle roughly 10–12 cm across (depending on yarn and hook). Wet-block to secure shape so the web spokes are defined for joining.
— Pumpkin Motif (Jack-o-Lantern) :
Round 1 :
6 sc in magic ring (6)
Round 3 :
(1 sc, 1 inc) x 6 (18)
Round 4 :
(2 sc, 1 inc) x 6 (24)
Round 5 :
(3 sc, 1 inc) x 6 (30)
Info :
Work these rounds in pumpkin orange for the main body of the pumpkin. Keep stitches even to achieve a round disc that will later be flattened and face-embroidered.
Round 6 :
1 sc in each st (30)
Round 7 :
1 sc in each st (30)
Round 8 :
(4 sc, 1 inc) x 5, 5 sc (35)
Round 9 :
1 sc in each st (35)
Round 10 :
BLO work: 1 sc in each st BLO around to produce slight ridge for pumpkin dimension (35)
Info :
Stop and decide face placement now: the photo shows round pumpkins with triangular eyes and a smiling mouth. We'll embroider the face with black yarn later. Mark the center and where the highest points of the face will be before embroidering.
Round 11 :
Switch to front-face round: 1 sc in each st around (35)
Round 12 :
Ch 1, sc around decreasing slightly to flatten: *(4 sc, 1 dec) x 5, 5 sc* (30)
Round 13 :
(3 sc, 1 dec) x 6 (24)
Round 14 :
1 sc in each st (24)
Round 15 :
Fasten off with long tail for sewing and embroidery. Using black yarn and a yarn needle, embroider two triangular eyes and a smiling mouth: triangles approximately 6-8 sts wide and centered. Fill with satin stitch for solid shapes.
Info :
To create the pumpkin stem: with green yarn make a small 6-round tube: MR 6 sc (6), 1 sc in each st (6) for rounds 2-6, then fasten off leaving a long tail to sew the stem to the top edge of the pumpkin. Optionally add a small leaf with 5 sc in magic ring, fasten off, and whip stitch beside stem.
— Black Cat Silhouette Motif :
Round 1 :
6 sc in magic ring (6)
Round 3 :
(1 sc, 1 inc) x 6 (18)
Round 4 :
(2 sc, 1 inc) x 6 (24)
Round 5 :
(3 sc, 1 inc) x 6 (30)
Info :
Begin the cat motif as a rounded disc in black to create the face area; later rounds will extend into ear points and tail curl. Mark the top center where ears will start.
Round 6 :
1 sc in each st (30)
Round 7 :
(4 sc, 1 inc) x 5, 5 sc (35)
Round 8 :
1 sc in each st (35)
Round 9 :
(5 sc, 1 inc) x 5, 10 sc (40)
Round 10 :
1 sc in each st (40)
Info :
From round 11 we begin shaping the ears and the tail by working partial rounds and adding increases in ear apex and decreases to form shoulder/neck joins. Keep marker at center to place eyes later.
Round 11 :
Work to shape right ear: sc in next 8 sts, dec, 3 sc, inc, 3 sc, dec (ear shaping done over 16 sts); continue sc around remaining st count to total (approx 44)
Round 12 :
Shape left ear similarly in mirrored placement: sc to mirror location, repeat ear shaping sequence, sc remaining stitches evenly (approx 44)
Round 13 :
Form shoulder and base: (6 sc, dec) around until you have (36)
Round 14 :
1 sc in each st (36)
Round 15 :
Start tail extension: working back half only, ch 4 at tail anchor, then in each of next 12 sts work (hdc, dc, tr) working in decreasing stitch counts to form tapered tail (this is worked as short rows over a half-circle)
Info :
Tail shaping uses short-row technique: work into next 12 sts only, turning at ends to create a curved tapered shape. Keep tail slightly elongated to maintain the whimsical curl visible in the photo. You can use a stitch marker to indicate where to stop the short rows.
Round 16 :
Turn and crochet back across tail short-row: slip st along the underside then 1 sc into each stitch worked across, creating a thick tail base; fasten off tail end when length matches photo curvature.
Round 17 :
Return to main cat body: 1 sc in each st around (36)
Round 18 :
Dec shaping for lower curve: (3 sc, 1 dec) x 6 (30)
Round 19 :
(2 sc, 1 dec) x 6 (24)
Round 20 :
Fasten off leaving long tail for joining. Block flat and shape ears with pins to create triangular points. Embroider facial details: eyes in golden yellow using satin stitch, tiny pink triangle for nose, and three white whisker stitches on each side as shown.
Info :
Eye placement: place safety-embroidery eyes between rounds 9-11 approximately 8-10 stitches apart center to center for the wide-eyed expression. Eyes shown are embroidered with yellow yarn to avoid safety pieces on a tabletop item.
— Candy Corn Wedge Motif :
Round 1 :
Ch 4, 2 sc in 2nd ch from hook, 1 sc, 3 sc in last ch; working on opposite side of foundation chain: 1 sc, 2 sc in last ch (8 total) — forms small triangle base
Round 2 :
Turn work and sc evenly around the triangle to create single-row border: 1 sc in each st, increase at corners to maintain triangular shape (12 sc)
Round 3 :
Switch to golden yellow: 1 sc in each st around (12)
Round 4 :
Increase sides: *(sc in next 3 sts, inc) x 3* (15)
Round 5 :
1 sc in each st (15)
Info :
Change to orange for the wide middle band: cut yellow leaving tail for weaving and join orange with a sl st at a corner to continue triangular expansion.
Round 6 :
In orange: (4 sc, inc) x 3 (18)
Round 7 :
1 sc in each st (18)
Round 8 :
Change to white for tip: 1 sc in each st for two rounds to create white tip (18)
Round 9 :
Fasten off leaving tail. Trim and weave ends. Place candy corn wedges spaced between motifs when joining to the runner. Optionally work a sc border in beige around wedge to match runner edges.
Info :
Candy corn pieces are worked flat as wedges and edged to match the beige joining color so they read as motifs when placed next to the webs and pumpkins.
— Small Stem and Leaf (Make Many) :
Round 1 :
MR 6 sc in green (6)
Round 2 :
1 sc in each st (6)
Round 3 :
Sc2tog, sc, sc2tog (4)
Round 4 :
Chain 6, sl st back into base to make a curly tendril; fasten off leaving tail to sew to pumpkin top
Info :
Make one stem and one tiny leaf for each pumpkin motif. Stitch stems firmly with a long tail so they sit upright when sewn into position.
— Joining Motifs into Runner (Join-As-You-Go Option) :
Info :
The runner is constructed by alternating spiderweb medallions with clusters of three motifs: pumpkin, cat, candy corn. Plan motif order as: web - (pumpkin, candy corn, cat) - web - (pumpkin, candy corn, cat) - web - ... to match the photo. You will need 4-6 spiderweb medallions depending on desired length. Pin motifs on a flat surface before joining to check alignment.
Round 1 (Joining Start) :
With beige yarn and a 4.0mm hook, join to outer border of first spiderweb medallion with sl st, ch 1, sc evenly in each border stitch around until you reach the point where the next motif will attach (72 sc)
Round 2 :
At attachment point, align pumpkin motif border with web border and join with sc through both layers for 6-10 stitches to secure the pumpkin; continue sc around web border. Repeat to attach candy corn and cat motifs to the same web at their respective anchor points so you create a cluster attached around the web.
Round 3 :
Between motif joins create decorative chain arches: *(ch 5, sl st into next sc of web)* around the web to create airy connections, anchoring each arch into the outer sc row of both web and adjacent motif if aligned (this gives the lacy look between motifs)
Info :
Use slip-stitch joins when attaching two circular edges for an invisible seam, or use whip stitch for stronger hold. The runner in the photo appears to use a combination of sc joins and chain arches to create negative space between motifs.
Round 4 :
After attaching a cluster to one web, move to the next web medallion and repeat the join sequence to attach the next cluster. Keep consistent spacing so the pattern alternates evenly along the runner length.
Round 5 :
If you prefer a continuous fabric, use join-as-you-go: when completing the last round of a new medallion, do not fasten off; instead slip-stitch to the corresponding stitch on an adjacent medallion and continue the final round so motifs are permanently linked as you work.
Round 6 :
Check alignment periodically and pin motifs before stitching permanently. Fasten off and weave tails when small areas are complete to avoid long floats across the wrong side of the runner.
— Outer Scalloped Edge and Finishing :
Round 1 :
With beige yarn and 4.0mm hook, attach to any outermost sc on runner and work even sc around entire runner edge to create a uniform border; work 1 sc in each outer sc and 3 sc across chain arches (estimate stitches, maintain even count)
Round 2 :
Sc evenly to smooth any irregular joins; keep tension relaxed so scallops lie flat (this round evens the border)
Round 3 :
*Skip 2 sc, 5 dc in next sc, skip 2 sc, sl st in next sc* repeat around to create large scallops (adjust repeat to fit your stitch count so scallops are evenly spaced)
Round 4 :
Work small picot edging on scallops: *(sl st, ch 3, picot, sl st) in center dc of each scallop* repeat around for delicate points
Round 5 :
Fasten off and weave in all ends along the underside of the runner. Trim any excess and steam-block the finished runner to set shape if using cotton blend yarn.
Info :
For a flatter finished piece, block fully pinned to shape: pin the scallops evenly and use a low-steam iron or wet-block method depending on yarn fiber. Allow to dry completely before use.
— Finishing Touches and Embroidery :
Round 1 :
Embroider faces and details after joining: use black yarn and satin stitch to fill triangular jack-o-lantern eyes and a smiling mouth. Use yellow for cat eyes, pink for nose and white for whiskers. Sew each stem and leaf to the pumpkin tops securely.
Round 2 :
Weave all tails to the back of the runner and trim flush. If any motifs feel loose, reinforce with a few hidden whip stitches from the back side.
Info :
To achieve the same look as the photos, arrange the runner so cats and pumpkins alternate along both edges, with candy corn wedges filling smaller gaps. The beige webs create a neutral background that keeps the colorful motifs prominent.
This Halloween table runner is a lovely blend of playful and elegant: spiderweb medallions provide a neutral, airy base while black cats, pumpkins, and candy corn add bright seasonal charm. Each motif is crafted with care and joined into a long, eye-catching runner that dresses up any table or porch. I hope you enjoy assembling the clusters and watching the design come together — it’s such a satisfying finishing touch! 🎃🧶