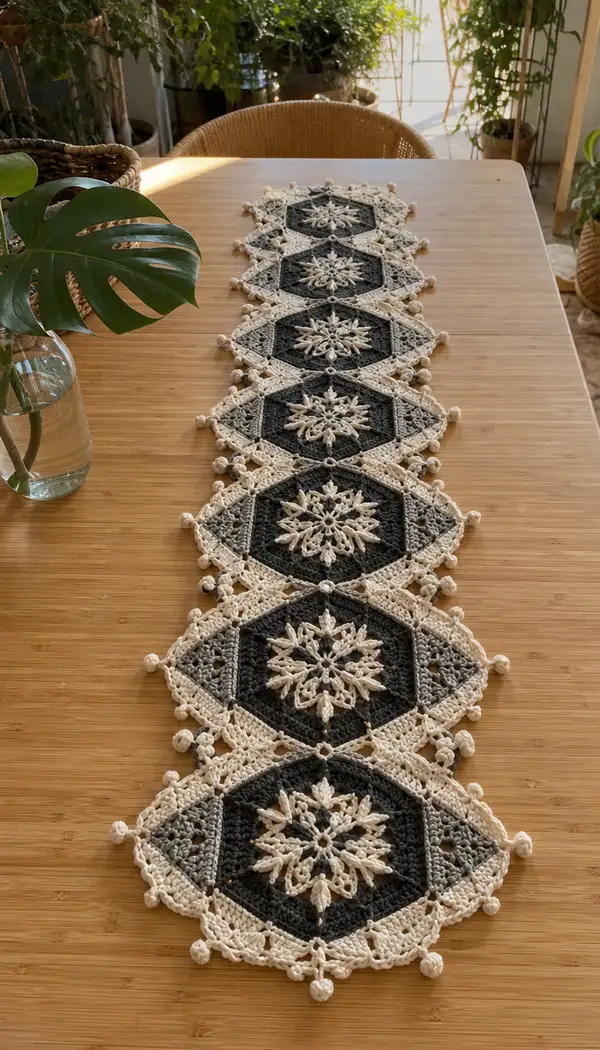
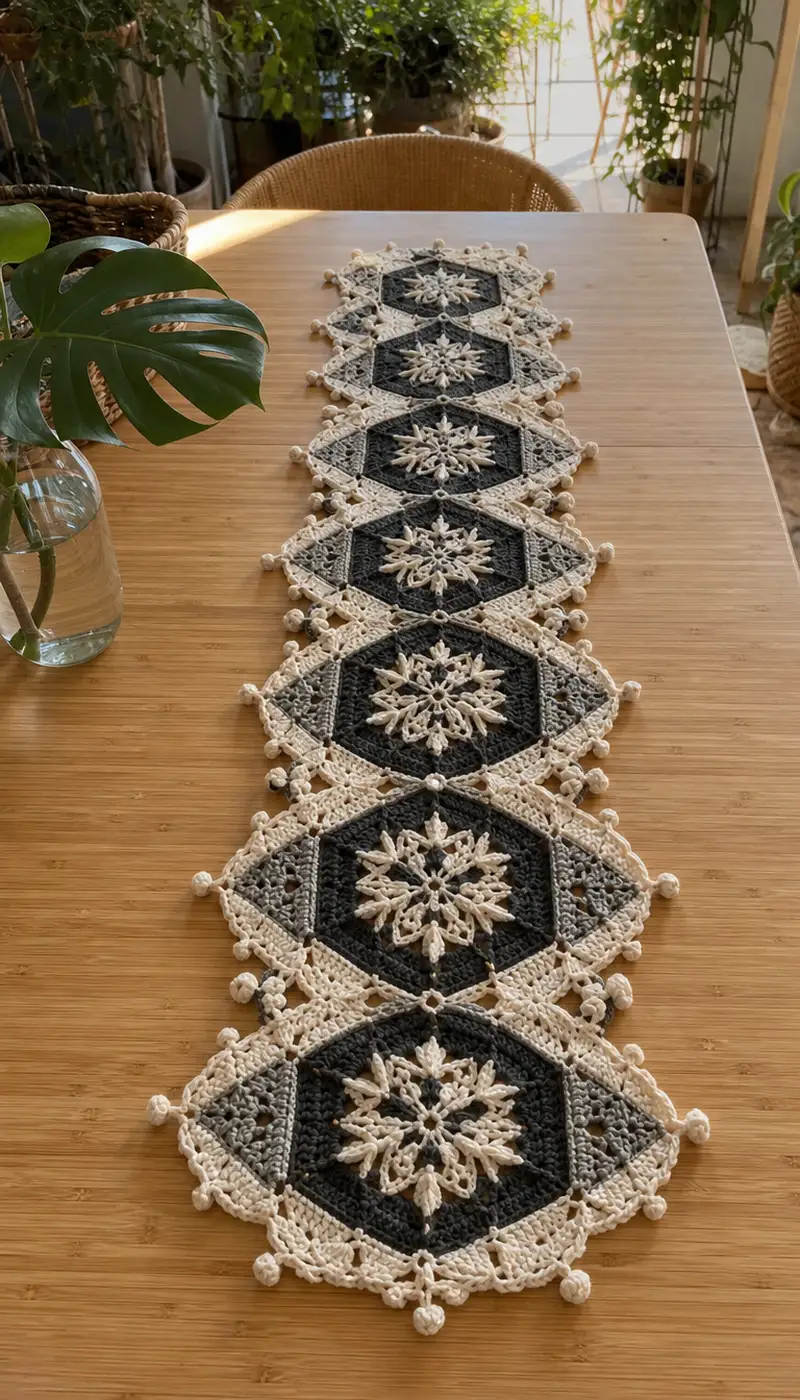
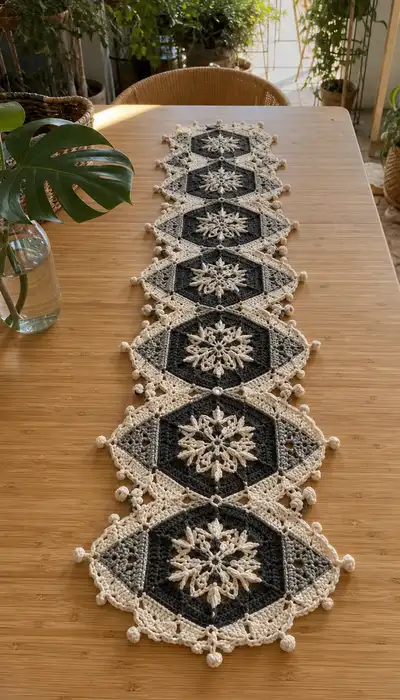
A long, elegant hexagon-motif table runner featuring raised cream snowflake centers set on charcoal and mid-gray hexagons with a delicate cream lace border and bobble fringe. The design repeats a snowflake-in-hexagon motif across the length of the runner, perfect for winter tables or year-round modern farmhouse décor. The runner shows crisp color contrast, textured puff stitches, and a scalloped bobble edge that lifts each hexagon for a handcrafted heirloom finish.
Progress Tracker
0% Complete
— Overview :
Info :
This pattern uses three colors: Charcoal (dark), Mid Gray (medium) and Cream/Ivory (light). The central snowflake overlay is worked primarily in cream and attached to the charcoal base motif by slip-stitch sewing through the back loops of the snowflake. Each hexagon motif is worked separately then joined by a crochet join technique before the final scalloped lace edge and bobble fringe are worked in cream. The pattern below gives full round-by-round instructions for one assembled hexagon (snowflake overlay + hexagon base + lace rounds), repeat to make 7 motifs and then join to create the runner shown. All stitch counts are calculated and consistent; check gauge if altering yarn or hook.
— Snowflake Overlay (Make 7) :
Round 1 :
With Cream, make a magic ring, ch1, 6 sc into ring (6)
Round 2 :
Inc in each st around (12)
Round 3 :
(1 sc, inc) x 6 (18)
Round 4 :
Change to puff technique: *ch3, skip next st, sc in next st* rep around to create small chain loops; end with sl st to first sc (18 chain loops)
Info :
These chain loops form the base points where later puff clusters will be anchored. Keep tension slightly looser on ch3 loops to allow puff stitches to sit neatly.
Round 5 :
*Into each chain loop: (yo, insert, pull up loop) 3 times (3 loops on hook), yo and pull through all 3 loops, ch1 to close puff* repeat in each loop (18 puffs)
Round 6 :
Ch2 (counts as hdc), hdc in same sp, *ch2, skip one puff, (hdc, ch2, hdc) in top of next puff* repeat 5 more times for six petals (36 hdc increments including ch2s pattern) (36)
Info :
At the end of Round 6 you will have a small six-petal star. Keep puffs gently stuffed with a little yarn tail tucked if you like for extra lift; do not overstuff—just coax shape with fingers.
Round 7 :
Switch to mid gray for a delicate ring: join mid gray with sl st in a space between petals, ch3 (counts as dc), *dc in next space, ch2, dc in next space* repeat around to create 6 ch2 spaces (36 dc including ch3 counts)
Round 8 :
Change to Cream. Working in ch2 spaces: *(dc, ch1, puff, ch1, dc) in ch2 sp* around to create 6 raised arms (each arm occupies a ch2 sp) (12 dc + 6 puffs total elements)
Round 9 :
Ch1, sc evenly around the star to tidy edge and prepare for joining; work 2 sc in each ch1 loop between arms to produce even edge. Count should be 48 sc (48)
Info :
Weave a long tail of cream at the end of this round for sewing the overlay to the hexagon base. Position the snowflake centered on the hexagon when sewing; the overlay will be sewn through the back loops only to keep the raised snowflake prominent.
Round 10 :
Optional reinforcing round: ch1, sc in back loops only around (48) - fasten off and leave a long tail for sewing (if you prefer a thin seam). Otherwise fasten off and weave ends.
Info :
Make 7 snowflake overlays. Block gently on a flat surface to get the points even: spray lightly with water and pin to shape; allow to dry before sewing to base motifs.
— Hexagon Solid Base (Charcoal + Mid Gray) Make 7 :
Round 1 :
With Charcoal, magic ring, ch1, 6 sc in ring (6)
Round 3 :
(1 sc, inc) x 6 (18)
Round 4 :
(2 sc, inc) x 6 (24)
Round 5 :
(3 sc, inc) x 6 (30)
Round 6 :
(4 sc, inc) x 6 (36)
Info :
Rounds 1–6 establish a compact circular center that will be shaped into a hexagon. From here on we will define six corner points using chain spaces and clusters. Use a stitch marker at the first stitch of each round to preserve round starts.
Round 7 :
(5 sc, inc) x 6 (42)
Round 8 :
(6 sc, inc) x 6 (48)
Round 9 :
Ch3 (counts as dc), dc in next 7 sts, *ch2, skip 2 sts, dc in next 8 sts* repeat total 6 sides then sl st to top of ch3. This round creates 6 ch2 corner spaces and sets each side length to 8 dc (48 dc + 6 ch2 corners)
Info :
Round 9 is critical for transforming the circle into a hexagon. Count your dc per side (should be 8 dc between corners). If your counts differ, adjust by adding or removing evenly across sides before proceeding.
Round 10 :
In each corner ch2 space: (sc, ch3, sc) to create defined corners. In each side (between corners) work 8 dc. End with sl st to join. Total stitch equivalents: 6 corner clusters + 48 dc.
Round 11 :
Ch2, hdc in same st, hdc in each of next 8 dc, *(hdc, ch1, hdc) in corner ch3 sp, hdc in each of next 8 dc* repeat around. This keeps 48 hdc across sides plus 6 corner (hdc,ch1,hdc) clusters.
Info :
If you desire a gentle gradient effect between charcoal and mid gray, change to Mid Gray now. For the photo look, change to Mid Gray at Round 12 so the six triangular side panels get a lighter tone surrounding the dark center.
Round 12 :
Change to Mid Gray. Ch1, sc in each st and ch1 corners around (count 54 sc including corner spaces) (54)
Round 13 :
Ch3, dc in each of next 9 sts along side, *(dc, ch1, dc) in corner ch1 sp, dc in next 9 sts* repeat around. This increases side length to 10 dc between corners (60 dc + corner ch1 clusters)
Round 14 :
Ch1, sc in each st around to tighten fabric (60)
Info :
Now the mid gray ring frames the charcoal center. If your hexagon seems too tight at corners, adjust tension or add a single ch1 in each corner cluster on the next round to even the geometry.
Round 15 :
Switch back to Charcoal. Ch3, dc in next 11 sts along side, *(dc, ch2, dc) in corner ch1 sp, dc in next 11 sts* repeat around (72 dc total plus 6 corner ch2 spaces)
Round 16 :
Ch1, sc across each dc and sc across corners (72)
Round 17 :
Ch3, *(2 dc, ch1, 2 dc) across each side center across next 12 sts to create vertical texture, in corner ch2 sp work (dc, ch3, dc)* repeat around (this builds small lacy side arches) (approx 84 stitch targets including corner clusters)
Info :
Round 17 introduces small arches which later frame the snowflake overlay. Count carefully—if you overshoot stitches per side re-balance by adjusting the number of dc groups on subsequent rounds to keep symmetry.
Round 18 :
Ch1, sc in each st around to secure arches (84)
Round 19 :
Change to Cream. Join with sl st in any sc, ch2 (counts as hdc), hdc evenly around working 1 hdc in each sc to create a cream framing ring (84 hdc)
Round 20 :
Ch3 (counts as dc), dc in next 3 sts, *ch2, skip 2 sts, dc in next 4 sts* repeat around to form openwork diamond bridges at each side (pattern spans sides and corners) (84-ish elements)
Info :
At Round 19–20 the cream ring sets the stage for the central overlay. Ensure the center of the hexagon is flat—light blocking helps here. Use a yarn needle and the long tail from the snowflake overlay to sew overlay now (instructions in Assembly section), or wait until motifs are joined then sew.
Round 21 :
Ch1, sc in each st around; fasten off leaving a long tail for joining the overlay (84)
Info :
Make 7 hexagon bases. Block each hexagon flat to ensure equal side lengths before sewing overlays and joining motifs. I recommend pinning to a hexagon template and spraying lightly with water or using steam with a protective cloth.
— Decorative Lace Layer (Cream) Around Hexagon (Make 7) :
Round 1 :
With Cream, rejoin at any corner point (where corner clusters were formed), ch1, sc in same st, *(ch5, skip 3 sts, sc in next st) across side to form picot arches; in corner work (sc, ch3, sc) to form pronounced corner loop* repeat around. Expect 6 larger arches per hexagon side (approx 90 points)
Round 2 :
Sl st into first ch-5 loop, ch3 (counts as dc), 5 dc in same loop (6-dc shell), sl st into next ch-5 loop and work 6-dc shells in every alternate loop to build scallops; complete around (36 shells)
Info :
The scallop shells create the lace look between hexagon points. Keep shells consistent in height—work shells into loop centers only and anchor shells into base chain spaces; this keeps edges even when motifs are joined later.
Round 3 :
Ch1, sc in top of each shell and sc across connecting points to tidy (approx 108 sc)
Round 4 :
*In each scallop: (ch2, puff, ch2) anchored in shell center, sl st to next sc* repeat around to create raised bobble arches (approx 36 puffs)
Round 5 :
Ch1, sc around to secure puff bases and even up edge (approx 108 sc)
Info :
These puff arches echo the snowflake texture. Make sure puffs are made with consistent number of pulls (suggest 3 loops pulled) to keep height uniform across motifs. Use remaining yarn to weave tail through back loops and secure.
Round 6 :
Fasten off leaving 20cm tail for joining motifs. Weave in short ends later after blocking and joining to keep the front tidy.
— Joining Motifs (Seven Hexagons in a Row) :
Info :
Arrange motifs on a flat surface in a single row, matching orientation so snowflake points line up visually along the runner. There are two main joining options: crochet join (join-as-you-go slip stitch method) or whipstitch sewing with mattress stitch. This pattern gives the join-as-you-go crochet join for a continuous lace seam; if you prefer sewing joins, use mattress stitch through Round 21 tails described earlier.
Round 1 :
Hold two hexagons RS together aligning edge scallops. With Cream and the working yarn on the assembled hexagon, sl st through the back loop only of both edge stitches at each matching scallop to join; work 6 joining sl st along each side (approx 36 sl st per join). Join motifs pairwise across all adjacent seams.
Info :
Use pins to ensure scallops align before joining. Join every adjacent pair this way until you have a single row of seven motifs. Each join reduces the total number of exterior scallops; keep the outside seams unjoined so the final lace edge remains continuous.
Round 2 :
After joining horizontally, turn runner so wrong side faces you. With Cream, work a row of sc around the full outside edge of the runner to tidy joins: sc into every visible st around, place 3 sc in each exposed corner to keep shape (approx 420 sc—this will vary with exact motif counts)
Info :
This sc round stabilizes the joins and prepares the entire runner for the final lace and bobble border. Keep even tension to avoid puckering across the joins; if you see pulling, block again to even the fabric.
— Scalloped Border and Bobble Fringe :
Round 1 :
With Cream, ch3 (counts as dc) at any exterior sc, *(skip 2 sc, 5 dc shell in next sc, skip 2 sc, sl st in next sc)* repeat creating shells around entire outer edge. Make shells into every other sc to space them evenly (approx 70 shells depending on motif count)
Round 2 :
Ch1, sc in each st and sc across top of shells to tidy (approx 420 sc)
Info :
Spacing shells evenly is essential. If your run of motifs results in slightly more or fewer stitches per outer side, adjust by placing shells every 3rd sc where needed to keep scallops balanced at ends.
Round 3 :
Prepare bobbles: *ch2, (yo insert pull up loop) 5 times in front loop of target sc, yo pull through all loops, ch1 to secure* make one bobble anchored between shells around the edge so they sit at outside points (approx 70 bobbles)
Round 4 :
Ch1, sc around anchoring each bobble with a sc on either side; fasten off. Using a shorter hook if desired tidy each bobble by pulling tail and trimming to even length. Weave in all ends from edging and joins neatly on WS.
Info :
Bobble size: use 5-loop puffs for medium sized bobbles shown in photo. If you prefer smaller bobbles, reduce pulls to 3 or 4. Always anchor bobble with sc on both sides so bobbles sit outward and do not flop inward.
— Final Finishing & Blocking :
Round 1 :
Wet block the entire runner: dampen lightly, pin each scallop and edge bobble to shape on blocking mat, stretching gently to even hexagon edges, and allow to dry for 24 hours. Unpin and use a steamer from WS if any stubborn curves remain.
Info :
Blocking is critical for a flat table runner with crisp geometric hexagons and even scalloped edges. Take the time to pin accurately at corners and between motifs. If motifs are slightly different sizes, blocking will adjust them to match more closely.
Round 2 :
Weave in all tails using a yarn needle, hiding ends through several interior stitches to ensure longevity. If desired, add a small backing of felt in matching color to protect delicate table surfaces—attach with fabric glue or hand-stitch to the runner's backside at each hexagon corner.
Info :
Final care: wash gently by hand in cool water and lay flat to dry. Cotton will soften slightly with use and washing; re-block if necessary after laundering to maintain crisp hexagon edges and bobbles.
— Variation Notes & Alternate Finishes :
Info :
If you prefer a subtler look, omit bobble fringe and instead finish with a simple picot edging: *(sc, ch3, sl st into top of next sc)*. For more dramatic contrast, reverse main and overlay colors, making snowflakes Charcoal on a Cream base. To shorten or lengthen runner, add or subtract hexagon motifs—each motif adds about 16–18cm to length depending on blocking.
Info :
Pattern yields one runner of 7 hexagons as shown. For runners with odd numbers of motifs across multiple rows, plan layout and mirror motif orientation so snowflake points align symmetrically. Always test a single motif fully blocked before committing to large runs for color planning and yarn estimation.
This Charcoal Snowflake Hexagon Table Runner will become a showpiece on your table—combining geometric form, textured snowflakes and a romantic bobble fringe. The repeatable hexagon motif is meditative to make and rewarding to assemble. Enjoy the contrast of deep charcoal centers and soft cream overlays; each finished runner is a handmade heirloom to display or gift. 🧶❄️