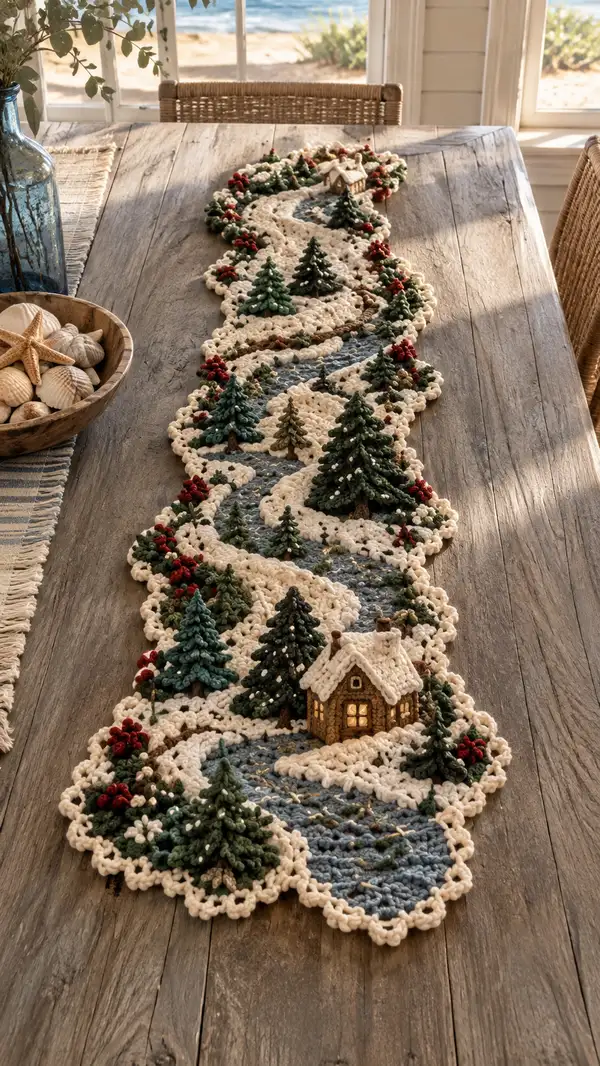
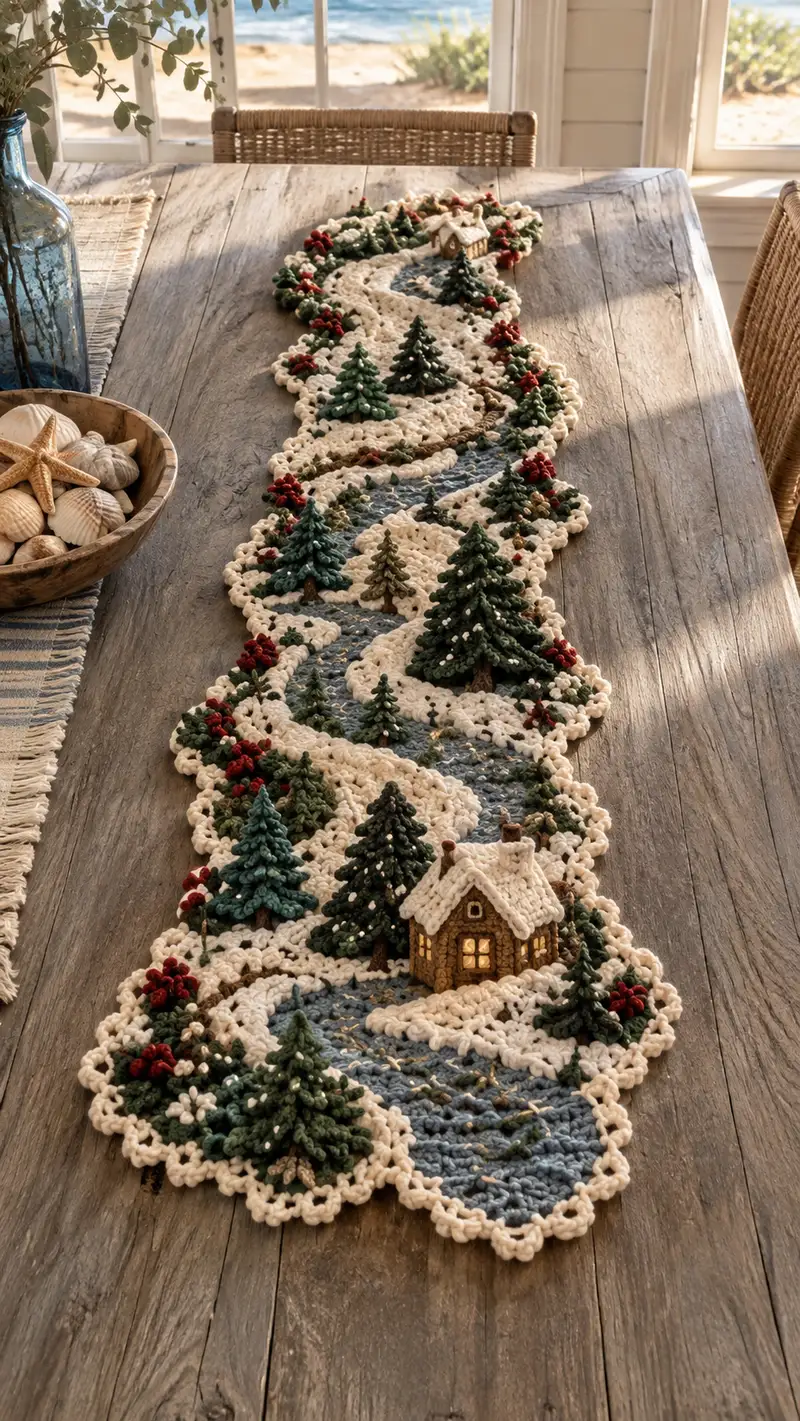
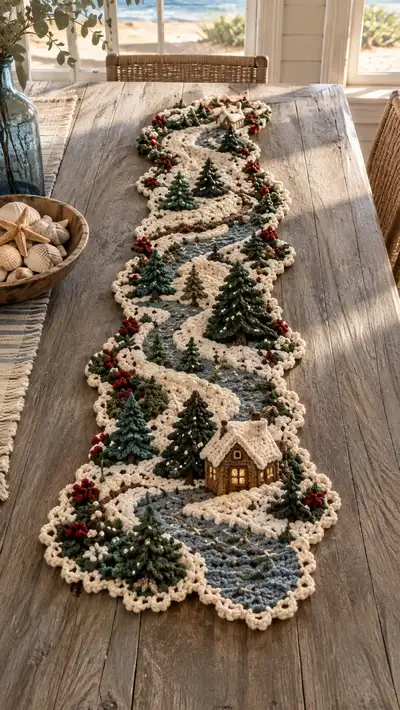
A charming, sculptural table runner that evokes a snowy riverside scene — winding blue river, cream snowbanks, 3D pine trees, holly clusters and a tiny cottage. Worked in textured stitches with layered appliques, this piece brings cozy winter charm to any table. The pattern includes detailed instructions for panels, trees, berries and a scalloped edge to recreate the dimensional landscape.
Progress Tracker
0% Complete
— Pattern Notes :
Info :
This runner is built from elongated landscape motifs worked in the round and joined to form a winding path. Work panels flat in joined rounds and place 3D trees and appliques after main assembly. Keep tension consistent; use stitch markers at each round start. All stitch counts are given for US terms. Gauge is not critical for overall look but affects final size.
Info :
Color names used: 'Cream' (off-white for snow), 'River Blue' (mid-tone blue for water), 'Forest Green' (dark green for trees), 'Mid Green' (lighter tree layer), 'Brown' (tree trunks and cottage base), 'Holly Red' (berries), 'Gold' (metallic highlight thread). Substitute similar tones if desired.
— Base Landscape Motif (Make 7-9 motifs; join to create elongated runner) :
Round 1 :
6 sc in magic ring using River Blue (6)
Round 3 :
(1 sc, 1 inc) x 6 (18)
Round 4 :
(2 sc, 1 inc) x 6 (24)
Round 5 :
(3 sc, 1 inc) x 6 (30)
Round 6 :
1 sc in each st (30)
Round 7 :
Change to Cream. *2 sc in next st, 1 sc in next 4 sts* repeat around to form irregular oval (36)
Info :
When changing to cream, join with sl st in any stitch and carry blue inside or weave in; this creates the snowbank border working outward from the river core.
Round 8 :
(2 sc, 1 inc) x 12 (48)
Round 9 :
1 sc in each st (48)
Round 10 :
Work irregular edge shaping: *3 sc, dec* repeat 8 times (40)
Info :
Use BLO for a slightly defined ridge in one or two rounds here if you want the snowbank to have subtle ridges. Try Round 9 in BLO for texture.
Round 11 :
*2 sc, 1 inc* repeat around to gain oval width where needed (60)
Round 12 :
1 sc in each st (60)
Round 13 :
Work scallop shaping for joining: *skip 1 st, (dc, ch1, dc) in next st, skip 1 st, sl st in next* repeat around to create few scallops for joining (approx 20 scallops)
Info :
Make 7-9 of these landscape motifs. Vary Round 11 increases in some motifs to create the irregular coastline look in the photo. Block each motif lightly for shape before joining.
— Connecting River Panels (Worked into selected motif centers to create continuous river) :
Round 1 :
With River Blue, join in center of motif where river will pass. ch1, 8 sc in round to form narrow river bed (8)
Round 2 :
(1 sc, 1 inc) x 4 (12)
Round 3 :
1 sc in each st (12)
Round 4 :
Change to River Blue held with Gold thread carried loosely for a single round. *1 sc, inc* x 6 (18)
Info :
To create a flowing water effect, work alternating rows of sc and hdc using River Blue and occasionally carry in a strand of Gold metallic thread held together for a few stitches for sparkles. Do not carry gold across wide sections; work it as a second strand for 3-4 sts then drop.
Round 5-8 :
1 sc in each st (18) — work one hdc round on Round 7 to create subtle ridging
Round 9 :
Gradually narrow river where it flows into next motif: (2 sc, dec) x 6 (12)
Round 10 :
(1 sc, dec) x 4 (8)
Info :
Leave long tails at the end of each river section for mattress-stitch joining to the adjacent motif so the water looks continuous. Add small gold stitches along the river using embroidery after assembly for reflected light.
— Snowbank Surface and Raised Texture (Worked around river and edges) :
Round 1 :
Join Cream at river edge. ch1, sc evenly around river edge into chain spaces and around motif edge to build raised banks (work 1 sc for every 1-2 sts of river depending on curve)
Round 2 :
*sc in next st, (ch3, sl st into third chain from hook) to form tiny popcorn loops along bank* repeat decorative edge along curves
Round 3 :
Change to Cream held double (two strands) and work 1 sc in each st for a puffy thick snow effect across selected panels (this will create thicker snowbanks)
Info :
Working with two strands of worsted creates a bulkier, cushioned texture reminiscent of drifted snow. Use this technique selectively on larger banks to keep weight manageable.
Round 4-6 :
Vary between 1 sc and 1 hdc rows in double strand Cream to create ridging. Add sparse white picots (ch3, sl st into base) to represent snow tufts on banks.
Round 7 :
Fasten off, leaving long tail for whip-stitch joining to adjacent motifs.
— Large Pine Tree (Make 3 large trees) :
Round 1 :
With Forest Green on 4.0 mm hook: 6 sc in mr (6)
Round 3 :
(1 sc, 1 inc) x 6 (18)
Round 4 :
1 sc in each st (18)
Round 5 :
Switch to mid green if desired for two-tone branches. *2 sc, inc* x 6 (24)
Info :
This initial cone creates a small stopper at the top of the tree. We will crochet layered branch tiers around this central cone using joined rounds of triangular 'tiers'.
Round 6 :
Form first lower tier: ch2 (counts as 1 hdc), in next st work (hdc, dc, hdc) to form a small shell; skip 2 sts between shells. Repeat around to make approx 6 shells (shells create the first skirt)
Round 7 :
Work next tier below: join at a skipped st and create larger shells: ch2, (dc, tr, dc) in same base, skip 1-2 sts between shells. Aim for 6-8 shells to flare the skirt
Round 8 :
Repeat Round 7 but increase shell size: ch2, (tr, tr, dc, tr, tr) in each shell base to create fuller tiers (approx 6 shells)
Round 9 :
Work a simple round of sc between tiers to anchor them (1 sc in each stitch around)
Info :
Each subsequent tier will be worked slightly larger than the previous to create a conical tree. Make 4-6 tiers total for a large tree depending on desired height. Use tucked ends and small amounts of stuffing at the bottom to stabilize base.
Round 10 :
Repeat creating a larger shell tier: (ch3, (tr x5) in same base, ch3) anchored by sc rounds between tiers — repeat 4 times to widen tree base
Round 11 :
Create final skirt: with FLO, work 1 sc in each st to create a natural layered appearance (st count variable; aim for 36-48 sts depending on tiering)
Round 12 :
Fasten off leaving long tail. Stuff base lightly to hold shape. Sew a small cardboard or felt disc inside base if you want a flat bottom for standing, otherwise leave base to be sewn onto runner.
Round 13 :
Trunk: using Brown on 3.5 mm hook, 6 sc in mr (6)
Round 14 :
1 sc in each st around for 5 rounds to make a short stump (6)
Round 15 :
Fasten off leaving long tail for sewing trunk into tree base. Sew trunk into center of tree bottom, secure with stitches through tree interior and runner when attached.
Info :
Make 3 large trees. Use darker greens for the largest trees in front and lighter greens for background trees. Add tiny cream French knots or seed stitch with cream yarn to simulate snow on branches.
— Medium Pine Tree (Make 6 medium trees) :
Round 1 :
With Mid Green, 6 sc in mr (6)
Round 3 :
(1 sc, inc) x 6 (18)
Round 4 :
Form two tiers: join, ch2, (hdc, dc, hdc) across 6 shell bases to create first skirt
Round 5 :
Repeat shell once larger: ch2, (dc, tr, dc) in each base to form second skirt
Round 6 :
One round sc around to anchor: 1 sc in each st (approx 24)
Round 7 :
Trunk: Brown, 6 sc in mr and 3 rounds sc (6)
Round 8 :
Fasten off leaving tail for sewing. Add minimal stuffing at trunk base only.
Info :
Medium trees are worked quicker than large by limiting tiers. Place them staggered along river edges to create depth. Add tiny cream knots for snow dots if desired.
— Small Pine Tree / Sapling (Make 10-12 small trees) :
Round 1 :
Forest Green, 6 sc in mr (6)
Round 3 :
1 sc in each st (12)
Round 4 :
Form single small shell tier: ch2, (hdc, dc, hdc) in each 3rd st to create a petite skirt (approx 4 shells)
Round 5 :
Trunk: Brown, 6 sc in mr and 2 rounds sc (6)
Round 6 :
Fasten off leaving long tail for sewing. These small trees require very little stuffing — a tiny pinch at base.
Info :
Small saplings create foreground and midground layering. Mix greens and sizes to avoid repetitive placement. Glue or sew onto runner surface according to layout.
— Berry Clusters and Holly (Make 20-30 clusters) :
Round 1 :
With Holly Red on 3.5 mm hook, ch2, 6 sc in second ch from hook to form tight round berry (6)
Round 2 :
1 sc in each st (6)
Round 3 :
Fasten off leaving long tail to sew clusters. Make clusters of 3-5 berries by sewing berry units together in small bunches.
Info :
Optionally, use small florist wire stems wrapped with green yarn and thread berries onto wire to make flexible clusters you can tuck into snowbanks and under tree branches.
Round 4 :
Holly leaves: With Forest Green on 3.5 mm hook, ch4, (sc, hdc, sc) in 2nd ch from hook, sl st to base to form small pointed leaf. Make 2-3 leaves per berry cluster and sew around cluster base.
— Tiny Snow Dots and Highlights (Embellishment Stitches) :
Round 1 :
Using Cream on yarn needle, sew small French knots or seed stitches across tree tiers to mimic snow; place heavier on upper branches.
Round 2 :
Using Gold metallic thread, add tiny straight stitches across river surface to simulate reflected highlights. Tie off and weave ends on wrong side.
Info :
Less is more with metallic highlights; stitch in short, irregular dashes rather than long lines to mimic scattered light.
— Cottage Applique (Make 1) :
Foundation Round 1 :
With Brown on 3.5 mm hook, ch6, join to form small rectangle: row foundation: ch1, sc across 6 sts, turn and work in rows to create a 6x8 sc rectangle for cottage walls (approx 8 rows)
Round 2 :
Using lighter brown, embroider log lines: with yarn needle, stitch horizontal lines across rectangle to create log cabin texture
Roof Round 1 :
With Cream on 3.5 mm hook, ch10, sc across to form roof panels; make two triangular roof slates by decreasing at ends each row until triangle is formed (approx 6 rows each triangle)
Round 4 :
Window & Door: Using River Blue or small beads, attach windowpanes (two 2x2 sc squares) and a small brown door rectangle. Sew onto wall rectangle before joining roof.
Round 5 :
Assemble cottage: Sew the two short sides of wall rectangle to form a box, insert tiny stuffing to keep shape, then sew roof triangles across top edges overlapping slightly. Add a small chimney: Brown, 4 sc in mr, 3 rounds sc; sew to roof.
Round 6 :
Fasten off and weave tails. Add cream picot edging along roof to look like snow drifts using (ch3, sl st) picots spaced evenly.
Info :
If you prefer, make cottage as a flat applique rather than a box for lighter weight. Attach with whip stitch or glue to runner where desired.
— Scalloped Outer Border and Joining Motifs :
Round 1 :
With Cream, join to outer motif edge where scallops were left. Work 1 sc evenly through edge to unify motifs and prepare for joining.
Round 2 :
Scallop round: *skip 1 st, (dc, ch1, dc) in next st, skip 1 st, sl st in next* repeat across seams to accentuate coastal scallops (maintain same scallop spacing around all motifs)
Round 3 :
Joining: Place two motifs right sides up and mattress stitch along cream sc rounds, using long tail from motifs. Sew carefully to make river seams continuous, matching river Blue stitches as you go. Continue joining motifs in sequence to create the elongated runner shape.
Info :
As you join, position river panels so the blue centers align and the edge scallops interlock into the flowing S-shape shown. Pin motifs first to verify curve before sewing.
Round 4 :
Once all motifs joined, work an outer finish round of Cream: 1 sc in each st around entire runner to neaten seams (total st count variable depending on joined size)
Round 5 :
Final scallop edging: *5 sc in same st, skip 2, sl st in next* repeat around to create a chunky scalloped border reminiscent of snowdrifts.
Info :
The final scallop round uses puffier stitches — consider working each scallop using 5 dc cluster worked together and finished with a sl st at the base for a bold border.
— Assembling 3D Elements onto Runner :
Round 1 :
Layout all 3D trees, cottage and berry clusters across runner in desired composition. Use pins to temporarily secure positions.
Round 2 :
Sew each tree trunk into the cream snowbank at chosen round numbers: for large trees sew around a 10-12 stitch circle of cream anchor points using excess tail to create a secure foundation.
Info :
For stability, anchor larger trees with a few running stitches into a small stitched 'foot' of felt or a sewn-in round of dense single crochet; this prevents tipping when displayed on a table.
Round 3 :
Attach berry clusters: tuck clusters near tree bases and attach with a few passing stitches or a dab of fabric glue; stitch holly leaves under clusters to hide attachment points.
Round 4 :
Position cottage and attach by stitching from inside the cottage base through the runner with a secure whipping stitch. If cottage is heavy, attach small felt disc underneath and glue for extra stability.
Round 5 :
Stitch small decorative gold highlights along the river using short irregular straight stitches in metallic thread, concentrating near curves to mimic sunlight catches.
Info :
Use small, invisible stitches and weave ends neatly on the underside. If you want removable decor, attach with small removable fabric buttons or snaps sewn to the runner underside and the element bases.
— Final Finishing Touches :
Round 1 :
Weave all ends into wrong side with tapestry needle. Ensure no long tails remain in exposed areas. Trim ends close after weaving.
Round 2 :
Light blocking: pin runner gently into desired shape on a clean surface and lightly steam from a distance. Avoid heavy pressing on 3D elements. Let dry completely.
Info :
Check for any loose decorative elements. Add extra stitches where needed for permanence, especially on high-traffic tables. Consider using a table protector underneath delicate elements or placing runner under glass for heavy use.
Completing this Cream and Blue Winter River Table Runner turns your table into a cozy miniature winter landscape — a perfect blend of texture, color and seasonal charm. The 3D trees and tiny cottage bring a playful, handcrafted warmth to holiday decor, while the flowing blue river and scalloped snowbanks create a sculptural centerpiece. I hope making this runner gives you as much joy as arranging the finished scene on your table! 🧶❄️🌲