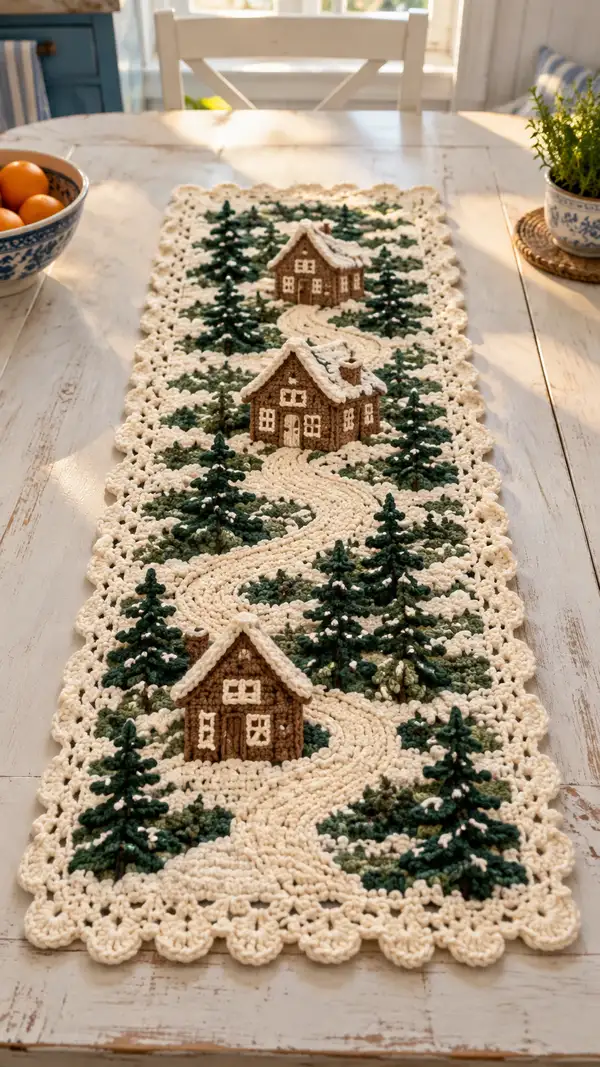
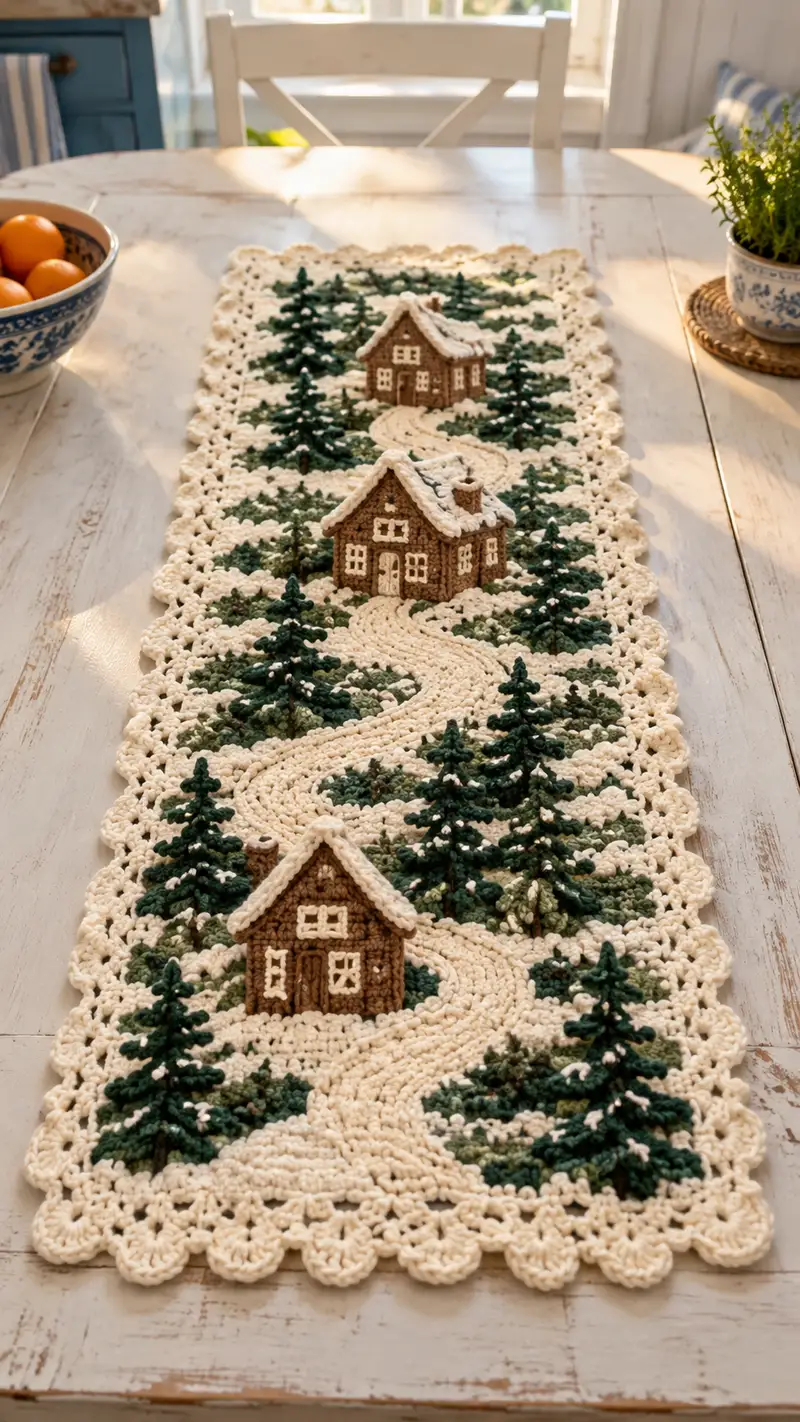
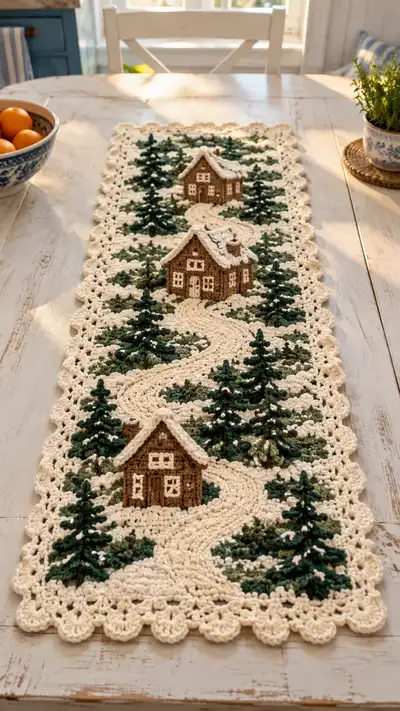
A charming cream and forest-green table runner featuring a winding snow-covered path, three cozy 3D cabins and layered evergreen trees. This textured runner uses raised stitches and appliqued motifs to create a wintery landscape that sits beautifully on a dining table or sideboard. The neutral cream background and deep green trees make it perfect for seasonal decor or year-round rustic charm. Detailed construction includes the flat landscape panel, raised path, three dimensional houses, stand-up pine trees, and a scalloped edge.
Progress Tracker
0% Complete
— Materials, Gauge & Overview :
Info :
Gauge: 14 sc x 16 rows = 10 cm/4 in in single crochet using 4.5mm hook in worsted weight yarn. Runner finished size approximately 12 x 48 in (30 x 122 cm). This pattern makes a landscape panel, a raised winding path that is crocheted as a long cord, three small 3D cottages, multiple layered pine trees, and a decorative scalloped edge. Use cream for the field/background, two greens for trees, and brown for cabins. Work all motifs in either continuous rounds or joined rounds as indicated. Maintain consistent tension across pieces. Blocking recommended before final assembly.
Info :
Abbreviations used throughout: mr, ch, sc, hdc, dc, sl st, inc, dec, BLO, FLO. Read through entire instructions before beginning. Use stitch markers to mark beginning of rounds and motif top points for placement later.
— Base Field (worked as expanding oval rounds) :
Round 1 :
6 sc in magic ring (6)
Round 3 :
(1 sc, inc) x 6 (18)
Round 4 :
(2 sc, inc) x 6 (24)
Round 5 :
(3 sc, inc) x 6 (30)
Round 6 :
(4 sc, inc) x 6 (36)
Round 7 :
(5 sc, inc) x 6 (42)
Round 8 :
(6 sc, inc) x 6 (48)
Info :
These first eight rounds form a small oval which will be expanded into a long runner shape by adding 6 stitches each round at the two long ends of the oval. To maintain an elongated shape, increases are distributed by increasing every 7th stitch in successive rounds as shown below. Keep track of the two ‘end’ regions where increases occur — mark them with stitch markers for consistency.
Round 9 :
(6 sc, inc) x 6 (54)
Round 10 :
(7 sc, inc) x 6 (60)
Round 11 :
(8 sc, inc) x 6 (66)
Round 12 :
(9 sc, inc) x 6 (72)
Round 13 :
(10 sc, inc) x 6 (78)
Round 14 :
(11 sc, inc) x 6 (84)
Round 15 :
(12 sc, inc) x 6 (90)
Round 16 :
(13 sc, inc) x 6 (96)
Round 17 :
(14 sc, inc) x 6 (102)
Round 18 :
(15 sc, inc) x 6 (108)
Round 19 :
(16 sc, inc) x 6 (114)
Round 20 :
(17 sc, inc) x 6 (120)
Info :
At Round 20 you should have 120 stitches around the oval. This will be the final width for the field. Check your shape — it should be long and slightly oval; if it looks too round, add one more increase round on the two ends only by putting inc every 18 or 20 stitches across the long edge to lengthen slightly. Use blocking pins to gently shape if needed.
Round 21-40 :
1 sc in each st around (120)
Info :
Work 20 rounds even to build a flat field that will take appliques. Place removable markers at the centerline and at thirds to mark approximate cabin placement later (these markers will help align path and cabins). After round 40 the panel will be long enough to accept the path and motifs. If you prefer a wider runner, work additional even rounds keeping the 120 stitch count per round.
Round 41 :
(17 sc, dec) x 6 (114)
Round 42 :
(16 sc, dec) x 6 (108)
Info :
These two rounds subtly taper the ends to prevent flaring and help the scalloped border to sit nicely. Keep tension even and do not over-decrease; the field should remain essentially flat.
Round 43-46 :
1 sc in each st around (108)
Info :
Place temporary pins or clips marking where each cottage will be attached before making the cottages. Measure equal spacing along the centerline so your three cabins are visually balanced: near each end, and one centered. These marks will guide path routing as well.
— Raised Winding Path (make as long cord and applique) :
Info :
The path is made as a flat oval rope to give a raised ridge. You will make several path segments and seam them together to form the S-shaped walk that meanders between cottages. The example uses 3 segments (lower, middle, upper) but you may make more to fit your panel length. Each segment below is worked as rounds to make a wide oval about 12–14 sts across, then worked longer rounds for length.
Segment A — Round 1 :
6 sc in mr (6)
Round 3 :
(1 sc, inc) x 6 (18)
Round 4 :
(2 sc, inc) x 6 (24)
Round 5 :
(3 sc, inc) x 6 (30)
Info :
At round 5 the oval is about 30 stitches circumference and 12–14 stitches across at the widest point — perfect for a visible path. You can change the width by working an extra increase round or skipping it for a narrower path.
Round 6-18 :
1 sc in each st around (30)
Info :
Work more rounds to make a long length. For the lower segment make 13 even rounds (Rounds 6–18) which will give a flat, low cord of desired length. Stuff very lightly into this cord with a few tufts of fiberfill to keep it shaped if you want it to sit up a bit on the runner. Finish segment with sl st and leave a long tail for sewing.
Segment B :
Repeat Rounds 1–18 to make second path segment (30 sts circumference) — make length to reach between middle and upper cabin marks. Leave long tail for seaming.
Segment C :
Repeat Rounds 1–18 to make third path segment. Adjust the number of even rounds (Rounds 6–18) to increase or decrease segment length for perfect placement.
Info :
After making segments, block them lightly if desired, then lay them on the field and shape into an S-shaped winding path. Use pins to position and make sure the edges meet naturally. Sew the path to the field with a yarn needle and matching cream yarn using invisible whip stitch along both sides. For a more raised effect sew only one edge and stuff slightly more; for a flush effect sew both edges tightly.
— Large Cabins (Make 3 identical cottages) :
Info :
Each cottage is built in pieces: floor/base, walls, roof panels, chimney, and small appliques (door, windows). The house sits on the runner and is lightly stuffed to hold its shape. Use warm brown for walls, darker brown for door and chimney accents, and cream for roof snow and window frames. The houses are about 2.5–3 in tall when finished.
House Base & Walls — Round 1 :
6 sc in mr (6)
Round 3 :
(1 sc, inc) x 6 (18)
Round 4 :
(2 sc, inc) x 6 (24)
Round 5 :
(3 sc, inc) x 6 (30)
Round 6 :
1 sc in each st around (30)
Round 7 :
1 sc in each st around (30)
Round 8 :
(3 sc, dec) x 6 (24)
Round 9 :
1 sc in each st around (24)
Round 10 :
1 sc in each st around (24)
Info :
At Round 10 you have a small cylinder that will form the body of the cottage. Stop here for a short wall height; continue even rounds for taller walls if desired. Make sure to stuff lightly into the body as you create the roof base later so the house remains slightly three-dimensional but still sits flat when seamed to the runner.
House Roof Panel — Make 2 panels (left and right) :
With brown (or alternate roofing color): ch 16, row 1: sc in 2nd ch from hook and across (15), ch 1, turn. Row 2: sc across (15). Row 3: dec at beginning (sc2tog), sc in next 11, dec at end (13). Row 4: sc across (13). Row 5: dec,s c x 9, dec (11). Continue in this manner decreasing 2 sts every other row until you are left with 3 sc. Fasten off leaving long tail for sewing. Make a second identical panel mirrored.
Info :
Sew the two roof panels together at the center ridge using mattress stitch, aligning edges so that overhang is even on both sides. Attach roof to top of house cylinder by sewing the ridge to the last round of the wall. Add a cream edging as snow by crocheting 1 round of sc in cream along the roof edges or by sewing small puffs of cream yarn to imitate piled snow.
Chimney :
With dark brown: mr 6 sc (6), Rnd2: inc x6 (12), Rnd3-6: 1 sc around (12). Fasten off leaving long tail. Lightly stuff and sew to roof placement before attaching roof to house body.
Door & Windows (applique) :
Door: With dark brown ch4, sc 3 across, ch1 turn, sc3 to make a small rectangle. Sew centered on front wall. Windows: With cream ch4, sc 3 across, fold in half and stitch to create square frame; embroider cross panes using cream yarn and a yarn needle. Make 3–4 windows per house as pictured. Use running stitch to draw window boxes and sills.
Info :
Before sewing the house to the runner, block the wall base flat at the bottom (it should be a circular base). Pin the base to the field and sew through both base round and field with sturdy matching brown yarn using small, neat stitches to keep house firmly in place. Sew around the entire circumference of the house base so it will not shift.
House Finishing — Rounds 11-14 :
After roof is attached, add small decorative rounds of cream along roof edges: Join cream at roof edge and sc around the flange to create the look of snow drips. You can add small puffs: (sc, ch2, sl st back in same st) spaced every 4 stitches to create snow bobbles.
Info :
Make three cottages following the same steps. Vary the roof pitch slightly for visual interest by adding or subtracting 2–3 decreases when shaping the roof panels.
— Evergreen Trees (Make 12–16; clustered sets of 3–5) :
Info :
Trees are worked as stacked cones: start with trunk cylinder, then add multiple layered branch rounds worked as small round starburst leaves. Use two greens to make depth: forest green for lower layers and moss green for highlights. Trees are sewn to the runner at base and anchored with extra stitches through the field for upright stability.
Trunk — Round 1 :
mr 6 sc (6)
Round 2 :
1 sc in each st around (6)
Round 3 :
(1 sc, inc) x 2, 1 sc x 2 (8)
Round 4-6 :
1 sc around (8)
Info :
Trunk should be a sturdy short cylinder about 6–8 rounds tall. Optionally insert a short piece of florist wire or a skewer inside trunk before filling to help tree stand when sewn to the runner. Fold or knot the bottom to form a flat base that will be sewn to the field.
Branch Layer 1 — Round 1 :
Join forest green to top of trunk, ch1, (sc, ch2, sl st in same st) x 8 around to create 8 picot points (16 loops). Fasten off and center this layer so the picots form a small star.
Branch Layer 2 :
Join moss green to st between picots, ch1, (hdc, ch2, sl st) in each gap around to make a larger starburst — total 8 groups forming a round. Fasten off.
Branch Layer 3 :
Join forest green to back of previous layer and work (dc, ch2, sl st) in gaps or (sc 3, sl st) to form a fuller cone shape. Continue 2–3 additional rounds, alternating greens, increasing by placing two dc clusters in every other gap so that each subsequent layer flares outward, forming a conical tree silhouette about 2.5–3.5 in tall total including trunk.
Info :
Work 3–4 branch layers depending on desired fullness. Sew each tree to the runner through the trunk base using strong matching green or brown yarn, then stitch the bottom trunk to the panel with several passes for stability. Attach additional embroidery dots of cream to mimic snow on branch tips if desired.
Tree Topper Option (small star) :
With cream ch4, join to top of tree and work 5 sc into ring, ch3 sl st to base to create a tiny star/tuft. Sew or tack in place.
— Small Ground Shrubs and Greenery Appliques :
Info :
To create clustered low greenery between trees and along the path do small tufts of moss: Join moss green, ch4, sl st into first ch to form a loop, make 3–5 clusters of (sc, ch2, sl st) anchored into the base field at designated points. Vary color and size for a natural look. Add small cream knot stitches for snow dots.
— Border Scallop Edging :
Info :
A scalloped border in cream frames the runner. Work one round of sc around the entire field to tidy the edge, then do scallops spaced every 6 stitches as described below. Work with the 4.5mm hook and keep even tension so scallops are uniform.
Round 1 (edging) :
Join cream yarn to any st on edge, ch1, sc evenly around, placing 3 sc in each corner (if needed) to keep field flat. Work 1 sc in each st around. Join with sl st to first sc.
Round 2 (scallops) :
*Skip 2 sts, (5 dc in next st), skip 2 sts, sl st in next st to anchor scallop*; rep from * to * around. Adjust spacing so you make even scallops; you should have roughly 18–22 scallops per long side depending on the length of your base. Join with sl st.
Round 3 (finish) :
Ch1, sc around, placing a sc in center top of each scallop to give a neat ridge. Fasten off and weave ends.
Info :
If scallops ripple, block the runner with steam or wet-block and pin scallops to shape until dry. Small adjustments to stitch count at corners may be needed for perfectly even scallops.
— Embroidery & Snow Dots :
Info :
Use cream or white yarn to embroider windowpanes (a simple cross stitch), door lines, and path highlights. To mimic scattered snow, use French knots or small bullion knots of cream on tree branches and along path edges. These are decorative and can be placed freely for a natural look.
— Assembly & Placement Guidance :
Info :
Before attaching any 3D motifs, block the field flat. Lay out path segments, houses, trees and greenery, adjusting placement until you are happy with the composition. Pin each piece in place. Sew the path segments first using matching cream yarn and a yarn needle — secure both edges if you want the path very flat, or sew along the central seam if you want it more cord-like and raised.
Info :
Sew houses next by stitching around their base to the field using small even stitches and passing through a couple field rounds to ensure a firm anchor. Sew trees by the trunk base, stitching through the field for several passes. For additional stability add a few stitches from the trunk up into the lowest branch layer to stabilize the tree upright. Tuck tails toward the underside and weave in securely.
— Detailed Stitching Notes and Finishing Touches :
Info :
To achieve the snow-edge look on roofs and path edges, crochet tiny bobbles: (ch2, 3 dc in same st, ch2, sl st in same st) spaced evenly. Alternatively, make small 3–5 stitch knots by pulling a short length of yarn through the field and trimming to a small tuft to mimic loose snow.
Info :
Weave all ends on the WS, but tack stitch tails under motifs so they cannot be seen from the RS. Use small, tight stitches to preserve the neat, embroidered look of windows and doors. If you plan to launder, consider handwashing gently and drying flat to preserve 3D shapes.
— Optional Variations & Color Notes :
Info :
To make a wintery holiday version, swap roof snow yarn for a sparkly white or add metallic gold embroidered lights on cottages. To make a spring/summer landscape, use lighter greens and swap cream for a pale beige to give a sunny, grassy path effect. All motifs can be resized by changing hook size and yarn weight — keep proportions consistent.
— Full Round Count Summary (approximate) :
Info :
Base field rounds: 1–46 (46 rounds); Path segments: each 18 rounds plus shaping (3 segments typically) ; Each cottage: ~14 structural rounds plus roof panels and appliques (estimate 28–36 rounds per house including roof shaping and finishing) ; Each tree: trunk + 4–7 branch rounds (approx 8–12 rounds per tree) ; Scalloped border rounds: 3 rounds. Total rounds across all parts vary depending on number of trees and path segments but will exceed 120 rounds of work across the entire project, providing the layered detail seen in the photo.
Info :
Your finished composition should resemble a wintery path meandering past three cottages with clusters of evergreen trees; adjust motif density to taste. Take time to place and pin before stitching to ensure a balanced, pleasing layout that mimics the photographed runner.
This Cream and Forest Green Cabin Path Table Runner brings a tiny winter landscape to your table with delightful dimensional details. The combination of textured stitches, raised path, and 3D cottages creates a handcrafted centerpiece that invites touch and admiration. Once finished, it’s the kind of project that makes you smile every time you pass by — cozy, nostalgic, and full of charm. 🧶🏡✨ Make one to gift or to keep as a seasonal heirloom; each stitch becomes a memory on your table. Happy crocheting!