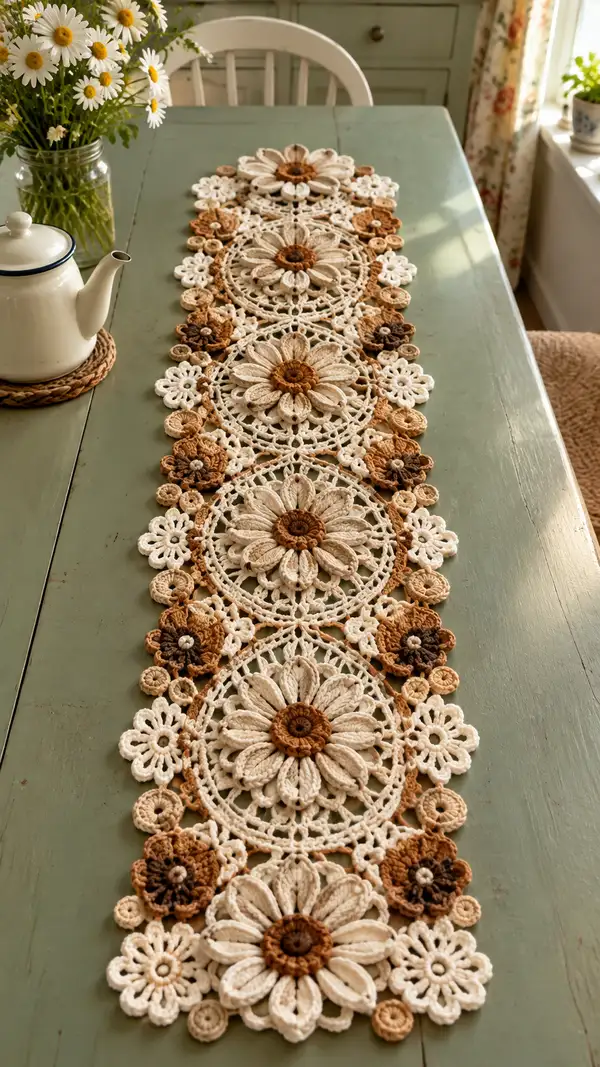
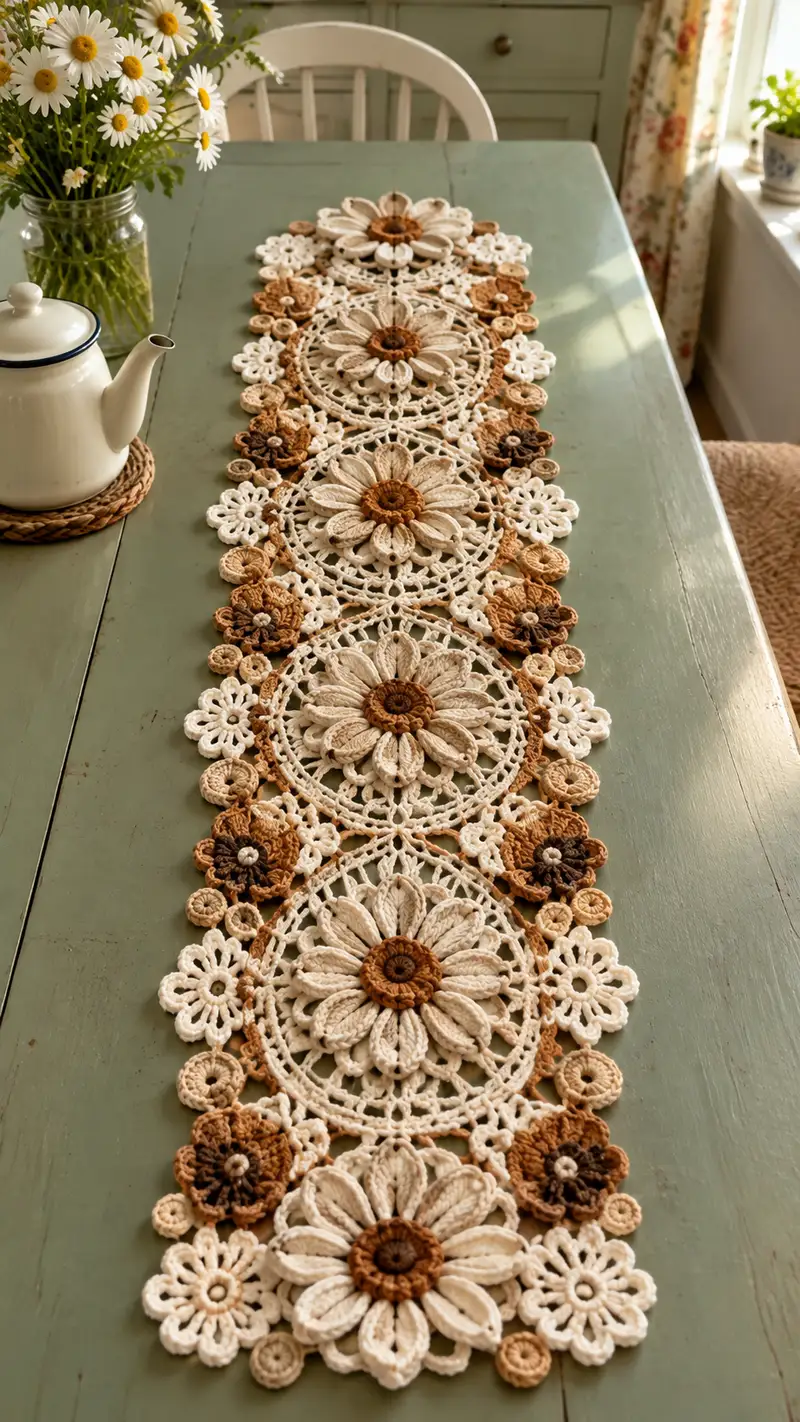
A delicate lace table runner composed of repeating daisy medallions and clustered flowers in cream and mocha tones. This elegant runner features textured puff petals, openwork rings, and small rosettes joined to form a vintage-inspired centerpiece. It looks stunning on a kitchen or dining table and pairs beautifully with simple farmhouse decor. The pattern uses modular motifs joined together for a customizable length.
Progress Tracker
0% Complete
— Notes & Gauge :
Info :
This pattern is modular: one Large Daisy Medallion (LDM), small five-petal Flowers (SFP), Mini Rosettes (MR), and tiny Rings (TR) are made and joined. Use the same hook for motif consistency. Gauge is not strict for this decorative runner but for reference: one large medallion measures approximately 18-20cm (7-8in) across when blocked using sport-weight cotton on 3.0mm hook.
Info :
Work tightly for most rounds (especially when making puff petals) so that the stitches hold shape; however, allow slightly loose loops when making puff stitches so the petals puff out. Blocking will open the lace and even the joins.
— Large Daisy Medallion (make 4) :
Round 1 :
Make a mr, 6 sc into ring (6)
Round 2 :
Inc in each st around (12)
Round 3 :
(1 sc, inc) x 6 (18)
Round 4 :
(2 sc, inc) x 6 (24)
Round 5 :
(3 sc, inc) x 6 (30)
Round 6 :
(4 sc, inc) x 6 (36)
Info :
Change to mocha for a warm center if desired. Secure color and work Rounds 7-9 in mocha, then switch back to cream for petals. We will build a slightly raised center to anchor petals.
Round 7 :
1 sc in each st around (36) – mocha
Round 8 :
(3 sc, inc) x 9 (45) – mocha
Round 9 :
1 sc in each st around (45) – mocha
Info :
Fasten off mocha and join cream for the petal foundation round. The stitch counts above give a tidy center with slightly raised texture; this helps the petals sit neatly around the core.
Round 10 :
Join cream. (2 sc, ch 3, skip 1) x 15 (30 sc worked, 15 chain-3 loops) — counts remain 45 foundation points around, used to place petal bases
Info :
We created 15 chain-3 loops around the center; each loop will hold a petal or a pair of petal stitches depending on the petal pattern chosen. The number 15 gives a tight floral look for the project photographed; you may adjust to 12 or 18 if you prefer fewer or more petals but then recalculate repeats accordingly.
Round 11 :
Slip into first ch-3 space, *ch 1, (puff in ch-3 sp) x3, ch1, sl st into same ch-3 sp; sl st into next sc; rep from * around to make 15 puff clusters (each cluster uses one ch-3 sp)
Info :
Puff stitch: yarn over, insert hook, yarn over, pull up loop (do this 3 times into same space), yarn over and pull through all loops on hook. Tighten slightly to form a puff. Make three puffs per petal base if you want a fuller petal — these clusters form the petal foundation.
Round 12 :
Work from front: To form layered petals, join yarn at base of first cluster and work elongated petals. *(ch 3, skip to next cluster, insert hook behind cluster and draw up long loop to make a dtr-like elongated petal: (yarn over twice, insert in base space or around the post of cluster, yarn over pull through), repeat to get 3 loops on hook then yarn over, pull through all loops) — this makes 15 elongated petals; sl st to next sc between clusters to anchor each petal
Info :
The elongated petal is worked as a tall puff/dtr combination for visual height. Maintain consistent loop lengths while pulling up to keep petals even. If unfamiliar with elongated puff/dtr, practice a single petal before working the full round.
Round 13 :
1 sc in each sc and sl st around to secure petals into place (45). Sew in any loose ends from petal construction as you go.
Round 14 :
(2 sc, ch 4, skip 1 sc) x 15 (45 sc worked, 15 ch-4 loops made) — these loops will form the openwork ring that frames the petals
Round 15 :
In each ch-4 loop work: sl st, ch2, (2 dc, ch2, 2 dc) centered into loop, sl st into next base sc between loops (creates 15 small shell arches) — stitch count around remains 45
Info :
These shells create a lacy ring around the petal cluster and add visual depth. Keep consistent tension on ch-2 spaces; these will be used later for joining and additional decoration.
Round 16 :
*(Sl st into center of shell, ch3, 1 dc into center ch-2 sp of shell, ch3, sl st into next sc) x 15 — creates 15 small loops around outer shell (these loops will be worked into for the outer decorative ring)
Round 17 :
Join mocha or tan for outer decorative ring. In each small loop: (sc, ch3, sc) centered in each loop; rep around (45 sc worked) — this creates a beaded ring feel
Info :
Using mocha here gives contrast: the dark center, cream petals, then mocha ring creates the warm tone transitions visible in the photograph. You may carry the yarn rather than break it, but be sure to weave in ends during blocking to hide carry-through yarn.
Round 18 :
1 sc in each st around (45)
Round 19 :
(3 sc, ch 5, skip next 2 sc) x 9 + (3 sc, ch5) x 6 — rearrange pattern so there are 15 larger ch-5 loops evenly spaced around outer edge (45 sc used)
Round 20 :
Work into each ch-5 loop: (sl st, ch2, 4 dc, ch2, sl st) to form 15 large petals that echo the inner elongated petals but remain lacy (counts remain even as 45 foundation points)
Info :
At this point your large medallion has a three-layered structure: a raised center, sculpted inner petals, and a larger open outer petal ring. Block the motif lightly now to open the loops and see placement for future small flower joins.
Round 21 :
Switch to cream. Between each outer petal work: *ch 3, 1 sc at base of next outer petal*, rep around to create 15 joining picots (45 sc anchoring points)
Round 22 :
Round of decorative arches: (1 sc in next 2 sc, ch4, skip 1 sc) x 15 — creates 15 ch-4 spaces for attaching small flowers and rosettes later (45 sc total presence)
Round 23 :
In each ch-4 space work: sl st, ch2, (2 dc, ch2, 2 dc), sl st (forms delicate loops for later joins) — remain with 45 anchor points
Round 24 :
1 sc in each st around to tidy the edge (45)
Info :
If you would like a slightly larger medallion increase Rounds 25-26: (4 sc, inc) x ? etc. For this runner we keep the medallion compact. Fasten off leaving a long tail for joining. We will decorate and add small motifs to the outside of this medallion in the separate small motif sections.
— Small Five-Petal Flower (make 12 for clusters) :
Round 1 :
mr, 6 sc into ring (6)
Round 2 :
Inc in each st around (12)
Round 3 :
(1 sc, inc) x 6 (18)
Round 4 :
Switch to cream or light beige. (2 sc, ch3, skip 1 sc) x 6 to make 6 ch-3 loops (12 sc anchor points total)
Round 5 :
Into each ch-3 loop work petal: *ch1, (puff x3) in loop, ch1, sl st into next sc* — creates 6 puff petals (18 anchor sc remain)
Round 6 :
Round of sc around to tidy edge (18)
Info :
Make 12 of these small flowers in varying color combinations (some mocha centers, some beige centers) to create the clustered look in the image. Sew a tiny bead or French knot with embroidery thread into each flower center for a bright focal point.
— Mini Rosette (make 20-30) :
Round 1 :
mr, 8 sc into ring (8)
Round 2 :
Inc in each stitch around (16)
Round 3 :
(1 sc, inc) x 8 (24)
Round 4 :
Ch 1, *sl st into next 2 sc, ch 4, sl st back into same 2 sc* repeat around to create small bubble loops; finish in the last sc and fasten off (24 anchor points)
Info :
Mini rosettes can be worked quickly and varied in color to add depth. Use darker shades for some rosettes for contrast. These small motifs will be used to fill gaps between larger flowers and soften the outline of the runner.
— Tiny Ring (decorative spacer) (make 30-40) :
Round 1 :
ch 6, join with sl st to form a small ring; ch 1, work 8 sc evenly into ring (8)
Round 2 :
Slip stitch around or work 1 round of sc to tidy. Fasten off leaving tail for sewing
Info :
These tiny rings are used as little circular connectors and to mimic the small bead-like circles seen around the medallions in the photo. Make many in cream and tan to create a clustered, organic edge.
— Joining Motifs & Connector Lace :
Info :
Lay out your medallions in a straight line with the small five-petal flowers and rosettes arranged in the same pattern as the photograph (each medallion flanked by two clusters of small flowers and rosettes). Use pins to mark join points: medallions are joined at the outer arch shell spaces (Rounds 21-23 anchors) using slip-stitch chains and small sc bridges.
Round J1 :
Join yarn at an outer arch of Medallion A (Round 22 ch-4 arch). Ch 6, sl st into corresponding ch-4 arch of Medallion B to create a 6-chain connector bridge. Repeat pairs of connectors at every third arch to evenly anchor motifs (repeat across joining edge) — make 5-6 connecting bridges per medallion pair depending on spacing
Info :
Make connectors symmetrical: place one connector in the center top of the medallion pair and two on either side. For precision, map anchors to small picot or sc anchors introduced in Round 21.
Round J2 :
Work into connectors: sc across each ch-6 chain to flatten and secure the join (6 sc across each connector). When working into medallion edges, work sc in each anchoring sc rounding to keep tension even — do not over-tighten or the motifs will curve.
Info :
Use spare small rings and mini rosettes to fill gaps along the connector strips. Sew mini rosettes into the centers of some connector arches using mattress stitch to hide seams for a neat finish.
Round J3 :
For each cluster: position 3 small five-petal flowers and 2 mini rosettes in a pleasing cluster, then sew through the outer arch and the back of the petals with long whip stitches to secure. Weave ends through several stitches to lock the cluster in place.
Info :
When sewing clusters, work from the right side so you can hide securing tails under petals and behind rosettes. Keep the surface flat by pulling yarn gently; avoid bunching the base stitches.
— Outer Edge Lace & Finishing Round (edging across full runner) :
Round E1 :
Once all medallions are joined in a row and clusters attached, work a continuous edging around the entire runner: Join yarn at any outer edge point, *sc evenly around entire outside perimeter spacing one sc every 3-4mm depending on motif density; at corners or dips (between motifs) work (ch3, sl st) to make small loops for a scalloped edge*
Round E2 :
In each ch3 loop work: (sc, ch3, sc) to form a decorative picot scallop. Maintain even tension so the runner lays flat when blocked. This round will weave through small rings and rosettes to create an integrated border.
Info :
Blocking the runner after joining is essential. Use rust-proof pins and a steam or wet-block technique as suitable for cotton yarn. Pin edges to flatten medallions and expand lace evenly. Allow to dry fully before use.
Round E3 :
Make final finishing stitches: weave in all ends using a yarn needle, and for extra security, add a few hidden slip stitches through thick seam junctions. Inspect runner for gaps and fill with tiny rings or rosettes sewn into place as needed.
Info :
Optional: add a lightweight starch spray to help keep the runner flat on display surfaces, or lightly press (steam) after final blocking for crisp lace definition.
— Alternate Petal Option (for a slightly fuller daisy) :
Round A1 :
After Round 11 (puff clusters), instead of elongated petals at Round 12 work a second puff round: in each ch-3 loop make (ch1, puff x5, ch1, sl st) to get a fuller petal — then secure with one round of sc at base (45 sc)
Info :
Use this alternate petal if you want chunky, three-dimensional daisies similar to the deeper petals in the photo. Keep tension consistent for all petals for an even look across medallions.
— Detailed Stitching & Techniques Info :
Info :
Puff Stitch Method: yarn over, insert hook into space, yarn over, pull up a loop (repeat 3-5 times depending on petal fullness), yarn over, draw through all loops, ch1 to lock. If using elongated puff/dtr, yarn over twice before insertion, pull up tall loops, then finish by pulling through all loops.
Info :
Blocking Tips: Mist motif lightly, pin onto blocking mat centering each medallion and stretching petals gently outward until the lace is even. Let dry completely. This step modernizes and opens the lace so connector stitches align without puckering.
Info :
Joining Tips: Sew through back loops only of anchors when possible to keep the front surface decorative and seamless. For slip-stitch joins, use a matching thread color and work slowly to keep chains even and flat.
Info :
Customization: To lengthen or shorten the runner, add or remove medallions and adjust the number of connector bridges between medallions accordingly. You can also substitute colors for a seasonal palette and use a slightly thicker yarn/hook for a more rustic, chunky appearance, remembering to adjust measurements.
Completing this Cream And Mocha Daisy Lace Table Runner is such a rewarding journey — every medallion and tiny rosette adds charm and texture to your table! The warm mocha centers against soft cream petals create a cozy, timeless look that feels handmade and special. Blocking and joining bring the whole piece to life, and the modular build means you can tailor the length to suit any table. 🧶🌼 Enjoy finishing touches like tiny beads or a starched edge to make your runner pop. Happy crocheting — your table will thank you! ✨