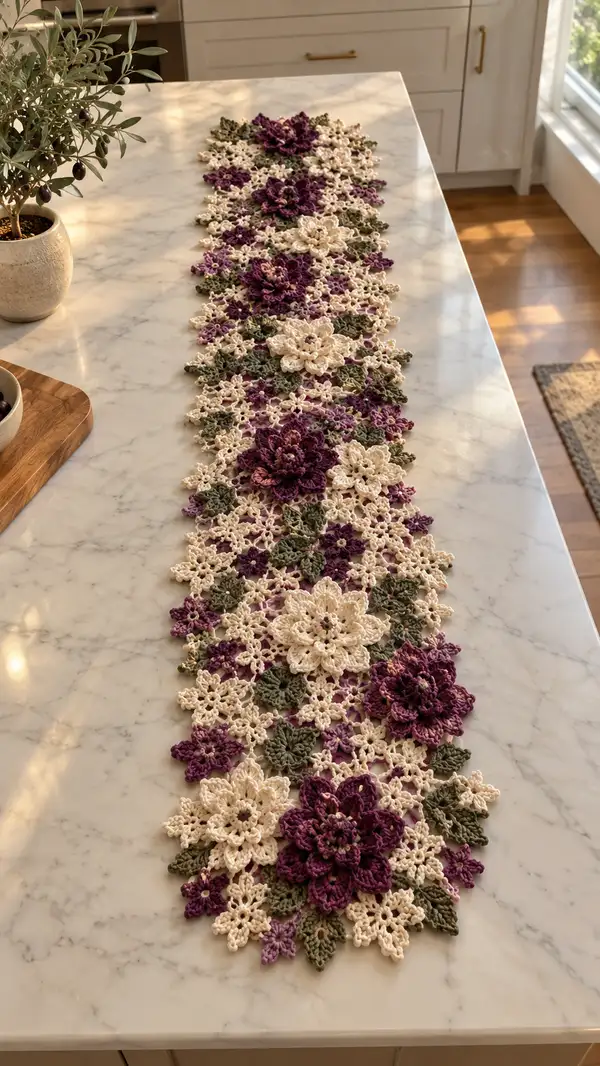
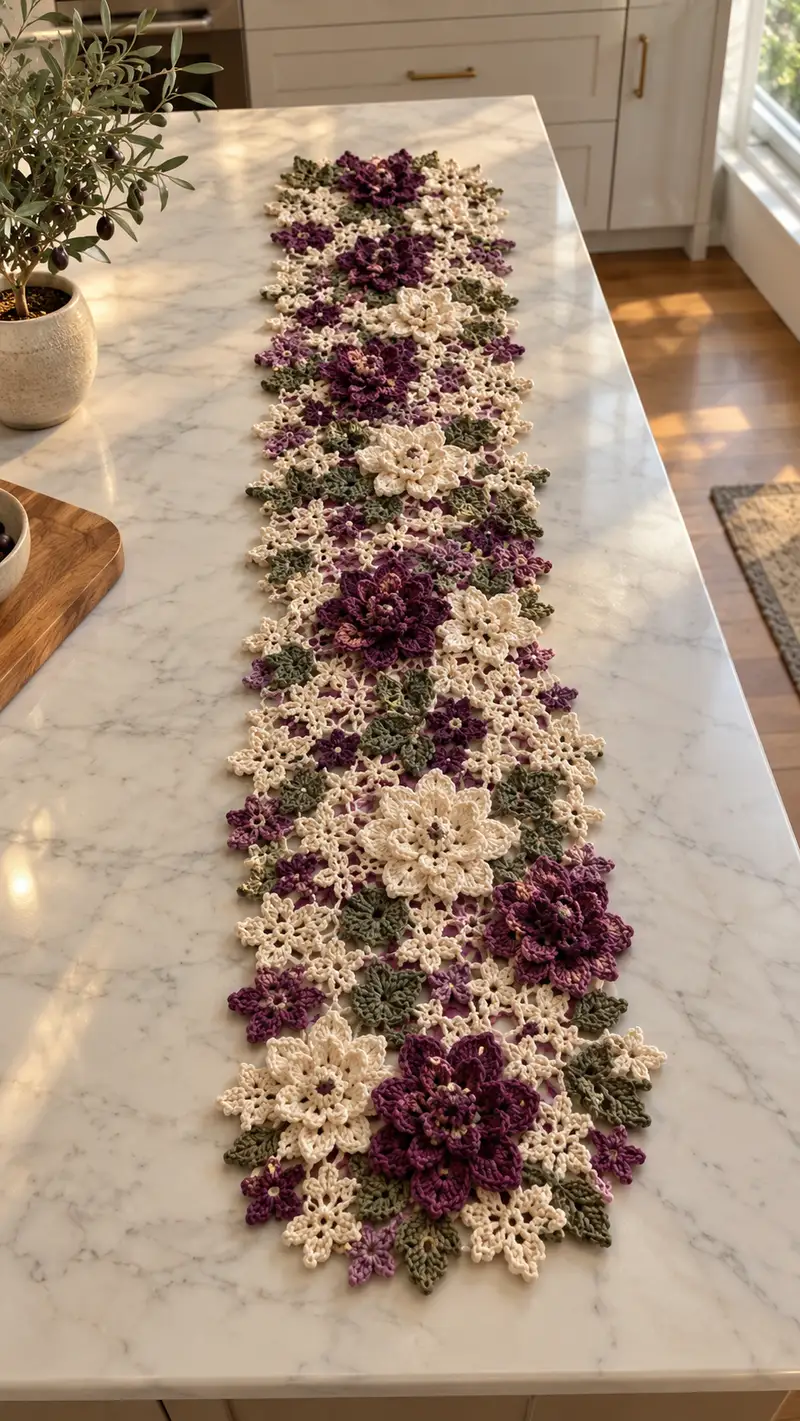
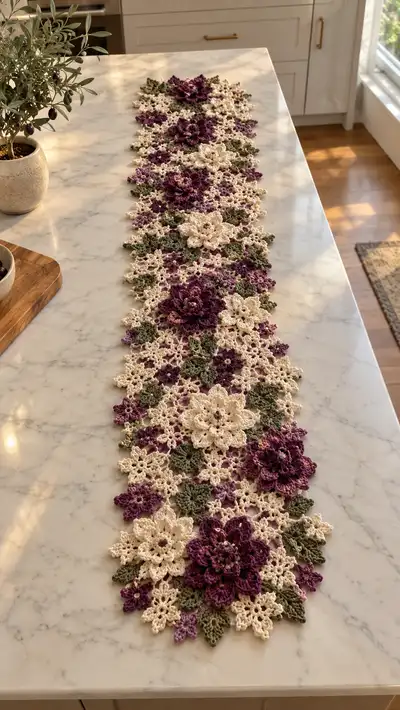
A delicate, vintage-inspired floral lace table runner worked in cream, plum and olive tones. This runner is made from layered 3D flowers, small star blossoms and leafy motifs joined with openwork lace connectors for an elegant, airy finish. The rich plum blooms sit atop cream lace with olive leaves peeking through—perfect for a dining table or console. Instructions include motif rounds, join-as-you-go tips, blocking and a decorative scalloped edge for a professional finish.
Progress Tracker
0% Complete
— Pattern Notes & Gauge :
Info :
Gauge is not critical for this lace table runner but consistent motif size is. Using sport-weight mercerized cotton and a 2.5mm hook each large flower should measure approximately 12-14 cm across, medium flowers 9-10 cm, small blossoms 3-4 cm and leaves 4-5 cm long after blocking. Make a sample motif and block it to check size. Keep tension consistent and block motifs flat (except the layered petals which are shaped upward).
Info :
Work in rounds for circular motifs and in joined rounds for connectors. Use stitch markers to mark the first stitch of each round when motifs are worked in continuous rounds. For motifs worked in joined rounds (sl st to join) you may fasten off at the end of the round unless the round will be joined later.
— Small Star Blossom (Make many) :
Round 1 :
6 sc in magic ring (6)
Round 3 :
(1 sc, inc) x 6 (18)
Info :
Change to cream yarn if creating tiny star blossoms in the lace ground. Keep tension loose on the chains later to create airy points.
Round 4 :
(2 sc, inc) x 6 (24)
Round 5 :
Ch 3, skip 1 st, sl st in next st; rep around to make 8 small picot looped points, join with sl st in first ch-3 sp (8 loops)
Info :
Each ch-3 loop will be worked into later when connecting motifs; leave a small tail when fastening off so you can sew if needed.
Round 6 :
Working into each ch-3 loop: (sc, ch 3, sc) in each loop; fasten off leaving long tail for joining (16 sc/loop points when viewed as clusters)
Info :
Small star blossoms form the lace filler between larger motifs. Make many (approx. 40–60) depending on runner length. Block lightly to shape loops into open star points; do not overstretch.
— Filler Petite Flower (tiny cluster, Make many) :
Round 1 :
6 sc in magic ring (6)
Round 2 :
Ch 2, (dc, ch 2) x 6 around, join with sl st to first dc (6 petal loops)
Round 3 :
Into each ch-2 loop: (sc, hdc, sc) to create small textured petal; fasten off (6 tiny petals)
Info :
These tiny clusters are great for filling gaps between leaves and petals. Use plum or light plum for contrast. Weave ends under petals and trim closely after blocking to keep motifs tidy.
— Leaf Motif (Make many) :
Round 1 :
Ch 10, sl st in 2nd ch from hook to form foundation, working along other side of chain: sc in next 2 ch, hdc in next ch, dc in next 3 ch, tr in next 2 ch, sl st in last ch. Then work along other side of ch foundation back: sl st, tr in next 2 ch, dc in next 3 ch, hdc in next ch, sc in next 2 ch; sl st to join to base point. (Leaf shaped oval)
Info :
Leaves are created as elongated ovals; keep the outer stitches slightly looser for a flat leaf when blocked. Use olive/leaf green yarn. Make approximately 30–40 leaves for a standard runner.
Round 2 :
Working in FLO around leaf: sc in each st around to make a neat edge; add 3 small picots (ch 3, sl st in 3rd ch) at tip and two base points for decorative points; fasten off leaving tail for joining
Info :
Lightly steam-block leaves flat with a gentle curve; arrange leaf veins by pinning slightly folded down the center while damp, then allow to dry completely.
— Medium Layered Flower (Make 6–8) :
Round 1 :
6 sc in magic ring (6)
Round 3 :
(1 sc, inc) x 6 (18)
Round 4 :
(2 sc, inc) x 6 (24)
Info :
Use cream yarn for medium flowers to provide a soft contrast to plum blooms. Keep rounds 1–4 tight so the center is firm; this helps layered petals sit neatly.
Round 5 :
Ch 2, * (dc, ch 2, dc) in next st, skip next st *; rep around to form 12 ch-2 loops; join with sl st (12 loops)
Round 6 :
Into each ch-2 loop: (sc, hdc, dc, hdc, sc) to form 12 rounded petals; join and fasten off inner layer leaving long tail for attaching next layer (12 petals)
Info :
Block this layer flat, pinning petals out so each is evenly spaced. These petals form the base layer — keep them slightly flatter than the top layer to create depth.
Round 7 :
Rejoin at back of motif with plum or contrast color: ch 3, working behind first petal base, make (tr, ch 1, tr) in back loop space between petals to create six taller loops spaced evenly (6 tall loops)
Round 8 :
Into each tall loop: (dc, tr, dc) to create sculpted upper petals; sl st to join and fasten off leaving tail for sewing; slightly curl petals upward by pinning while damp (6 top petals)
Info :
Using a contrasting darker edge yarn (light plum) for the top layer adds definition. When sewing the two layers together, align center stitches and use mattress or whip stitch to secure through both layers at 6 points, pulling slightly to cup petals upward.
— Large Layered Bloom (Make 4–6) :
Round 1 :
8 sc in magic ring (8)
Round 3 :
(1 sc, inc) x 8 (24)
Round 4 :
(2 sc, inc) x 8 (32)
Round 5 :
(3 sc, inc) x 8 (40)
Info :
Large blooms use a firm center to support multiple petal layers. Work rounds 1–5 tightly and do not skip stitch markers—these rounds set the foundation for many petal attachment points.
Round 6 :
Ch 2, * (dc, ch 2, dc) in next st, skip next st * around to make 20 ch-2 loops; join with sl st (20 loops)
Round 7 :
Into each loop: (sc, hdc, dc, hdc, sc) — this forms 20 broad base petals; fasten off inner layer leaving tail (20 petals)
Info :
Block base petals flat. These will act as the lower skirt for the bloom. Make sure petal tips are pinned evenly to maintain a circular silhouette.
Round 8 :
Rejoin at gaps between base petals with plum yarn: ch 4, (dtr, ch 1, dtr) in space, skip one petal base; rep around to create 10 larger tall loops; join (10 tall loops)
Round 9 :
Into each tall loop: (tr, dtr, tr) to create prominent middle petals; sl st to join and fasten off (10 middle petals)
Round 10 :
Rejoin at center and work a third, smaller top layer: ch 3, (dc, ch 2, dc) in every other stitch to create 10 ch-2 loops for top ruffled petals; join (10 loops)
Round 11 :
Into each top loop: (sc, sc, hdc, sc, sc) then sl st to join; leave long tail to sew top layer to middle for 3D effect (10 top petals)
Info :
Top layers may be worked in a lighter or darker shade of plum to deepen the flower's center. When sewing layers together, secure in three equidistant points per petal to keep layers sturdy and slightly cupped upward for dramatic texture.
Round 12 :
With contrast yarn, embroider tiny cluster centers using French knots or small beads: bring yarn to center and work 8–12 small knots/beads in a compact cluster; secure and weave ends well
Info :
Beads add weight and sparkle; if using beads for tableware safety, avoid metal beads and choose lightweight glass or wooden options. Secure bead thread with small knots and weave ends through several layers of the flower base for stability.
— Lace Connector Motif (Ground) :
Round 1 :
Ch 8, sl st to form ring, ch 3 (counts as dc), 11 dc into ring, join (12 dc)
Round 2 :
Ch 4 (counts as tr), * ch 3, skip next dc, tr in next dc * around to create 6 open loop segments; join (6 loops)
Round 3 :
Into each ch-3 loop: (sc, ch 5, sc) to create airy connecting loops; join with sl st
Info :
This connector creates the open lace ground for the runner. Make many of these motifs (approx. 20–30 depending on length) and use their ch-5 loops as join points for small blossoms and leaves. Work loosely on these rounds to keep the ground airy.
Round 4 :
Ch 1, sc in each st and in each ch-5 loop: (sc, ch 3, sc) in each loop to create 6 star-like join points; fasten off leaving long tail for assembly
Info :
When joining motifs, align ch-5 loops of connectors with ch-3 loops of star blossoms and sc them together using the tail. Plan negative spaces so larger blooms can overlap the connectors without bulk.
— Assembly: Planning & Layout :
Info :
Before joining, lay out all your motifs on a blocking board or large flat surface in the desired runner composition. Aim for a repeating rhythm: large plum bloom, cluster of small stars and leaves, medium cream bloom, and so on to create flow. Leave breathing space so the lace ground shows through. Photograph the layout for reference during joining.
Info :
Decide which motifs will be joined using join-as-you-go (JAYG) and which will be sewn after blocking. Prefer JAYG for connectors and adjacent small blossoms; sew larger layered blooms onto multiple connection points using the long tails from the petal rounds.
Round 1 :
Begin joining ground motifs: place two Lace Connector motifs right sides together aligning ch-5 loops and join by whip stitching through loop bases leaving small visible chain spaces to keep lace character (do not flatten loops)
Info :
Use a matching cream yarn for invisible joins on the lace ground. When a large bloom overlaps, leave one connector loop un-joined at that position so the bloom can be sewn on top with more depth.
Round 2 :
Sew small star blossoms into connector loops: insert long tail through connector ch-5 and star ch-3, pull gently to set, and secure with 6–8 small stitches through the star base and connector; fasten off and weave ends
Info :
For a natural look, do not attach all loops; stagger attachment points so flowers appear randomly scattered. Use pins to hold motifs while sewing and step back periodically to view composition balance.
Round 3 :
Sew leaves in clusters beneath larger flowers: place leaf bases under the exterior of a large flower and sew through leaf base stitches and the underside of the flower lower skirt using a mattress stitch; secure with 10–12 passes for stability
Info :
Sewing leaves under flowers helps the runner sit flat while making the composition feel layered rather than simply glued on. Try to angle leaves slightly outward from the center of large blooms for a realistic spread.
Round 4 :
Attach medium flowers next by aligning the 6–12 attachment points around their perimeter to adjacent connector loops or star points. Use a whip stitch through the back loop at each point to keep front neat; pull slightly to cup petals upward.
Info :
Large layered blooms should be attached by sewing through at least 6 points: 3 near the base layer and 3 slightly inward through the second layer. This keeps flowers secure and prevents flopping while allowing the top petals to remain three-dimensional.
Round 5 :
When you have two long strips of connected ground motifs, join the strips along their long sides with mattress stitch through the motif joins so the runner becomes a continuous length. Reinforce with backstitches at regular intervals (every 2–3 motif joins) to avoid gaps.
Info :
Keep joins flexible; rigid, over-tight joins can pucker the lace. Use larger assembly pins and lay on a flat surface as you sew to maintain the runner's silhouette.
— Decorative Scalloped Edge (Final Border) :
Info :
Work the edge after all motifs are assembled and firmly blocked in position. Use cream yarn for a unified delicate border. If edges feel too open, use the 2.25mm hook for the border rounds to create tighter, neat scallops.
Round 1 :
With cream yarn and 2.5mm hook, join with sl st to any outer loop, ch 1, sc evenly along outer edge spacing about 3 sc per small star point or 6 sc around petal tips; make sure to follow outer contour (st count varies)
Round 2 :
*Ch 4, skip 2 sc, sc in next st* repeat along edge to create even arches; adjust ch length to fit curve; fasten off
Round 3 :
Rejoin at base of an arch: into each arch work (sc, hdc, 3 dc, hdc, sc) to create scalloped fan; repeat for each arch around entire runner; fasten off and weave ends
Info :
If the scallops pull the runner in, use a slightly larger hook (2.75mm) or reduce stitch sizes (2 dc instead of 3 dc) to relieve pulling. Conversely, if scallops are loose, repeat border with 2.25mm hook to tighten.
Round 4 :
Optional: Work a narrow picot trim on scallop tips: sl st to top dc, *ch 3, sl st in 3rd ch, sl st back into the top dc* repeat on each scallop tip for delicate points; fasten off and weave ends
Info :
Finishing trims add polish—choose either picots or a simple rope of chains; pick one to avoid a busy edge. Press and steam-block lightly after trimming to settle the final shape.
— Final Blocking & Finishing :
Info :
Pin the entire assembled runner on a large blocking board or foam mat to final dimensions. Use rust-proof T-pins and set each petal and leaf to the desired three-dimensional position. Mist lightly with water or use low steam to relax fibers; do not over-wet mercerized cotton. Allow to dry fully (24 hours) before removing pins.
Info :
Weave in all remaining tails using a yarn needle: follow stitch paths and weave each end at least 4–6 cm through adjacent motifs. Trim ends close to the work after ensuring stability. If any beads were used, double-check their attachment and stitch reinforcement.
Info :
Store runner flat or rolled (not folded) to avoid creases. For long-term care, hand wash gently in lukewarm water with mild detergent and reshape while damp, or spot clean as needed.
This floral lace table runner is a beautiful blend of delicate openwork and sculpted blooms—each petal invites a closer look and each leaf catches the light. The modular motif construction means you can adapt the runner to any length or colorway, making it a flexible heirloom for gift-making or special tables. With patient stitching, careful blocking, and thoughtful assembly, you'll create a runner that feels both vintage and fresh. Enjoy the meditative process of making and the joy of seeing your table transformed. 🧶🌸