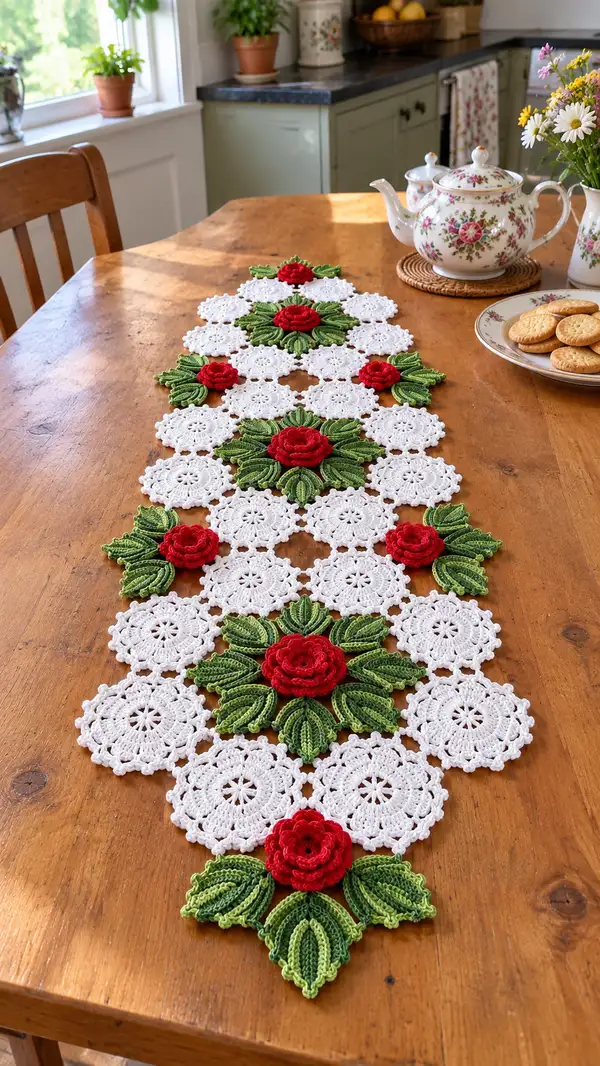
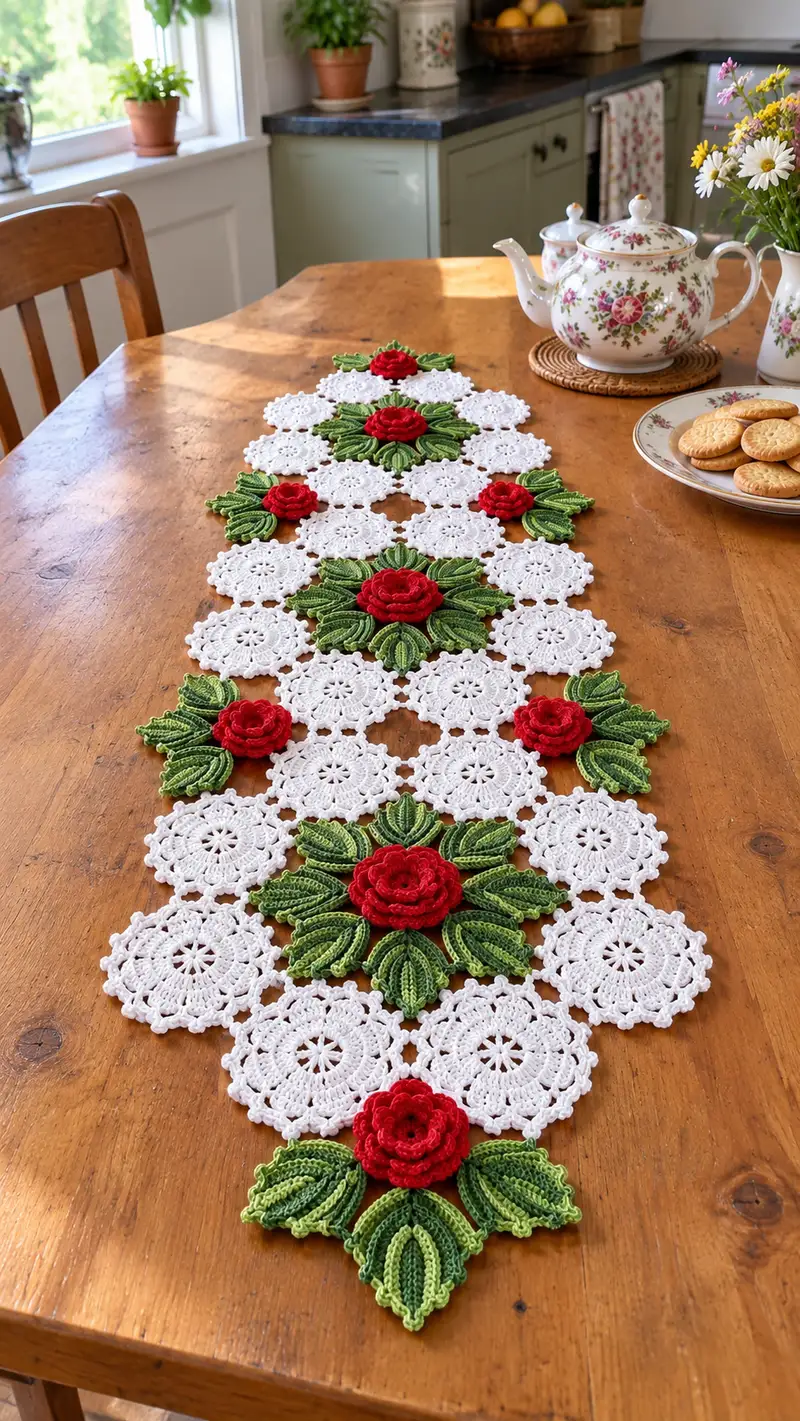
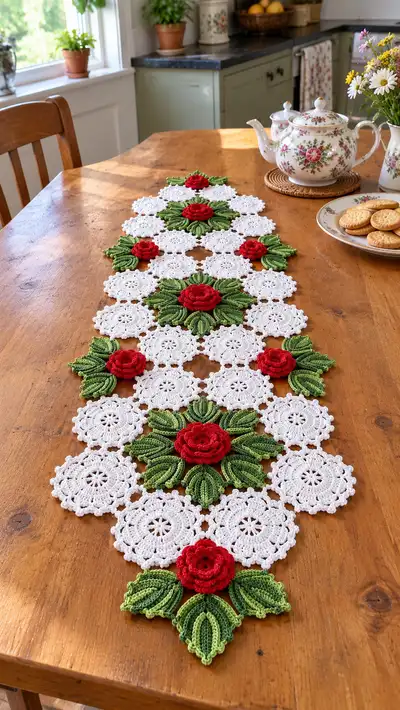
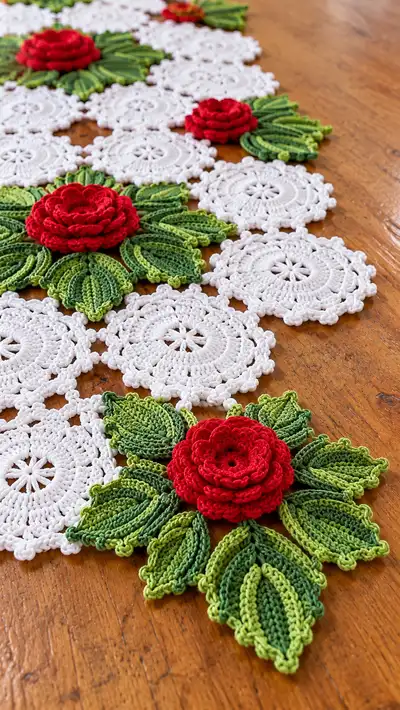
Create a charming vintage-inspired lace table runner made from delicate white medallions, layered green leaves, and 3D red rose appliques. This runner features repeating circular doily motifs joined with clusters of sculpted leaves and popped-up roses for a dimensional centerpiece. The finished piece makes a lovely holiday or everyday table accent and photographs beautifully on wood or linen surfaces. Detailed round-by-round instructions guide you through motif, leaf, rose and joining construction.
Progress Tracker
0% Complete
— White Medallion Motif :
Round 1 :
Make a magic ring, ch3 (counts as first dc), 11 dc into ring, join with sl st to top of ch3 (12)
Round 2 :
Ch3, dc in same st, 2 dc in each st around, join with sl st to top of ch3 (24)
Round 3 :
Ch3, (1 dc in next st, 2 dc in next st) x 8, join (32)
Round 4 :
Ch2 (counts as hdc), hdc in next st, (2 hdc, 2 hdc in next st) x 8, finish round evenly to have 48 hdc equivalents (48)
Info :
Maintain an even tension so the medallion lies flat. Blocking after completion will ensure consistent diameter across motifs
Round 5 :
Ch1, sc in each st around working into both loops (48)
Round 6 :
Ch4 (counts as tr), tr in same st, *ch1, sk 1 st, 3 tr in next st* repeat from * to * around, sl st to top of ch4 to form petal-like arches (16 clusters)
Round 7 :
Join in ch1 space, ch3, 2 dc in same space, ch2, 3 dc in same space (creates rounded segment), *3 dc, ch2, 3 dc in next ch1 space* repeat around, join (16 shells)
Round 8 :
Ch1, sc in each dc and ch space around to even out edges, work 3 sc in top of each shell peak to create slight scallop (approx 88 sc total)
Round 9 :
Ch3, dc in same st, *ch3, sk 2 sc, dc 2 in next sc* repeat to create lacy openwork, finish by making final dc in last sc (pattern should form small open scallops)
Info :
If you prefer a firmer medallion, use a slightly smaller hook or add one more round of sc before doing decorative rounds. Leave a 10-12 cm tail for joining if you plan to sew instead of crocheting motifs together
Round 10 :
Switch to working in FLO for a subtle ridge: ch1, sc in each st BLO around to give a textured ring (same stitch count as previous round)
Round 11 :
Ch3, (2 dc, ch2, 3 dc) into every 4th st or designated shell to deepen scallops; join (16 larger shells)
Round 12 :
Ch1, sc in each st, placing 3 sc in top stitch of each shell to complete scalloped edge (approx 96 sc)
Round 13 :
Ch1, *sc in next 4 sts, picot (ch3, sl st into first ch of ch3), sc in next 4 sts* repeat around to accent edge, sl st to join (decorative picot spacing depends on hook/yarn)
Info :
Measure diameter of medallion now; target is approximately 7-9 cm depending on thread and hook. Make as many medallions as needed following layout: for pictured runner plan 26 medallions (adjust to table length)
Round 14 :
Optional: add one final round of very small scallops - *ch2, sl st in next sc* around to tidy edge (stitch count unchanged)
Round 15 :
Fasten off and weave in ends; block medallion to shape using pins on blocking board and a damp cloth if needed
Info :
Make a batch of medallions, aiming for consistent blocking size. Keep them in the correct arrangement ready for joining. Depending on runner length you can add or remove medallions—arrange symmetrically
— Rose Flower (Layered Petal Rose) :
Round 1 :
With red yarn, make mr, ch1, 10 sc in ring, join with sl st (10)
Round 2 :
Ch2 (counts as hdc), hdc in same st, 2 hdc in each st around, join (20)
Round 3 :
Ch1, sc in same st, *ch3, sk next st, sc in next st* repeat around creating 10 ch3 loops for petal base, join (10 loops)
Info :
These ch3 loops will become the foundation for the first petal layer. Keep loops even and not twisted. If your petals look too small, enlarge the chain length in the loops to ch4
Round 4 :
Work petals in each loop: sl st into loop, (ch1, sc, hdc, 2 dc, hdc, sc, ch1) all in same loop; sl st to base to finish petal. Repeat for each loop to make 10 rounded petals
Round 5 :
Ch2, work 2 hdc in base between petals to add fullness, *2 hdc in next base* repeat around (20 hdc)
Round 6 :
Create second petal layer: ch3, *sl st in front of first layer petal base, ch3* repeat to form 10 ch3 loops offset between first petals, join
Round 7 :
Form second-layer petals with slightly taller stitches: sl st into loop, (ch1, sc, hdc, 3 dc, hdc, sc, ch1), sl st to base. Repeat for each loop (petals will sit behind and between first row)
Info :
Stagger the petal placement so the second layer fills the gaps. Gently shape petals forward with fingers as you build to get the dimensional rose look
Round 8 :
Ch1, sc around to tidy base and secure the ends of petals (approx 40 sc depending on petals), join
Round 9 :
Create third layer foundation: ch2, *ch5, sl st to base between petals* repeat around to make 10 ch5 loops offset again
Round 10 :
Petals for third layer: sl st into loop, (ch1, sc, hdc, 4 dc, 2 dtr, 4 dc, hdc, sc, ch1), sl st to base. Repeat for each loop to create lush outer petals
Round 11 :
Ch1, sc around base catching ends of petals and tightening the center if necessary. If center hole is visible, weave in a small felt circle on the underside or add an extra row of sc to close center
Info :
Use your fingers to cup petals and mold them; steam or lightly damp block if using cotton (apply steam carefully). Make multiple roses; for pictured runner make 7 larger roses and a few smaller single-row roses for accents
Round 12 :
Optional small rose variant: mr, ch2, 12 hdc in ring, ch3 loops and 1 petal round using (sc, hdc, 3 dc, hdc, sc) to produce a compact 6-8 petal bud
Round 13 :
Fasten off leaving a long tail for sewing the rose to leaves or medallion clusters. Weave ends into underside for tidy finish
Info :
For depth variation use 2 strands of thread held together for larger roses (this thickens petals and shortens required rounds). Make sure to adjust hook size accordingly.
— Sculpted Leaf (Make many) :
Round 1 :
With dark green, ch8, sc in 2nd ch from hook, hdc in next, dc in next, tr in next, dtr in next (center peak), tr in next, dc in next, hdc in next, sc in last; do not turn, now work back along opposite side: sc, hdc, dc, tr, dtr, tr, dc, hdc, sc to create a symmetric leaf-shaped oval; do not join, slip stitch to base to close (approx 18 sts)
Round 2 :
Ch1, sc in each stitch around the leaf edge to tidy and build base (same stitch count as round 1)
Round 3 :
Change to a lighter green (Info: change in this round), join in a back-loop at base, ch1, sc in BLO across to create a defined rib line (same count)
Info :
Working in BLO will give a raised center rib; this is critical for the sculpted look. If using thread, a slightly larger hook for edge rounds helps the leaf lie flat
Round 4 :
Ch3, *sk1, dc in next st, ch1* repeat across the rib to create little ridges. Turn and work back with sc across to stabilize
Round 5 :
Switch back to dark green, work 1 sc around all edge stitches, making slightly larger scallops at the tip by placing (sc, ch2, sc) at the central peak
Round 6 :
Create vein ridges on leaf face: with contrasting light green, using float or sewn couching, run a yarn chain of surface slip stitches down the center and secure at ends. Alternatively, embroider veins with basic backstitch using a tapestry needle
Round 7 :
Ch1, sc in each st around; at the tip make picot edging: *sc in next 3 sts, picot* repeat across to add finished decorative points (approx 20-22 sc)
Info :
Stiffen leaves lightly with diluted fabric stiffener if you want them to hold an arced shape when attached; otherwise they can be gently shaped by hand
Round 8 :
Fasten off leaving long tail for sewing. Make leaf groups of 6-8 leaves per large cluster and 3-4 leaves for small clusters seen between medallions
Round 9 :
Optional alternate leaf: work longer, narrower leaf using 12 chain foundation and increased center dtr to make a larger base for big floral clusters
Info :
Vary the shades of green between leaves in the same cluster for a natural, layered look as shown in the photo. Alternate light and dark leaves around each rose.
— Small Connector Medallion :
Round 1 :
mr, ch3, 11 dc in mr, join (12)
Round 2 :
Ch1, sc in same st, *ch3, sc in next dc* around to create 6 small loops, join
Round 3 :
In each ch3 loop work (sl st, sc, hdc, 2 dc, hdc, sc) to make small circular petals; join, sc around to tidy (approx 36 sts)
Round 4 :
Ch1, sc in each st, place picot at 6 evenly spaced points (ch3, sl st) which will align with medallion's picot points to aid joining. Fasten off and weave tail
Info :
These small connectors create the neat little negative spaces between the larger medallions and are worked in white to match the medallions. Make as many as needed to form rows and staggered layout
— Joining and Runner Assembly (Layout & Joining Rounds) :
Info :
Lay out all medallions, connector pieces, leaves and roses in final arrangement before joining. The pictured runner uses a central column of larger clusters with two offset columns of medallions flanking it. Pin to blocking board to hold positions
Round 1 :
Choose a medallion as starting center. With white yarn and right side facing, join in the picot point on the edge of medallion A that corresponds to a contact point with medallion B, ch1, sl st through corresponding picot on medallion B to join (use sl st join method). Continue around to make the first row of joins forming a triangular lattice. Repeat joins between adjacent medallions to connect the first cluster (join count depends on cluster size)
Round 2 :
After initial joins, reinforce joins with a second pass: from the inside of the runner, join yarn and work sc across the seam edge catching both motifs' edge stitches, placing 2 sc where the picot join occurs to stabilize
Info :
When joining, always work from the underside for nearly invisible joins. Use a blunt tapestry needle to tack seams in place first if you prefer sewing over crocheted joins
Round 3 :
Where a leaf cluster meets a medallion group, place the leaf underside against the medallion backside, and using the long tail from the leaf, whip stitch the leaf base to the medallion working a few discreet stitches through medallion rounds 10-12 to anchor it without distorting the lace
Round 4 :
Place rose at the center of a leaf cluster and join by stitching through the underside base of the rose to the leaf bases at 8-10 evenly spaced points. Avoid piercing petal faces; stitch under the base and secure with multiple passes for stability
Round 5 :
Once clusters are attached, take a length of white yarn and work a tidy connecting row across the exposed joins: with right side up, sl st along the join lines catching both motifs, creating continuous small loops where connectors fit; this tidies irregular spaces
Info :
If you prefer a more permanent join, use sewing method: with yarn tail and needle sew through corresponding picots with small invisible stitches. For a softer edge use sl st joins only and then secure ends invisibly
Round 6 :
Add connector medallions where four corners of medallions meet: align connector so its picot points meet surrounding medallions, and join using sl st into all four points. Sew back and forth to secure the tiny medallion in place
Round 7 :
Inspect the runner for gaps; stitch any loose floating edges by working small sc anchors through both layers and tighten slightly to blend edges. Trim excess tail and hide ends through neighboring stitches
Round 8 :
Optional margin join: using white yarn, sc around the entire runner edge catching underlying motif edges to produce a continuous border base for final edging (stitch count varies by runner size)
Info :
When joining motifs, keep tension loose enough so joins don't pull medallions into ruffles, but tight enough to hold pieces flat. Check symmetry frequently by stepping back and viewing runner on table.
— Decorative Edge & Final Picot Rounds :
Round 1 :
With white yarn and right side facing, join in any outer edge stitch, ch3, dc in same stitch, *ch2, sk 1, 2 dc in next st* repeat around to create a gentle scalloped edge (stitch count varies)
Round 2 :
Ch1, sc in each st across scallops, placing (sc, picot, sc) at center of each scallop for decorative points. This will align with previously made picots and unify the edge (picot = ch3, sl st into first ch)
Info :
Take care at corners or points where several medallions meet; make tiny increases or decreases to maintain flatness. Blocking the assembled runner at this stage helps the final edge settle evenly
Round 3 :
Optional beaded edge: if you wish to add weight and sparkle, before final round string small glass beads on thread and work them into the last round by sliding a bead onto the working yarn before making each picot
Round 4 :
Fasten off and neatly weave in all ends on the underside. Gently steam-block the entire runner for firm, even shape. If using starch, spray lightly and shape with pins until dry
Info :
Your runner is modular - to extend it, make additional medallions and repeat the joining pattern. To shorten, remove a row and adjust the edge rounds to suit
— Finishing Touches and Variations :
Info :
Variation: make roses using two strands of thread held together for larger blooms. Variation: dye a few medallions a soft cream for antique look. For a denser centerpiece place 2-3 roses in each large leaf cluster instead of one
Info :
Care: hand wash gently in lukewarm water with mild soap, reshape while damp, and dry flat. Avoid tumble dryer. Iron on low with a cloth if needed once fully dry
This floral lace table runner blends classic doily technique with sculpted three-dimensional flowers to create a charming table centerpiece. The layered roses and textured leaves bring real depth and heirloom quality to the runner, while the modular motif layout lets you scale the design to fit any table. I hope stitching each medallion, leaf and rose brings you as much joy as arranging the finished runner on your table—happy crocheting and enjoy your beautiful handmade accent! 🧶🌹