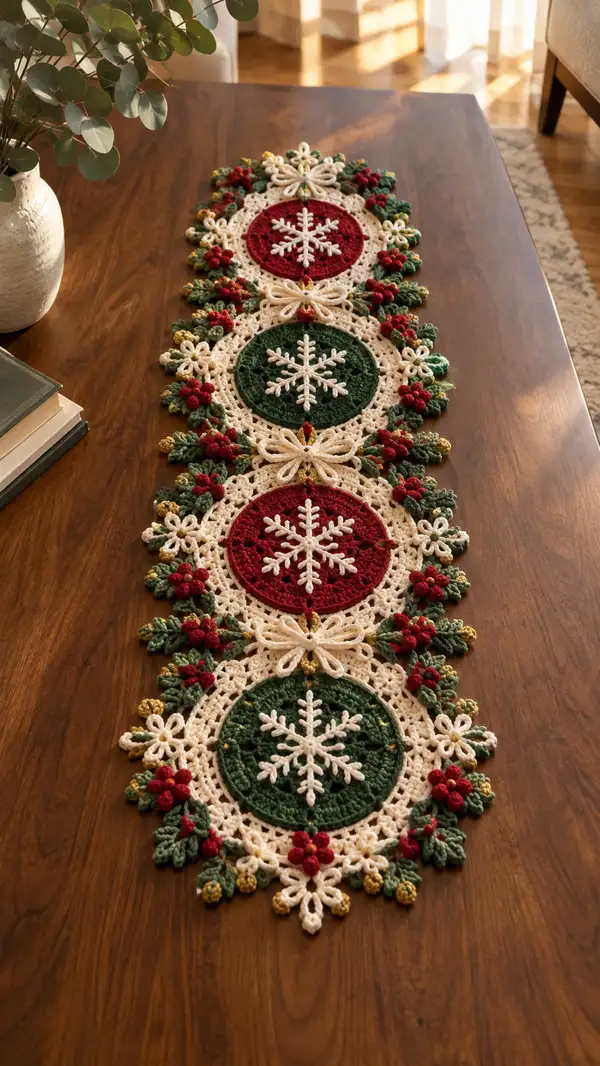
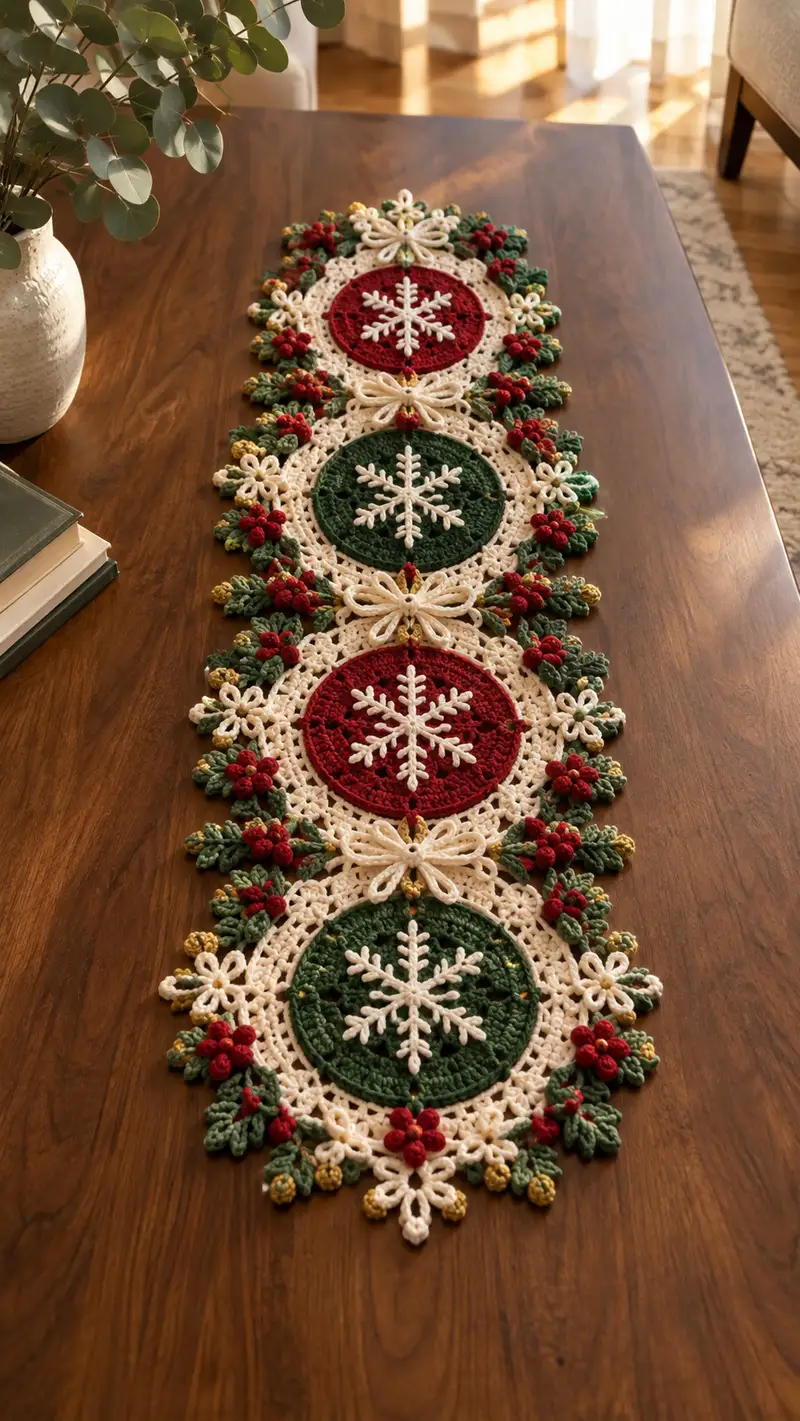
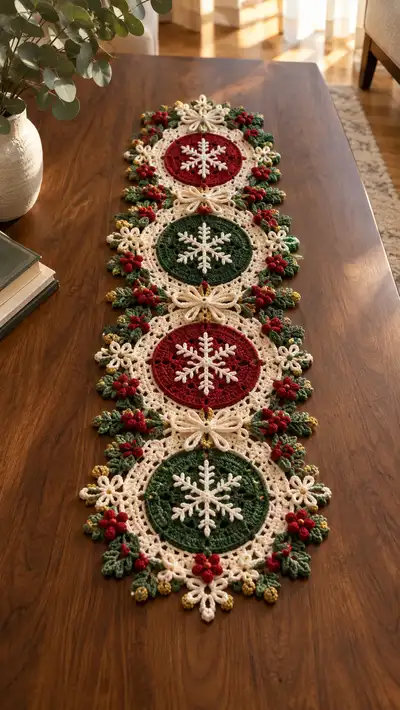
A festive, hand-crocheted table runner built from four connected ornament medallions in alternating crimson and forest green centers, framed with cream lace, holly leaves, berry clusters, gold accents and decorative bows. Each circular motif features a raised white snowflake applique at its center and is edged with intricate lacework and layered foliage. The runner lays flat and elegant on a dining table or sideboard — a seasonal centerpiece with classic holiday color and texture.
Progress Tracker
0% Complete
— Notes & Gauge :
Info :
This pattern is modular: you will make four ornament medallions (two crimson, two forest green), four snowflake appliques, multiple holly leaf clusters, berry bobbles, and three decorative bows, then join them to form a long runner. Gauge is not critical, but try to match hook sizes to achieve a flat circular medallion approximately 7.5-8 inches (19-20 cm) across for the center circles and 10.5-11 inches (27-28 cm) after the lace edging. Tension: 48 sts around at round 8 gives a good sized center.
Info :
Use stitch markers at the start of rounds. Carry unused colors behind work only if you are comfortable doing so; otherwise fasten off and weave ends as you go. The runner pictured alternates color for centers: Crimson (motif 1 & 3) and Forest Green (motif 2 & 4) with cream lacework throughout.
— Ornament Center (Make 4; 2 in Crimson, 2 in Forest Green) :
Round 1 :
6 sc in magic ring (6)
Round 3 :
(1 sc, inc) x 6 (18)
Round 4 :
(2 sc, inc) x 6 (24)
Round 5 :
(3 sc, inc) x 6 (30)
Round 6 :
(4 sc, inc) x 6 (36)
Info :
At this stage you have a small cup-shaped circle. Keep tension even to prevent cupping—if the center bows up, work the next round looser; if it ruffles, tighten slightly.
Round 7 :
(5 sc, inc) x 6 (42)
Round 8 :
(6 sc, inc) x 6 (48)
Round 9 :
1 sc in each st (48)
Round 10 :
*sc in next 3 sts, ch 3, sk 3 sts, sc in next 2 sts* repeat around to create subtle texture and docking points for the lace (48 total sc positions remain, ch-3 loops form decorative spaces)
Info :
If you prefer a slightly smaller center, stop after round 9 and begin the lace edge; if you prefer a slightly larger motif, add an additional even round of 1 sc in each st before the transition round.
Round 11 :
Join cream yarn in any ch-3 space with sl st, ch 1, *(sc, ch 3, sc) in same ch-3 sp, 2 sc in next 3 sc, (sc, ch 3, sc) in next ch-3 sp, 2 sc in next 3 sc* repeat around. End with sl st to first sc. Count: the total number of sc will increase to 64 (pattern of clusters creates additional ch-spaces)
Round 12 :
Ch 3 (counts as dc), dc in same sp, *(ch 2, 3 dc in next sc), 1 dc in each of the next 2 sc, (3 dc in next sc), ch 2* repeat around. This creates a raised ring of dc clusters. End with sl st. (approximately 80-88 dc including ch-3 starts; adjust to keep clusters centered)
Info :
Switch to cream color before round 11 for the decorative lace border that frames the colored center. We will work several rounds in cream to create the lacy medallion edge that unites with the holly clusters.
Round 13 :
Ch 1, sc in each dc and ch-2 space around, working 1 sc in each stitch and placing 3 sc in the center of 3-dc clusters to maintain an even edge (count ~88 sc). Finish with sl st.
Round 14 :
Ch 4 (counts as tr), tr in same st, *sk 1, (ch 3, sl st in next sc), ch 3, sk 1, 2 tr in next sc* repeat creating looped arches around (approximately 44 arches). End with sl st. These arches will form joining points for outer lace motifs and holly clusters.
Info :
Block this medallion gently if needed to open the arches and make the outer lace join neater. For best results, pin into a circular shape and steam or wet-block carefully.
Round 15 :
Working into each arch from previous round: *(sl st into arch, ch 5, (sc, ch 3, sc) into arch to create a petal loop), sl st into base of next arch* repeat around for 44 petal loops. This creates an open lace ring ready for holly leaves and decoration.
Round 16 :
Ch 1, sc around working 1 sc into the tip of each petal loop and 2 sc in the arch bases where needed to even out the count. Aim for approximately 88 sc total to create a stable base for leaves.
Round 17 :
*Into next 2 sc: (sc, hdc, 2 dc, hdc, sc) - a small shell to anchor leaf groups. Skip 2 sc and sl st into next sc to create spacing* repeat around. End with sl st. This alternation of shells and spaces forms mounting points for holly clusters and bows.
Round 18 :
Fasten off and weave in ends, leaving long tails for joining when assembling motifs into the runner. Each ornament medallion should measure approximately 10.5-11 inches across after this lacework (blocking recommended).
Info :
Make 4 ornament medallions total — 2 in crimson centers and 2 in forest green. Keep the cream lace rounds identical for all motifs so they join cleanly. Label each motif as you go to avoid mixing colors inadvertently.
— Snowflake Applique (Make 4; white) :
Round 1 :
Ch 6, join with sl st to form a small ring (6 chains) (or make MR 6). This small ring is the center for the snowflake.
Round 2 :
Ch 1, *(ch 6, sl st to ring) repeat 6 times to form 6 long arms (6 chain loops). Fasten off and weave tail to the back. You now have 6 arms radiating from the center.
Info :
For sturdier arms, you can make a short chain and slip-stitch back along it to create a corded look. Use a smaller hook (3.0mm) for a tighter snowflake if desired.
Round 3 :
Join yarn at base of any arm with sl st, ch 1, sc into base. On each arm: ch 2, (hdc, dc, hdc) in middle of arm chain, ch 2 and sl st to arm base to form a little prong. Repeat for all 6 arms making small side branches to mimic a snowflake.
Round 4 :
Working into each arm: ch 1, sc in center of the (hdc, dc, hdc) cluster to create a small raised stem; then sl st back to center. Repeat around to reinforce the arms. Fasten off and leave long tail for sewing to ornament center.
Round 5 :
Optional: embroider tiny French knots with matching white or add a tiny gold bead to the center for sparkle. If you prefer a fuller snowflake, repeat Round 3 on the reverse side to mirror and stiffen the arms.
Info :
Sew the snowflake to the flat center of the ornament medallion using long tails. Position the snowflake centered on the colored round; center it by eye or measure from edges to ensure symmetric placement. Use small stitches and hide knots on the back.
— Holly Leaf Cluster (Make 32 clusters; green leaves, red berries) :
Round 1 :
With forest green, ch 7. In 2nd ch from hook: (sc, hdc, 2 dc, hdc, sc) working back down the chain to form a pointed leaf (6 stitches across). Sl st to base to close leaf. This forms 1 leaf. (Do not fasten off if making leaf pairs)
Round 2 :
Ch 1, turn and work 1 sc evenly around the outside of the leaf to tidy edges - approx 8 sc. Fasten off leaving a 6-8" tail for sewing.
Info :
Each holly cluster in the runner is composed of 3 small leaves grouped together with 3 small red berry bobbles in the center. Make a total of 96 leaves (32 clusters x 3 leaves) or 32 clusters ready to assemble.
Round 3 :
To make a 3-leaf cluster: sew three leaves together side-by-side along their bases using the long tail, slightly overlapping the bases so the cluster fans outward. Secure with several passes and knot on the back.
Round 4 :
Using crimson yarn, make 3 small berry bobbles per cluster (see Berry Bobble section). Sew the three bobbles into the center of the 3-leaf cluster. Add a tiny gold accent bobble or bead if desired.
Info :
Make 32 clusters in total. Place clusters between medallion arches and around the outer scallops as shown in the photo. Vary slight leaf orientation for a natural look.
— Berry Bobble (Make 96 red small berries & 16 gold accent berries) :
Round 1 :
With crimson, ch 2, 6 sc in 2nd ch from hook (6) - small tight ball
Round 2 :
*Inc in each st around* (12) - optional to enlarge slightly
Round 3 :
Fasten off leaving a long tail and pull tail through the center to close into a small bobble if desired. Alternatively, weave tail through to secure and shape into a puff. For gold accent berries, use gold yarn and make slightly smaller bobbles by stopping after round 1 and gathering.
Info :
If you prefer a more pronounced berry, add one more round of 12 sc then gather. For a firm berry, place a tiny bit of stuffing (a small pea-sized amount) inside before closing the final stitches and pulling tight.
— Decorative Bow (Make 3; cream) :
Round 1 :
Ch 20 (or 18 for a slightly smaller bow). Row 1: sc in 2nd ch from hook and across (19 sc). Fasten off and leave long tail for wrapping.
Round 2 :
Fold the strip accordion-style in half and use the long tail to wrap tightly around the center several times to create a bow shape. Secure ends on the back with a few stitches. Optionally, create two loops by folding both sides into symmetrical loops before wrapping to ensure even bow shape.
Round 3 :
For a decorative flourish, add a small picot edging to each loop edge: join yarn to loop edge, *(sc, ch 3, sl st to base)* repeat 6 times around the outer curve. Fasten off and weave in ends.
Info :
Make 3 bows to sit between the four ornament medallions. Secure with a small gold accent bobble at the knot (sew on a gold bead or make a tiny gold bobble).
— Joining Motifs & Outer Edge Finishing :
Round 1 :
Arrange the four finished ornament medallions in the desired order (crimson, green, crimson, green) with about 1/4 inch overlap at lace arches. Pin in place on a blocking board to preview join points (the bows will be placed at the three junctions).
Round 2 :
We will use a join-as-you-go slip stitch method: With cream yarn and the right-side facing, insert hook through an outer arch on the first motif and the corresponding arch on the second motif, yarn over and sl st through both loops to join; work a sl st join every 3rd stitch across overlapping arches to secure motifs flat. Continue joining motif 1 to 2, then motifs 2 to 3, then 3 to 4.
Info :
Keep joins flat and do not pull tight; the runner should lay flat on the table. If a gap exists, add a small decorative chain loop over the gap and tack down to blend. Use pins before final joining to ensure symmetrical alignment.
Round 3 :
Once all motifs are joined, work a unifying outer round in cream around the entire perimeter: ch 1, sc evenly around entire runner edge placing 3 sc in larger points where holly clusters will attach to provide stability (approx 240-260 sc depending on spacing). End with sl st and fasten off.
Round 4 :
Decorative scallop round: Join cream in any outer loop, *(ch 3, 5 dc in next space, ch 3, sl st in same space) skip next 2 sc, sl st in next sc* repeat to form scallops around the perimeter. This gives a finished edged look and new anchor points for additional embellishments.
Info :
Sew holly clusters in position: place clusters between scallops and at the triangular points between motifs. Use matching green yarn tails to sew through the bases of cluster leaves and secure with small stitches to the runner's outer round. Add 3 red berries to each cluster and 1 small gold accent at alternating positions.
Round 5 :
Attach bows: position bows at the three midpoints between motifs and sew through the back of the knot with cream yarn. Reinforce by passing through the border and a few stitches of each adjacent motif so the bows sit flush and remain secure when the runner is moved.
Round 6 :
Final finish: Weave all remaining tails through the back of the runner, secure with a double knot and hide ends by threading into the work. If using beads, sew them on now at centers of bows and in selected holly clusters for sparkle.
Info :
Block the entire joined runner flat and pin carefully to maintain a long rectangular shape. Steam block or wet block according to yarn manufacturer's recommendations. Allow to dry completely before use to ensure stability of joins.
— Optional: Embellishment Variations & Finishing Touches :
Info :
Alternate berry colors (crimson and berry pink) or add tiny jingle bells sewn under bows for a festive sound. For a glossier look, attach a tiny gold bead to the tip of each scallop and the center of each bow. You can also omit snowflakes and embroider a monogram or small initials on each ornament center for personalization.
Info :
To make a shorter runner, reduce number of ornament medallions to 2 or 3. To extend, add additional medallions in matching sequence. When altering length, make sure to add or remove bows accordingly to keep symmetrical spacing.
Info :
Care: hand-wash gently in cool water, reshape and dry flat. Avoid machine-washing or tumble-drying which may distort lace and join points.
Completing this Crimson and Forest Green Snowflake Table Runner is such a satisfying project — each medallion and holly cluster comes together to create a warm, festive centerpiece full of texture and color. The layered snowflakes and three-dimensional berries give lovely depth, while the cream lace ties everything together for a classic holiday look. 🧶✨ Display it proudly during the season or gift a hand-crafted runner to someone special. Happy stitching and enjoy the cozy results! 🎁