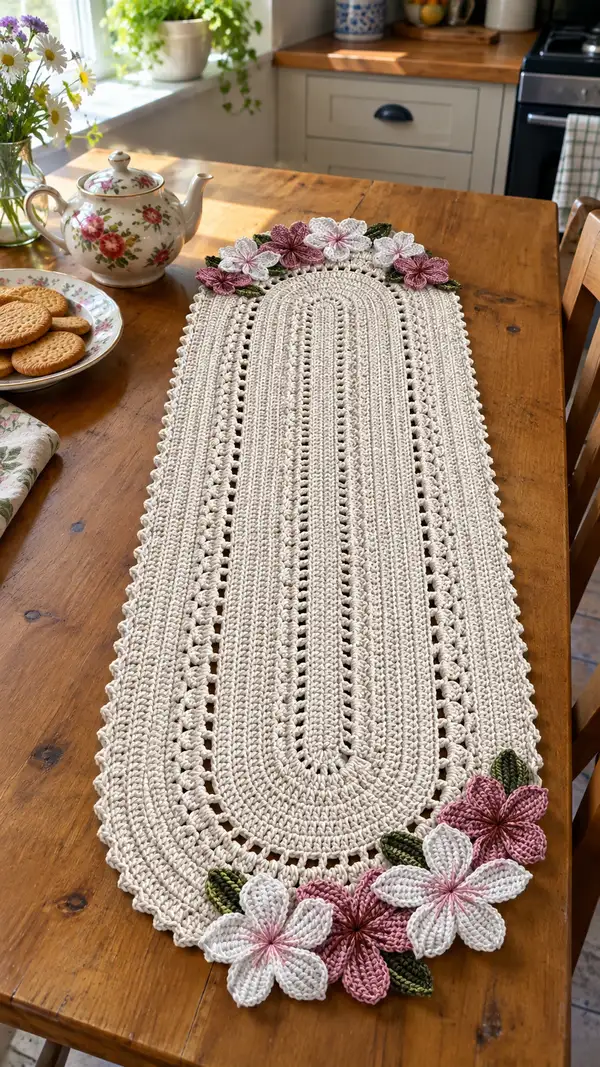
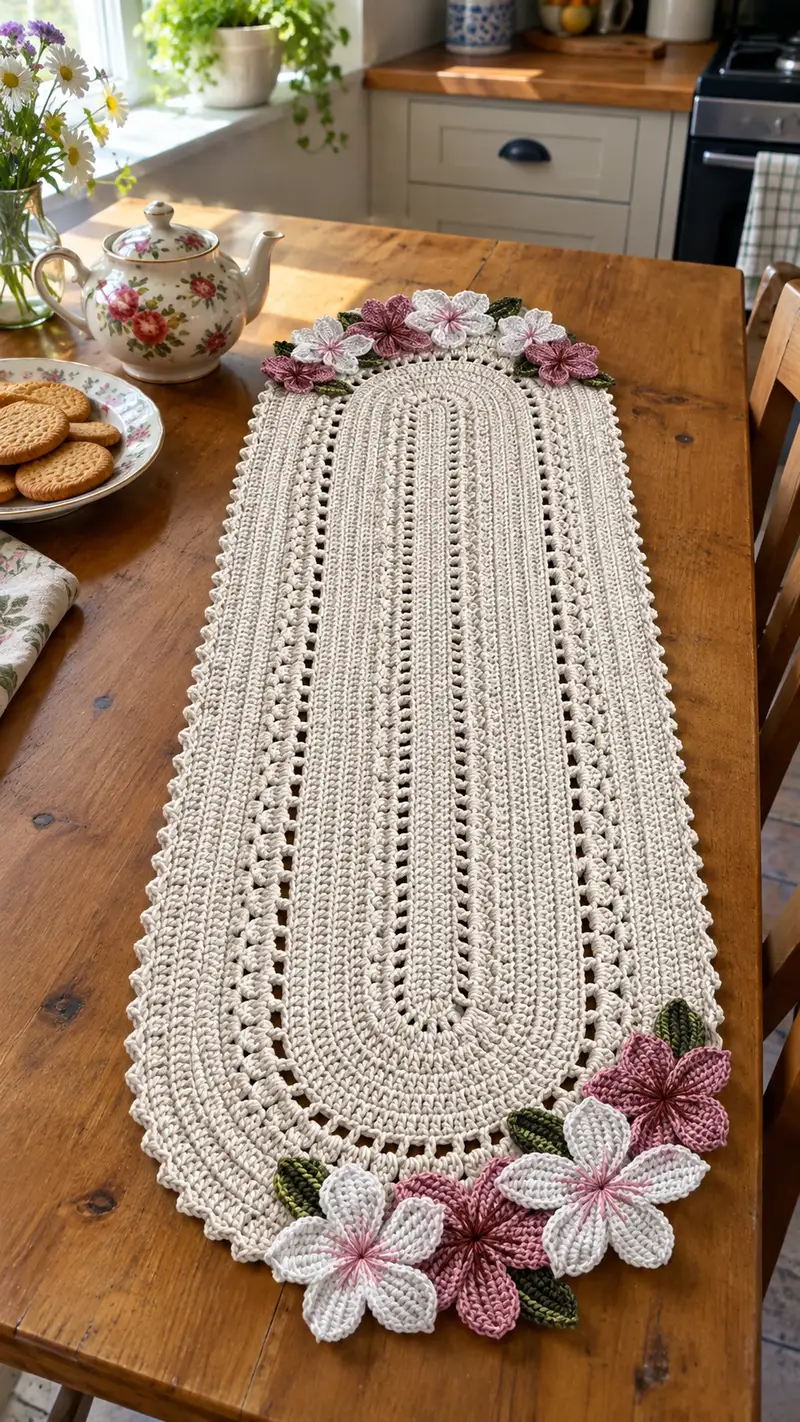
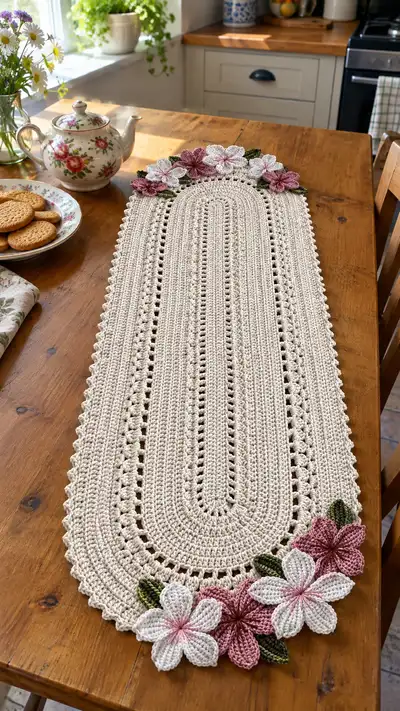
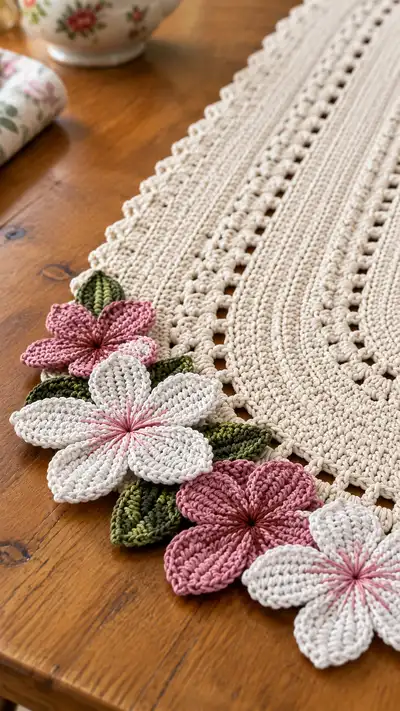
A timeless crochet oval table runner worked in a warm cream cotton with delicate textured rows and a scalloped edge. Hand-sewn layered flowers in soft blush pinks and white with olive leaves adorn both ends for a romantic, vintage-inspired look. Designed to sit lengthwise down a dining or kitchen table, this runner features raised petal texture and openwork ribs for subtle breathability and structure. Includes full instructions to create the oval base, textured panels, scalloped edging, 7 layered flowers and coordinating leaves.
Progress Tracker
0% Complete
— Materials & Gauge :
Info :
Gauge is not critical for table runner width, but to achieve similar finished size use worsted cotton and 4.0mm hook. Approximate finished size: 95-105cm long by 25-28cm wide depending on yarn and tension.
— Notes Before You Start :
Info :
Runner is worked in continuous rounds (no turning) from a foundation chain oval. Each round will be joined with a sl st or worked continuous as you prefer. Use a stitch marker to note the beginning of each round. Flower and leaf motifs are made separately and sewn on.
— Base Oval (Foundation chain and increase rounds) :
Round 1 :
Ch 30. Work 1 sc in 2nd ch from hook and in each ch across (29 sc). Work 3 sc in last ch (this creates the rounded end). Working on the opposite side of the foundation ch, work 1 sc in each ch across (29 sc). Work 3 sc in first ch to join the round (do not join; place marker in first sc). Total = 64 sc.
Info :
The starting chain of 30 is chosen so the runner is narrow and elongated; if you prefer wider runner, add multiples of 4 to the starting chain and adjust increase rows proportionally.
Round 2 :
(Work evenly along the long sides, increase around curve points) *Work 10 sc, inc* repeat 4 times (total: (10 sc x4)+4 inc = 40+4 = 44) plus the existing 20 sc across curves counted earlier brings Total = 68 sc. To keep math easy: this round increases 4 stitches distributed evenly at curve clusters. Total = 68.
Round 3 :
*Work 11 sc, inc* x4 (11x4=44 +4 inc =48) plus side counts maintained = 72 sc.
Round 4 :
*Work 12 sc, inc* x4 = (12x4=48 +4 inc =52) Total = 76 sc.
Round 5 :
*Work 13 sc, inc* x4 = (13x4=52 +4 inc =56) Total = 80 sc.
Round 6 :
*Work 14 sc, inc* x4 = (14x4=56 +4 inc =60) Total = 84 sc.
Info :
These increase rounds build the rounded ends of the oval. Place stitch markers at the beginning of each curve (every quarter) to help locate increases. Keep tension even to avoid roping or waves.
Round 7 :
*Work 15 sc, inc* x4 = (15x4=60 +4 inc =64) Total = 88 sc.
Round 8 :
*Work 16 sc, inc* x4 = (16x4=64 +4 inc =68) Total = 92 sc.
Round 9 :
*Work 17 sc, inc* x4 = (17x4=68 +4 inc =72) Total = 96 sc.
Round 10 :
*Work 18 sc, inc* x4 = (18x4=72 +4 inc =76) Total = 100 sc.
Info :
After Round 10 the oval has broadened. From here we will add a few more rounds of subtle increases then move to even rounds to build length. Always count stitches on one side (edge between curves) to ensure increases are spaced symmetrically.
Round 11 :
*Work 19 sc, inc* x4 = (19x4=76 +4 inc =80) Total = 104 sc.
Round 12 :
*Work 20 sc, inc* x4 = (20x4=80 +4 inc =84) Total = 108 sc.
Round 13 :
*Work 21 sc, inc* x4 = (21x4=84 +4 inc =88) Total = 112 sc.
Round 14 :
*Work 22 sc, inc* x4 = (22x4=88 +4 inc =92) Total = 116 sc.
Info :
Depending on your desired width stop increasing after Round 14 if you prefer a narrower runner. The counts above will produce a mid-width runner. From next round we will work even rounds for building the length.
Round 15-34 :
Work 1 sc in each st around (116 stitches each round). Move stitch marker each round. Repeat for 20 rounds to build the runner length steadily and maintain the oval shape. Total each round = 116 sc.
Info :
Check the runner lays flat after every 4 rounds. If you notice cupping or ripple, block lightly or adjust tension. These rounds create the stable middle section. If you want a longer runner, add more even rounds here in multiples of 2 to keep symmetry.
— Textured Panel & Openwork Rows (create the center rib and open columns) :
Round 35 :
*[1 sc in next 3 sts, ch 1, sk 1]* across long sides; in curve areas work 1 sc in each stitch as before. This forms small ch-1 eyelets along both sides to create the split columns. Total = maintains 116 sts.
Round 36 :
1 sc in each st around, working into ch-1 spaces as single stitches (116 sc). This evens up the row and forms a subtle raised rib on each side of the eyelet column.
Round 37 :
*1 sc in next 3 sts, bobble cluster over next 3 sts (hdc cluster or 3 dc cluster pulled together), 1 sc in next 3 sts, ch 1, sk 1* along long sides; maintain normal sc around curves. Total remains 116 but texture added.
Info :
For the bobble cluster you can work 3 hdc together (work 3 hdc leaving last loop on hook, then yarn over and pull through all loops) or 3 dc cluster to give higher texture. Keep clusters aligned round-to-round by counting and placing a stitch marker every 10 sts if needed.
Round 38-42 :
Work 1 sc in each st around for 5 rounds to stabilize the texturing (116 sc each round). Move marker and check size.
Info :
If you prefer more distinct columns, substitute Round 36 with an additional ch-1 row to create deeper columns. I worked the runner pictured with 5 rounds of stabilization to allow stitches to relax before edging.
— Decorative Scallop Edge Rows :
Round 43 :
Change to edging stitch: *1 sc in next 2 sts, 5 dc cluster (shell) in next st, 1 sc in next 2 sts* repeat around each long side. On curve ends substitute shells with 3 dc shells to keep edge smooth. Count should remain 116 (shell consists of multiple stitches worked into single stitch, so count each shell as 1 stitch for placement; continue sc counts between shells to keep spacing even).
Round 44 :
1 sc in each st around (116 sc). This anchors shells and evens the edge before reverse sc finishing.
Round 45 :
Work reverse single crochet (crab stitch) around for a neat corded border. Work evenly; do not change stitch count. Fasten off and weave in ends or continue to attach flower clusters next.
Info :
If you prefer a flatter scallop, work 3 dc shells instead of 5 dc and space them with 1 sc between shells. The pictured runner has a subtle pointed scallop made with 5 dc shells on the long edges and 3 dc shells around the curves.
— Flower Module (Make 7 flowers - 5 petals each) :
Info :
Each flower is composed of 5 elongated petals worked from the same center. Use a contrasting hook 3.5mm for petals if you want crisper definition. Make 7 flowers: 4 smaller blossoms (5 petals each, smaller petal counts) and 3 larger blossoms (slightly more rows for fuller petals). The pattern below gives a detailed 10-round petal worked into a magic ring and also a method to elongate petals with chains and rows for a flat petal shape.
Flower Construction - Petal Template (petal Rounds 1-10) :
Make a magic ring. Rnd 1: Ch1, 6 sc in MR, pull tight (6). Rnd 2: *Ch 3, dc in same st, ch 2, sl st in next st* repeat around to form five chain petals? (This creates little loops.) This is an alternate simple method – but for the elongated ribbed petal seen we will use the following elongated petal method instead below.
Petal Round 1 :
Ch 8. In 2nd ch from hook work: sc, hdc, dc, tr, dc, hdc, sc (7 stitches along chain excluding the turning ch). Slip stitch into base stitch to form the petal. Fasten the petal to the center. (This single petal uses 7 worked stitches.)
Petal Round 2 :
From the same center, ch 10 (2 extra for length), work sc, hdc, dc, tr, tr, dc, hdc, sc across chain; sl st to center. This builds a slightly taller petal. Maintain neat tension. Petal length increased by 2 chains compared to Round 1 pattern.
Petal Round 3 :
Repeat Round 2 but work dc stitches with a front-loop-only rib for the center rib: when working the center dc, insert hook through the FLO to create the raised rib effect. Fasten off the petal tail leaving 15cm for sewing. This technique creates the raised central vein seen in the petals.
Info :
Work five individual petals around the common center, spacing them evenly by counting base stitches or using small slip stitch anchors between petals. To achieve the layered look in the photo, make three larger flowers with petal chains of 10 and two filler rows per petal and four smaller flowers with chain 8 petals.
Petal Round 4-6 :
For fullness, add a second round on each petal as follows: join yarn at petal base, ch1, work a round of sc around each petal edge evenly (approx 18 sc along petal depending on length) to stabilize shape. Rounds 4-6 are for reinforcing and shaping; counts will vary slightly by petal length but expect 16-20 sc around each petal.
Info :
For the raised ribs, use a contrasting thin yarn to stitch radial lines from the center out to the petal tip after all petals are made. Use long running stitches through the petal centers to create the starburst center detail as seen in the image.
Assemble Flower :
Sew five petals together at their bases into a circular cluster. Weave the center tail through all petal bases and pull slightly tight to form the flower center. Embroider center with long running stitches using dusty rose yarn to create a starburst. Secure and weave in ends. Make petals with slight stagger so flowers appear layered.
Flower Variations :
For the larger flowers (3 of them), use Ch 10 starting chains for petal Rounds 1-3 and add an extra stabilization round (Round 6) to give petal depth. For the smaller flowers (4 of them), use Ch 8 starting chains and fewer stabilization rounds.
Flower 1 :
Make 5 petals following Petal Rounds 1-6 using blush pink (accent A). Assemble and embroider center in dusty rose. Fasten off and weave tails.
Flower 2 :
Make 5 petals following Petal Rounds 1-6 using white (accent C) with pale pink embroidery center. Assemble.
Flower 3 :
Make 5 petals following Petal Rounds 1-7 (add an extra sc stabilization round) using muted rose (accent B). Assemble with darker center embroidery.
Flower 4 :
Make 5 petals as per small flower template in blush pink. Assemble.
Flower 5 :
Make 5 petals as per small white template. Assemble.
Flower 6 :
Make 5 petals as per small muted rose template. Assemble.
Flower 7 :
Make a fuller 6-petal variation if you want an extra large bloom. Ch 10 for each petal and add 2 stabilization rounds around each petal before assembly. Use white with pale pink embroidery.
Info :
When making the petals, keep the base of each petal narrow and the tip broad. Press petals lightly with steam from a distance on a cotton setting when blocking; do not scorch. Light blocking helps petals lay flat and keeps them identical in shape for neat clusters.
— Leaf Module (Make 12 leaves) :
Leaf Round 1 :
Ch 10. Work back along the chain: sc in 2nd ch from hook, hdc in next, dc in next 2, tr in central chain, dc in next 2, hdc, sc. Turn and work same stitches along opposite side of the chain to create a symmetrical leaf edge (approx 18 sts total). Slip stitch to base and fasten off leaving long tail for sewing. Repeat to make 12 leaves in olive green.
Leaf Round 2 :
Optional: With contrasting green strand, work 1 sc around leaf edge to neaten, and add a central vein using surface slip stitch or embroidery in darker green yarn down the center from base to tip.
Info :
Vary leaf sizes by using chain 8 for smaller filler leaves and chain 12 for larger leaves. In the pictured runner most leaves are medium (ch10) with two larger leaves under the biggest bloom (ch12).
— Joining Flowers and Leaves to Runner :
Info :
Lay the runner flat and decide on cluster positions at both ends. The photographed runner has three flowers arranged at each end and one central small filler flower strategically placed; replicate or adapt to your taste. Pin flowers and leaves before sewing to check placement and symmetry.
Step 1 :
Position the largest flower slightly off-center at the rounded end and pin with sewing pins. Arrange two medium flowers around it to create a crescent cluster. Add leaves behind and between flowers, tucking them under petals and pinning in place.
Step 2 :
Sew flowers to runner using the long tails. Use ladder stitch or whip stitch through the petal bases and runner fabric. For secure attachment sew through multiple rounds of the base to anchor flowers so they will not shift with handling.
Step 3 :
Sew leaves last so they tuck naturally behind and between petals. Use small discreet stitches and weave in tails on the wrong side of the runner. Add a few blind stitches through the runner edge to hold heavy clusters flat.
Info :
For extra security you can add a dab of fabric glue at the base before sewing, but do not glue all the way through to the front to avoid seepage. Test glue on a yarn scrap first.
— Embroidery & Finishing Touches :
Step 1 :
Using dusty rose or contrasting thread, embroider the petal centers with long running stitches radiating from the very center outward to each petal tip. Make 12-16 running stitches per petal so the center is visibly textured as in the image.
Step 2 :
Weave all yarn tails into the back of the runner for a clean finish. Trim close without cutting the structural yarn. Block the finished runner: dampen slightly, pin flat on blocking surface in proper oval shape, and allow to dry completely to set scallops and flowers.
Info :
Blocking is essential for cotton runners to achieve the crisp edges and to flatten the petals. Use rust-proof pins and a steam iron on low to press gently if needed. Do not over-iron flowers to avoid flattening the 3D texture.
— Alternate Layout & Color Notes :
Info :
You can make a symmetrical cluster at both ends exactly like the photo, or make a single large cluster at one end for a runner that displays a dramatic focal point. Swap flower colorways to match seasons — soft pastels for spring, richer burgundy and gold for autumn.
Final Check :
Inspect the runner for any loose ends or uneven petals. Make any final stitches to flatten or adjust petal overlap. Your runner is now ready to use and display!
This elegant oval floral runner elevates everyday dining with a delicate vintage feel and handcrafted charm. The creamy base with layered pink and white flowers is perfect for a cozy kitchen table or a special afternoon tea. Each petal and leaf is made with care and thoughtfully placed to create a balanced, romantic look. 🧶🌸 Display with fresh flowers or use alone as a seasonal statement piece. Happy crocheting — I hope this runner brings warmth to your home! ✨