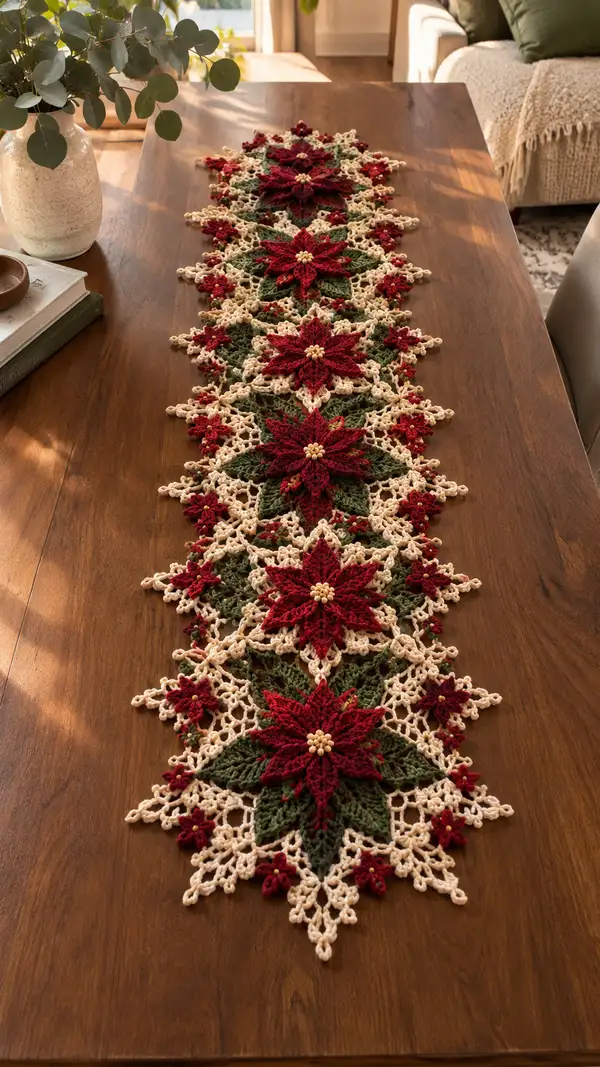
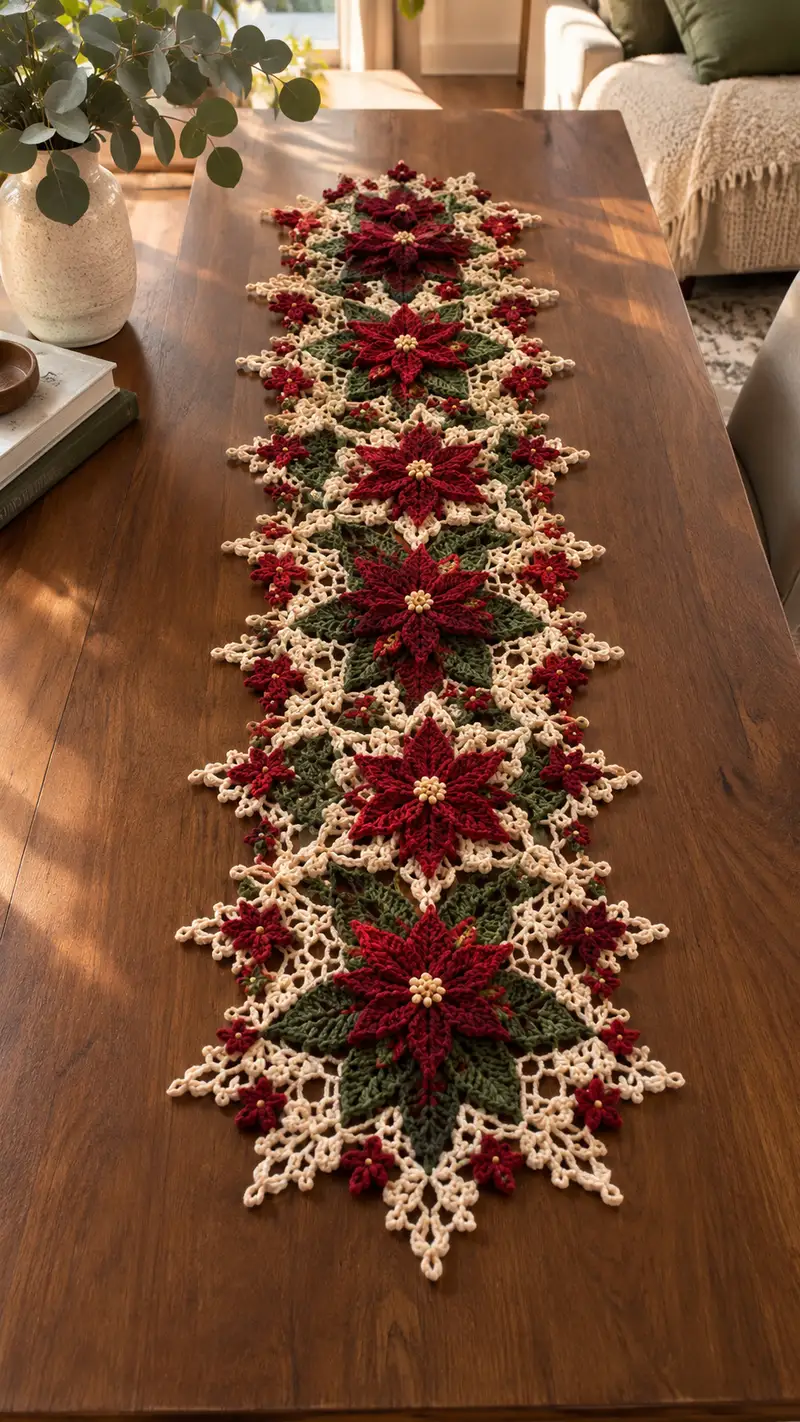
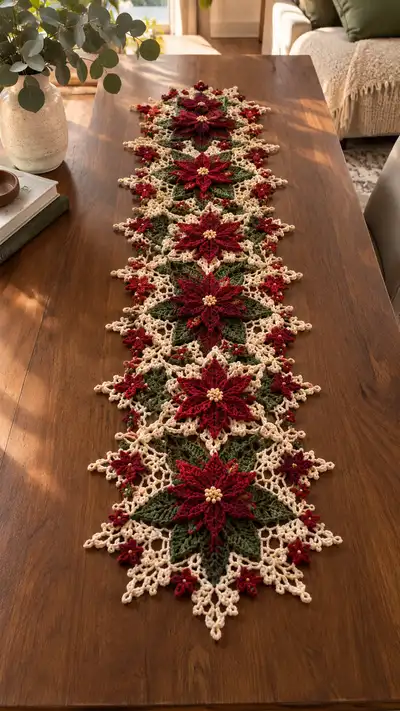
A festive, lacey table runner featuring a row of layered poinsettia motifs in deep crimson, rich green leaves, and a delicate cream lace background. Each large poinsettia is built with textured petals and a beaded center, linked together with an openwork lace join. Perfect for a holiday centerpiece or seasonal table decor, the runner in the photo shows five full poinsettias with small star accents and scalloped cream edging.
Progress Tracker
0% Complete
— Notes and Preparation :
Info :
This runner is constructed from repeated large poinsettia motifs (Large Motif), small star motifs (Small Star), leaf units (Leaf Unit) and a cream Lace Connector that joins motifs join-as-you-go. Work motifs flat, block each motif to shape, then join using the Lace Connector instructions. The sample piece in the photo contains five full large motifs and small star accents between them — adjust motif count to match desired runner length.
Info :
Gauge is not critical but try to keep consistent tension across all motifs. Use same hook throughout unless indicated. Place stitch markers at the start of each round and for key join points.
— Large Poinsettia Motif (Make 5) :
Round 1 :
mr, ch1, 6 sc in magic ring (6)
Round 3 :
(1 sc, inc) x6 (18)
Round 4 :
(2 sc, inc) x6 (24)
Round 5 :
(3 sc, inc) x6 (30)
Round 6 :
(4 sc, inc) x6 (36)
Round 7 :
(5 sc, inc) x6 (42)
Round 8 :
(6 sc, inc) x6 (48)
Info :
Rounds 1-8 form a worked circle that acts as the motif base. Place a stitch marker at the start of Round 9. This base will anchor petal and leaf layers. Do not fasten off; keep working in the round.
Round 9 :
1 sc in each st around (48)
Round 10 :
*ch4, sk 2 sc, sc in next st* rep around — 16 ch4 loops (16)
Info :
These 16 ch4 loops create anchor spaces for the first petal layer. Count loops as you go; if you end with 15 or 17, adjust at the last space by adding or subtracting a ch to maintain even petal placement.
Round 11 :
Change to Crimson. Work petal into each ch4 loop as follows: (sc, hdc, 3 dc, hdc, sc) in ch4 loop; sl st to next anchor sc to position for next loop. Repeat around (16 petals)
Round 12 :
Working behind the first petal layer, make elongated ridge behind each petal: in the same anchor sc between loops, ch1, 1 sc in anchor sc, ch5, sl st in space between petals (creates looped decorative space) — rep 16 times
Info :
If using beads for centers, thread the appropriate number of seed beads onto a length of thread now for later securing. Keep them nearby to sew into center after motif completion.
Round 13 :
Create second petal layer (slightly staggered over first): Join Crimson in the back of any petal, ch2, (dc2tog over central 2 dc of petal, tr, dc2tog) into that petal; sl st to base between petals. Repeat for each petal (16 second-layer petals)
Round 14 :
Working under the second petal layer, secure petals with small sc anchors: *sc in base between petals, ch3, sl st in tip of petal* rep around (16 picots/ch3 loops)
Round 15 :
Change to Dark Green. From back loops at round 9, *ch6, drop loop and 3 sc in next anchor sc* rep around to create leaf anchor points — you will have 8 chain arches (8)
Round 16 :
In each ch6 arch, work leaf as follows: (sc, hdc, 3 dc, tr, 3 dc, hdc, sc) in the ch6 arch — creates 8 full leaves
Round 17 :
Extend leaf depth: (FLO) in each leaf mid-row work 1 hdc in next 4 sts to create visible ribbing, sl st to base (no stitch count change)
Info :
At this stage you have two crimson petal layers and a green leaf ring beneath. Block motif gently to flatten leaves before continuing to cream lace rounds to ensure smooth joins later.
Round 18 :
Change to Cream. Join in space between leaves, ch4, *sc in leaf base, ch4* rep around creating 8 ch4 loops that will anchor the lace connector (8 loops)
Round 19 :
In each ch4 loop work: sc, ch3, (dc, ch3, dc) all into loop, sl st to next loop base (decorative fan begins) — rep 8 fans
Round 20 :
Between each fan work: ch6, sl st to next fan base; on fans work small picot edge: (dc, ch3, dc) on center dc, sl st
Info :
These cream rounds form the first part of the lace connector; when motifs are joined later these chain arches will be used as join-as-you-go anchors. Keep tension even so arches are consistent.
Round 21 :
Work a small scallop around the motif: *sl st into next 3 sts, (ch3, 3 dc, ch3) into space, sl st next st* around creating 16 small scallops — maintain placement (16 scallops)
Round 22 :
Embellish scallops with picots: into each scallop ch3-sp work (sc, picot, sc) — no change to anchor counts
Round 23 :
Finish motif base: 1 sc in each st around the outermost row to tidy edges (approx 96 sc depending on placement)
Info :
Sew bead centers now: using a short length of thread or thin yarn, sew a small cluster of 7 seed beads to the very center of the motif forming a circular center. Or embroider using mustard yarn to create a cluster. Secure thread or yarn ends on the back of the motif and weave in several inches to hide.
Round 25 :
Trim and fasten off Crimson and Green ends, leaving long Cream tail for joining. Weave in shorter tails now and block motif flat on blocking mat with pins.
Info :
Make 5 full Large Poinsettia Motifs for a runner as in photo. For a longer runner make additional motifs; for a table square use 3 or 4 motifs arranged in a different layout.
— Leaf Unit (Small) (Make 10) :
Round 1 :
With Dark Green, ch6, join with sl st to form ring (6)
Round 2 :
Work into ring: sc6 (6)
Round 3 :
(ch3, sc in next st) x6 creating 6 loop arches for small leaf decoration (6 loops)
Round 4 :
In each loop: (sc, hdc, 3 dc, hdc, sc) forming a tiny leaf or petal — rep 6 (6 small leaves)
Round 5 :
Edge with sc around to tidy, then sl st to join; fasten off leaving long tail for sewing (approx 18 sc)
Info :
These small leaf units are used to fill gaps in the lace and to anchor small crimson star motifs. Place them strategically when assembling to create balanced spaces.
— Small Star Motif (Make many for accents) :
Round 1 :
mr, ch1, 6 sc in mr (6)
Round 2 :
(ch4, sl st in next st) x6 forming 6 star points (6 loops)
Round 3 :
Into each ch4 loop: (sc, hdc, 3 dc, hdc, sc), sl st between loops (6 small star points)
Round 4 :
Optionally embellish center with a single bead or tiny embroidered French knot in Mustard/Gold, fasten off leaving tail for sewing
Info :
Make a varying number of these stars to echo the photo arrangement — there are two stars per motif gap and a few single stars at the runner ends.
— Lace Connector & Join-As-You-Go Mesh :
Info :
The Lace Connector is worked in Cream and is the structural lace that joins all motifs. It is easiest to work this after blocking each Large Motif and while motifs remain flat. You will use join-as-you-go where indicated — this means as you work chain arches and fans you will occasionally replace a sl st with a sl st into a corresponding loop on an adjacent motif to join.
Round 1 :
With Cream, ch8, join to form ring with sl st (8)
Round 2 :
ch3 (counts as dc), 23 dc into ring, join with sl st to top of ch3 (24 dc)
Round 3 :
*ch5, sk 1 dc, sc in next dc* rep around producing 12 ch5 arches (12)
Round 4 :
Work into each ch5 arch: (sc, ch3, 3 dc, ch3, sc) forming 12 decorative fans that will anchor to motifs (12 fans)
Info :
When joining to a Large Motif, replace the sl st anchor of a fan with sl st through a pre-designated ch4 arch on the motif outer cream rounds. Join motifs symmetrically — typically connect fans to the ch4 loops created in Round 18 of Large Motif.
Round 5 :
Between each fan work ch8 loop: *(ch8, sl st at base between fans)* rep around to form an airy lattice (12 ch8 loops)
Round 6 :
In each ch8 loop work a small mesh: (sc, ch5, sc) then sl st into the side of the adjacent fan to secure mesh (joins become permanent for runner structure)
Round 7 :
Work a second scaffold of smaller loops: *ch4, sc in center top of fan, ch4, sl st in next ch8 mid* rep around creating double-layered lace (24 ch4 loops)
Info :
Keep the cream tension slightly looser than the colored motifs so the lace sits softly around the motifs. For join-as-you-go: when you reach a point where a chain loop should meet a motif, sl st into that motif's prepared loop and continue crocheting from the adjoining motif to lock pieces together.
Round 8 :
Introduce small picot clusters to imitate the photo: *in each small ch4 loop work (sc, picot, sc), ch2 to next loop* rep around (24 picot clusters)
Round 9 :
Edge the joining mesh: *sl st to fan outer, ch7, sl st into next fan outer* rep around producing long connecting loops used to stabilize and create scallops (12 long loops)
Round 10 :
Work into each long loop: (sc, hdc, 5 dc, hdc, sc) creating a fuller lace arch; sl st between arches (12 arches)
Info :
As you work these arches across the full runner length, join them to corresponding outer scallops on adjacent Large Motifs using sl st at symmetrical points. The number of sl st joins per arch should be even to prevent twisting (typically 2-4 connection points per arch depending on spacing).
Round 11 :
Begin a row of decorative nodes between large arches: *ch4, (picot, ch3) x3, sc into base between arches* rep (approx 24 nodes)
Round 12 :
Secure nodes by working sl st through adjacent motif picots when available — this forms small crimson and green accent anchoring points later
Round 13 :
Repeat a mesh round to even out counts: 1 sc in each st around the existing lace scaffolds to tidy and unify stitch counts (st count variable)
Info :
The Lace Connector will be worked iteratively while attaching motifs. Work a portion of the Lace Connector between motifs and stop to attach to the Large Motif edges, then continue onward. Use blocking wires or pins to hold motifs at the correct spacing while joining.
Round 14 :
Work decorative loops that echo the motif scallops: *ch6, sl st into next arch top, ch6, sl st* rep creating a staggered row of loops for a lacy appearance (approx 24 loops)
Round 15 :
Into each ch6, work (sc, hdc, 3 dc, hdc, sc) to add texture to the join; when a loop contacts a motif outer scallop, sl st into motif to join (use JAYG method) — rep around
Info :
When joining two Large Motifs across a lace span, pin the motifs so that anchors align: generally motifs are spaced so that the cream fans of adjacent motifs meet and interlock with two ch-arch connections. Keep a consistent repeat for each motif pair.
Round 16 :
Deepen the lace lace by adding small bobble accents: *in selected spaces make (ch2, (dc3tog bobble), ch2) then sl st into next scaffolding* rep about 12 bobbles across the join
Round 17 :
Tidy with 1 sc in each st around the assembled join area; this locks the join and evens out stitch counts (variable)
Round 18 :
Create an inside runner spine: ch10, sc into the opposing lace center points across motifs to form small chain bridges; repeat between each motif pair to stabilize center (bridge count = motifs - 1)
Info :
These internal bridges are worked in cream and should be taut but not stretched; they stabilize the runner and keep motifs from sagging between joins. Adjust length of chains if spacing differs on your table.
Round 19 :
Add small cherry accents using Crimson: in selected lace picot spaces, join Crimson and make (sl st, ch3, sl st) small knots to emulate small red buds, fasten off and weave in tail — repeat around each motif join (approx 2-4 per motif)
Round 20 :
Refine outer edge: with cream work *sc in each st around outermost lace, working (ch3, picot, ch3) at points to form scalloped points* proceed across entire runner perimeter
Info :
At this stage your motifs should be connected in a long strip with lace mesh between them and small star/leaf accents secured. Carefully block the entire runner on a large mat so the lace scallops can be pinned into a clean edge before final edging rounds.
— Final Edging and Scalloped Points :
Round 1 :
With Cream, pick up at one runner end outermost stitch, ch1, evenly sc around the entire outer edge of the runner to create a tidy base (st count variable depending on runner size)
Round 2 :
*(ch5, skip 2 sc, sl st in next sc) repeat to create uniform picot arches along the scalloped edge* continue around
Round 3 :
Into each ch5 arch work (sc, hdc, 5 dc, hdc, sc) to make pronounced scallop points; at the very tip add a small picot (ch3, sl st) for delicate points — rep across whole edge
Round 4 :
Fasten off and weave in all long ends neatly along the back side of the runner; trim flush after securing.
Info :
Optional: For extra stability, you can add a final slip stitch round in contrasting pale yellow threaded very lightly to give a subtle highlight to scallops. Use sparingly; too much contrast will compete with the poinsettia focal points.
— Finishing Touches and Blocking :
Info :
Block the entire runner: pin it to measured dimensions on a blocking mat following the photo proportions (approx width of large motif across diagonals). Steam block gently or wet block according to yarn fiber instructions to open lace and flatten motif join seams. Allow to dry completely before removing pins.
Info :
Sew any remaining small star or leaf units into place with sew-as-you-go small stitches. Use matching yarn for invisible joins and secure beads with a couple of passes of thread through the motif center from back to front and back, tying securely and hiding ends inside the motif. For extra security, a dot of fabric glue on knots can be applied and hidden behind the bead cluster.
Info :
Final trimming: tidy stray fibers and look for areas where tension created small uneven loops — adjust by tiny tucks with a yarn needle to keep the outer scallops balanced.
Info :
Optional size adjustment: to lengthen make additional Large Poinsettia motifs and join them using the Lace Connector repeats. To shorten simply omit motif pairs and finish with a symmetrical scalloped end.
This crimson poinsettia table runner blends traditional holiday motifs with airy cream lace for a timeless centerpiece. Each layered flower, carefully beaded and blocked, creates a rich textured focal point that’s both elegant and handcrafted. The join-as-you-go lace makes assembly satisfying and immediate, so you see the runner come together quickly. 🧶 Lay it proudly on your holiday table, or gift it to someone who treasures handmade seasonal decor. 🎁