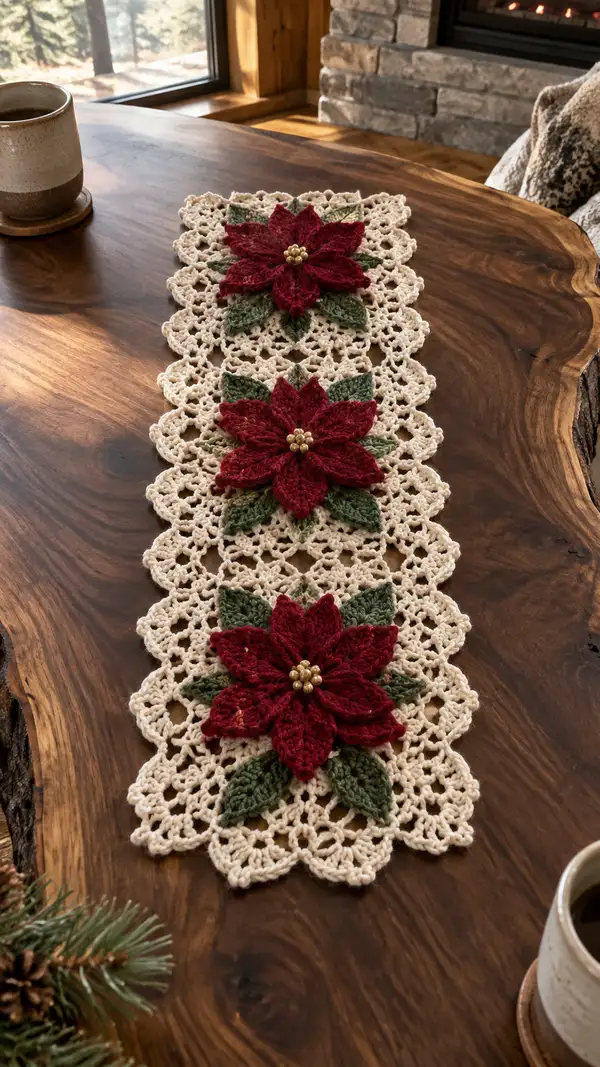
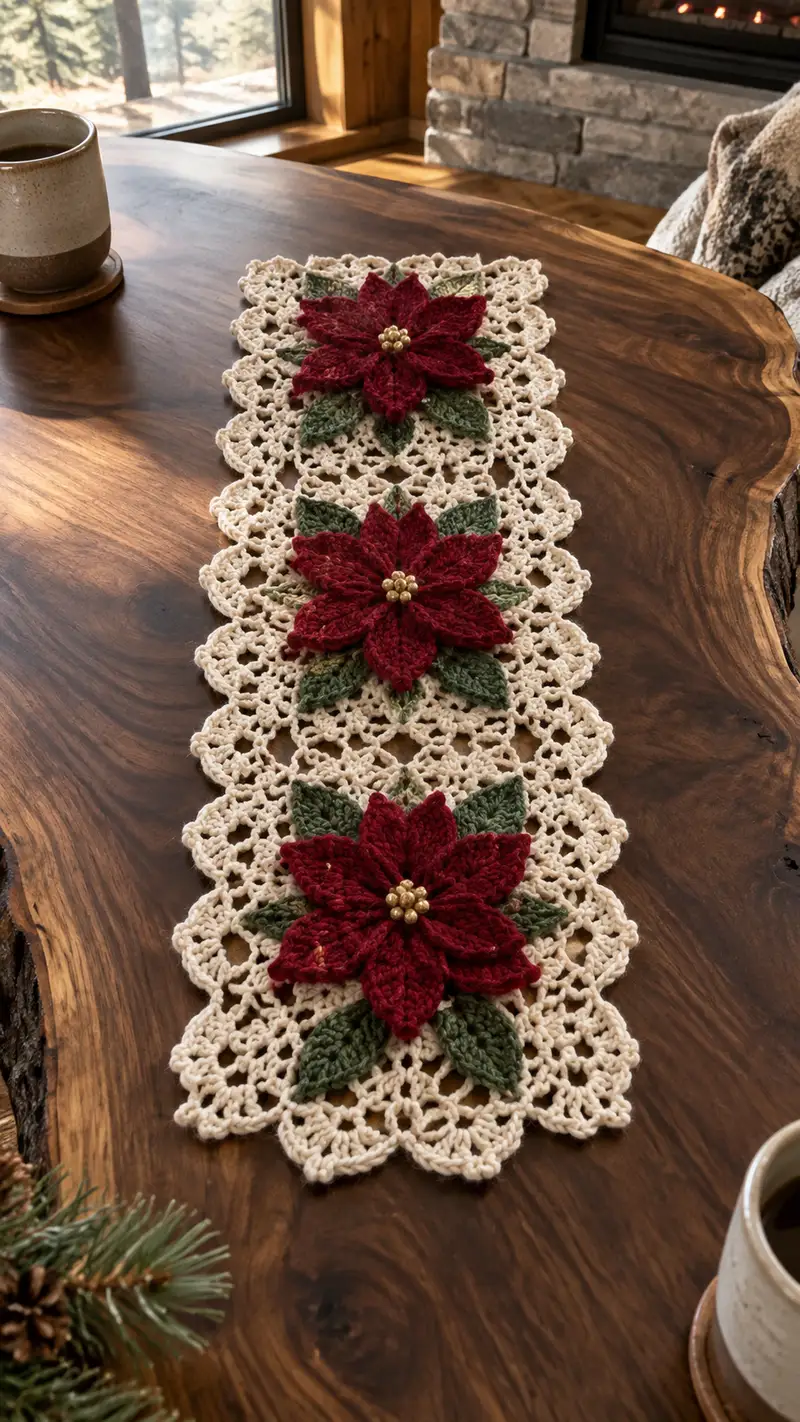
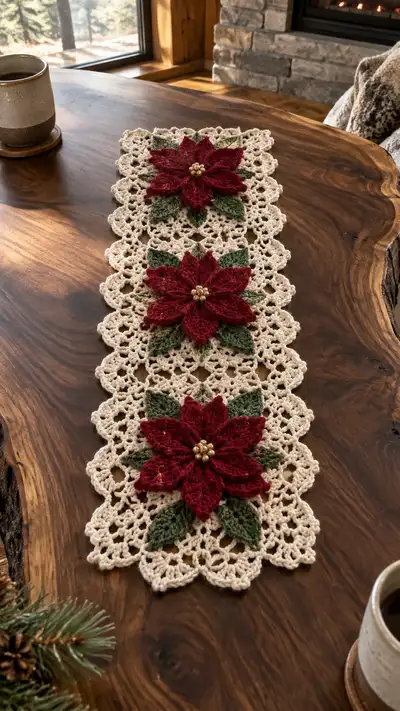
Create a stunning holiday table runner featuring three oversized deep-red poinsettias mounted on a delicate cream lace background. Each poinsettia has layered sculpted petals, textured green leaves, and a golden bead center that catches the light. The openwork lace modules are joined into an elegant rectangular runner and finished with a scalloped border for a vintage-inspired look. Perfect for holiday centerpieces, sideboards, or a special gift, this pattern gives step-by-step instructions to recreate the exact piece seen in the photo.
Progress Tracker
0% Complete
— Notes & Gauge :
Info :
Gauge is not critical for table runner length but affects finished size and lace openness. Using worsted cotton and a 4.0mm hook produces a finished runner approximately 12 inches wide and about 36-40 inches long for three modules joined as shown. Adjust hook or yarn weight to change size. Block modules for best results.
Info :
Pattern is written in US terms. Work petals and leaves flat as indicated, and work lace modules in joined-round motif fashion. Use stitch markers for motif repeats and corner points. All rounds are worked continuously unless otherwise noted; join rounds with sl st or as instructed.
— Poinsettia Petal — Large Petal (Make 8 petals per flower; 24 petals total for 3 flowers) :
Round 1 :
Make a foundation ch 14. Row-turn: 1 sc in 2nd ch from hook, 1 sc in each ch across until last ch (13 sc total). Do not turn; continue working along opposite side of foundation chain to form a petal base: 1 sc in each ch across (13 sc). Slip stitch to first sc to form a small oval (26 sts into oval base). Count: 26
Round 2 :
Ch 1, 1 sc in same st, *hdc in next, 2 dc in next, 3 tr in center tip chain area (worked in the chain tip as a peak), 2 dc in next, hdc in next, sc in next; rep along opposite side symmetric; sl st to first sc (this forms a tall pointed petal shape). Approx stitch count around petal perimeter: 26 + increases at peak (approx 34 textured counts when counting dc/tr as one stitch region).
Info :
Work slowly on Round 2 to keep symmetry on both sides. The central tall cluster (3 tr) creates the point. If you prefer a slightly larger petal, add an extra dc either side of the tr cluster for more flare.
Round 3 :
Ch 1, BLO: sc in first 2 sts, hdc in next 2, (dc, ch1, dc) in tip center (creates a small picot-like ridge), hdc in next 2, sc in next 2; continue mirror on opposite side; sl st to join. The petal now has a ruffled edge. Maintain symmetry for 8 identical petals. Stitch region counts remain visually approximate but should match across petals.
Round 4 :
Ch 2 (counts as hdc), 1 hdc in next st, 2 dc in each of the tip cluster chains and hdc in the sides to reinforce curve, 1 hdc in next, ch 1, sl st to base. Fasten off leaving a 6-8 inch tail for sewing to flower disk. Repeat to make 8 large petals per flower.
Info :
Make petals with a slightly smaller hook (3.5mm) if you want tighter sculpted edges. Leave tails long to weave together later; arrange petals in a circular star before sewing to ensure even spacing.
— Poinsettia Petal — Medium Petal (Make 8 petals per flower; 24 petals total) :
Round 1 :
Ch 10. 1 sc in 2nd ch from hook and in each ch across (9 sc). Work 1 sc across opposite side of foundation chain (9 sc). Form a small oval base with sl st to starting sc. Total perimeter counts ~18 sc.
Round 2 :
Ch 1, sc in first 2 sts, hdc in next 2, 2 dc in tip (worked in turning chain), hdc in next 2, sc in next 2; complete opposite side symmetrically; sl st to join. Fasten off leaving sewing tail. These medium petals are slightly narrower than large petals and sit under the large layer.
Info :
Medium petals sit underneath the large petals for a tiered look. Make sure the tip shape matches the large petals but remains proportionally smaller. Use the same yarn held single for consistent texture.
— Poinsettia Petal — Small Petal (Make 8 petals per flower; 24 petals total) :
Round 1 :
Ch 8, sc in 2nd ch from hook and each ch across (7 sc), work mirrored 7 sc on opposite side, sl st to join. Total approx 14 sc perimeter.
Round 2 :
Ch 1, sc in first two sts, hdc in next, 2 dc in tip, hdc in next, sc next two sts, mirror on opposite side, sl st to join. Fasten off leaving long tail. Small petals will form the innermost layer.
Info :
For a crisp inner petal, work small petals using a 3.5mm hook and slightly tighter tension to help them stand under the larger layers.
— Poinsettia Leaf (Make 6 leaves per flower; 18 leaves total) :
Round 1 :
Using olive/forest green, ch 12. Row-turn: sc in 2nd ch from hook and in next 9 ch (10 sc), continue along opposite side with 10 sc back to start; sl st to join (20 sc perimeter). This creates an elongated oval leaf base.
Round 2 :
Ch 1, *sc in first 3 sts, hdc in next 3, dc in next 2, hdc in next 2, sc in last 2; repeat opposite side for symmetry; sl st to join. The leaf now has a subtle midrib curve.
Round 3 :
Ch 1, FLO: sc across to shape a defined ridge on the surface to mimic vein texture (1 sc in each st FLO). Sl st to join. Fasten off leaving a 6-8 inch tail for sewing beneath the flower.
Info :
Optionally embroider a central vein using a small length of sage yarn folded and stitched onto the leaf with running stitches. The FLO ridge catches light and gives a natural vein look without extra thread if preferred.
— Flower Center (Make 3 centers) :
Round 1 :
Thread 9-12 small gold beads onto the tail of a short yarn length or onto a fine sewing thread. Place beads in a tight cluster by sewing them together into a bead ball using the thread. Alternatively, thread beads onto a small length of yarn and whipstitch through them to form a tight circular cluster approximately 1/2 inch diameter.
Info :
If using a beading needle, sew the bead cluster onto a felt circle the size of the cluster first, then attach felt to the center of the layered petals for extra stability. Make sure bead heads are secure; tie and weave knot securely on the back.
— Flower Assembly (Assemble One Flower: 8 large + 8 medium + 8 small + 6 leaves + center) :
Round 1 :
Arrange 8 large petals evenly around a circle (visualize 360 degrees/8 = 45 degrees apart). Pin them in position overlapping their bases by about one third so the surface forms a star. Use the long tails to whipstitch petals together along the base in a circle to form the outer layer.
Round 2 :
Pin the 8 medium petals so that each medium petal sits between two large petals and slightly under them, with tips visible between large petal tips. Sew the medium layer to the large layer using the tails; secure with multiple small stitches to a small felt disc or directly to the base stitches to stabilize.
Round 3 :
Pin the 8 small petals to the center, offset from the medium tips to fill the flower center. Sew small petals securely into place. Add the 6 leaves: position three leaves slightly rotated under one side of the flower and three under the opposite side to create a natural spread; sew leaves at their base to the flower underside, allowing leaf tips to peek out between petals.
Round 4 :
Attach gold bead cluster at center by sewing through the inner petal layers to the underside of the flower with strong thread; secure tightly. Weave in any visible tails through the underside of the flower and trim. Repeat to make three complete poinsettias.
Info :
Pin the fully assembled flower onto a flat surface to inspect symmetry. If using felt backing, trim felt to small circle and hide stitches beneath it for a neat finish. If you prefer a more flattened look, press lightly with steam from a distance; do not overpress to avoid crushing the petal texture.
— Lace Module (Make 3 modules to form runner; each module fits one flower) :
Round 1 :
With cream yarn and 4.0mm hook, work 6 sc into magic ring (6)
Round 2 :
6 inc (12) — Work (1 sc, inc) x 6 around to form small circle (12)
Round 3 :
(1 sc, 1 inc) x 6 (18) — Continue to expand motif
Round 4 :
(2 sc, 1 inc) x 6 (24)
Round 5 :
(3 sc, 1 inc) x 6 (30)
Info :
These early rounds form a tight center that will support an open lace pattern. Keep tension even and place a marker at the start of each round to track increases.
Round 6 :
Round 6: 1 sc in each st around (30)
Round 7 :
Ch 5, skip next 2 sts, sl st in next, *ch 5, skip 2 sts, sl st in next; rep around to create chain loops; yield 10 chain loops around motif. Join with sl st to starting point.
Round 8 :
Into each ch-5 loop: (sc, hdc, 3 dc, hdc, sc) — creates petal-like loop; join to make 10 petals around (counts per loop variable but symmetrical)
Round 9 :
In each space between petals ch 3, sl st into next space to openwork bridge; rotate motif to maintain flatness. This creates a lacy star background under the poinsettia.
Round 10 :
Ch 4, 3 dc cluster into next ch space, ch 4, sl st into next, repeat around to make larger scalloped points on the edge. This row moves motif toward a rectangular/elongated shape when later joined.
Info :
At this stage, block or pin the module to a flat surface to check that it lies flat. Adjust tension or add a small strategic sl st to remove any curl. Modules should be identical in size before joining.
Round 11 :
Work (ch 5, sc into the base of the next large cluster) across to create an airy net, intentionally leaving larger chain spaces for a lacy background. Count: aim for 16-20 chain-spaces depending on previous cluster counts; maintain even spacing.
Round 12 :
Into each chain space: (sl st, ch 3, 2 dc, ch 3, sl st) — creates open diamond motifs around center. Join carefully so module remains flat.
Round 13 :
Work a decorative joining round: ch 1, sc in each sc and sl st in each chain space to tidy edges. This locks the net into a consistent perimeter. Count will equal number of perimeter stitches — keep even for joining later.
Round 14 :
Edge preparation round: ch 2, *dc in next 3 sts, ch 2, sk 1; rep around to form scallop points for final border. Slip stitch to join.
Info :
These motifs are intentionally worked with open spaces to echo vintage lace. If you desire a denser background under the flower, reduce chain lengths in Rounds 7 and 11 by two chains each.
— Joining Modules (Join 3 modules end-to-end to form runner) :
Round 1 :
Place two completed modules right sides together aligning long edges or flat sides intended for joining (modules are rectangularized by selective cluster placement). Using cream yarn and tapestry needle or whipstitch, join loops by sewing through corresponding edge stitches every 3-4 stitches to create flexible seam. Repeat to attach third module.
Round 2 :
Alternatively, join modules by crochet: Hold modules together, pick up working yarn at one corner, sl st through both layers at corresponding stitch, ch 3, *sc through both layers in each stitch across the seam, ch 1 between scs for a lacy seam; repeat across entire edge. This gives a decorative ladder-join appearance.
Info :
Before permanently joining, pin modules on a blocking board in the final layout and place assembled flowers on top to ensure consistent spacing. The picture shows three modules joined with flowers centered approximately 1.5 inches from each module center line.
— Scalloped Edge & Final Border (Worked after modules joined) :
Round 1 :
With cream yarn, attach at one corner of the runner seam. Round begins: ch 1, 1 sc in seam edge evenly spaced along entire runner edge (work 1 sc per 2 pattern stitches or adjust to maintain tension). Count varies with runner length; maintain even distribution.
Round 2 :
To form scallops: *sk next sc, (5 dc, ch 3, 5 dc) into next sc (creates large shell), sk next sc, sl st into next sc; rep across each side and ends to create repeating scallops. Make sure scallops at joins are centered and consistent.
Info :
If scallops seem too large for your taste, reduce to (3 dc, ch 3, 3 dc) per shell. Keep symmetry at corners by placing an extra sl st or sc to center the scallop at the corner point.
Round 3 :
Embellish scallops: Into the ch-3 picot of each shell, work (sl st, ch 2, picot) or small picot cluster (3 sl st) to give an openwork lace finish. This creates the delicate scalloped edge seen in the photo.
Info :
Block entire runner after border is complete. Use steam or wet blocking to shape scallops and flatten motifs. Pin each scallop to a uniform size so runner edges are even. Let dry completely before removing pins.
— Attaching Flowers to Modules :
Round 1 :
Position each assembled poinsettia in the center of its corresponding module. Use sewing pins to secure in place and check centering: aim to place the flower center approximately over the motif center of the module and leave at least one scallop visible on all sides around the flower.
Round 2 :
Sew each flower by taking the long tails left from petals and leaves; use small, neat whipstitches or ladder stitch around the base circle of the flower through both the petal base and lace module center stitches. Sew in several passes for a secure hold; knots should be tied on the underside and woven into the lace for invisibility.
Round 3 :
Sew the bead cluster at flower center after petals are secured. If you used felt backing, sew through felt and the lace module a few times to anchor the flower. Remove pins and check for evenness. Repeat for all three flowers.
Info :
Because petals are three-dimensional, stitch through petal bases and not through petal faces to preserve texture. Place extra stitches where petals overlap to prevent lifting when the runner is used as a centerpiece under light table objects.
— Optional Reinforcement & Starching :
Round 1 :
If you expect heavy use or to display under heavier decor, add tiny discs of stiff felt or interfacing under each flower before final sewing to distribute weight and prevent sagging in the lace. Sew felt disc in place first, then sew flower atop felt.
Round 2 :
For a slightly stiffer display, lightly starch the completed runner and re-pin to blocking board until dry. This will keep scallops crisp and petals slightly raised. Avoid excessive starch on petals which can reduce three-dimensional softness.
Info :
Always test starch on a yarn scrap before applying to the finished project. Cotton responds well to light starching; synthetic blends may resist stiffening and could show residue.
— Final Finishing Touches :
Round 1 :
Weave in all loose ends from petals, leaves and modules from the underside of the runner. Use a yarn needle to hide tails through several stitches and trim close. Check bead centers for security and add extra knots if any bead movement detected.
Round 2 :
Give the runner a final inspection: ensure all petals are seated evenly and leaves arranged naturally. If desired, needle-block petals individually on a soft surface to refine shape, then re-attach if needed. The finished runner is ready for display once dry.
Info :
Store runner flat or rolled gently to avoid crushing petals. If you wash the runner, hand wash in cool water and re-block to preserve delicate lace and petal structure.
This gorgeous poinsettia table runner brings festive warmth and handcrafted charm to your home — every petal and scallop made with care! It makes a beautiful centerpiece for holiday gatherings or a heartfelt gift for someone special. Enjoy the slow, meditative process of creating layered petals, lacy motifs, and the satisfying click of beads into place. 🧶✨ Your finished runner will be a seasonal keepsake you can display with pride. Happy stitching and joyful decorating! 🎄