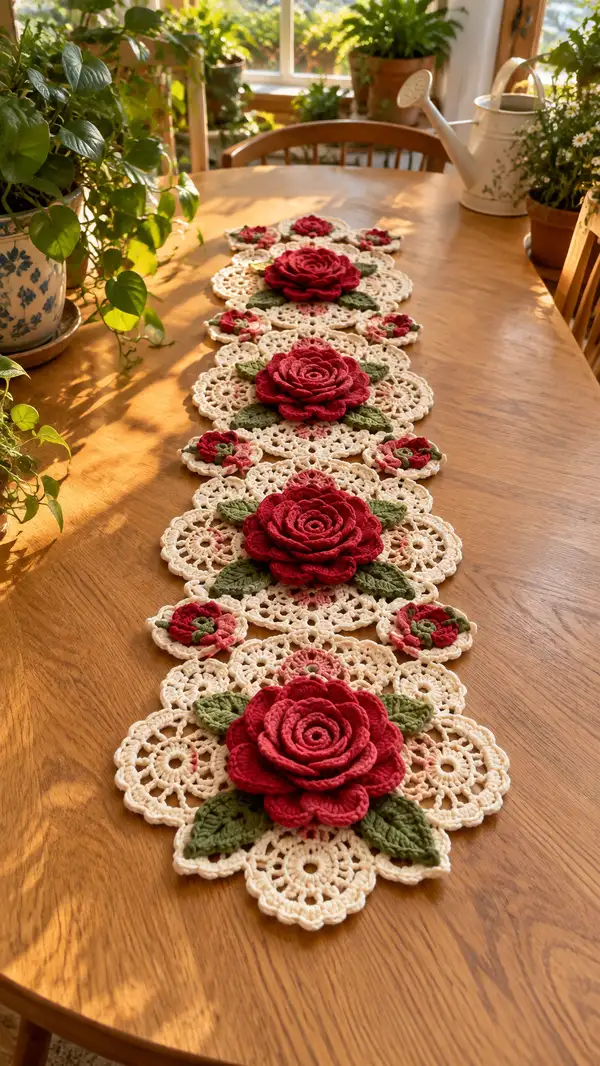
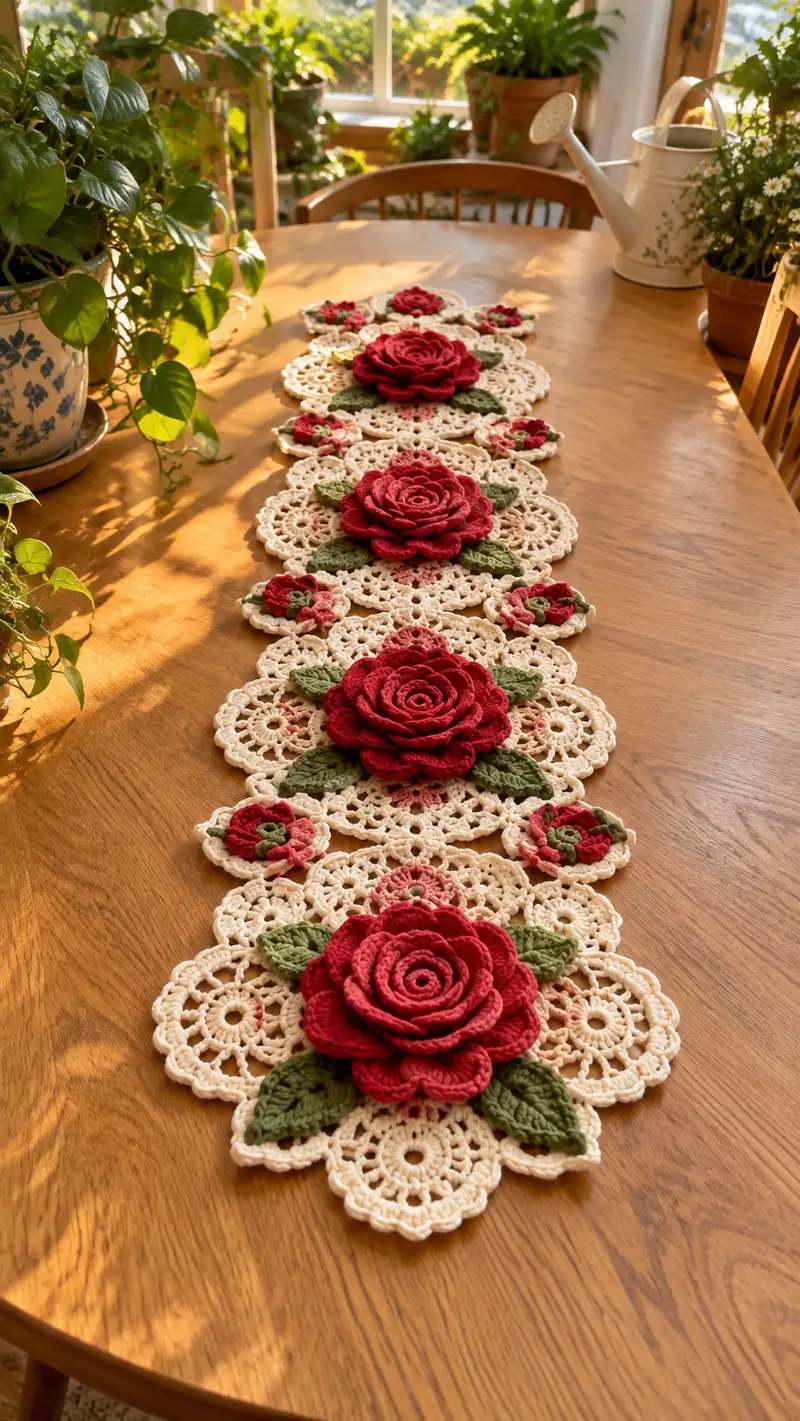
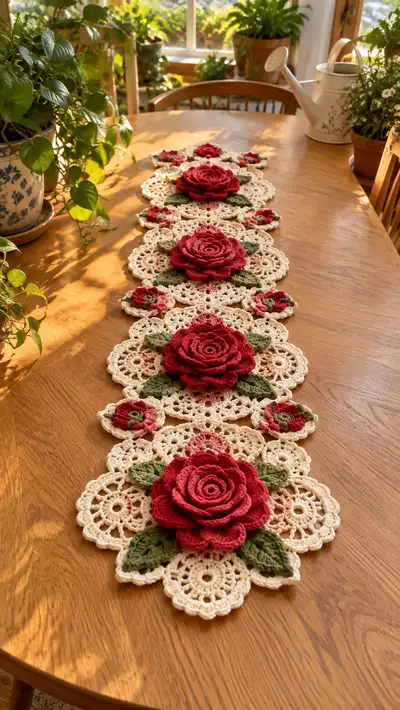
An elegant lace table runner featuring large three-dimensional deep-red roses, leafy accents in olive green, and delicate cream doilies joined to form a long runner. The design combines textured layered roses with vintage-inspired lace motifs for a classic, romantic centerpiece. Perfect for dining tables, sideboards, or as a statement decorative runner.
Progress Tracker
0% Complete
— Large Doily Motif :
Round 1 :
12 sc in magic ring (12)
Round 2 :
Inc in each st around (24)
Round 3 :
(1 sc, inc) x 12 (36)
Round 4 :
(2 sc, inc) x 12 (48)
Round 5 :
(3 sc, inc) x 12 (60)
Info :
Use cream yarn. Keep stitches even and check that the flat circle remains flat; if cupping occurs, add another even round without increases
Round 6 :
1 sc in each st (60)
Round 7 :
*Ch 4, sk 2 sts, sc in next st* rep around to form small picot loops (30 ch-4 loops). Sl st to first sc to join (30 loops)
Round 8 :
Work into each ch-4 loop: (sc, ch 3, 3 dc, ch 3, sc) into each loop to create petal-shaped clusters (30 clusters)
Info :
Stretch each cluster gently flat with your fingers before continuing; this creates a uniform lace petal edge
Round 9 :
1 sc between each cluster around (60)
Round 10 :
(2 sc, ch 2, 2 sc) in each sc (60 small shell markers; this forms anchors for next lace round)
Round 11 :
*Ch 5, sl st into center of small shell from previous round, ch 5, sl st into next anchor sc* repeat to form arched loops (60 ch-5 arches)
Info :
Keep loops consistent in tension; use stitch markers on every 10th loop if you find counting difficult
Round 12 :
Into each ch-5 arch work: sc, (ch 2, 3 dc, ch 2, sc) to create larger lace petals (60 petals)
Round 13 :
1 sc in each dc and sc around to tidy and even out edge (approx 240 sts, depends on dc counts)
Round 14 :
*Ch 3, skip 2, sc in next 2 sts, ch 3, sc in next 2 sts, skip 2* - create decorative scallops around (repeat 30 times)
Info :
This round adds a lacy scalloped border; maintain consistent stitch placement so the motif remains circular and balanced
Round 15 :
Work (sc, ch 3, picot, ch 3, sc) into the center of each scallop for a picot-enhanced rim (30 picot scallops)
Round 16 :
Between each scallop anchor, work 2 sc to tighten edge and finalize doily shape (approx 60-70 sc evenly distributed)
Round 17 :
Optional: 1 sc BLO around to create a gentle ridge that will help the rose sit snugly (same stitch count as previous round)
Round 18 :
Fasten off and weave in ends. Block flat, pinning out each scallop and petal to a round, even shape
Info :
Block and allow to dry thoroughly; blocking ensures consistent motif diameter and neat joins when assembling the runner
— Large Rose (Layered, 3D) :
Round 1 :
With deep red yarn, ch 6, join to form a ring, or 10 sc in mr (10)
Round 2 :
Inc in each st around (20)
Round 3 :
(1 sc, inc) x 10 (30)
Round 4 :
(2 sc, inc) x 10 (40)
Info :
These rounds create a firm center. Work tightly to give the rose a compact core before making expanding petal layers
Round 5 :
1 sc in each st (40)
Round 6 :
Ch 3 (counts as dc), *sk 1, dc in next 2 sts, ch 1* around to create small loops for first petal anchor (approx 26-28 dc/loops depending on spacing)
Round 7 :
In each loop: (sc, hdc, 3 dc, hdc, sc) - form first petal row. Work into each ch-1 or ch-loop evenly (approx 26-28 petals)
Info :
Shape each petal upward and out as you go; you can place a small amount of fiberfill behind petals later to help them hold form
Round 8 :
1 sc in each st across petal bases to tidy the row (same number of sts as petal anchors, approx 26-28)
Round 9 :
Ch 4, *sk petal base, sl st into next base* repeat to create raised loops for the next layered petals (approx 26 loops)
Round 10 :
Into each ch-4 loop: (sc, hdc, 5 dc, hdc, sc) for larger outer petals (26 larger petals)
Round 11 :
1 sc around to bring petals together and finish layer (approx 130 sc, one in each dc and sc around)
Round 12 :
Ch 5 loops around next round as anchor: *sc into next st, ch 5* repeat (26 ch-5 loops)
Round 13 :
Into each ch-5 loop make a large petal: (sc, hdc, 7 dc, hdc, sc) — this gives a full outer petal with a ruffled outer edge (26 full outer petals)
Info :
At this stage the rose has three visible petal layers. Stiffen or lightly block petals if you want very defined curves. You can also steam lightly with an iron at safe distance to shape.
Round 14 :
Fold each large petal slightly and work 3 sc along base to anchor folds and create depth (approx 78 sc)
Round 15 :
Create a rim: 1 sc around into the back loops only of the petal bases to tighten the bloom (same count as previous round)
Round 16 :
Optional: work short edging of tiny picots around outer petals for detail: *sc, ch 3, sl st in base* repeat across petals (approx equal repeats to petal count)
Round 17 :
For added sculpting, insert a small spiral strip: ch 40, turn, along chain work (sc, hdc, 3 dc, hdc, sc) across then roll up and sew into center of the bloom to add additional internal layers (one strip)
Info :
The spiral strip is optional but gives a luxuriant layered center. When sewing the spiral into the middle, use small, hidden stitches and adjust tightness to control how full the rose appears
Round 18 :
Arrange petals, steam-block if desired, and sew rose base to the center of the previously made large doily (center of doily should align with the center of rose)
Round 19 :
Fasten off and weave in ends. If additional fullness is desired, add a second spiral strip and sew into place before securing base
Round 20 :
Secure all layers by sewing through petal bases at 6 evenly spaced points; do not over-tighten or petals will flatten (6 anchor stitches recommended)
Round 21 :
Optional decorative top: in smallest gap at rose center, embroider a spiral with short chain stitches in matching thread to mimic stamen (cosmetic only)
Round 22 :
Use long tail from rose base to sew rose onto doily by weaving through doily center and back through the rose base several times to secure (6-8 passes)
Info :
Position the rose so petals sit outwards naturally. Pin in place while sewing to maintain symmetry and prevent twisting
Round 23 :
For each large rose, make three leaves (see leaf pattern) and position around lower half of rose before final securing; sew leaves through their centers into doily and rose base
Round 24 :
Trim and weave in all ends. Steam shape petals if required once rose is attached to ensure it holds desired curvature
Round 25 :
Repeat blocking lightly as last step to flatten doily around the secured rose and maintain a neat edge
Round 26 :
Final check: ensure center of rose is snug and there are no visible gaps between rose base and doily; add extra whip stitches where needed
Round 27 :
Fasten off and finish by hiding remaining tails under petal layers using yarn needle (no additional stitches)
Info :
Each large rose uses a good length of yarn and takes time; work slowly to preserve even petals. If you prefer smaller roses, reduce petal loops proportionally
— Small Rose (Bud) :
Round 1 :
With deep red or blush yarn, 8 sc in mr (8)
Round 2 :
Inc in each st around (16)
Round 3 :
(1 sc, inc) x 8 (24)
Round 4 :
Ch 3, work (sc, hdc, 3 dc, hdc, sc) into each ch-3 loop around to form 8 small petals (8 petals)
Round 5 :
1 sc around petal bases to tidy (24 sc)
Round 6 :
Optional: make a mini spiral strip ch 18, work (sc, hdc, 3 dc, hdc, sc) along chain, roll and sew into bud center for extra fullness
Round 7 :
Sew bud onto small connecting motif or into a scallop of doily. Fasten off and weave in ends
Info :
Small roses are used as accents between large motifs. Make multiple small roses to alternate along the runner as seen in the photo
— Leaf (Make as many as required; typical placement: 3 per large rose) :
Round 1 :
With olive green, ch 6, sc in 2nd ch from hook, hdc, 2 dc, hdc, sc (leaf tip formed) — total about 6 stitches along chain
Round 2 :
Turn and work along other side of chain: sc, hdc, 2 dc, hdc, sl st into first sc to finish leaf base (approx 12 sts total)
Round 3 :
Work along leaf edge: sc in each st, increasing near center for a gentle curve; add 2 sc into center base to create a slight ridge (approx 14-16 sc)
Round 4 :
FLO: 1 sc in each st FLO to create a visible vein ridge around the leaf (same stitch count)
Round 5 :
Emphasize vein: Using surface slip stitch, draw a center vein from base to tip across the leaf. Alternatively, embroider with matching yarn
Round 6 :
Optional increase: make a larger leaf by ch 10 and repeat the above, adding 2 additional rows of dc across each side to enlarge (custom size)
Round 7 :
Fasten off leaving a long tail for sewing. Block leaf flat with slight curve toward tip to mimic natural leaf shape
Info :
Make leaves in two sizes (standard and small) to place under petals and along runner. Sew leaves with tip slightly under rose base so petals overlap leaf tops
— Small Connecting Doily (Between Large Motifs) :
Round 2 :
Inc in each st (12)
Round 3 :
(1 sc, inc) x 6 (18)
Round 4 :
1 sc in each st (18)
Round 5 :
*Ch 4, sl st into next st* repeat to create eight arches for lace join points (8 ch-4 arches)
Round 6 :
Into each arch: (sc, ch 2, 3 dc, ch 2, sc) to make small petals (8 small petals)
Round 7 :
1 sc around to tidy and block; fasten off leaving tails for joining
Info :
These small motifs act as connectors between the large doilies and create the scalloped chain down the runner center
— Joining Motif & Runner Assembly (Repeat Sequence) :
Info :
Sequence used in the photographed runner: LargeDoily + LargeRose + 2x SmallDoilies + LargeDoily + LargeRose. Repeat this sequence to your desired length. Block all motifs before joining.
Round 1 :
Layout all motifs flat on blocking mat in intended order. Use pins to hold placement and check alignment of scallops and connecting loops
Round 2 :
Begin joining using whip stitch or single crochet join in matching cream where doily shells meet. For a firm join, use sc through both layers' back loops only
Round 3 :
Join small connecting motifs between large doilies with sc through the outermost ch-4 loops of the larger motifs and corresponding loops on small doily (approx 8 connection points)
Round 4 :
Attach large roses after primary motif joins are secure; position each rose so its base covers the center join and sew through both doily and rose base with long, hidden stitches
Round 5 :
Position leaves around each rose (3 standard leaves and 2 small leaves) and sew through centers into doily base. Tuck leaf bases under petal layers slightly for a natural look
Info :
Always pin before sewing. If using sc join technique, practice on two spare motifs to achieve an even, invisible seam
Round 6 :
Optional reinforcement: with cream yarn, work a round of slip stitches across the seams on the underside of runner to lock joins. This keeps the topwork neat
Round 7 :
After joining all motifs, trim and weave in all tails on the underside. Block runner flat again to correct any slight distortions after sewing
Round 8 :
Press very lightly (steam) to set shape; avoid direct iron on cotton yarn if fibers can shine or flatten
Info :
Repeat joining process slowly and check symmetry after every third join to maintain a straight runner line
— Edging & Final Finishing :
Round 1 :
With cream yarn, work a tidy sc border around entire runner edge where motifs meet: 1 sc in each outermost stitch across all motifs (stitch count varies with runner length)
Round 2 :
*Sc in next 3 sts, ch 3, picot, ch 3, sc in next 3 sts* repeat around to create a soft scalloped finish (repeat number depends on length)
Round 3 :
Work a final decorative shell in corners/ends if needed: (2 dc, ch 2, 2 dc) in large scallops to mimic doily edge
Round 4 :
Fasten off, weave in ends carefully on underside, and give the entire runner a final light blocking to set the lace and rose placement
Info :
If desired, add small non-slip pads under runner corners for table protection and to prevent sliding. Avoid adhesives near yarn fibers
Round 5 :
Final inspection: ensure roses are secure, leaves lie flat, and no stuffing or extra fibers are visible. Reblock any distorted areas
Round 6 :
Enjoy and display your runner. For seasonal variation, change rose color to pink, white, or pastel and contrast with a coordinating doily color
Info :
Adjust runner length by repeating the LargeDoily + SmallDoilies sequence; make sure to maintain the same join spacing to keep proportions consistent
This deep red rose lace runner combines delicate crochet lace with sculpted three-dimensional flowers to create a truly showstopping tabletop accent. Each motif is a little piece of handiwork that comes together into a graceful, romantic composition. Whether you make one for a dining table or as a special display piece, the combination of cream doilies, lush roses, and green leaves will add warmth and charm to your home. I hope stitching this beautiful runner brings you as much joy as placing it on your table! 🌹🧶