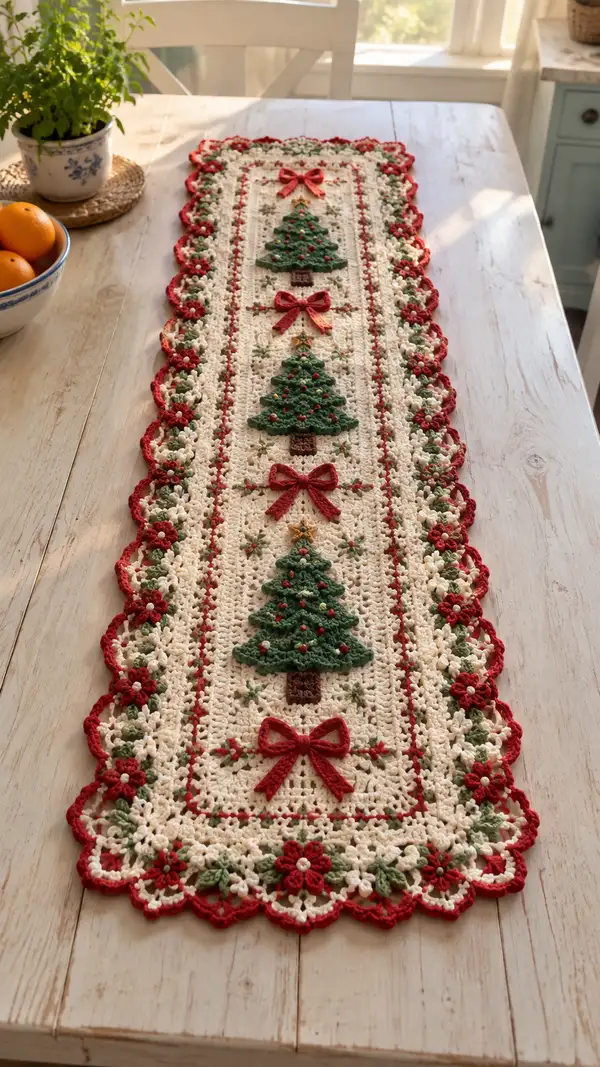
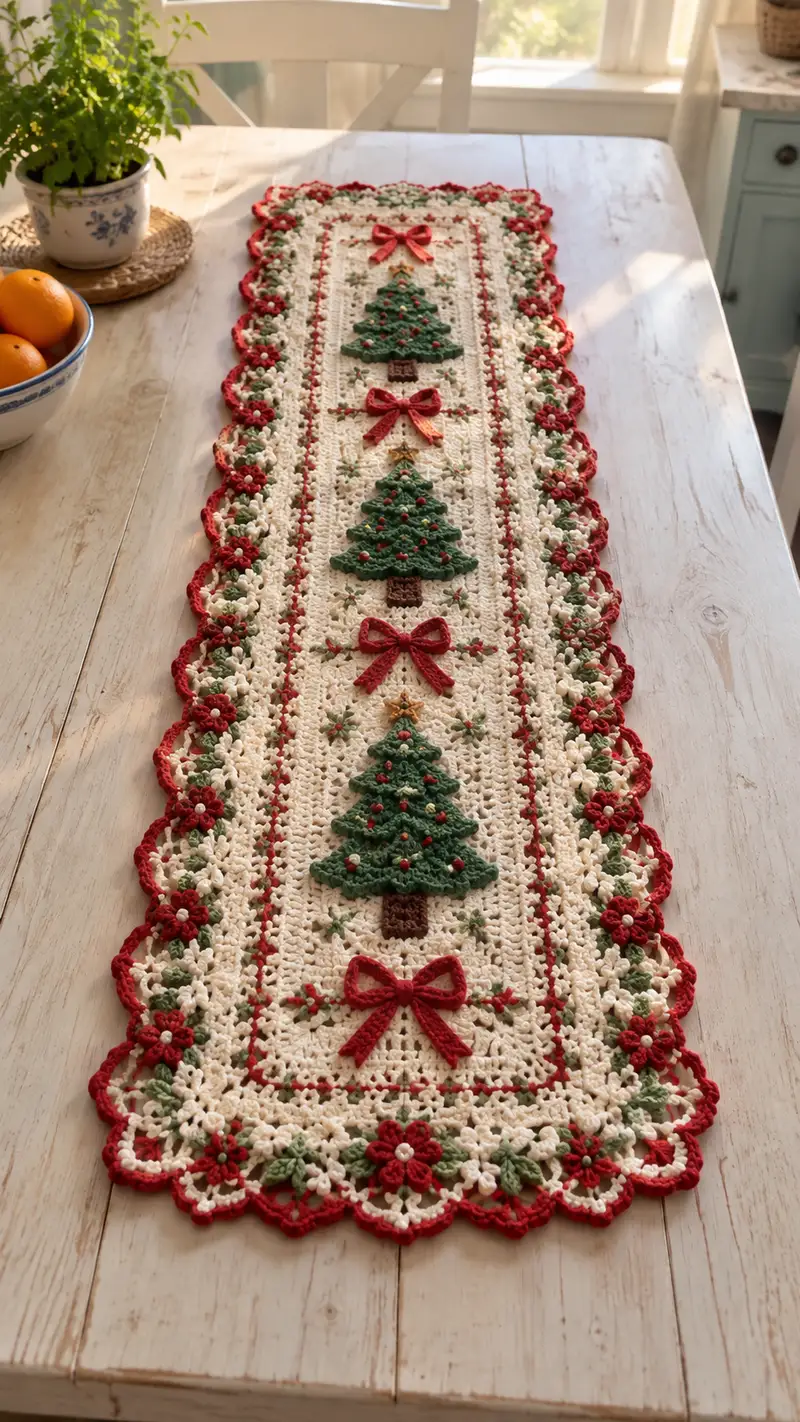
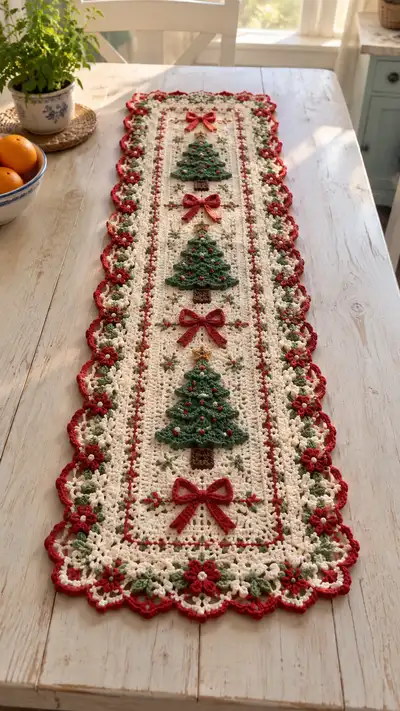
A long, elegant Christmas table runner featuring three dimensional crochet Christmas trees, delicate red bows, and a lacy floral scalloped border. This runner pairs warm cream background with classic holiday red and green accents and tiny gold star details. Perfect for a dining table or buffet to bring vintage holiday charm to your home. The pattern uses small motifs and applique assembly to create a richly textured, heirloom-style runner.
Progress Tracker
0% Complete
— Materials & Gauge :
Info :
Gauge is flexible for a table runner. Using worsted weight yarn and a 3.5mm hook, 10cm (4") square ~14 sts x 8 rows in sc is approximate. Adjust hook to match desired firmness. The sample runner measures approximately 36" long x 8" wide (92cm x 20cm) after blocking and applique placement.
— Center Panel (work flat in rounds/rows) :
Round 1 :
Ch 122. (This gives 121 foundation chain stitches across; the runner will be worked in joined rows; adjust length by adding multiples of 6 + 2 if you want a different size.) Turn, sc in 2nd ch from hook and in each ch across (121)
Round 2 :
Ch 1, turn. Sc in each st across (121)
Round 3 :
Ch 3 (counts as first dc), turn. *Sk 2 sts, 3 dc in next st (shell), sk 2 sts, sc in next st* Rep from * to * across, ending with 1 dc in last st to complete edge (keeps edge square). (Approximate shells = 17 shells, sc spacers = 17, exact distribution adjusted across 121.)
Round 4 :
Ch 1, turn. Sc in each st and in top of dc across to create a solid grounding row (121)
Round 5 :
Ch 3, turn. Work shell row across again working 3 dc in the center of shell below: *3 dc in center of previous shell, ch1, sc in top of the sc below* Rep across. End with dc in top of turning ch. (Keeps pattern of shell lattice across the width.) (121)
Round 6 :
Ch 1, turn. Sc in each st and into chain-1 sps across for one grounding row (121)
Info :
Repeat Rounds 3-6 a total of 6 times to build the central lattice panel height. This creates a balanced pattern of shells and grounding rows. The repeat will add roughly 24 rows of texture.
Round 7-18 :
Repeat Rounds 3-6 three more times (you should have repeated the shell/grounding sequence six times total by the end of R18). After Round 18 the center panel will be tall enough to accommodate three tree appliques spaced evenly. Stitch count remains 121 across.
Round 19 :
Ch 3, turn. Work a compact dc row across in the tops of stitches to create a stable band: dc in each st across (121)
Round 20 :
Ch 1, turn. Sc in each st across (121)
Info :
Mark three positions where the tree appliques will be sewn. Count from one short end and mark at ~7" (18cm), 18" (45cm), and 30" (76cm) along the length for even spacing. To translate to row numbers, measure visually or count the sets of shell repeats: center of each tree will be aligned with the center of one set of shell repeats. Pin markers on RS for later placement.
Round 21 :
Ch 3, turn. Work decorative star points inside row: *dc, ch2, sk1, dc* across using sts as anchor so that decorative chain points appear inside the grid. This forms a subtle dotted line to guide the eye between trees. (121)
Round 22 :
Ch 1, turn. Sc across for a clean band (121)
Round 23 :
Ch 3, turn. Work 1 row of V-stitches across: (dc, ch1, dc) in same st, sk1, repeat; end will provide slight openwork for lightness. Work evenly across to maintain 121 stitch width in terms of anchor points.
Info :
If you prefer a denser center, substitute dc rows for the open V-stitch rows. The important part is a firm band where appliques will be sewn: use at least two grounding rows before sewing heavy appliques.
Round 24-30 :
Work alternating grounding rows (sc across) and 1 shell row to create a firm rectangle: R24 sc, R25 shell, R26 sc, R27 shell, R28 sc, R29 shell, R30 sc. Keep stitch count consistent (121) and block the panel flat when complete.
Info :
Fasten off cream yarn leaving a 12-18" tail for joining to border later. We will work border in rounds around the entire panel after appliques are attached. Blocking now will make applique placement and border joining far easier.
— Tree Applique (Make 3 identical) :
Round 1 :
With spruce green, ch 6, sl st to first ch to create a small loop, ch 3 (counts as first dc), 4 dc into loop (5 dc total including turning ch) (5)
Round 2 :
Ch 3, turn. Work along the base to create a small triangular layer: 2 dc in first st, ch1, sk1, 2 dc in next st, ch1, 1 dc in last st. At the top center (sl st into top of previous dc cluster) to form a small peak. (7 clusters/anchor points; overall width now ~7-9 sts)
Round 3 :
Ch 3, turn. Increase pattern to create triangular silhouette: *dc, ch1, 2 dc in next st* across the row so that the triangle increases by one shell each side. End with dc into the top center. (Approx 11 dc across; count will vary as triangle grows)
Info :
Work these first three rounds loosely to create a flat foundation for layered ripple rows. Keep edges symmetrical; place stitch markers at edges of each triangular row to find center positions later.
Round 4 :
Ch 1, turn. Work a shell-lattice row to create texture: *sk 1, (3 dc) in next st, ch1, sk 1, sc in next anchor* repeat across the triangular shape to form little scalloped branches. After completing row, fasten off and weave in tail. (Width will be approximately 12-14 stitch anchors)
Round 5 :
Change to working in rows from bottom to top for layered branches. Reattach spruce green at bottom center of triangle, ch 4, turn. Build first branch ridge: 2 dc in same st, ch2, sl st back into center to lock ridge (works as a small raised cluster). Repeat on either side at each marked anchor point to create a raised branch row. (Use 7-9 little ridges across.)
Round 6 :
Fasten off and reattach to work a second layered row above the first. Ch 3, turn. Work a row of puff-dc shells to create fullness: in each anchor space, work (yarn over, insert, pull up loop) x 3, yarn over, pull through all loops, ch 1 between puffs. This produces 7-9 puffy branches. After completing row, secure and fasten off.
Round 7 :
Reattach and work a third fractal layer: place small 3-d clusters made of (dc, ch1, dc) worked into the top of the puff stitches to create a layered triangular look. Space clusters evenly to maintain triangle shape. Fasten off with a 6-8" tail for sewing.
Round 8 :
With a tapestry needle and contrasting darker green, surface embroider small tiny french knots (use small spare yarn or bead) or sew tiny red beads across the tree to mimic ornaments. Place beads symmetrically or randomly to taste (we used approximately 9-12 beads per tree).
Info :
Each applique tree is constructed in layers to look like a small 3-D fir. Work the layers loosely but keep the base edge neat so it will sit flat against the center panel. Leave a long sewing tail for attachment. Make 3 identical trees and one small trunk square in brown for each tree (see trunk pattern below).
Trunk (Make 3) Round 1 :
With brown yarn, ch 6, sc in 2nd ch and each ch across (5). Ch 1, turn.
Trunk Round 2-3 :
Sc across (5) for two additional rows to create a small rectangular trunk approximately 3 rows high. Fasten off leaving tail for sewing. (5 x 3 rectangle)
Info :
Alternatively, make trunk using 6 sc x 4 rows for a slightly taller trunk; count carefully so trunk width visually matches base of tree. Sew trunk to underside center of tree applique before attaching tree to the runner for ease.
— Decorative Bow (Make 3) :
Round 1 :
With deep red yarn, ch 12. Sc in 2nd ch from hook and across (11). Ch 1, turn. Sc across (11).
Round 2 :
Ch 1, turn. Sc in each st across (11). Fold the strip in half lengthwise and stitch the short ends together with slip stitches to form a small looped bow shape. Flatten and pinch center to form bow loops.
Round 3 :
Cut a 6" tail of red yarn. Wrap the tail around the pinched center of the bow several times to create a tightly bound center, secure with a small knot on the back, and weave tail into the back of the bow. Lightly stuff with a small bit of fiberfill if you want a rounded bow look. (No stuffing for flat ribbon look.)
Round 4 :
Make two matching tails for each bow if desired: ch 14, sc back across, fasten off. Sew tails to underside of bow and arrange them to lay naturally pointing downwards. Make 3 bows total.
Info :
Bows can be made with picot edges by adding a final round of sc and picot around the loop for a more decorative look. Secure wrapping yarn tightly and weave ends to the wrong side for neatness.
— Flower Motif for Border (Make ~28 depending on width) :
Round 1 :
With deep red, magic ring, ch 1, 10 sc in ring, pull ring closed, sl st to first sc (10)
Round 2 :
Ch 2 (counts as hdc), *ch 1, skip next sc, hdc in next sc* around creating 5 chain loops, sl st to top ch 2. (5 loops)
Round 3 :
In each loop work (sc, hdc, 3 dc, hdc, sc) to create a full petal; rep in each loop to make 5 petals. Fasten off with a long tail for sewing. Sew a small pearl bead into center for a classic look.
Info :
Make matching cream flowers as well by changing to cream yarn: these alternate along the border with red flowers. For each flower you will later add a small green leaf pair under it (leaf instructions follow).
— Small Leaf (Make ~56 pairs) :
Round 1 :
With spruce green, ch 6, sl st into 2nd ch from hook, hdc in next, dc in next, hdc in next, sl st into last ch to create a small pointed leaf. Fasten off leaving tail for sewing.
Info :
Sew two leaves per flower, slightly staggered so they peek out from under petals for a natural effect. Use a small whip stitch to anchor leaves to flower underside and then position onto runner edge during assembly.
— Border Foundation (Join to panel and work around) :
Info :
With cream yarn and the center panel blocked and trimmed of loose ends, lay the panel flat RS up. Begin working the border by picking up evenly around the panel edge with sc to create a firm base for decorative border. Place a stitch marker in the center of each short side to help count corners.
Round 1 :
Join cream yarn at one short end corner with sl st, ch 1, work sc evenly along short edge placing approx 2 sc per 1 cm to maintain even tension; across long edge approx 3 sc per inch depending on your gauge. For the sample, make 10 sc across the short end corner edge and 121 sc along each long edge, adjusting to match panel edges. At corners, work (sc, ch2, sc) to allow flexibility. End with sl st to join. (Stitch count will approximate original 121 anchor points around long edges.)
Round 2 :
Ch 3 (counts dc), *sk next sc, (3 dc, ch1, 3 dc) in next sc (large shell), sk next sc, dc in next sc* repeat across edge to start scalloped border. In corner spaces, work an expanded shell (3 dc, ch3, 3 dc) to round the corner smoothly. (This produces a deep scallop row around the panel.)
Round 3 :
Ch 1. Work sc in top of each dc and in chain spaces across to tidy shell row and create anchors for flower placement. Aim to make an anchor point at the center of each shell where a flower will be sewn. Adjust spacing so flower centers are evenly distributed along each long side; in the sample runner there are 9 flower positions per long side.
Info :
Before finishing this ring, place the pre-made flowers with pins in the shell centers and ensure even spacing. The flowers will be sewn onto these anchor points in assembly. Leave the border base slightly loose to allow tiny adjustments before final sewing.
— Border Flower Attachment & Contrast Row :
Round 4 :
With red, sc into each shell center anchor point (these were created in Round 3) and fasten off after attaching each red flower by sewing its center to the sc anchor. After sewing flowers across both long sides and short ends, join red yarn for a contrast picot row.
Round 5 :
With red yarn, join at any shell apex, ch 1, *sc in shell apex, picot (ch 3, sl st into base of the ch 3), sc in next shell apex* repeat across. This creates the small red picot ridge visible in the sample runner that frames the cream interior.
Info :
Sew small green leaves under each flower with a tiny whip stitch. Add a pearl bead to center of each red flower and a small green bead to cream flowers for highlights. Secure bead threads by running needle through the bead hole and tying a small knot on wrong side, then weaving tail into fabric.
— Inner Red Chain Motif (Decorative row inside center lattice) :
Round 6 :
With red, join yarn at one long side inside the border about 6 sts in from edge, ch 1, sc across a narrow row approximately 4 rows in from the edge to create a visual internal frame. Maintain even spacing and work a clean sc band. (Sc across to opposite edge and join)
Round 7 :
Ch 3, dc around for a subtle raised cord. If desired work in BLO to create a rope effect: ch 3, (dc in next 3 sts BLO) repeat across. Fasten off and weave ends. This red inner frame enhances the rectangular composition and echoes the outer red picots.
Info :
This red accent is optional but recommended; it mirrors the red scallop edge and ties the design visually together.
— Scalloped Outer Edge (Cream base with red scallop rim) :
Round 8 :
With cream, rejoin yarn at the outside of the shell band; ch 1, *sc in next sc of shell band, ch 3, sl st into base of shell apex* repeat to create a chain loop between shells around full perimeter. At corners, work ch 4 to keep curve smooth. Fasten off.
Round 9 :
With red yarn, join to any chain loop, *(sc, picot, sc, 5 dc) all into the chain loop to form scallop points* repeat around. End by sl st to starting sc and fasten off. This red scallop becomes the bold red edge seen in the sample runner.
Round 10 :
With cream, work a final finishing round of small shells into the back loops of the red scallop base to slightly soften the edge: in each scallop work (sc in FLO, ch2, sc) and fasten off, weaving ends neatly. Block again lightly to shape scallops evenly.
Info :
Use steam blocking or damp block depending on yarn content. Pin scallops very carefully to keep uniform spacing. Allow to dry completely before removing pins.
— Embroidery Details on Center Panel :
Round 11 :
With gold yarn, stitch small stars above each tree position using simple star embroidery: bring needle up at center, stitch 5 straight stitches radiating out equally, then cross-stitch small X in center for stability. Add tiny gold seed beads at star centers if desired.
Round 12 :
With green embroidery yarn, stitch small cross-stem vines between trees using straight stitches and small french knots for berry accents. Use red embroidery or beads for berry pop points. This will create the tiny star-and-vine detailing visible on the cream background.
Info :
Embroider before final sewing of appliques if you plan vines to pass under or around appliques. If adding embroidery after attaching trees and bows, use very small stitches to anchor through both applique and base without puckering.
— Assembly & Applique Sewing :
Round 13 :
Position each tree applique on the pre-marked positions on the center panel (approx 7", 18", and 30" from short ends). Pin in place through the trunk and some peripheral stitches so trees lie flat. Ensure they are centered across the width by counting shell repeat units to the left and right; they should be centered at the midline of the panel lengthwise.
Round 14 :
Using the long tail from each applique, sew the tree to the panel with small whip stitches around the base of each branch layer and trunk. Use invisible ladder stitches across the trunk area to anchor it flat and secure. Attach 9-12 tiny red beads by sewing through tree layer and base panel to mimic tree ornaments.
Round 15 :
Sew each red bow approximately 1" above each trunk center. Pin into place first, then anchor by stitching through the wrapped center on the back of the bow to the panel. If you prefer the bow to be looser, sew only through the center and add a few stitches to the underside of each loop for shape retention.
Info :
When sewing appliques, only stitch through the bottom-most layer of tree and panel to avoid creating bulky spots. Use small, tight stitches and weave tails through a few stitches on the wrong side to secure. Trim tails close to surface after weaving to maintain a flat underside.
— Final Finishing Touches :
Round 16 :
Sew flowers and leaves to the outer scallop shells. Place cream flowers as the larger filler flowers and red flowers at the scallop apexes. Add a pearl bead to each flower center and a green bead to cream center flowers to mimic the sample runner. Ensure beads lie flat and are secured with knots sewn into the wrong side and hidden under the scallop.
Round 17 :
Weave all loose ends into the wrong side of the runner using a tapestry needle, following the broken stitch pattern to hide tails. Check both sides for any stray loops or knots that might protrude and trim carefully.
Round 18 :
Lightly press or steam block the finished runner. If your yarn is acrylic, use a low-heat steam and pin to maintain scallop shape. For cotton, wet block and allow to dry completely pinned to the dimensions specified to maintain flatness and shape.
Info :
Allow drying for 12-24 hours depending on humidity; remove pins carefully and check edges for uniform scallops. Touch up any irregular scallops with small whip stitches to reshape if necessary.
This festive table runner brings a timeless handcrafted charm to holiday gatherings and everyday dinners alike. The layered trees, tiny bead ornaments and scalloped floral border add depth and vintage warmth that your table will love. Each section is modular so you can work at your pace and customize colors and trims. Enjoy the meditative rhythm of stitches as your runner becomes a treasured seasonal heirloom! 🎄🧶