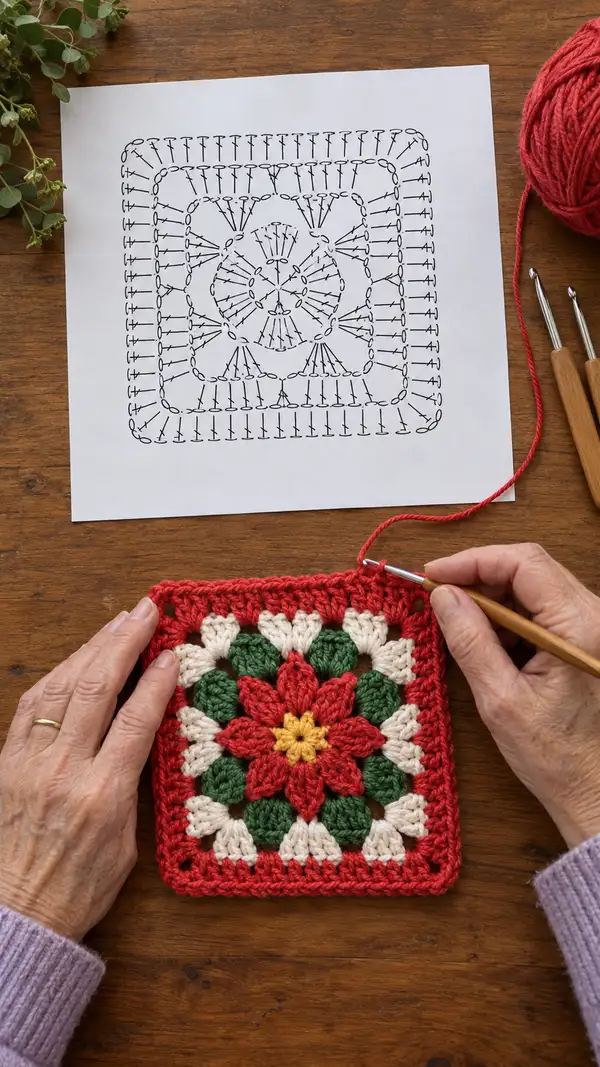
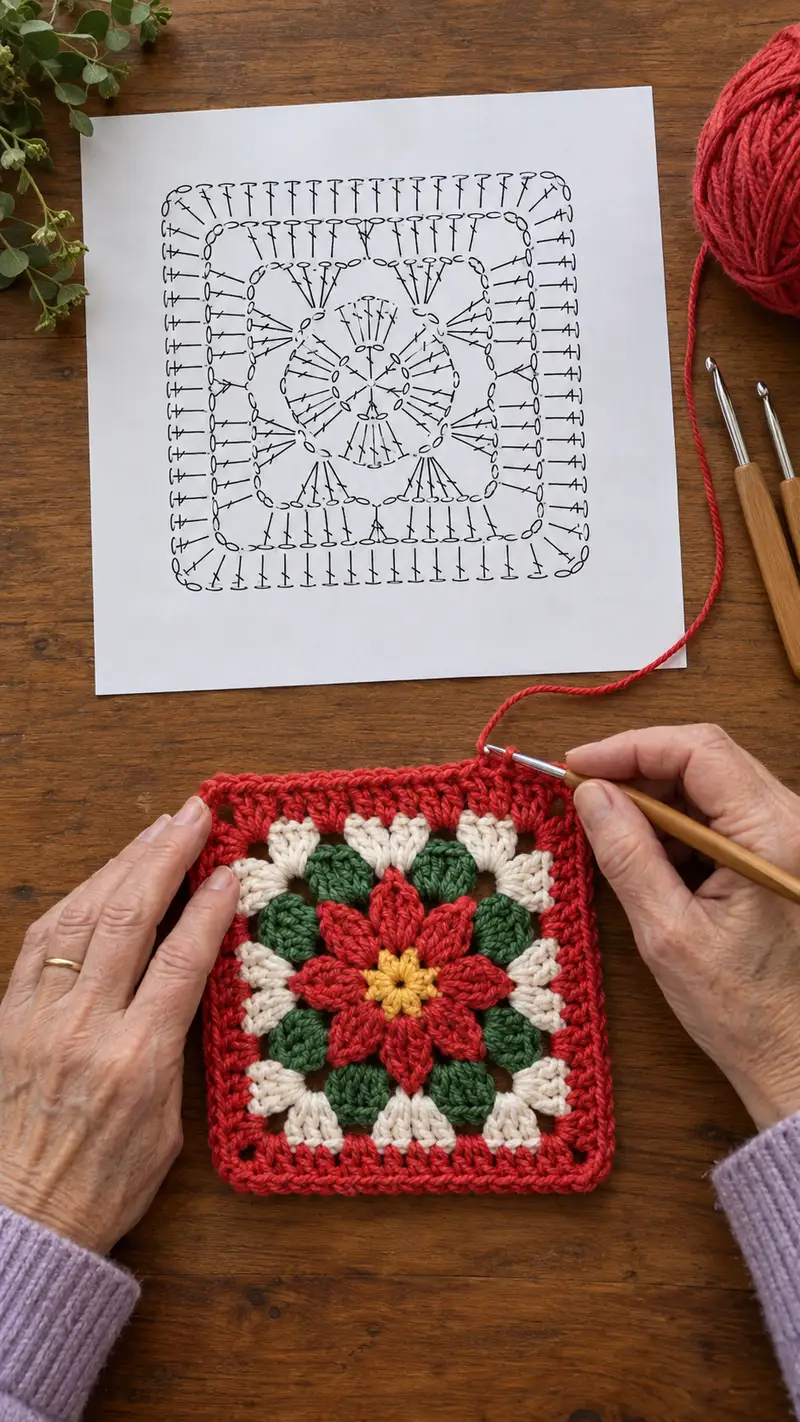
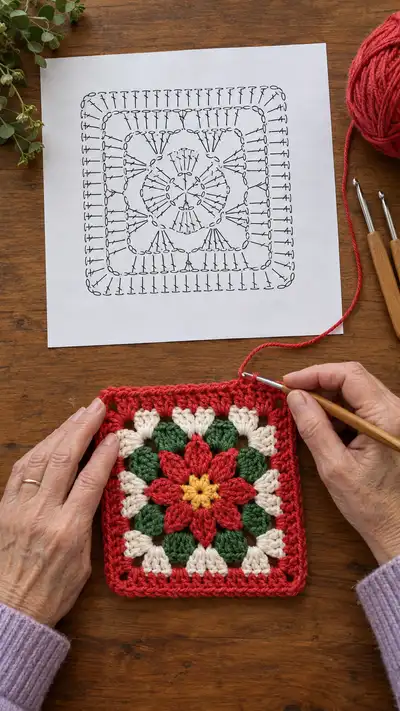
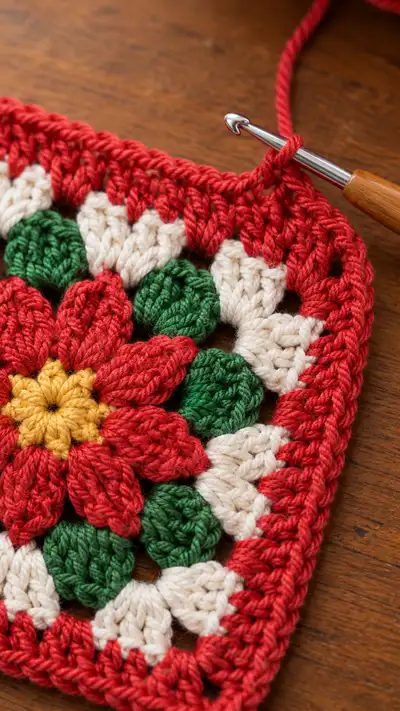
Create a festive poinsettia granny square that doubles as a seasonal coaster, ornament panel or blanket square. This textured square features a yellow center, layered red petals, rounded green bobbles and cream arches, finished with a deep red textured border. The design uses puff/petal stitches, bobbles and classic corner increases for a neat square shape.
Progress Tracker
0% Complete
— Materials & Gauge :
Info :
Gauge is approximately 10 cm (4 in) square after blocking when using worsted weight yarn and a 4.0mm hook for the full motif shown. Make a gauge swatch to adjust hook if needed. This square as photographed measures about 12 cm (4.75 in) unblocked, 13-14 cm blocked depending on yarn.
— General Notes :
Info :
This pattern is worked in rounds starting from the center and moves outward. The motif is divided into eight identical segments (eight petals). Where repeating instructions are given as 'x8' you will repeat the sequence eight times. Use stitch markers to mark the start of rounds and each corner when we begin square shaping. Puff and bobble stitches are worked into single stitch bases; instructions will specify how many loops to pull for puff and bobble stitches.
— Center (Yellow) :
Round 1 :
Make a magic ring, ch1, 8 sc in ring (8)
Round 3 :
(1 sc, inc) x8 (24)
Info :
Change to sunflower yellow yarn for the central tiny petals. Finish Round 3 and join yellow in the next indicated stitch by pulling up a loop with the yellow.
Round 4 :
Switch to yellow. *ch1, (pull up 5 loops in next st leaving last loop on hook each time to form a puff) yarn over and pull through all 6 loops, ch1, sl st into next st* x8 across the round (24 puff bases, counts remain 24)
Info :
These small center puffs form a tight rosette. Keep the loops pulled to a consistent height (approx twice your hook) and close each puff gently so the center is not lumpy.
Round 5 :
Sl st to the base of the first puff to join, ch1, 1 sc in each puff base around to tidy the center (24)
Info :
Fasten off yellow leaving a 20 cm (8 in) tail if you plan to embroider a tiny center eye later, otherwise weave in ends now on the wrong side.
— First Petal Layer (Red petals building from Round 6) :
Round 6 :
Join red in the top of any center sc. *ch3 (counts as first dc), 2 dc in same st, [puff petal: pull up 6 loops in next st (into front of center sc), yarn over and draw through all 7 loops to close the puff], ch2, sl st into next st (this sequence forms one petal unit)* x8 (petal units = 8, stitch count remains 24 joined in petal bases but the round uses petals rather than standard sc count)
Info :
Each petal is built across two or three base stitches; the numerical stitch count for the round is taken as the number of petal units (8) but the working circumference remains built from existing 24 base stitches. Place a removable marker at the first petal to track round starts.
Round 7 :
ch1, 1 sc in the space between each petal and 3 sc around the base of each puff/petal cluster to secure petals (repeat across so that you have 48 sc total around when counted as regular single crochet placement into the multiple bases) (48)
Round 8 :
1 sc in each st (48)
Info :
Work the petal shaping gently: when making the long puff petals, pull loops slightly taller than the small center puffs so petals lift. If your yarn splits, use a smaller hook for puffs to keep them tidy.
Round 10 :
Ch2 (counts as hdc), *hdc in next 2 sts, ch1, skip 1 st* repeat to end (48 w/ ch spaces counted within the 48 placement)
— Second Petal Layer (Red sculpted petals) :
Round 11 :
Join new red if you fastened off. *Into the ch1 space before each previous petal: (ch2, pull up 7 loops into the same space to make an elongated puff, draw through all 8 loops), ch2, sl st into base of petal* x8 (8 elongated petals; stitch count remains 48 when later regularised)
Info :
If you want deeper petals, add one more loop to the puff (pull up 8 loops total, close to 9) — this will produce a larger petal but may require slightly more yarn and a larger surface area.
Round 12 :
Sl st to join, ch1, sc in each st and in each puff base around to tidy and even out the circumference (48)
Round 13 :
1 sc in each st BLO (48)
Round 14 :
1 sc in each st (48)
Info :
Using BLO on Round 13 gives a subtle ridge behind the petals, helping them sit forward and remain sculpted without folding toward the center.
Round 15 :
Ch3 (counts as dc), dc in next st across for two repeats, then *(dc3 cluster into next st to form slight pointed petal tip), skip 1 st, dc in next 3 sts* x8 (48)
Round 16 :
1 sc in each st (48)
Info :
At this stage the double layer of red petals should be distinct from the center. If a petal looks floppy, selectively tack it at the base with a small stitch from the wrong side to hold it outward.
— Green Bobble Round (Leafy bobbles) :
Round 18 :
Join green in a stitch approximately centered between two red petal groupings. *ch1, (bobble: yarn over, insert, pull up loop, yarn over, pull through two) repeat 4 times to form a bobble of 5 loops, yarn over and pull through all loops, ch1, sl st into next 4 sts to secure and space out bobbles* x8 (48 placements; 8 bobbles)
Round 19 :
Ch1, sc in each st and in the ch1 spaces created between bobbles to regularize the round (48)
Round 20 :
1 sc in each st BLO to form a small ridge behind bobbles (48)
Info :
Bobble stitches stand proud; keep bobble loops consistent. When closing bobbles, avoid pulling the final draw-through too tightly or they will shrink visibly.
Round 21 :
1 sc in each st (48)
— Cream Arches (Transition round creating open arches) :
Round 22 :
Change to cream. *ch4, sk 3 sts, sl st into next st* x16 around so that you form 16 arches spaced evenly around the motif (16 ch-4 spaces)
Round 23 :
Into each ch-4 space: (sc, hdc, 3 dc, hdc, sc) forming shell arches (16 shells). Place 1 sc in the base stitches between shells to stabilize (total visual shell count 16; stitch count regularised to 48 equivalent)
Info :
These cream arches visually separate the green bobbles from the outer border and create a soft transition into the square shaping rounds.
Round 24 :
1 sc in each st (48)
Round 25 :
Ch1, sc in each st BLO (48)
Round 26 :
1 sc in each st (48)
— Square Formation: First Corner Increase (Move from circle to square) :
Info :
We will convert the round work into a square by adding evenly spaced corner increases. The motif is divided into eight sections; we will place corner groups at every second section (i.e., 4 corners total). Each corner increase will add 2 extra stitches to the round (total increase +8 stitches). This is achieved by doing (5 sc, inc) x8 which expands the round to 56 stitches.
Round 27 :
Change to red. (5 sc, inc) x8 (56)
Round 28 :
1 sc in each st (56)
Round 29 :
Ch1, sc in each st BLO (56)
Round 30 :
1 sc in each st (56)
Info :
At this point the motif begins to square slightly. Use pins to gently nudge corners outward if you plan to block immediately; the increases create flat corner groups that form the square silhouette.
Round 31 :
(6 sc, inc) x8 (64)
Round 32 :
1 sc in each st (64)
Round 33 :
Ch1, sc in each st BLO (64)
Round 34 :
1 sc in each st (64)
Info :
We increased to 64 to make room for the square corners and to create enough fabric for the textured border. Work evenly and keep counts accurate by adding a small marker at every 8th repeat to help count 8-block repeats across the round.
— Gentle Square Expansion and Texture Rounds :
Round 35 :
(7 sc, inc) x8 (72)
Round 36 :
1 sc in each st (72)
Round 37 :
Ch1, 1 sc in each st BLO (72)
Round 38 :
1 sc in each st (72)
Round 39 :
(7 sc, 1 FPdc around next st, 1 sc in next 3 sts) x8 to create a slight ridge at regular intervals (72)
Round 40 :
1 sc in each st (72)
Info :
Front post double crochets create vertical ridges that help disguise the transition from circular rounds to square rounds. Keep these FPdc stitches aligned by marking the placement when you complete the round.
Round 41 :
(8 sc, inc) x8 (80)
Round 42 :
1 sc in each st (80)
Round 43 :
Ch1, sc in each st BLO (80)
Round 44 :
1 sc in each st (80)
Info :
We are gradually enlarging the square in stages so the corners remain crisp instead of forcing a sudden change. At any point you can block to inspect the square shape and add or reduce increases to suit your preferences.
— Mid-Border Decorative Rounds :
Round 45 :
Change to cream for decorative scallops: *sk 2 sts, (5 dc in next st), sk 2 sts, sc in next st* repeat across to create 16 scallops around (80 approximate placement; work sc in base slots to keep count even) (80)
Round 46 :
1 sc in each st (80)
Round 47 :
Change to green, 1 sc in each st (80)
Round 48 :
Ch1, sc in each st BLO (80)
Round 49 :
1 sc in each st (80)
Info :
These scallop rounds are decorative and optional; if you prefer a simpler look skip Round 45 and continue with sc rounds in the colour you want for the main border.
— Outer Square Growth Rounds :
Round 50 :
(9 sc, inc) x8 (88)
Round 51 :
1 sc in each st (88)
Round 52 :
Ch1, 1 sc in each st BLO (88)
Round 53 :
1 sc in each st (88)
Round 54 :
(10 sc, inc) x8 (96)
Round 55 :
1 sc in each st (96)
Round 56 :
Ch1, sc in each st BLO (96)
Round 57 :
1 sc in each st (96)
Info :
At 96 stitches you have a generous border that displays the central motif clearly. If you want a smaller square, stop after Round 44–48 and begin finishing rounds instead of continuing increases.
— Textured Outer Edge Rounds :
Round 58 :
Change to red. *ch2, 1 hdc in next 3 sts, (2 dc in next st) as gentle raised clusters for texture* repeat around (96)
Round 59 :
1 sc in each st (96)
Round 60 :
Ch1, 1 sc in each st BLO (96)
Round 61 :
1 sc in each st (96)
Info :
Info :
Repeating sc rounds several times firms the border and evens stitches before the final decorative edge. If you prefer, substitute one sc round with a hdc round to vary the texture.
— Final Decorative Edge (Raised Ridge and Crab Stitch) :
Round 62 :
1 sc in each st (96)
Round 63 :
FPsc row: ch1, *FPsc around next st (yarn in front of work), sc in next st* repeat around to create a raised rib (96)
Round 64 :
1 sc in each st (96)
Round 65 :
Change to red (final border color). Work crab stitch (reverse sc) around the outer edge for a neat, rope-like finish. Insert hook from left to right, sc in each st around (96)
Info :
Crab stitch gives a polished, slightly right-slanting edge that visually contains the square. Work loosely if your final edge puckers; a slightly larger hook can help.
Round 66 :
Optional second crab stitch for extra definition: crab stitch into each st around (96)
Round 67 :
Fasten off and weave tails securely. Block square gently to flatten and square the corners—pin corners out to the same distance and steam or wet block as appropriate for your yarn.
Info :
Weaving tails through the wrong side in a few different directions reinforces the border and prevents popping puffs. Use a few small securing stitches within bobbles if they feel loose.
— Optional Extra Texture & Edging Variations (Extra Rounds for thicker appearance) :
Round 68 :
If you want a thicker border for coasters or a rug, work an additional round of (2 sc, inc) x32 to go from 96 to 128 stitches (128)
Round 69 :
1 sc in each st (128)
Round 70 :
Ch1, sc in each st BLO (128)
Round 71 :
1 sc in each st (128)
Info :
These extra rounds are optional and intended for pieces that will see heavier use. Each extra round increases yarn usage but creates a more substantial finished square.
Round 72 :
Alternate edge suggestion: sc row followed by a popcorn round—*popcorn in every 8th stitch* to add a decorative bobble-edge (maintain count by working popcorn at consistent intervals) (128)
Round 73 :
Finish with crab stitch in final color around the outer edge (128)
Info :
If you make multiple squares, keep your final border consistent across pieces for easy joining. A single crab stitch is often the cleanest for seam-free joins using mosaic or whip-stitch joining methods.
— Finishing Touches :
Info :
Weave in ends to the wrong side, trimming tails after burying them at least 3-4 cm into the fabric. Block each square pinned to equal dimensions so that joining is even; allow to dry completely before joining or assembling into a larger project.
Info :
To join multiple squares, use slip-stitch join in the round for a neat seam, or mattress stitch for a nearly invisible seam. If making a blanket, add a uniform border after joining to hide any slight size variances.
This festive poinsettia square is a delightful combination of texture and color that comes together beautifully. Each petal and bobble adds depth and charm—perfect for holiday projects or year-round floral finishes. Make one as an ornament, a set for coasters, or stitch many into a seasonal throw. Enjoy the cozy crafting time and share your handmade creation with pride! 🎄🧶