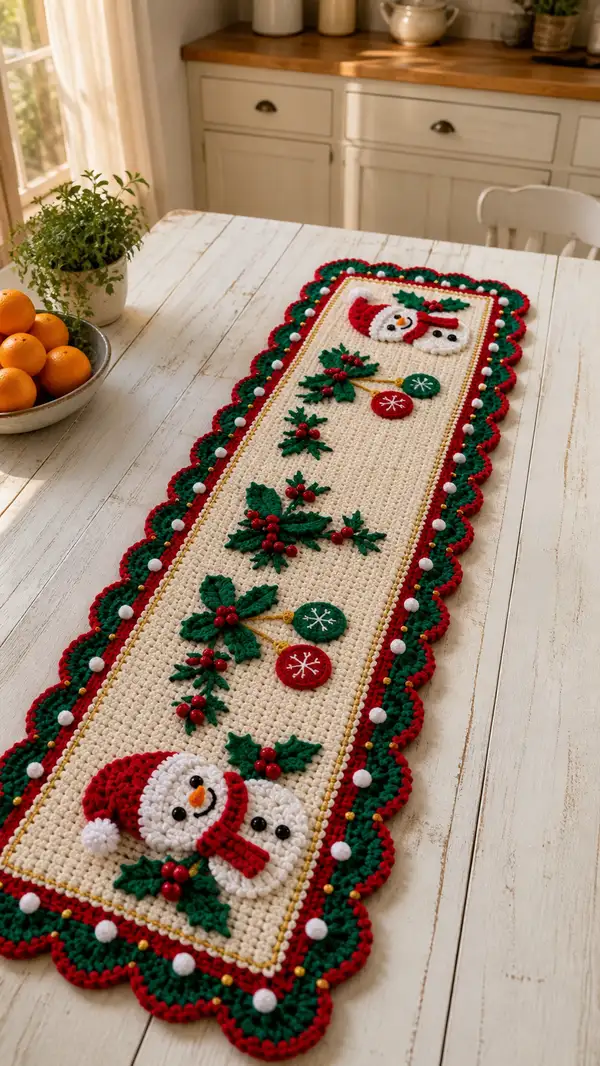
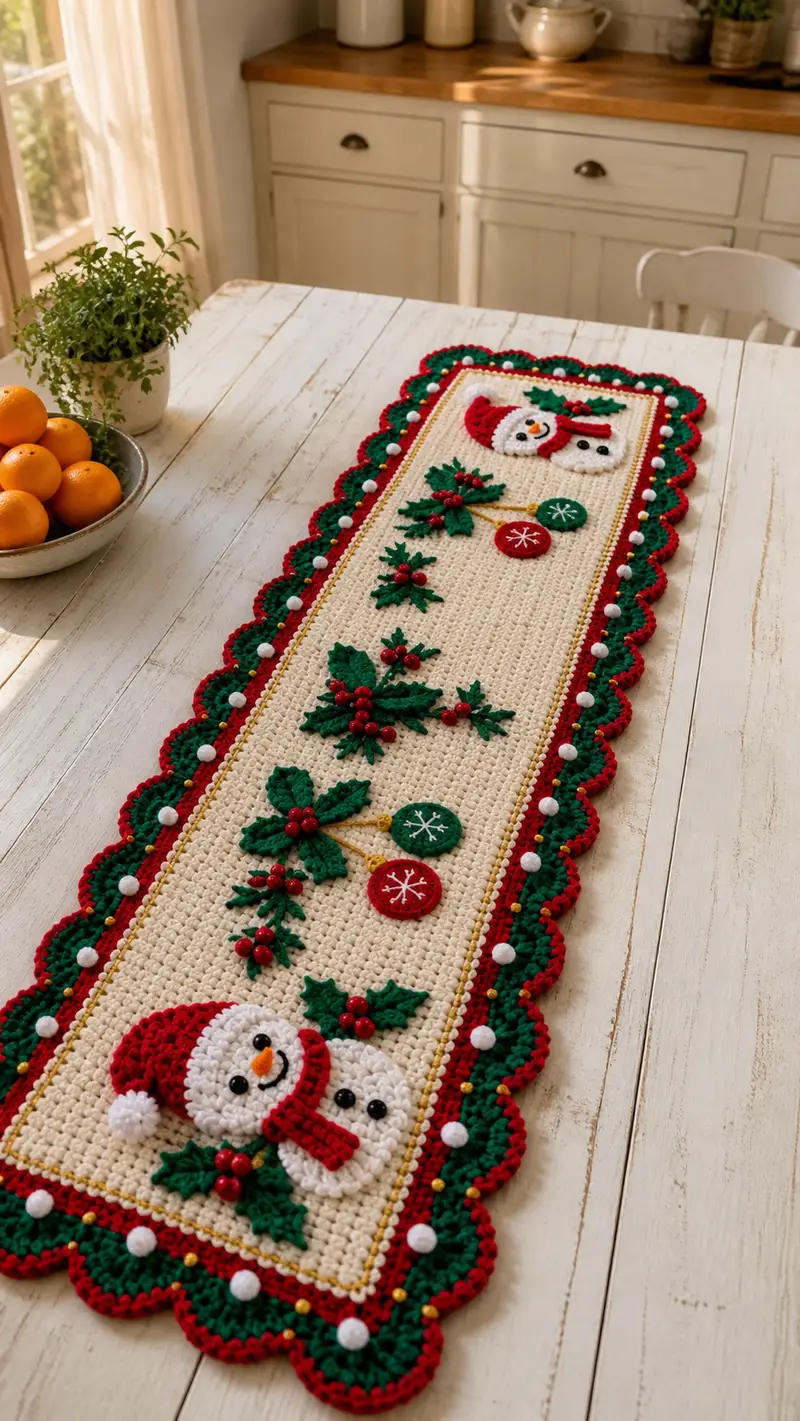
A charming, vintage-inspired crochet table runner featuring cheerful snowman appliques, layered holly clusters, decorative ornaments and a scalloped red-and-green border. Worked in warm cream with bright holiday accents and three-dimensional berries and bobbles for texture. Perfect for holiday tables and seasonal displays, this pattern includes step-by-step instructions for the base panel, appliques, leaves, berries and finishing border.
Progress Tracker
0% Complete
— Materials & Gauge :
Info :
Finished approximate size: 12" wide x 48" long (30 x 122 cm). Gauge is not critical for appliques but for base panel work a 10 cm x 10 cm (4"x4") swatch should be approx 14 sc x 16 rows in worsted weight using 4.0 mm hook. Adjust hook if necessary to obtain firm fabric so stuffing is not visible through stitches.
— Base Panel (worked flat in rows) :
Round 1 :
Foundation chain 170 or desired width multiple to achieve approx 12" width (170 ch). Note: chain a few extra for fringeless fastening if you prefer; the number given yields a neat border allowance (170)
Info :
Chain count can be adjusted by multiples of 2 to slightly widen or narrow the runner. Keep all motif placement proportions consistent if changing width.
Round 2 :
Row 1 (RS): Sc in 2nd ch from hook and in each chain across, turn (169 sc)
Round 3 :
Row 2 (WS): Ch 1, sc in BLO of each st across, turn (169)
Info :
Working the WS rows in BLO creates a subtle rib that helps the appliques sit more naturally and gives slight definition. Use stitch markers at each end of every 10th row to maintain straight edges.
Round 4-9 :
Rows 3-8: Repeat Row 2, maintaining 169 sc each row (169)
Round 10 :
Row 9 (RS): Change to cream/ivory if not already. Continue 1 sc in each st across (169)
Info :
Work even for a crisp rectangle. This runner uses texture rather than color in the background so keep stitches consistent. Mark the center line of the panel as a reference for applique placement (Row approximately 24-28 depending on your final chosen length).
Round 11-40 :
Rows 10-39: Continue 1 sc in each st across until panel measures 46" in length (or until you reach placement row for the lower snowman at approx 6" from one end). Count rows as you go; the number of rows will vary slightly by tension. Keep total rows about 110-130 rows to achieve 48" overall with border additions (169)
Info :
Placement guide from bottom up: at approx 3" from one short end, position first snowman (bottom). Another snowman at 35" from same end near the opposite end. Three holly clusters and ornaments positioned between them. Use pins to temporarily place appliques before sewing.
Round 41-44 :
Rows 40-43: Work 4 rows in sc BLO to create a subtle ridge line inside the future border (169)
Info :
These rows form a small inset that will be outlined by the gold / yellow round before the border scallop. Count carefully to ensure the stitch count remains 169.
Round 45 :
Row 44 (RS): Ch 1, sc evenly across in both loops to tighten edge if desired (169)
Info :
Fasten off and weave in ends temporarily; we will add the gold contrast slip-border before attaching scallops. Blocking the panel flat is recommended before applying border rounds to reduce waviness.
— Decorative Outline (gold/yellow accent) :
Round 1 :
With gold yarn and RS facing, join with sl st into first stitch at one short end, ch 1, sc evenly around the entire rectangle working 3 sc in each corner to keep corners flat. Work 169 sc along sides proportionally (approx total st count = 2*(169) + small corner increases depending on length)
Info :
Keep your stitch count even along long sides by placing a stitch marker at the midway point of each side; add or skip a stitch in a subtle way so scallop later lays flat.
Round 2 :
Sl st join to first sc, finish off or carry gold yarn for hand embroidery dots in later step. (Even outline)
— Scalloped Border Foundation (green & red scallops) :
Round 1 :
With green yarn, join with sl st into the space just outside the gold outline on the RS. Ch 1, *skip 2 sc, (5 dc) in next st, skip 2 sc, sl st in next sc; rep across entire edge. Work 3 dc clusters in each corner space to maintain curve*
Info :
Each scallop will be formed by the 5-dc shell. Adjust number of skipped stitches as needed to fit shells evenly across the perimeter. Aim for approx 28-32 scallops around long edges depending on width.
Round 2 :
Join red yarn in top of each green shell: ch 1, *sc in top of shell, ch 1, sc in same top (picot-like spacing) to create red edging along shells; rep around. At corners work sc, ch1, sc in corner shell tops (even)
Info :
The red round provides definition to the scallops and a base to attach white bobbles. Work loosely enough so scallops are not tight or curled.
Round 3 :
With red yarn, sl st around to smooth joins, fasten off leaving tails for weaving (even)
Round 4 :
Using white yarn, make bobbles: In selected scallops (every 2nd scallop) attach 3D bobble by working a 5-tr cluster in a single st (see Bobble section) and secure. Space bobbles evenly (approx 14-16 bobbles)
Info :
Bobbles are decorative raised white dots. Make them with a tighter hook (3.5 mm) for dense shape and sew securely through shell top so they do not fall off with wear.
— White Bobble (Make approx 16) :
Round 1 :
Using white and 3.5 mm hook: Ch 2, 6 hdc in 2nd ch from hook; join with sl st (6)
Round 2 :
Ch 1, 2 hdc in each st around (12)
Round 3 :
Without closing completely, pull tail to pucker center, fasten off leaving long tail. Stuff lightly with tiny amount of fiberfill to keep raised profile. Sew onto scallop top. (12)
Info :
Make bobbles as small round clusters and sew on firmly with yarn needle into the shell tops. Position them symmetrically along both long edges.
— Snowman Applique (Make 2: Top & Bottom) :
Info :
Each snowman is composed of two joined snowballs (head + torso), hat, scarf, embroidered facial features, and three black body buttons. The head section below is worked in rounds; use white worsted yarn with 3.5-4.0 mm hook for a slightly firm texture. Place one snowman approx 3" from one short end and another near the opposite end as in photo.
Head - Round 1 :
6 sc in mr (6)
Head - Round 2 :
6 inc (12)
Head - Round 3 :
(1 sc, inc) x 6 (18)
Head - Round 4 :
(2 sc, inc) x 6 (24)
Head - Round 5 :
(3 sc, inc) x 6 (30)
Head - Round 6 :
(4 sc, inc) x 6 (36)
Head - Round 7 :
(5 sc, inc) x 6 (42)
Head - Round 8 :
(6 sc, inc) x 6 (48)
Info :
Place safety eyes between Round 11 and Round 12 approximately 6-8 stitches apart for a friendly expression. If using embroidered eyes, mark positions with pins and embroider after stuffing.
Head - Round 9-14 :
1 sc in each st (48)
Head - Round 15 :
(6 sc, dec) x 6 (42)
Head - Round 16 :
(5 sc, dec) x 6 (36)
Info :
Begin stuffing head lightly. The snowman face should be softly stuffed to maintain a slight dome, not rigid. Embroider mouth and attach carrot nose (orange) after placement on panel for positioning.
Head - Round 17 :
(4 sc, dec) x 6 (30)
Head - Round 18 :
(3 sc, dec) x 6 (24)
Head - Round 19 :
(2 sc, dec) x 6 (18)
Head - Round 20 :
(1 sc, dec) x 6 (12)
Head - Round 21 :
6 dec (6)
Head - Round 22 :
Fasten off leaving long tail for sewing; finish stuffing and close opening. (6)
Info :
We will leave both head and torso openings on the bottom of the head intact until we join to the torso piece for neat invisible seam. Use mattress stitch or whip stitch to join later.
— Snowman Torso (Lower Snowball) :
Torso - Round 1 :
6 sc in mr (6)
Torso - Round 2 :
6 inc (12)
Torso - Round 3 :
(1 sc, inc) x 6 (18)
Torso - Round 4 :
(2 sc, inc) x 6 (24)
Torso - Round 5 :
(3 sc, inc) x 6 (30)
Torso - Round 6 :
(4 sc, inc) x 6 (36)
Torso - Round 7-10 :
1 sc in each st (36)
Torso - Round 11 :
(4 sc, dec) x 6 (30)
Torso - Round 12 :
(3 sc, dec) x 6 (24)
Torso - Round 13 :
(2 sc, dec) x 6 (18)
Torso - Round 14 :
(1 sc, dec) x 6 (12)
Torso - Round 15 :
6 dec (6)
Torso - Round 16 :
Fasten off leaving long tail. Stuff lightly and leave opening to join to head or to panel as applique base.
Info :
For a flat applique look, flatten torso slightly before finishing; for a puffed applique, stuff more. Join head and torso by overlapping 4-6 stitches and sewing with matching white yarn for a seamless snowman shape.
— Snowman Hat (Make 2) :
Hat - Round 1 :
With red yarn: ch 2, 6 sc in 2nd ch from hook (6)
Hat - Round 2 :
6 inc (12)
Hat - Round 3 :
(1 sc, inc) x 6 (18)
Hat - Round 4 :
1 sc in each st around (18)
Hat - Round 5 :
Fold to create brim: ch 1, sc in BLO across for brim ridge (18)
Hat - Round 6 :
Attach small white pom: using white yarn make tiny bobble and sew to tip OR make 6 hdc in a magic circle, pull to close, sew to top, fasten off
Info :
Position hat centered on top of head and sew down only at brim stitches so hat looks slightly tilted as in the photo.
— Snowman Scarf (Make 2) :
Scarf - Round 1 :
With red yarn: ch 20 (or desired length to wrap around snowman base), Row 1: sc in 2nd ch from hook and across (19)
Scarf - Round 2 :
Ch 1, turn, sc in BLO across for textured edge (19)
Scarf - Round 3 :
Ch 1, turn, sc across, fasten off leaving long tail to sew in place and add small fringe on ends (19)
Info :
Sew scarf around neck area joining ends to give the appearance of being tied. Tuck fringe under and stitch securely to the back of the torso.
— Snowman Facial & Body Details :
Info :
Use small black buttons or embroidered black yarn for eyes and 3 small buttons on the torso. Embroider carrot nose with orange yarn using satin stitch, approximately 6-8 mm long. Embroider mouth with black yarn forming a gentle smile under eyes between Round 12 and 13 on the head.
— Holly Leaf (Make 8 clusters - make 6 large leaves and 6 smaller leaves) :
Leaf - Round 1 :
With green yarn: ch 8, sc in 2nd ch from hook, hdc in next, dc in next 2, hdc next, sc next, sl st to join at beginning to form a leaf outline (7 sts across)
Leaf - Round 2 :
Turn leaf, sc in first st, *hdc, dc, tr, dc, hdc, sc* (mirror), fasten off leaving tail for sewing (7)
Leaf - Round 3 :
Using yarn tail, seam center of leaf with a running stitch to give vein texture; pinch lightly to create natural curl. Block flat if desired.
Info :
Make leaves in two sizes: large leaves ch 10 and increase center stitches (dc x3) to produce slightly bigger shape. Arrange clusters of three leaves and add three or five berries to each cluster depending on size.
— Holly Berry (Make many - approx 30) :
Berry - Round 1 :
With red yarn and 3.5 mm hook: mr, 6 sc in mr (6)
Berry - Round 2 :
Inc in each st around (12)
Berry - Round 3 :
Ch 1, 1 sc in each st around (12), fasten off leaving long tail. Lightly stuff and sew clusters of 3 or 5 together to form holly berry clusters.
Info :
Sew small seed beads inside some berries if you want extra sheen. Position clusters on leaves and tack down to base panel before final sewing.
— Decorative Ornaments (Make 4) :
Ornament - Round 1 :
With red or green: mr, 6 sc (6)
Ornament - Round 2 :
6 inc (12)
Ornament - Round 3 :
(1 sc, inc) x 6 (18)
Ornament - Round 4 :
1 sc around (18)
Ornament - Round 5 :
(1 sc, dec) x 6 (12)
Ornament - Round 6 :
6 dec (6) - close leaving tail to sew and lightly stuff (6)
Info :
Embroider snowflake or star details on one side of ornament with white yarn using simple straight satin stitches; attach gold hanging loop by making a chain of 6 and sewing to top.
— Attachment & Positioning of Appliques :
Info :
Pin all appliques on the RS of the base panel following placement diagram: bottom snowman at 3" from bottom short edge, second snowman at 3" from opposite short edge, three holly clusters and two ornaments spaced evenly between them. Ensure each applique is centered on the panel width-wise. Use pins to secure before sewing.
Attachment Step 1 :
Sew each applique to the base panel using matching thread and mattress stitch around the applique edges. Start with the snowmen, sewing from the lower edge of the torso into the base panel so they sit firmly. Use long tails left from fasten-off for neat sewing.
Info :
When sewing, bring needle through a couple of stitches on the base panel to hold appliques flat and avoid a puckered look. For puffier appliques only sew a 6-8 stitch perimeter so some three-dimensional profile remains.
— Final Embroidery & Details :
Info :
Use gold yarn to stitch tiny dots along the inner edge (following the gold round) to echo the photo. Use black yarn to embroider eyes/mouth as needed and orange for the carrot nose. Add 3 small black buttons down each torso center or sew on small black plastic buttons.
Round :
Optional: Add tiny scattered French knots in gold or red as extra sparkle across panel if desired (RS)
Info :
For a professional finish, weave in all ends on the WS and block the piece lightly: dampen, pin flat to desired measurements and allow to dry completely before use.
— Finishing Border Touch-ups :
Round 1 :
Inspect scallops and resew any loose shells. Reinforce bobbles by stitching through shell top and three times through bobble base.
Round 2 :
Add small glass or plastic beads sewn intermittently along gold round if desired for extra shimmer. Space beads every 10-12 stitches.
Info :
Trim stray fibers carefully and steam-press lightly from the WS if needed to flatten and set shape. Do not iron directly on decorative bobbles or appliques.
— Care Instructions :
Info :
Hand wash cold on gentle cycle or spot clean. Lay flat to dry. Avoid tumble drying to preserve bobbles and appliques. Store flat or rolled to avoid crushing decorations.
Your finished festive runner will add instant holiday charm to any table — the snowmen, holly clusters and scalloped border create a joyful, handcrafted statement. Each applique brings texture and personality, making this a piece you'll be proud to display and gift. I hope you had fun stitching every bobble and leaf — enjoy cozy holiday gatherings with your handmade centerpiece! 🧶🎄✨