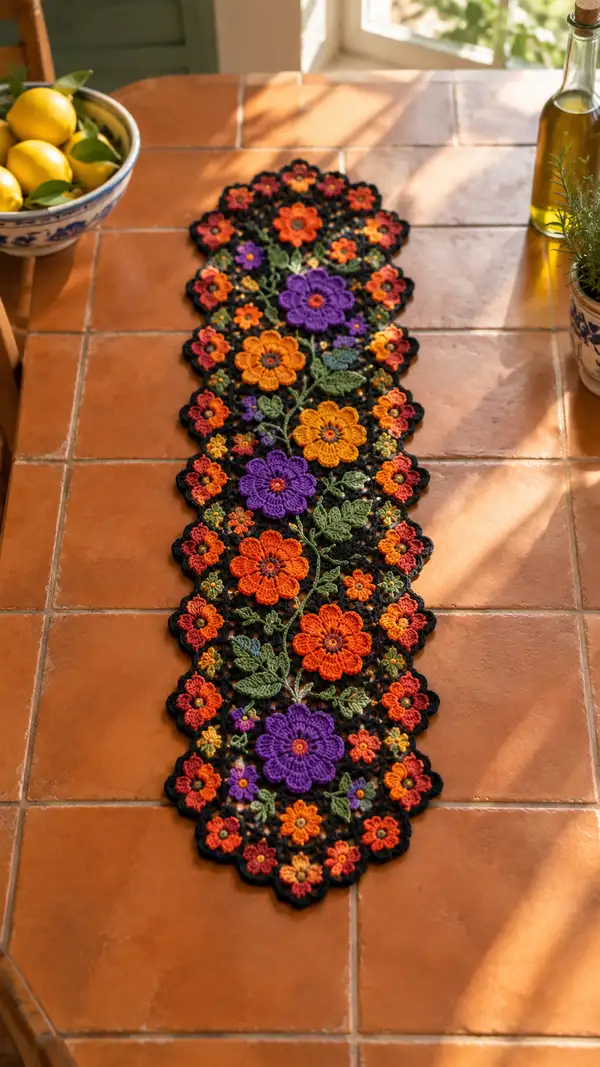
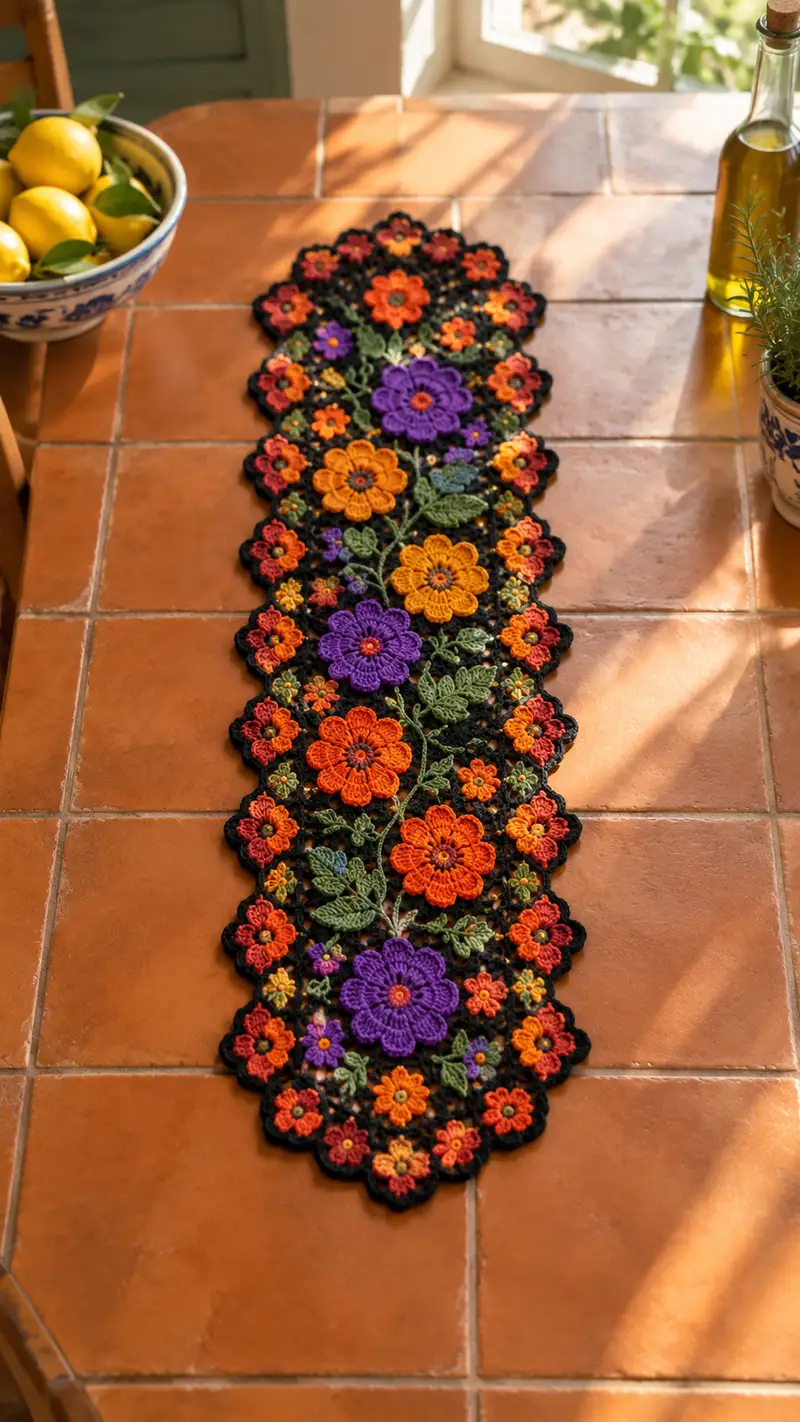
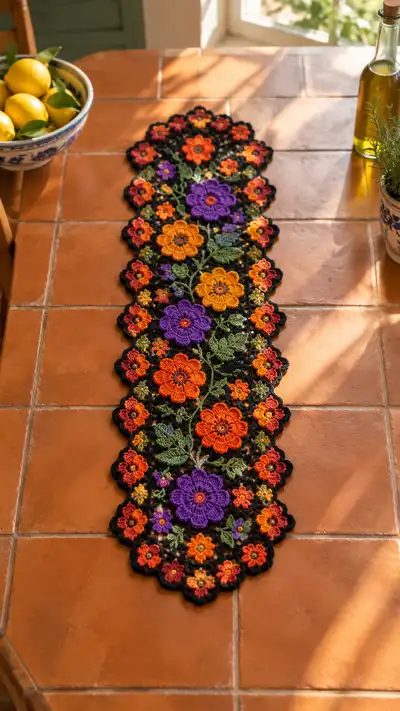
A richly textured, mosaic-style table runner composed of layered floral motifs in warm autumn tones set against a delicate black lace lattice. This pattern recreates the layered look of clustered blooms, leaves and tiny filler flowers joined into a long runner perfect for a dining table or console. The design features bold orange and purple focal flowers, golden accents and leafy vines for a handcrafted heirloom centerpiece.
Progress Tracker
0% Complete
— Materials & Notes :
Info :
Use DK weight yarn for a lacy, stable fabric similar to the original sample. If you use lighter or heavier yarn, the finished size will vary. The pattern uses join-as-you-go techniques to connect flowers and filler motifs to the black mesh; you may choose to make motifs first, block them, then join with whipstitch if preferred.
Info :
Throughout this pattern rounds are given for both motif construction and mesh shaping. Count stitches carefully and place stitch markers at the start of each round to maintain alignment. When color-changing, fasten off or carry as directed in Info sections.
— Large 8-Petal Flower (Make 4 focal flowers) :
Round 3 :
(1 sc, inc) x 6 (18)
Round 4 :
(2 sc, inc) x 6 (24)
Round 5 :
(3 sc, inc) x 6 (30)
Round 6 :
(4 sc, inc) x 6 (36)
Round 7 :
(5 sc, inc) x 6 (42)
Round 8 :
(6 sc, inc) x 6 (48)
Info :
By round 8 you should have 48 stitches; this allows for 8 evenly spaced petals (48/8=6 sts between petal anchors). Place marker at the first stitch of Round 9 to keep track of petals.
Round 9 :
*sc in next 5 sts, ch4* x 8 around (48) - ch4 loops become petal anchors
Round 10 :
*sl st into next ch4 loop, ch3, 3 dc into loop, ch3, sl st back into same loop, sc in next 5 sts* x 8 (48)
Info :
Petals are now formed. Keep tension even when working into chain loops. Fasten off and change to a contrasting petal color if you want bi-color petals; otherwise continue with same yarn.
Round 11 :
Join petal color (or continue) with sl st at base of a petal, ch1, sc in same st, *ch2, (fpdc, 1 dc, bpdc) all worked around petal post to give textured ridge, ch2, sc in base between petals* x 8. Finish with sl st to join (48)
Round 12 :
Working into ch2 loops from previous round: *(sc, hdc, 3 dc, hdc, sc) in each ch2 loop (petal edge)* x 8; sc between petals in previous base stitches to keep count (48)
Info :
Round 12 creates the scalloped outer edging of each petal; ensure each petal receives the same cluster counts so the flower lies flat.
Round 13 :
ch3, *picot on top of each petal: (sl st, ch3, sl st into first ch made) in top dc of petal; ch1, sc in next base st* around. (48)
Round 14 :
Optional second petal layer: Join new yarn color at a petal base, ch2, 5 dc worked into base loop behind petal (work into back loops of the base stitches to create depth), skip next base 5 sts, repeat around to create 8 second-layer petals. Maintain 48 bases.
Info :
If adding a second petal layer, place it so that second petals sit between primary petals for a fuller bloom. Secure floats or fasten off tails neatly between rounds.
Round 15 :
Weave a decorative pistil: Using contrasting yarn, embroider 8 small French knots equally spaced into the center, or make a tiny 6-round puff center (see Center Puff section). Fasten off and weave ends.
Round 16 :
Finish by working a neat round of sc in BLO around the flower base to create a flat joining edge for mesh connection: 1 sc in each st BLO (48)
Info :
Block each completed large flower flat before joining. Pin petals out gently and mist with water for wet-blocking, allow to dry to open lace definition.
— Medium 6-Petal Flower (Make 6) :
Round 3 :
(1 sc, inc) x 6 (18)
Round 4 :
(2 sc, inc) x 6 (24)
Round 5 :
(3 sc, inc) x 6 (30)
Round 6 :
(4 sc, inc) x 6 (36)
Info :
36 stitches allow for 6 petals with 6 base stitches each (36/6=6). Place marker at start of Round 7 to anchor petals evenly.
Round 7 :
*sc in next 4 sts, ch3* x 6 around (36) - ch3 loops are petal anchors
Round 8 :
Into each ch3 loop: sl st, ch3, 3 dc, ch3, sl st; sc in next 4 sts between petals (36)
Round 9 :
Work a layered edge: *(sc, hdc, 5 dc, hdc, sc) in top of each petal* x 6, sc in base stitches between petals to keep count (36)
Round 10 :
Working sc in BLO around base to create join edge: 1 sc in each st BLO (36)
Info :
These medium flowers sit as supporting blooms between large focal flowers. Block flat before assembly for best appearance.
— Small 5-Petal Flower (Make 20-24 tiny fillers) :
Round 3 :
(1 sc, inc) x 6 (18)
Round 4 :
*sc in next 2 sts, ch2* x 6 (18)
Round 5 :
Petals: into each ch2: (sl st, ch3, 3 dc, sl st) to create 6 tiny petals. Finish with sl st, fasten off (18)
Info :
Small flowers are quick and numerous; vary colors for visual interest. Sew a French knot or small bead into each center if desired.
— Center Puff (Make multiples for some flowers) :
Round 2 :
*2 hdc in each st* x 6 (12)
Round 3 :
Working in spirals, puff into each st around: *yarn over, pull through 3 times, yarn over pull through all loops* across 12 sts to form textured center. Fasten off leaving tail for sewing.
Info :
These tight puffs make realistic pistils and centers for medium and large flowers. Use a small amount of stuffing or thread-wrapped core for stability.
— Leaf (Make 18-24) :
Foundation :
ch 12 (or longer for larger leaf)
Round 1 :
sc in 2nd ch from hook, hdc in next, dc in next 3, hdc in next, sc in next 2, sl st in last ch; rotate to work on opposite side of chain: sc in next 2, hdc in next, dc in next 3, hdc in next, sc next 2, sl st to join. Fasten off. (Approx 22 sts)
Round 2 :
With leaf color, pick up yarn at base, ch1, work into back loops of each stitch on one side: *(sc, hdc, dc) as shaping requires, inc at widest point then mirror decreases back to base*; repeat for the other side to create a raised centre vein. Fasten off and block flat.
Info :
For veins: embroider a thin line of surface slip stitches or use fpdc/bpdc alternating to simulate central vein. Slight starching during blocking helps leaves keep shape.
— Tiny Cluster Filler (Make 30+) :
Round 2 :
sl st into next st, ch4, sl st back into same st to create a pouf; repeat around in each st to create a ring of mini loops (6 poufs)
Round 3 :
Fasten off and sew into gaps in the mesh for texture. Add a tiny seed bead or French knot to centers if desired.
Info :
These small clusters break up negative space and make the runner read as lush and floral when viewed from a distance.
— Focal Petal Shaping Alternatives (optional details) :
Info :
To make petals more 3D, add a row of long loops before outer edge: *yarn over and pull up long loop across petal mark, sc to secure* then cut loops and lightly trim to faux-floral texture.
— Black Mesh Joining Motif (Make multiple and use to join flowers into runner) :
Round 1 :
Make a small connector disk to anchor petals: 6 sc in mr (6)
Round 3 :
(1 sc, inc) x 6 (18)
Round 4 :
ch5, skip 2, sc in next st, *ch5, skip 2, sc* around to create 6 ch5 loops (18)
Round 5 :
Work into each ch5 loop: sl st, ch3, 5 dc, ch3, sl st (six openwork petals), sc in base between loops to maintain count (18)
Info :
These black mesh motifs are used as repeat units between floral pieces. They create the airy negative space and allow vines to be stitched across multiple motifs.
Round 6 :
Join-as-you-go option: when working round 6 on a mesh motif, slip stitch to an adjacent motif's sc base to form a seam; continue the round and repeat joins where motifs meet.
Round 7 :
For a more open mesh, ch7 loops can be worked instead of ch5; count adjustments: maintain base stitch count so the mesh lays flat.
Round 8 :
Repeat mesh motifs across the runner layout, connecting to flower bases by slip stitch at the sc in BLO round previously made on each flower (see flower join info below)
Info :
Always pin motifs in your chosen arrangement before final joining. The black mesh is what holds the runner together; take care to keep its tension consistent to avoid puckering.
— Long Vine & Branch (Worked as a chain of openwork stitches between flowers) :
Foundation :
Attach moss green yarn to a mesh motif where you want a vine to start; ch 30 for a long vine (adjust length to fit between motifs)
Round 1 :
Starting in 2nd ch from hook: sc, hdc, dc, dc, ch3 picot as decorative leaf junctions at intervals (every 6 chains), continue to end; secure to next motif with sl st or weave through leaf base
Info :
Work vines in a slightly looser tension than motifs so they drape naturally across the mesh. Use small leaves attached at intervals to simulate sprigs between flowers.
— Leaf Attachment (How to sew leaves to vines) :
Info :
Sew leaves along the vine by placing the leaf base on top of vine chs and using ladder stitch to secure from the underside; leave a small reactive loop for realism so leaves don't lie perfectly flat.
— Border Scallop (Edge finishing) :
Round 1 :
With black yarn attached to outermost mesh motif, ch1, sc evenly across edge stitches to create a defined border baseline; count total baseline stitches then use scallops every 4 or 5 sts depending on desired scale.
Round 2 :
*sc in next 2 sts, (ch3, 5 dc in next st, ch3), sc in next 2 sts* repeat along edge to create scallops; adjust repeat to end evenly.
Round 3 :
Work a neat final round: sc around, slip stitching into tops of scallops to tidy. Add tiny picots or seed beads to scallop peaks if desired.
Info :
Try a sample of 10 scallops before working entire edge to ensure your spacing matches the runner's contour. Blocking after border is completed will smooth scallops into graceful curves.
— Decorative Vein Embroidery and Beading :
Info :
Use contrasting yarn or embroidery thread to outline leaves and stitch tiny veins. Add seed beads to small flower centers by sewing through finished fabric with a beading needle for sparkle.
— Joining Strategy & Overall Layout :
Info :
Lay out motifs on a flat blocking board to match the photo: a central column of alternating large purple and orange focal flowers separated by med flowers, with clusters of small flowers filling edge scallops. The sample runner arranges motifs in a linear, repeating mosaic that narrows slightly at each end into 3 scalloped modules for a tapered effect.
Info :
Join-as-you-go: when working the final sc round of a flower (sc in BLO join edge), instead of finishing and fastening off, slip stitch to the adjacent mesh motif's sc, then continue the round to lock motifs together. When joining a flower to more than one motif, work joins symmetrically to avoid skewing shapes.
Info :
Alternate method: block all motifs separately, arrange on table, and use invisible ladder stitch with matching black yarn to stitch motifs together along the sc BLO edges. This is slower but offers precise control over placement.
— Assembly Sequence (recommended) :
Info :
1) Crochet all flowers, leaves and filler clusters. 2) Block motifs flat. 3) Lay out in your chosen layout. 4) Join mesh motifs first to create the underlying lattice. 5) Attach focal flowers and medium flowers into the lattice by join-as-you-go or sewing. 6) Sew leaves and vines. 7) Add border scallop and final finishing.
Round 1 :
Final finishing round (work after all motifs joined): Use black yarn, sc around entire runner edge in even stitches to unify. Add blocking again and check scallops.
Info :
Weave in ends as you go where possible. Aim to have no long loose floats on the wrong side. If any motifs wobble after joining, add a couple of extra whipstitches through adjacent mesh and motif BLO to stabilize.
Round 2 :
Optional: Spray with a light fabric stiffener or dilute PVA applied with a sponge to scallop edges to help hold shape if runner will be placed on a textured surface.
Info :
Final blocking: pin the runner to desired measurements and allow to dry thoroughly. For extra crispness, use iron-on steam on low setting with a pressing cloth if yarn manufacturer instructions permit.
This Floral Mosaic Table Runner is a true celebration of color, texture and handwork—every motif adds depth and character to your table. As you assemble each bloom and leaf, you’ll see the design come alive, forming an heirloom-quality centerpiece that’s both functional and decorative. Blocking and careful joining bring the final magic, making petals crisp and the lacework sing. 🧶🍂 Share your runner proudly or gift it to someone special—each stitch tells a story. Happy stitching and enjoy the process! 🌼✨