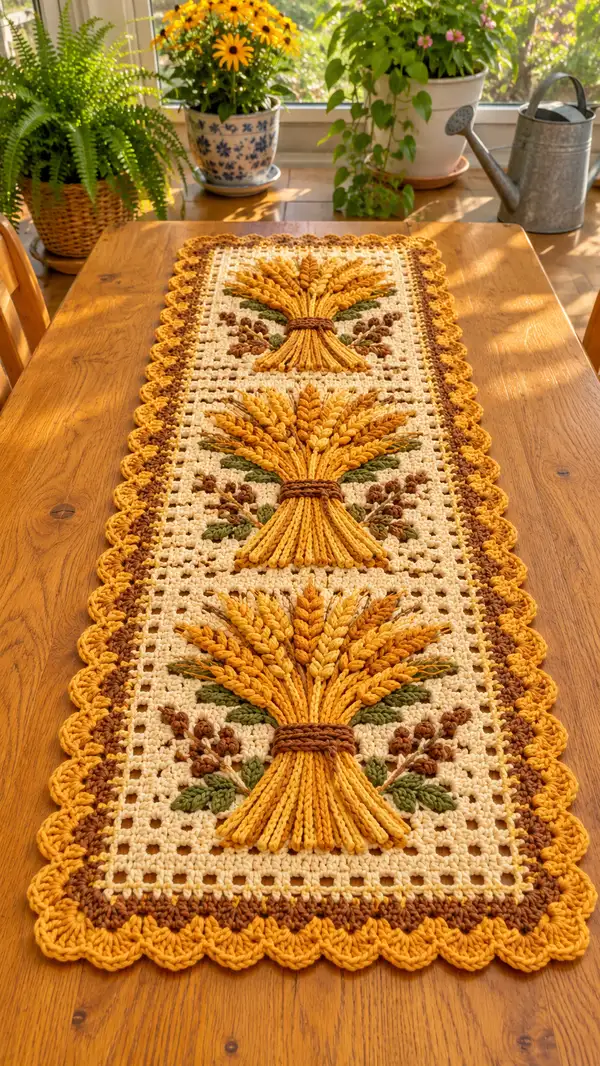
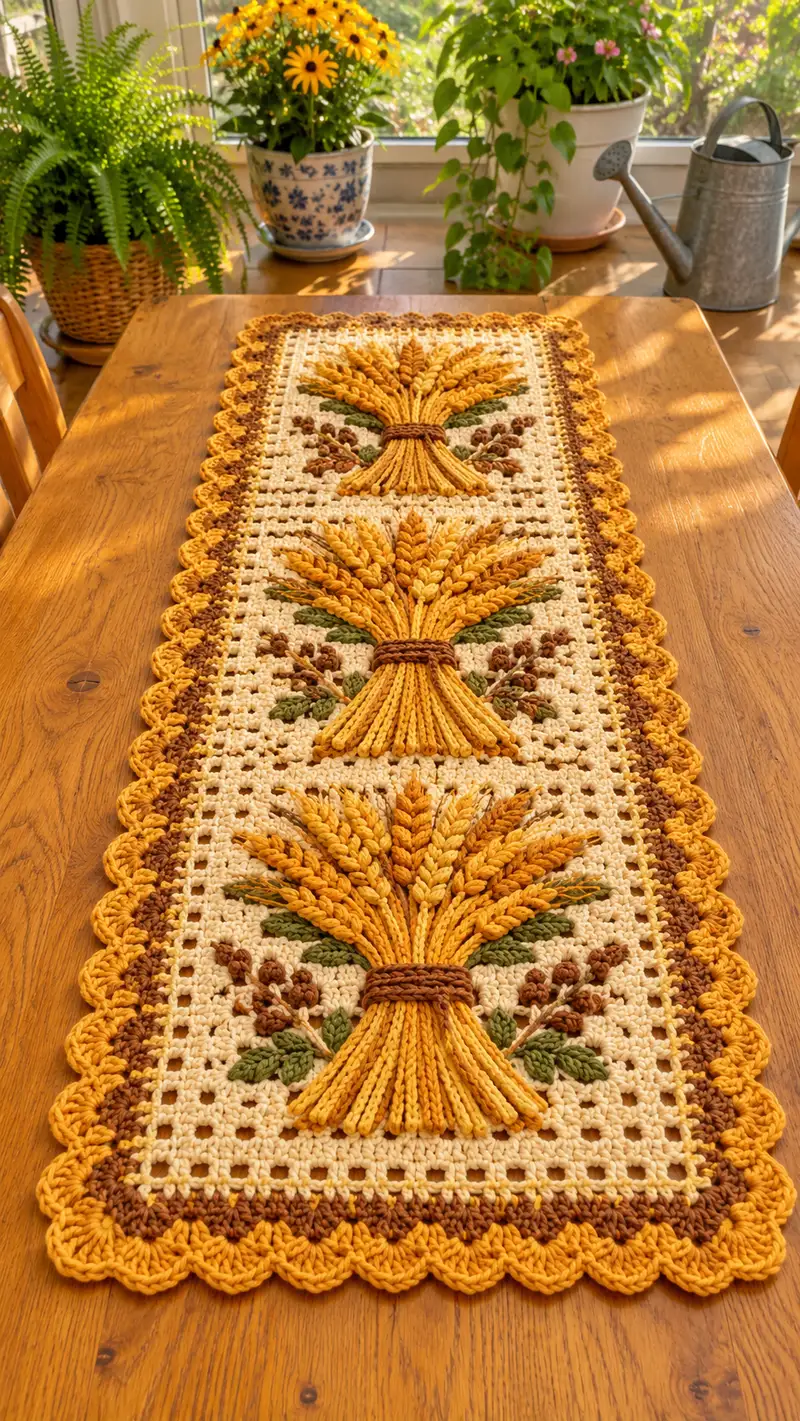
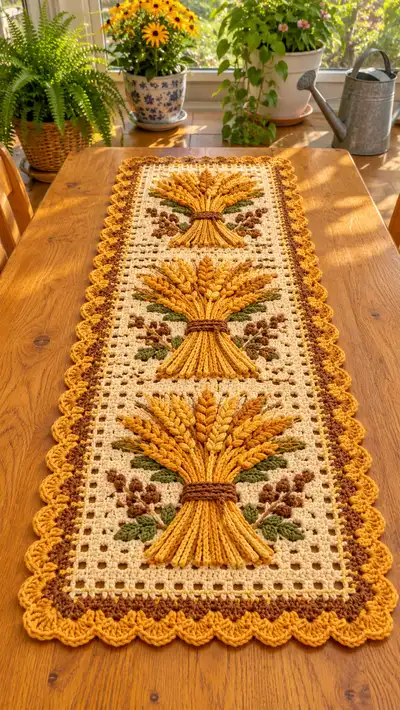
Create a warm, textured table runner inspired by harvested sheaves of wheat. This rectangular runner features three raised, braided wheat sheaf motifs on a cream mesh background, accented with leafy stems, bobble acorns and a scalloped golden border. The pattern uses textured post stitches, raised bobbles, and overlay techniques for a richly dimensional autumn centerpiece that's perfect for holiday or everyday farmhouse style.
Progress Tracker
0% Complete
— Notes & Gauge :
Info :
This runner is worked in three identical motif panels that are joined by a narrow mesh strip and edged with a multi-row border. Gauge is not critically strict for a decorative runner, but for size consistency check that 12 dc x 8 rows = 4in (10cm) in fabric before adding heavy textured stitches. Work tightly on textured post sections to keep definition. Use stitch markers to mark motif edges and join points.
Info :
Terminology: In this pattern 'round' refers to a row worked across the rectangle. Each motif is 31 stitches wide and 34 rows high before trimming and joining. When repeating the motif to form the runner, you will make 3 motif panels and 2 joining mesh strips between them, then work a continuous border around the whole piece.
— Materials Prep :
Info :
Prepare bobbins or small balls for wheat gold (main), amber gold (highlight), brown (ties), and green (leaves) so color changes are quick. Keep a small ball of fiberfill for teasing under raised sections. Block each finished motif to 10in wide x 11in tall (25.5cm x 28cm) approximately before assembly; adjust if your gauge varies.
— Motif (Make 3 identical panels) :
Round 1 :
Using cream yarn, chain 31. Turn. (31)
Round 2 :
3 dc in 4th ch from hook (counts as dc+ch2 mesh start), *ch2, skip 2 ch, 1 dc in next 1 ch; rep from * across to last ch, 1 dc in last ch. End with total 31 stitch positions including the dc and ch-spaces as worked. (31)
Round 3 :
Ch3 (counts as dc), turn. *Dc in next dc, ch2, sk next ch2 space and place dc in next dc; rep across ending with dc in last st. Maintain mesh pattern across (31)
Round 4 :
Ch3, turn. Dc in each dc across, working ch2 spaces as ch2 loops — keep regular mesh. This creates a slightly denser base row before the wheat overlay. (31)
Info :
These first four rows create the filet mesh background. Maintain consistent tension; this mesh will be visible between raised wheat stems. Place a stitch marker in the first stitch of each row to mark the right edge for alignment when you join panels later.
Round 5 :
Ch3, turn. Work dc into each dc across maintaining ch2 mesh pattern in the same positions as Round 2 (31)
Round 6 :
Ch3, turn. Dc across. (31)
Round 7 :
Change to golden yellow yarn. Ch3, turn. Working in front of your mesh background, prepare to begin the wheat sheaf base: 1 dc in first st, *ch1, sk next st, 1 dc in next st; rep across establishing 15 small loops that will act as anchors for the raised wheat elements. (31)
Info :
For the wheat sheaf we will create several layers: a lower skirt of short elongated loops, a central bundle of long elongated loop stitches, and overlay cluster 'ears' of wheat made from puff/post combination. Work each set of loops anchored to the mesh base so they can be trimmed and shaped later.
Round 8 :
Ch1, turn. Sc across in each visible stitch or ch loop to anchor anchors: 31 sc (31)
Round 9 :
Change to amber gold (for subtle shade). Ch3, turn. Prepare the lower skirt of the sheaf: in sts 5-27 (center 23 positions), work elongated loop stitch: (yo, insert hook, pull up loop to 1.5in long from fabric) repeat twice more in same stitch (so there are 3 tall loops held on hook), yo and pull through all loops to create a triple-loop elongated puff anchored at base. Work 1 elongated puff in every 1st stitch across the center section (23 elongated puffs). In edge 4 sts on each side keep 1 dc for framing. Total st positions remain 31.
Round 10 :
Ch1, turn. Secure elongated puffs: sc into top of each puff to anchor and tidy; sc in each dc along edges. (31)
Info :
If your elongated loops are too long, trim lightly later; they should be slightly longer than desired final length because trimming will shape the sheaf. Keep a consistent loop length across a motif for a neat braided look.
Round 11 :
Ch3, turn. Working in amber and golden gold alternation, create the central stems: place a series of 9 long surface chains anchored along rows 9-12 by pulling up long loop stitches from front (overlay loop). Technique: insert hook into specified anchor st from front, yarn over and pull a long loop up to desired length (about 2.5-3in), hold on hook. Repeat for each anchor to create parallel long loops across the center 9 positions. After collecting one loop from each anchor, fasten by working across with a slip stitch row to lock loops in place. This becomes the long central bundle. (31)
Round 12 :
Ch1 turn. Sc across, working sc into the base of each locked loop to secure center bundle. Edges remain plain sc. (31)
Round 13 :
Switch to golden yellow. Ch3 turn. Add the raised 'ears' of wheat above the central bundle: In the 9 center positions create short vertical post puff clusters: (yo, insert front post dc around specified stitch, yo pull up into a long loop, repeat 3 times around same post to form a multi-wrap post puff), then yo and pull through all loops to close puff. Work a puff cluster in each of the 9 center positions to give the appearance of rows of kernels. (31)
Info :
Front post puff clusters create very pronounced texture; use moderate tension to avoid overly tight fabric. If puff top is too bulky, use 3 wraps instead of 4. After making cluster row, you will cover the base with a banded tie and then shape the lower skirt to resemble bound wheat.
Round 14 :
Ch1, turn. Sc across, anchoring each puff cluster with an sc in its base. (31)
Round 15 :
Change to brown. Ch2, turn. Work a narrow horizontal band (the tie that holds the sheaf) across rows 14-16 centered over the stalk: in positions 12-20 work 9 hdc in back loops only (BLO) to produce a slightly raised band. In other positions sc across. (31)
Round 16 :
Ch1, turn. Sc across, securing tie: 31 sc (31)
Info :
For a neat tied look, work the tie over 3 rows: hdc BLO on row 15, then repeat a dense row of dc across row 16 while carrying the brown yarn behind until you secure it fully. Fasten off brown and weave in ends under the tie for a tidy finish.
Round 17 :
Switch back to golden yellow. Ch3, turn. Create a second decorative row of mini 'kernel' puffs above the first cluster: work small 2-wrap puff stitches into 11 positions above the central bundle to add density at the top of the sheaf. Edge positions remain dc. (31)
Round 18 :
Ch1, turn. Sc across, anchoring puffs. (31)
Round 19 :
Change to olive green. Ch3, turn. Add leaf accents on either side of the sheaf: at positions 7-9 and 23-25 work small raised leaf sequences: (1 hdc, 1 dc, 1 tr, 1 dc, 1 hdc) worked along a short vertical surface with FPdc to make the leaf lift from the background. Leaves are worked in FLO on the background row so they sit above mesh. (31)
Round 20 :
Ch1, turn. Sc across anchoring leaves with sc at their bases and dc at plain positions. (31)
Info :
Take care with leaf placement; place the right-leaf cluster slightly lower than the left cluster to create a natural asymmetric arrangement that matches the photo. Use stitch markers to mark the exact stitch positions (7-9 and 23-25) before making shaping stitches.
Round 21 :
Ch3, turn. Working in amber gold and golden gold, add small acorn/brown seed bobble clusters near the base of leaves: make 3 small bobbles on each side using 3-loop puff (yo insert, pull up 3 times then pull through), then sc to anchor. Place bobbles at stitches 5, 6, 26, 27 as compact accent groups. (31)
Round 22 :
Ch1, turn. Sc across entire row to secure bobbles and tidy the base of the motif. (31)
Info :
If bobbles are too loose, rework them with one extra loop wrap. After this row you may lightly tease a tiny amount of fiberfill under the central bundle before you fasten the final lower skirt, for a fuller sheaf profile.
Round 23 :
Change to golden yellow. Ch3 turn. Work finishing skirt: in the lower center 13 positions create rows of elongated loop stitches (2-wrap) to form the tied wheat stalk body below the tie band. Anchor each elongated loop into base stitches so they hang downwards when trimmed. (31)
Round 24 :
Ch1, turn. Sc across, anchor loop bases. (31)
Round 25 :
Ch1, turn. Using golden yellow, work a narrow picot row under the skirt: *(sc in next 3 sts, ch3, sl st in last ch to form a tiny loop) across the skirt area to tidy edge; sc across remaining side stitches. (31)
Round 26 :
Ch3, turn. Work 1 dc in each st across, creating a clean row to prepare motif for final mesh bands. (31)
Round 27 :
Change to cream. Ch3, turn. Re-establish mesh: *ch2, sk next st, 1 dc in next st across; rep to end to create a breathable grid that frames motif. (31)
Round 28 :
Ch1, turn. Sc across anchoring mesh. (31)
Round 29 :
Ch3, turn. Dc in each st across to stabilize edges. (31)
Round 30 :
Ch1, turn. Sc in each st across for neat edge. Fasten off and weave in ends. Block motif to specified measurements. (31)
Info :
Repeat Rounds 1-30 to make two more identical motif panels (total 3). Take care to orient leaves and bobble clusters consistently so the runner has a uniform look. After blocking, measure width; all three motifs should match. If a motif is slightly smaller, stretch gently while wet-blocking to match the others.
— Joining Mesh Strips (Make 2 to insert between motifs) :
Round 31 :
Using cream yarn, chain 31 (same width as motif). Turn. (31)
Round 32 :
Ch3, turn. Work open mesh across: *dc in next st, ch2, sk next 2 sts; rep across to create airy strip of height matching motif. Repeat this mesh for 4 rows so there is a clear space between motifs. (31)
Round 33 :
Repeat Round 32. (31)
Round 34 :
Ch1, turn. Sc across; fasten off and block to width. (31)
Info :
Make two mesh strips. The final runner is Motif1 + mesh strip + Motif2 + mesh strip + Motif3. Align the right and left edges precisely and pin when ready to join. Use mattress stitch or slip-stitch join method for an almost invisible seam.
— Assembly of Runner Panel :
Round 35 :
Lay motifs and strips flat in order. Using cream yarn and a tapestry needle, whip stitch or mattress stitch along the long edges matching stitch to stitch. Join so that front surface shows continuous mesh and motifs are evenly spaced. Seam across both sides of each mesh strip (two seams per strip) for stability. (Info: join lengthwise)
Info :
When seaming, place pins every 1/2in to keep edges aligned. If using slip-stitch join, join in a single crochet loop: place motifs WS together and slip stitch through both loops across each stitch for a neat seam. Avoid bulky joining stitches that will distract from the sheaf motifs.
— Border (Worked continuous around assembled runner) :
Round 36 :
With runner assembled and still blocked, join golden yellow yarn at a lower corner on the right side. Ch1, work 1 sc evenly spaced along the edge to create a thin foundation round. Place 3 sc in each corner to maintain shape. Continue sc evenly along the short edge, long edge and final short edge returning to start. (Work counts will equal runner perimeter; count sts to keep edges tidy)
Round 37 :
Ch3, turn. Work a round of dc across every sc to create a defined frame. Place 3 dc in each corner to ease turning. (Info: st count will be perimeter / ensure corners have increases)
Round 38 :
Change to brown. Ch1, turn. Work 1 sc in each st across to create a narrow textured stripe. This brown stripe frames the cream center and ties visually to the brown sheaf ties. (Info: this is a subtle framing round)
Round 39 :
Change to amber gold. Ch3, turn. Work 1 dc in each st across. (Info: this establishes the base for the scalloped outer edge)
Round 40 :
Ch1, turn. Work shell edging: *sk next 2 sts, (5 dc) in next st, sk next 2 sts, sl st in next st; rep around. At corners, work 7 dc in corner st to create rounded corner shells for a tidy rectangle. (This creates pronounced scallops around perimeter.)
Info :
If your perimeter shell spacing needs to be slightly tighter or looser for symmetry, adjust the number of skipped stitches between shells so that the final count returns neatly to the starting point. It's important shells align symmetrically at each side center and corner.
Round 41 :
Fasten off and weave in ends securely on WS. Block final runner flat and allow to dry. The scalloped border will create a high-contrast frame for the sheaves and complement the golden palette. (Info: final finishing)
Info :
Press gently with steam if desired, or leave to dry fully on blocking mats. The raised sheaf elements may be lightly shaped with scissors: trim elongated loops to create tapered 'stalks' for the lower skirt and slightly clip top loops to reveal rounded kernel shapes. Use caution and trim conservatively: you can always trim more but you cannot add back yarn.
— Finishing Touches & Alternative Techniques :
Round 42 :
Optional: Add a narrow crocheted cord of brown yarn and wrap it around the tie area of each sheaf to get a more realistic bound look. To do this, chain 40 in brown, single crochet back along chain to make a thin rope, then wrap twice and tack at back with needle. (Info: decorative tie)
Round 43 :
Optional embroidery: Use a strand of darker brown held doubled and a tapestry needle to stitch small vertical embroidery lines on the puff clusters to emphasize kernel ridges. Work short straight stitches radiating from the base towards the tip on each puff row. (Info: embroidery details)
Round 44 :
Optional: If you prefer less dimensional texture, substitute puff clusters with 3-tr clusters worked flat (dc3tog style) so the motif reads flatter but still textured. (Info: technique substitution)
Info :
Care: For cleaning, spot clean only. Avoid machine washing because the raised loops and bobbles may snag. If laundering is needed, hand wash gently in cool water and reshape before laying flat to dry.
This Golden Wheat Sheaf runner is a lovely seasonal centerpiece that brings texture and warmth to any table. The layered puffs, elongated loops and bobble accents create a tactile, heirloom-quality piece you'll be proud to display. I hope you enjoy the rhythm of creating three identical motifs and watching the runner come together with the final scalloped frame. 🧶🍂 Your finished runner will add cozy, handcrafted character to autumn celebrations and everyday dinners. Happy stitching and share a photo when you're done! 🌾✨