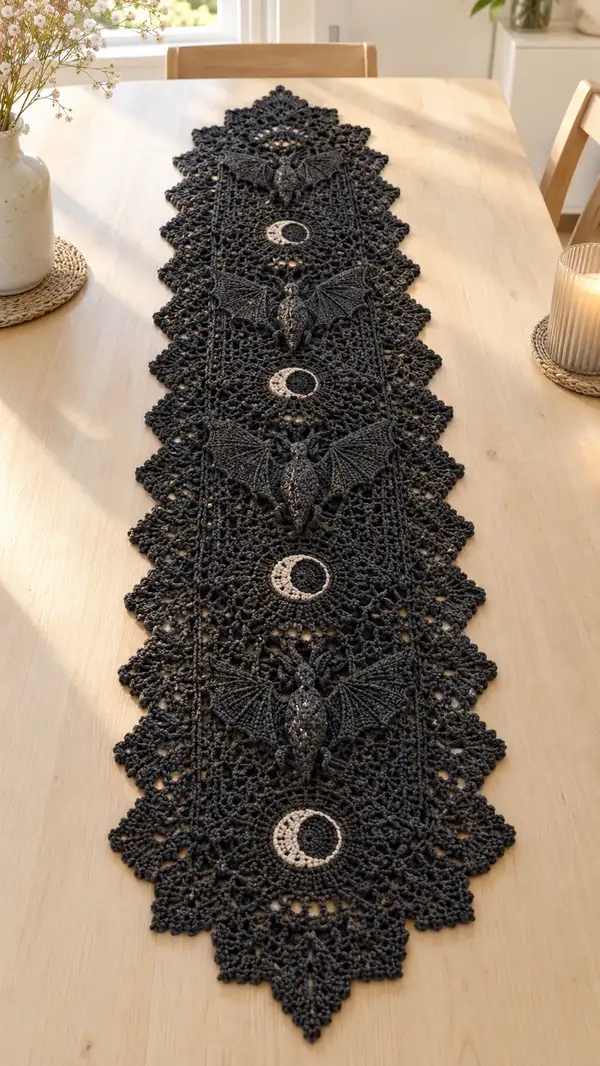
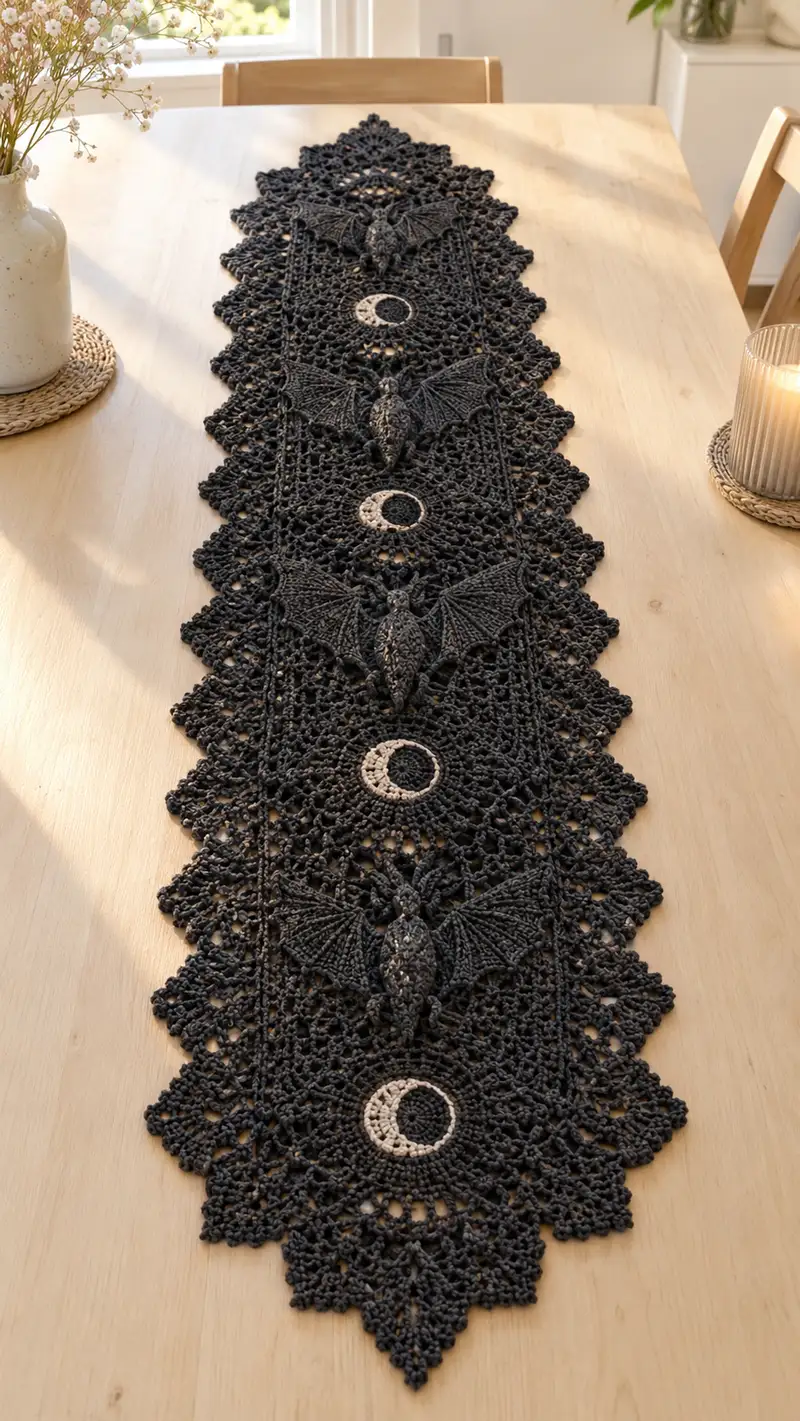
A dramatic, lace-style table runner featuring textured 3D bats and crescent moon medallions set into an openwork rectangular lace panel. Worked in a thick cotton or cotton-blend yarn for structure, this runner lays flat with pointed scalloped edges and repeating modules. The contrasting pale moons add a striking focal point against the deep charcoal body for an elegant seasonal or everyday centerpiece.
Progress Tracker
0% Complete
— Pattern Overview :
Info :
This runner is constructed from repeating modular units: a central open lace rectangle module, a crescent moon medallion worked in rounds, and a sculpted 3D bat module made of a stuffed body and two wings. The pictured runner repeats the sequence three times with scalloped pointed ends. Work each motif separately, block flat, then join with a joining round to form the continuous runner. Adjust repeats to desired length.
— Center Moon Medallion :
Round 1 :
6 sc in magic ring (6)
Round 3 :
(1 sc, inc) x 6 (18)
Round 4 :
(2 sc, inc) x 6 (24)
Round 5 :
(3 sc, inc) x 6 (30)
Round 6 :
(4 sc, inc) x 6 (36)
Info :
This establishes the circular base of the medallion. Keep tension slightly firm to reduce gaps; use contrast Stone yarn for the following rounds to create the crescent highlight.
Round 7 :
Change to Stone/Contrast color. 1 sc in each st (36)
Round 8 :
1 sc in next 6 sts, ch2, sk 2 sts, 1 sc in next 10 sts, ch2, sk 2 sts, 1 sc in remaining sts to create segmented spaces (36)
Round 9 :
Working into sts and ch-spaces: (sc, ch3, sl st into next ch space) around to shape the crescent outline (36)
Info :
At this stage you are shaping a crescent arc within the medallion by placing decorative chain arches on one side only. Position the crescent so it will sit centered within the lace opening when joined later.
Round 10 :
Switch back to Main color or continue in Stone if you prefer a solid moon. 1 sc in each st around to firm the circle (36)
Round 11 :
(2 sc, dec) x 9 (27)
Round 12 :
(1 sc, dec) x 9 (18)
Info :
Fasten off and weave in ends. Block the medallion flat and shape the crescent so the contrast color sits cleanly against the main body. Make 4 identical medallions for the pictured runner (one per module plus extras if you lengthen the runner).
— Bat Body (Make 3) :
Round 1 :
6 sc in magic ring (6)
Round 3 :
(1 sc, inc) x 6 (18)
Round 4 :
(2 sc, inc) x 6 (24)
Round 5 :
(3 sc, inc) x 6 (30)
Info :
Use a smaller hook (5.5mm) for the bat body if you want a firmer, more sculpted shape. Work tightly to minimize holes. This creates a rounded, slightly elongated beetle-shaped torso that will be lightly stuffed.
Round 6 :
1 sc in each st (30)
Round 7 :
1 sc in each st BLO (30)
Round 8 :
(4 sc, dec) x 5 (25)
Round 9 :
(3 sc, dec) x 5 (20)
Info :
At the end of Round 9 begin shaping the tapered rear of the bat body. Start light stuffing after Round 9 — use small amounts of fiberfill pressed into the nostril area and center so the body keeps its elongated form without being overstuffed.
Round 10 :
(2 sc, dec) x 5 (15)
Round 11 :
(1 sc, dec) x 5 (10)
Info :
Fasten off leaving a long tail for sewing. Stuff final area lightly and close the small opening by sewing through remaining 5 sts and pulling tight to form the pointed tail. Weave in tail through the body to secure and trim. Repeat to make 3 bat bodies.
— Bat Head & Details :
Round 1 :
With main color, ch2, 6 sc in second ch from hook (6) — small head nub (6)
Round 3 :
(1 sc, inc) x 6 (18)
Info :
Attach the head nub to the front of the body by sewing through round centers at the front-most point, leaving a seam for the bat face. Use small embroidered eyes or French knot stitches to make subtle eye points; do not use safety eyes — keep this decorative for stability.
— Bat Wing (Make 6: 2 per bat) :
Round 1 :
Ch10, sc in 2nd ch from hook, sc across to end, turn working along foundation (9)
Round 2 :
Ch2 (counts as hdc), hdc in next 3 sts, (dc, ch2, dc) in next st to create small picot arch for finger joint, hdc in next 3 sts, hdc in turning ch (9+ arch)
Round 3 :
Turn; ch3 (counts as dc), dc in each st across, working dc clusters into the arch: (dc3, ch2, dc3) in arch space to widen wing (11 + arch)
Round 4 :
Ch3, (dc, ch1, dc) in the first st along the outer edge to create scalloped outer edge, 1 dc in each middle st, (dc, ch1, dc) in arch top, repeat to end (13)
Info :
The wings are worked flat and shaped to have three 'fingers' or arches. To create the ribbed veins on the wing, after Round 4 work a series of BLO rounds that create raised ridges by crocheting into the back loop of the dc rows and placing evenly spaced slip-stitch ribs across the wing membrane.
Round 5 :
Working in BLO, sc in each st across to create a ridge (13)
Round 6 :
ch1, sl st into next 2 sts, (sl st, ch3, sl st) into each ch1 space along scallop to form decorative picots; continue sl st across the wing to the end (13)
Round 7 :
Fasten off leaving long tail for sewing. Layer a second narrow row of contrast pale highlights along the inner fingers if desired by slip stitching pale yarn along the inner edge; weave in ends.
Info :
Sew wings to the sides of the bat body: position so the base of each wing aligns with round 6 of the bat body (counting from front head nub). Use mattress stitch or whip stitch to attach through the back loop of both wing and body for a secure seam. Slightly fold wing tips forward to mimic natural wing hang.
— Lace Panel Module (Make 3 Modules for Sample Runner) :
Round 1 :
With main color, ch6, join with sl st to first ch to form loop, ch3 (counts as dc), 15 dc into ring, join (16)
Round 2 :
Ch4 (counts as tr), tr in each st around, join (16)
Round 3 :
Ch3, dc, ch2, sk next st, (dc, ch2, sk next st) around to create a lacy ring (16 dc clusters, 16 ch2 spaces)
Round 4 :
Into each ch2 sp: (sc, ch3, sc) to make petals; between petals sc into dc below to anchor (48 sts counting petals)
Info :
This rounds builds a circular medallion base inside the rectangular openwork. The lace panel must be squared later; we will convert the medallion into a rectangular panel using directional chains and corners in the next rounds.
Round 5 :
Ch6, 1 dc into top of every fourth petal to begin directional bars; work 4 bars spaced to form a cross (24)
Round 6 :
Work outward in alternating rounds of chain loops and dc clusters: ch5, skip 2, sc into next, ch5 across to form open mesh squares for the body of the panel. After this round your stitch count will vary with mesh spaces; aim for an even grid of 8x6 mesh squares across the width.
Round 7 :
Ch3, dc into each sc and into center of each chain mesh to widen where needed; count and adjust to maintain a rectangular ratio ~ 28-32 dc across depending on tension (approx 30)
Round 8-12 :
Repeat Round 6-7 alternating mesh (ch5, sc) and anchoring dc rows for 5 rounds to build length (maintain approx 30 across)
Info :
These rounds generate the open lattice look that sits beneath the bat and moon. Keep chains even; use a stitch marker at center of width to maintain symmetry. Work until this module roughly measures the same width as your bats' wingspan (in my sample each module is ~18 cm wide).
Round 13 :
Begin forming rectangular corners: ch3, dc across to corner, (2 dc, ch2, 2 dc) in corner space, continue across remaining side, repeat corner shells at each corner. This square-round increases count to roughly 36-40 dc perimeter depending on your mesh count.
Round 14 :
Work decorative open fan rows into each side: *(sk 2, 5 dc in next st, sk 2, sc in next)* repeat around to create fans along the edges (fan count ~10 per side)
Round 15 :
Ch1, sc into each st and into top of each fan to anchor. This reduces the live count back to perimeter dc count; expect approx 40 sc around.
Round 16 :
Work two rows of picot edging along the inner rectangular frame: (sc, ch3, sl st in 3rd ch) evenly around to create small decorative points (40)
Info :
Block this module flat. The medallion will serve as the base around which you place the moon medallion and the bat. You will be joining the moon to the center open space and sewing the bat to the mesh top. Make 3 modules for pictured runner length — repeat more for longer runners.
— Joining Moon to Lace Module :
Round 1 :
Position the Moon Medallion over the central hole of the Lace Module. Using main color yarn and a tapestry needle, whip stitch the moon's outer round to the inner ring of the lace module through every 4th stitch to keep it centered (approx 9-12 evenly spaced stitches).
Info :
Pin the moon into position before sewing. The moon should sit slightly raised — do not pull too tightly when sewing or it will pucker the lace. A few extra anchoring stitches at the top and bottom of the moon will keep it stable.
— Attaching the Bat Module to Lace Module :
Info :
Position the bat on the mesh so the body sits central above the moon and the wings drape across the mesh edges. The bat body base should align with the central horizontal bar created in the Lace Panel (roughly the same horizontal line as medallion center).
Step :
Sew the bat body to the mesh through the back loops of center rows using the long tail left from the bat body. Take tiny stitches to avoid visible gaps. Attach each wing with several hidden stitches along the wing base and through the mesh anchor point, shaping wings slightly upward as you sew.
Info :
When sewing the wings, pick up both the back loop of the wing base and the mesh to create a flat, secure join. Reinforce with two or three passes if you want extra durability on a surface that will be moved often.
— Central Runner Connector Rows (Join Modules into a Continuous Strip) :
Round 1 :
Align two completed Lace Modules with their edges touching. With main color and RS facing, sc through corresponding picot edges of both modules (work through both loops of each module's edge), joining the modules together with sc seams. Work approx 36 sc joins across the seam.
Round 2 :
After joining, work a unifying row along the seam: ch3, dc evenly across the seam line into each join stitch to form a framed ridge (approx 36 dc)
Info :
Repeat seam joining for all modules to build the runner length. Pin modules at least three points per seam before sewing — top, center, bottom — to ensure straight alignment. Trim any long tails as you go and weave in ends to keep joins neat.
— Scalloped Pointed Edge (Both Long Sides and Ends) :
Round 1 :
With RS facing, ch1, sc evenly along one long side spacing approx every 2 dc across the outer edge (approx 60 sc, count may vary with your gauge)
Round 2 :
*Skip 1 sc, 7 dc in next sc (shell), skip 1 sc, sc in next sc* across to create scallops. End with sc to finish (approx 20 shells)
Round 3 :
Ch3, into each shell work (2 tr, ch2, 2 tr) to elongate scallop for pointed tips, sl st into sc between shells to anchor (each shell becomes a pointed triangle)
Info :
For the runner ends, increase the number of shells into the corner to create pronounced points — work (3 tr, ch2, 3 tr) into corner shells to create the tall triangular tips visible in the photo. Keep tension firm on these rounds so the runner lays flat after blocking.
Round 4 :
Work a finishing picot and sl st row: (sc, ch3, sl st in 3rd ch) along points to sharpen tips and reduce curling (shell count same)
Round 5 :
Fasten off and weave in all ends. Repeat scalloped edge on opposite long side and on both ends of the runner for symmetry.
— Decorative Raised Veins on Wings (Optional Texture) :
Round 1 :
With main color and RS facing the wing, work small surface slip-stitch ribs: insert hook into back of wing, pull up a loop and sl st along a straight line from base to tip; repeat 3-4 ribs per wing finger. Anchor both ends with small backstitches.
Info :
This creates the textured vein lines seen in the wings. Work evenly spaced and tensioned ribs to avoid puckering the wing membrane. Use matching yarn color to keep texture subtle or contrasting color to highlight veins.
— Final Blocking & Flattening :
Step :
Wet-block each individual module and the completed joined runner: pin flat on blocking mat, shape pointed ends, and allow to fully dry. Use rust-proof pins and lightly steam if needed to relax any stubborn curls. Blocking is essential to achieve the lace openness and flat surface shown in the photograph.
Info :
When pinning, use a ruler to keep each side straight and measure repeat spacing between bats and moons so that the motifs lay equidistant. Allow 24 hours to dry before light pressing with a warm iron over a cloth if more flattening is required.
— Finishing Touches :
Info :
Weave in remaining tails securely on the WS. If you prefer greater permanence for the bat bodies, add a few discreet stitches through the underside of the wing into the bat body to lock position. You may optionally apply a small amount of fabric glue behind the bat body to ensure it remains anchored to the runner for display use.
Step :
Gently brush the runner surface with a soft bristle brush to settle any stray fibers and check all joins once more. Your finished runner is now ready to use and display.
Info :
If lengthening the runner, continue adding Lace Modules and repeating the sequence Moon -> Bat -> Lace Module until your desired table length is reached. Always block each new module before joining to maintain a consistent look.
Putting the final stitches into this gothic bat and moon runner is pure satisfaction — the raised bats and pale moons contrast beautifully against the deep lacework. Each modular unit blocks flat and snaps perfectly into the next to create a dramatic, elegant centerpiece. Whether for seasonal styling or a year-round moody accent, this runner invites compliments and cozy table moments. 🧶🕯️