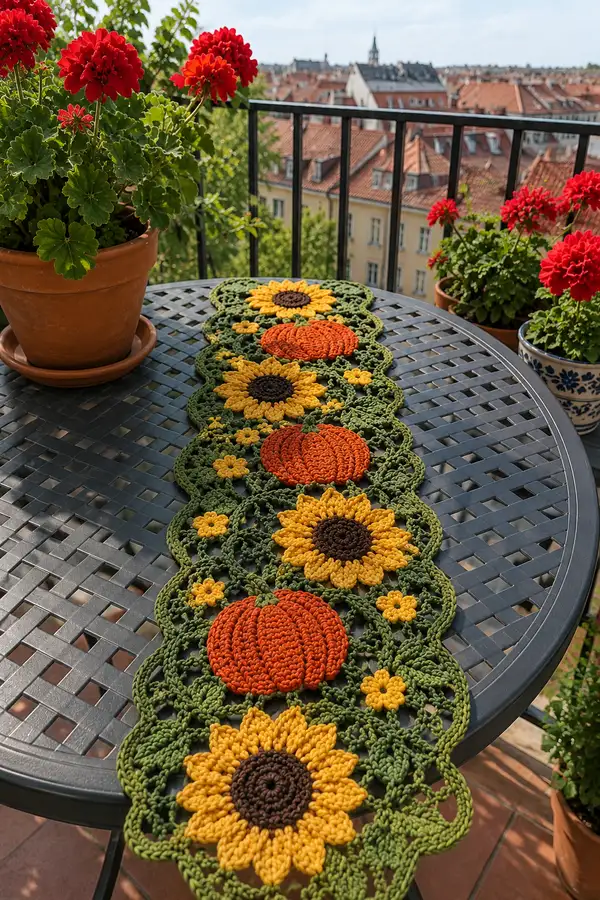
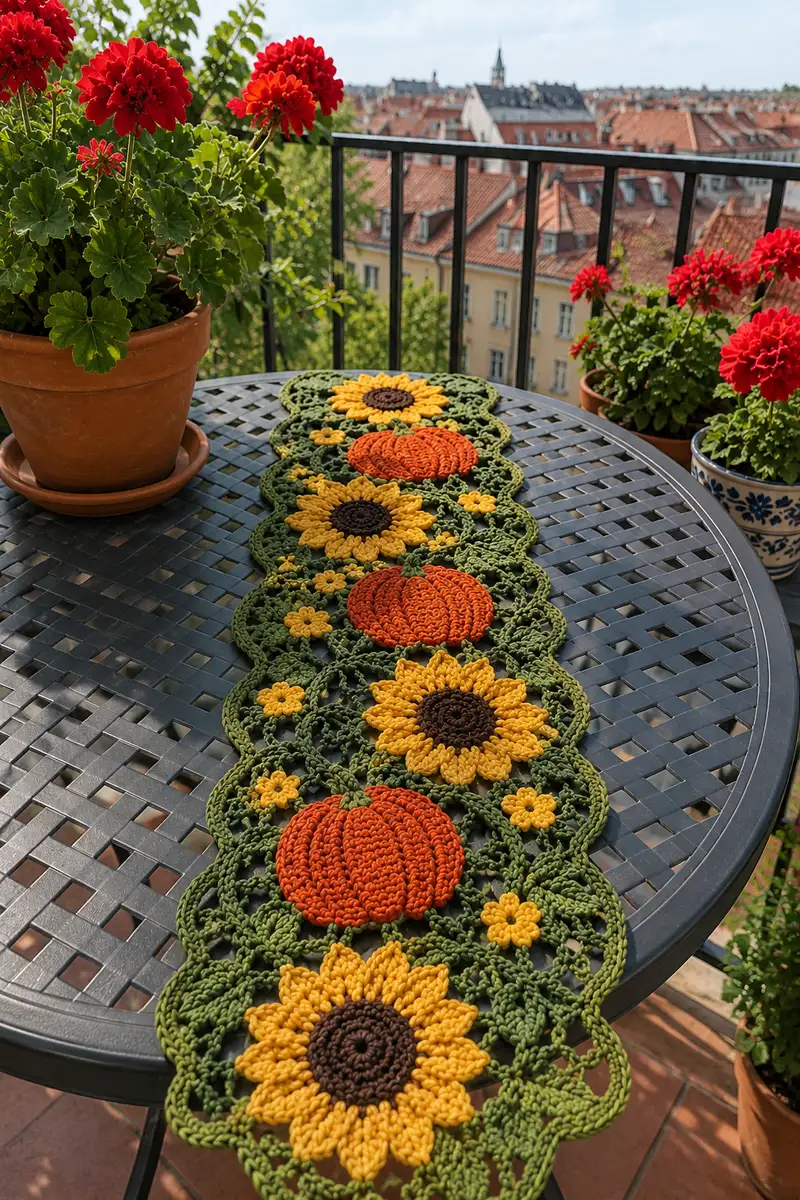
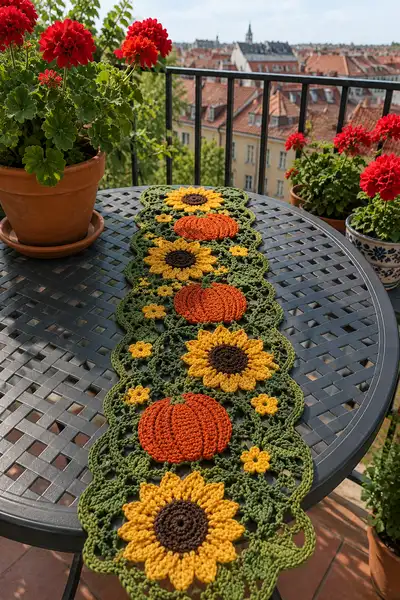
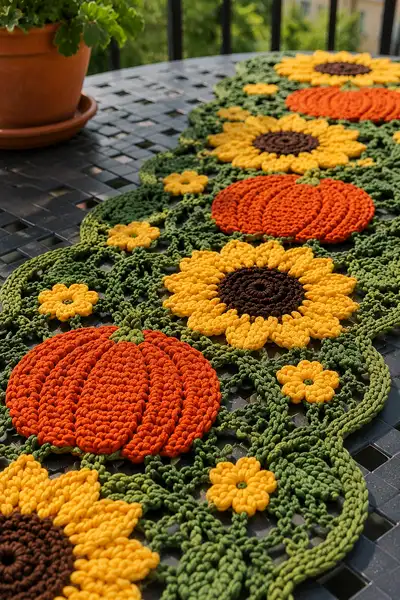
A warm, autumn-inspired table runner featuring alternating sunflowers and pumpkins on a lacy vine background. Worked in bright gold, rich pumpkin orange and earthy green, this runner adds harvest charm to any table. The design uses modular motifs joined as-you-go for a seamless floral vine with scalloped edges. Ideal for adding seasonal color to your home or creating a thoughtful handmade gift.
Progress Tracker
0% Complete
— Notes :
Info :
This pattern is modular: you will make alternating sunflower motifs and pumpkin motifs, joined with small filler flowers and vine connector motifs. Each large motif is worked in the round flat then joined into the vine grid. Work loosely but consistently; cotton yarn holds shape best when blocked after completing each motif. The pattern below lists full round-by-round instructions for each motif type and the vine join. Maintain stitch counts exactly for tidy joins.
— Sunflower Motif (Make 4-6 depending on runner length) :
Round 1 :
6 sc in magic ring (6)
Round 3 :
(1 sc, 1 inc) x 6 (18)
Round 4 :
(2 sc, 1 inc) x 6 (24)
Round 5 :
(3 sc, 1 inc) x 6 (30)
Round 6 :
(4 sc, 1 inc) x 6 (36)
Info :
Center done in dark brown. Use a smaller hook (3.5 mm) for Rounds 1-6 if you prefer a tighter, neater center. Finish center firmly but not overstuffed — this piece is flat.
Round 7 :
1 sc in each st (36)
Round 8 :
1 sc in each st (36)
Info :
Change to mustard yellow yarn at end of Round 8 for petals. Carry the brown inside or fasten off neatly and join yellow with sl st.
Round 9 :
(3 sc, sk 1, sl st in next st) x 9 (36)
Round 10 :
Work petal foundations: *sc in next 3 sts, ch 3, 3 dc in ch-3 space, ch 3, sc in next 3 sts; sl st into base to anchor petal* repeat 9 times (petal anchors 9 petals) (36)
Info :
We are creating 9 large petals around the center (photo shows sunflower with a generous petal set). If you prefer 12 petals, adjust Round 9 to (2 sc, sk 2, sl st) x12 and reduce petal width accordingly. The method here gives large sculpted petals using clusters.
Round 11 :
Working behind the petals, ch 1, *(3 sc in the gap behind the petal), sc along base across 6 sts corresponding to the next petal anchor* repeat 9 times to stabilize petals (36)
Round 12 :
Petal shaping round: in each petal work (sl st, ch 1, 1 sc, hdc, 3 dc, hdc, 1 sc, ch 1, sl st) into the top of the petal cluster to give volume; repeat 9 times across (petal units: 9) (36)
Info :
Use front post or slightly raised stitches if you want more sculptural petals. After Round 12, lightly block petal tips outward with pins to shape sunflower.
Round 13 :
Border round to transition to vine: attach green yarn at a petal base, ch 2, *hdc in side of petal, ch 3, sl st into gap between petals* repeat 9 times then sl st to starting point (36 base joins)
Round 14 :
Working in green: ch 1, *sc in next 2 sts, ch 4, sk 2 (creates vine loop), sc in next st* repeat around to create 9 vine anchor loops (36)
Info :
This green foundation creates loops used for as-you-go joins to the vine mesh. Keep these loops even and wide enough to accommodate two dc later for joining.
Round 15 :
Edge round: 1 sc in each green-st (36) making sure vine loops are tidy; sl st and fasten off leaving long tail for final blocking and joining
— Pumpkin Motif (Make 4-6) :
Round 1 :
6 sc in magic ring (6)
Round 3 :
(1 sc, 1 inc) x 6 (18)
Round 4 :
(2 sc, 1 inc) x 6 (24)
Round 5 :
(3 sc, 1 inc) x 6 (30)
Round 6 :
(4 sc, 1 inc) x 6 (36)
Round 7 :
(5 sc, 1 inc) x 6 (42)
Round 8 :
(6 sc, 1 inc) x 6 (48)
Info :
We use 48 sts around for an even number of pumpkin ribs (8 ribs). You can work with 40 or 32 for fewer ribs; adjust rib count accordingly. Keep the orange yarn and a 4.0 mm hook for the pumpkin rounds. This round count creates a fairly large pumpkin motif approximately 5.5" diameter when using worsted cotton.
Round 9-12 :
1 sc in each st (48)
Round 13 :
Texture base: ch 2 (counts as hdc), *2 hdc in next st, 1 hdc in next 5 sts* repeat around (48)
Round 14 :
1 hdc in each st (48)
Info :
We now create vertical ribs using front-post double crochet (fpdc) worked on alternating stitch columns. Mark every 6th stitch with a marker to orient ribs: you will have 8 marked stitches for ribs across 48 sts.
Round 15 :
Ch 2, *fpdc around the post of stitch #1 (marker), then 5 hdc across the next 5 sts* repeat around to create 8 raised ribs (48)
Round 16 :
Repeat Round 15 to build height and depth on ribs (48)
Round 17 :
(1 sc in each st) across to tidy top edge, creating a firm edge for joining (48)
Info :
Make 4 short rounds of fpdc for deep ribs if you want a taller pumpkin. For a flatter pumpkin, do two fpdc rounds only. Stuffing is not used — motifs are worked flat; ribs give illusion of roundness.
Round 18 :
Attach a small stem: change to olive green, ch 5, sl st back along ch to form a short stem, anchor with sl st to pumpkin top; fasten off leaving tail for sewing (no change to main count) (48)
Round 19 :
Working in green around pumpkin edge: ch 2, *sc in next 4 sts, ch 4, sl st in next st* repeat 8 times to create 8 vine anchor loops evenly spaced (48)
Round 20 :
Sc evenly around green edge to tidy (48), fasten off leaving long tail for as-you-go joins
— Small Filler Flower (Make many) :
Round 1 :
6 sc in magic ring (6)
Round 2 :
(1 sc, 1 inc) x 2 then (1 sc, sl st) to shape small circle (8)
Round 3 :
Change to yellow, *ch 2, 3 dc in same st, sl st into next st* repeat around to create 4 puff petals (4 petal clusters, 8 base anchors) (8)
Round 4 :
Sl st along base around to tidy and leave long tail for as-you-go joining; do not fasten off so you can join to vine loops (8)
Info :
These tiny flowers fill the spaces between pumpkins and sunflowers and are anchored into vine chain loops. Make a good number (8-12) for the pictured runner length; you can make more or fewer depending on spacing.
— Leaf / Vine Connector Motif (Make many) :
Round 1 :
Using green, ch 6, sl st into 2nd ch from hook and across to make a small cord of 5 sc along chain, turn and work back along chain on other side with 5 sc to form a small leaf base; join ends with sl st to form small oval leaf (10)
Round 2 :
Ch 1, working around oval, *sc evenly around with increasing at tips: (2 sc, 1 inc) at each tip; sc along sides* produce 14 sts total after increases (14)
Round 3 :
Leaf shaping: *sc in next 3 sts, hdc, 3 dc, hdc, sc in next 3 sts* to create a single shaped leaf (14)
Round 4 :
Attach a small vine stem: ch 6 from leaf base, sl st back along chain to make a cord; fasten off leaving long tail for sewing into vine mesh (14)
Info :
Leaves are used as connectors and decorative accents on the vine mesh. Make at least 12-16 leaves for the pictured runner; place them between the large motifs and along the border.
— Vine Mesh Motif (Make panels to join motifs in rows) :
Round 1 :
Using green, make a foundation circle to act as join anchor: 6 sc in magic ring (6)
Round 3 :
(1 sc, 1 inc) x 6 (18)
Round 4 :
(2 sc, 1 inc) x 6 (24)
Round 5 :
Ch 6, sl st into next st to make a loop; *sc into next 2 sts, ch 6, sl st into next st* repeat around to create 6 loops (24)
Round 6 :
Working into each loop from behind, ch 3, 3 dc, ch 3, sl st into base to form lacy arches; repeat around to create 6 arches (24)
Info :
These vine panels act as flexible chains between the large motifs. Panels are joined as-you-go to a petal-side loop or pumpkin loop using slip stitches through the loop. Make enough panels to connect all motifs into a linear runner (photo shows 7 large motifs interspersed with panels and filler flowers).
Round 7 :
Edge round: sc evenly around arches to tidy, then fasten off leaving long tail to sew into motif loops (24)
— Joining Motifs As-You-Go (Detailed method) :
Info :
We use the loops created on sunflower round 14 and pumpkin round 19 as joining points. Work the vine mesh panels and small filler flowers by inserting your hook through the loop on the completed motif and making sl st ch-joins to connect. Join every other vine loop to create a lacy open network. Below is a step-by-step joining routine used repeatedly.
Step 1 :
Place a sunflower motif flat; identify its 9 green joining loops from Round 14. Take a vine mesh panel and align its arches so that the panel's sl st base can be joined into these loops.
Step 2 :
With green yarn and right-side-up motifs, insert hook through both the vine panel loop and the sunflower loop, yarn over, sl st to join. Ch 3 and continue vine panel instructions; each join counts as one of the sl st anchors in the panel. Repeat to join both sides of the panel to adjacent motif loops so the mesh is continuous.
Info :
When joining pumpkins to panels, position pumpkin vine anchor loops evenly (8 around) and choose 4 anchors spaced across the top quadrant to join into the mesh so the pumpkin sits centered among vines.
— Runner Assembly Sequence (Example for pictured runner) :
Info :
Suggested motif order from one end: sunflower - vine panel - pumpkin - vine panel - sunflower - vine panel - pumpkin - vine panel - sunflower. Adjust number of repeats to desired length. Use filler small flowers and leaves to fill gaps and give an organic vine look.
Round 1 :
Start with center motif (sunflower). Join a vine panel on one side using the as-you-go method (1 sl st into petal-loop, ch and work panel arches). Fasten off when panel length matches the photo spacing and join to next motif (pumpkin).
Round 2 :
Attach each motif to adjacent panels using slip stitch joins. Each time you sl st through a motif loop and panel chain, you secure placement. Keep joins loose enough to allow slight drape but tight enough to keep shape (no more than 4-5 mm slack).
Info :
For neat joins, work from the right side and always join from the same relative position on each motif (e.g., top petal loops). Count loops between joins to maintain even spacing along runner length.
— Border and Scalloped Edge (Final finishing) :
Round 1 :
Once all motifs are joined into a straight runner, work a border round in green along the entire outer edge: sc evenly around the outer perimeter, placing approx 1 sc per visible stitch; on curves and arches, increase slightly to avoid puckering. Expect to add 6-12 extra sc on curved edges to lie flat (st count varies).
Round 2 :
Sc tidy round: 1 sc in each st around to make border even and firm. Place stitch markers every 12 sts to maintain smooth tension.
Round 3 :
Scallop round: *skip 2 sc, 5 dc in next sc (shell), skip 2 sc, sl st into next sc* repeat around to create scallops (shell count varies but keep shells evenly spaced)
Round 4 :
Picot finish: into the center stitch of each shell work *(sc, ch 3, sl st into first ch)* to create tiny picots between scallops; fasten off and weave in tails
Info :
Blocking is essential: wet block the entire runner gently; pin into rectangular shape and allow to dry flat to set scallops and motifs. Use light steam if necessary but not hot iron directly on yarn.
— Extra Decorative Embellishments :
Info :
You can add embroidered veins to leaves using a darker green and stem stitch, or attach small wooden beads to sunflower centers for rustic detail. If you want a stiffer runner, apply a thin layer of fabric stiffener to the back after blocking.
— Complete Stitch & Round List Summary :
Info :
Sunflower motif rounds ~15; Pumpkin motif rounds ~20; Small filler flower rounds ~4; Leaf rounds ~4; Vine mesh ~7; Border rounds ~4. For a runner with 7 large motifs and accompanying panels and fillers you will work well over 120 rounds total across all motifs and joins — detailed instructions above provide exact repeatable steps for each motif so that counts remain consistent during assembly.
— Finishing Touches :
Info :
Weave in all ends on the wrong side, trim close. For extra durability, use matching thread to pass through join seams and secure junctions only if the runner will face heavy use. Light starch can be used on cotton to keep shape when displayed.
Finishing this Pumpkin Vine and Sunflower Table Runner is such a satisfying moment — all those textured petals and ribbed pumpkins come together in an elegant, cozy display. The runner brightens any table and feels wonderful to touch with its sculpted cotton stitches. Enjoy arranging it as the centerpiece for fall gatherings or as a handmade gift that says 'I care.' 🧶🍂✨