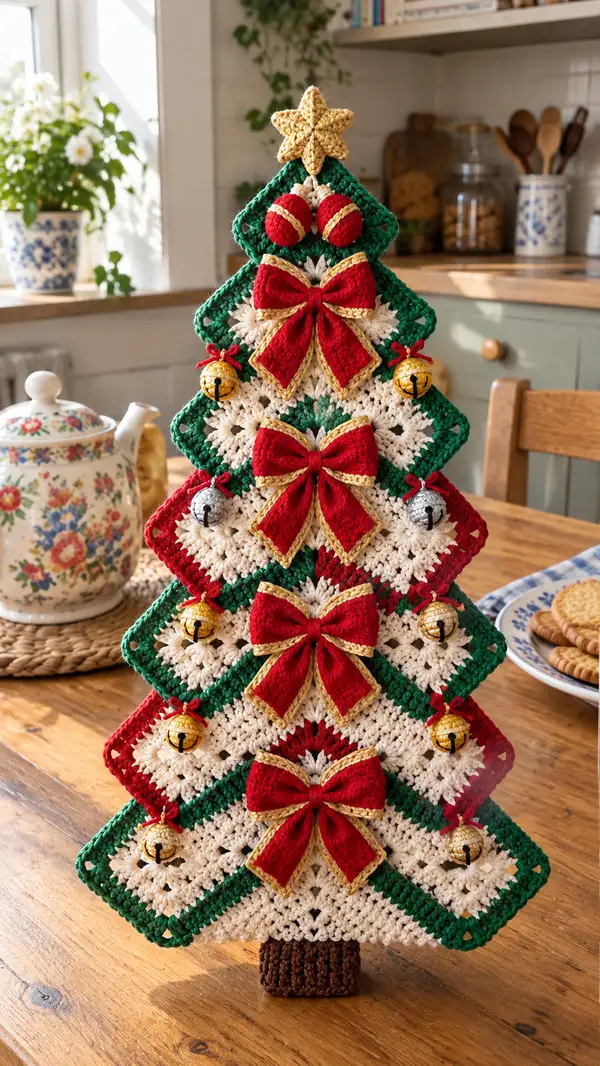
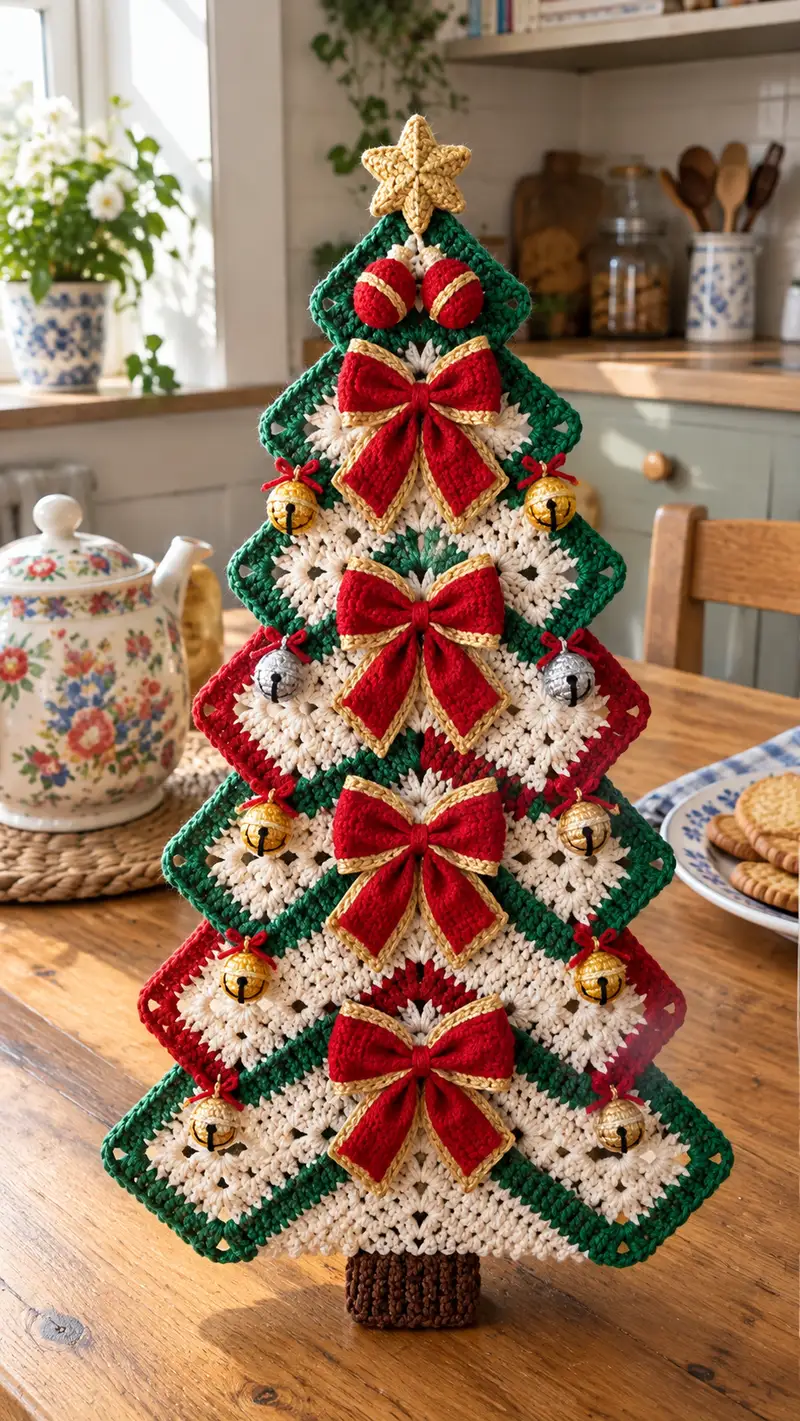
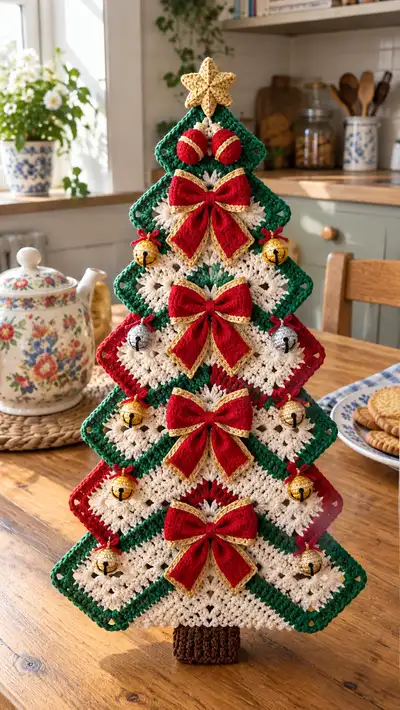
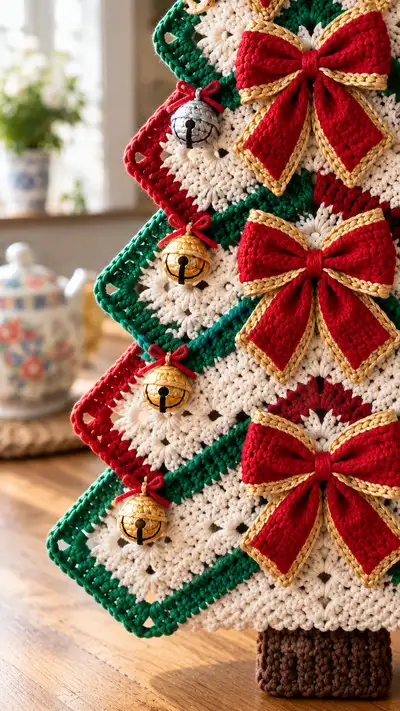
A festive, decorative wall hanging made from stacked granny squares arranged into a Christmas tree silhouette. Features cream-centered granny motifs with green and red borders, gold-trimmed red bows, jingle bells and a crocheted star topper. The design is perfect for tabletops, mantels, or hanging on the wall to add handmade holiday cheer.
Progress Tracker
0% Complete
— Materials & Gauge :
Info :
Gauge is flexible for a decorative piece; for reference each medium square (Rounds 1-14 below) measures approximately 10-11cm/4-4.5in across when worked in worsted weight yarn with a 4.0mm hook. Adjust hook size if you want a larger or smaller tree.
— Overview :
Info :
This project is built from six rotated granny squares stacked smallest-to-largest to form a tree silhouette: Square A (top, smallest) down to Square F (bottom, largest). Each square is worked starting in the center (cream), with two border colors used to create the alternating green/red tiered look. Bows (red with gold trim), small crocheted bells/loops, a star topper and a small trunk are made separately and sewn on.
— Square A (Top small diamond) :
Round 1 :
Ch 4, join with sl st to form ring. Ch 3 (counts as first dc), work 2 dc in ring, ch 2, *3 dc in ring, ch 2* repeat 2 times, sl st to top of ch-3. (4 corner clusters; each cluster is 3 dc; ch-2 corners)
Round 2 :
Sl st into first ch-2 sp, ch 3, (3 dc, ch 2, 3 dc) in same ch-2 sp (first corner), *ch 1, (3 dc, ch 2, 3 dc) in next ch-2 sp* repeat around, sl st to top of ch-3. (4 corners; ch-1 between corners; clusters per side = 1 corner cluster)
Round 3 :
Sl st into corner ch-2 sp, ch 3, (3 dc, ch 2, 3 dc) in same ch-2 sp, *ch 1, 3 dc in ch-1 sp from previous round, ch 1, (3 dc, ch 2, 3 dc) in next corner ch-2 sp* repeat around, sl st to top of ch-3. (Breathes extra clusters into sides for shape)
Round 4 :
Change to cream if not already. Sl st to corner ch-2 sp, ch 3, (3 dc, ch 2, 3 dc) in corner, *ch 1, 3 dc in each ch-1 sp along side as available (for Square A there will generally be 1 or 2 side groups), ch 1, (3 dc, ch 2, 3 dc) in next corner*; sl st to close. (Square grows evenly; this round builds the center snowflake)
Info :
Work the center rounds in cream until you have a stable 6-8cm center motif. Keep tension even so borders sit flat. Fasten off color if you prefer to cut and join a new border color for a crisp edge.
Round 5 :
Change to cream (if not), ch 3, dc groups as established around so sides are even. Aim for a center that reads as a clean 4-point square when rotated.
Round 6 :
Info : Finish center rounds. After Round 6 the square center should be firm. Change to green for outer border (first border color for Square A). Fasten off cream, join green at any corner ch-2.
Round 7 :
With green, ch 3, (2 dc, ch 2, 3 dc) in corner ch-2 sp to create a fuller corner, *ch 1, 3 dc in each ch-1 sp along the side (if present), ch 1, (3 dc, ch 2, 3 dc) in next corner*; sl st to close. (This gives a defined green frame near the center)
Round 8 :
Repeat Round 7 to widen the green border. For Square A only two green rounds are enough to keep the square compact. (Square A finished at Round 8: compact diamond that will be placed at tree top)
Info :
Block Square A flat, pinning corners out gently. Keep it slightly smaller than the next square to create the tiered overlapped look when assembled.
— Square B (Second tier) :
Round 1 :
Ch 4, sl st to join ring. Ch 3 (counts as dc), work 2 dc in ring, ch 2, *3 dc, ch 2* repeat to make 4 corner clusters. (Corner clusters = 4)
Round 2 :
Sl st to first ch-2, ch 3, (3 dc, ch 2, 3 dc) in corner, *ch 1, (3 dc, ch 2, 3 dc) in next corner* repeat around; sl st to top of ch-3. (4 corner clusters; sides currently empty)
Round 3 :
Work one round in cream to develop the central motif: in corner ch-2 do (3 dc, ch 2, 3 dc), ch 1, 3 dc in ch-1 sps, ch 1, repeat. This builds a larger center than Square A.
Round 4 :
Continue in cream, evening out side groups so each side contains 3 side clusters between corners. This creates a larger central snowflake effect. Fasten off cream when satisfied.
Info :
Square B will be slightly bigger than A; consider a red contrast stripe next before the green outer border to create the alternating look seen in the photo (cream center, thin red stripe, thick green outer border). Join red with sl st at one corner to add a narrow red round if desired.
Round 5 :
Optional narrow red stripe: join red, ch 1, sc evenly around in side spaces and 3 sc in each corner (or sc-ch2-sc in corner), sl st to join. (This creates a thin red line between cream and green)
Round 6 :
Join green for outer border: ch 3, (2 dc, ch 2, 3 dc) in corner; ch 1, 3 dc in each side sp across; ch 1, repeat around, sl st to top of ch-3. (This will be the main visible border for the tree tier)
Round 7 :
Repeat Round 6 for added width on the green border; this will determine the finished square size. Fasten off and block.
Info :
Square B should be blocked to a size roughly 1.25-1.5x Square A so it shows beneath it when stacked. Keep corners neat: use steam or wet blocking for smoother edges.
— Square C (Third tier, medium) :
Round 1 :
Ch 4, join to ring. Ch 3, 2 dc, ch 2, (3 dc, ch 2) x 2 more corners, sl st to join. (Core cluster count similar to earlier squares)
Round 2 :
Work two or three rounds in cream to enlarge center: each round add 3 dc clusters along sides between corners so sides contain 3-4 clusters by Round 3. This creates a larger star-like center.
Round 3 :
Change to red for a narrow stripe: join red at any side, ch 1, sc along side sps and 3 sc in corner ch-2 spaces. Sl st to join. (Red stripe makes a festive band in the middle of the tree)
Round 4 :
Change to green: join green, ch 3, (2 dc, ch 2, 3 dc) in corner, ch 1, 3 dc in each side space, ch 1; repeat around. (Widen green border to produce the diamond tier)
Round 5 :
Repeat Round 4 once more for a broader border to match the visual proportions in the photo. Fasten off and block square.
Info :
Squares C and below will determine the overall tree width. Make sure each successive square is larger than the one above by approx 1-1.5cm on each side to maintain tapered tree lines.
— Square D (Fourth tier, medium-large) :
Round 1 :
Ch 4, sl st to join ring. Ch 3, 2 dc, ch 2, 3 dc in ring into each corner to make initial square center.
Round 2 :
Work 3 rounds in cream building the center motif to a comfortable size. Add ch-1 side clusters between corners so there are 4-5 side clusters by Round 3.
Round 3 :
Join red for a thin stripe if desired: sc around, placing 3 sc in corners for a tidy edge. This will give a hint of red as in the photo's red/cream repeats.
Round 4 :
Join green and work two rounds: ch 3, (2 dc, ch 2, 3 dc) in corner, ch 1, 3 dc across each side; repeat. Repeat second green round to widen border. Fasten off and block.
Info :
As squares grow larger, be sure to work evenly on each side; count side clusters to maintain symmetry. Blocking at this stage is essential to keep the stacked look crisp.
— Square E (Fifth tier, large) :
Round 1 :
Ch 4, sl st to join. Ch 3, 2 dc, ch 2, 3 dc in ring each corner.
Round 2 :
Work 4 rounds in cream to build a robust center: by the end sides should contain 5-6 clusters between corners depending on how full you want the center to look.
Round 3 :
Optional narrow red stripe: sc around placing 3 sc in corners; this is the alternating accent band seen in photo between cream and green.
Round 4 :
Join green for the main outer border, work 3 rounds: ch 3, (2 dc, ch 2, 3 dc) in corners; ch 1, 3 dc along sides; repeat. Fasten off and block large square.
Info :
Square E should be proportionate to Square F (bottom). Square E will overlap Square F when stacked, so size accordingly — typically Square E about 1.25x Square D.
— Square F (Bottom largest tier) :
Round 1 :
Ch 4, sl st to join. Ch 3, 2 dc, ch 2, 3 dc in ring each corner to begin the largest square.
Round 2-4 :
Work 4 rounds in cream to build a large central motif; expand side clusters so each side ends with 6-8 side clusters, creating a wide diamond when rotated.
Round 5 :
Optional red band: join red, sc around and 3 sc in corners to produce a medium-width accent stripe.
Round 6 :
Join green for final border: ch 3, (2 dc, ch 2, 3 dc) in corner, ch 1, 3 dc across sides, ch 1; repeat around. Repeat this green border one or two times to reach desired finished width. Fasten off and block square flat.
Info :
Square F will form the base of the tree and therefore should be the largest. Ensure its corners remain pointed during blocking so the tree silhouette stacks neatly.
— Edging & Corner Holes (Optional decorative finish) :
Round 1 :
With contrasting color (green or red), join at any corner and work sc around whole stacked-joined edge (if working squares separately, do this for each square): sc evenly across sides and 3 sc in each corner to create a tidy edge.
Round 2 :
Ch 3, dc in each st around to create a subtle raised border; in side centers you may leave ch-1 holes at intervals to mimic the eyelet details in the photo. Sl st to join and fasten off.
Info :
These eyelet holes are optional but give the tree a hand-crafted lace-like look where small bells can be hung through the holes with tiny yarn loops or ribbon.
— Star Topper :
Round 1 :
Using gold yarn, ch 2, work 6 sc in second ch from hook, sl st to first sc to close. (6 sc)
Round 2 :
Ch 1, inc in each sc around (work 2 sc in each sc) (12 sc). Sl st to join.
Round 3 :
Ch 1, (sc in next sc, inc) repeat around to shape a small disc. (18 sc)
Info :
We will now form the five points of the star. Work tightly and use a smaller hook (3.5mm) if you want the star firmer.
Round 4 :
*Ch 6, sl st in 2nd ch from hook, sc in next ch, hdc in next ch, dc in last ch; sl st into star disc at a space to anchor point (this forms Point 1)*. Repeat from * to * four more times to form five points. Fasten off and leave long tail for sewing. (5 points)
Info :
Stuff each point lightly with a tiny amount of fiberfill before closing if you want a puffier star. Pin star to top square before sewing to position precisely.
— Red Bow (Make 4 large bows for front) :
Row 1 :
Make ch 26 with red yarn (or adjust length for smaller/larger bow). Sc in 2nd ch from hook and across (25 sc). Ch 1, turn.
Row 2 :
Sc across the 25 sc. Ch 1, turn. Repeat Row 2 for a total of 10 rows to create a dense rectangular bow body. (10 rows x 25 sc)
Info :
The bow body will be gathered in the middle to form loops. Keep edges neat; a smaller hook or tighter tension produces a stiffer bow shape.
Row 3 :
Fasten off leaving a long tail for wrapping around center. Fold the rectangle widthwise and pinch center tightly. Use the long tail to wrap several times around the pinched center to form the classic bow shape. Secure by weaving tail through the back with yarn needle. Repeat to make 4 identical bows.
Gold Trim :
Info : With metallic gold yarn and a 3.5mm hook, work a single round of slip-stitch edging around the bow loops and tails to mimic the gold trim in the photo. Join gold at an outside edge and sl st evenly around; fasten off and weave ends.
Bow Center Wrap :
Make a small length of gold or red yarn and wrap the center snugly to hide the binding stitches, then stitch the back of the bow to secure.
— Small Ornament Balls & Bell Loops (Make up to 8) :
Ball Round 1 :
Using red yarn for balls or gold yarn for decorative baubles, make a magic ring, ch 1, 6 sc into ring, tighten. (6 sc)
Ball Round 2 :
Inc in each st around (12 sc). Sl st to join.
Ball Round 3 :
(Sc 1, inc) x 6 (18 sc). Sl st to join. Stuff lightly if you want a slightly rounded ball but keep stuffing minimal because these are mainly decorative and will be flat against the square face.
Ball Round 4 :
Dec evenly to 12 sc (work sc2tog 6 times) and sl st to join. Fasten off leaving tail. Close by weaving tail through front loops of remaining sts and pull tight. Weave tail inside ball and secure.
Bell Loop :
Info : To attach a jingle bell, make a ch 6 loop in red or thin gold ribbon and slip through eyelet on bell, then attach loop to square by sewing through a corner hole or with a tiny sc at pre-determined hole. Tie a tiny bow of red yarn above the bell for a polished look.
Info :
Alternatively you can buy small metal jingle bells and tie them with thin red yarn through the decorative eyelets left on the square borders. Use a small dab of fabric glue inside the knot if you want them extra secure.
— Trunk :
Round 1 :
Using brown yarn, ch 7, join into a loop with sl st (or work a foundation ring if preferred). Ch 1, sc in each ch around to form a narrow tube (6 sc per round).
Round 2-10 :
Work 9 more rounds of 6 sc (6 sc) to create a trunk about 3-4cm tall. For a wider trunk, ch 9 initially and work 8 sc per round instead. Fasten off and stuff lightly before closing top if you want the trunk to stand upright slightly.
Info :
Sew trunk to the underside of Square F (bottom square) centered along bottom edge. If you want a freestanding tabletop version, insert a flat cardboard or thin wood piece inside trunk bottom for stability before sewing shut.
— Assembly: Joining Squares into Tree :
Info :
Lay squares flat in stacked order: A (top), B, C, D, E, F (bottom). Rotate each square 45 degrees so they read as diamonds. Overlap squares slightly so each lower square shows a ring of green on the outer edge and the points align vertically to create a silhouette of a tree. Pin in place on a blocking board or flat surface.
Step 1 :
Joining method 1 (Whip stitch join): Using green yarn, with RS facing, overlap square edges by approximately 1-1.5cm and whip stitch through both layers along the overlapping edge. Use small, even stitches so join is tidy but invisible from the front.
Info :
Joining method 2 (Slip-stitch join): With RS together, insert hook through both layers and sl st around the overlap to create a decorative raised ridge. Choose this if you want a visible seam that mimics a piped edge.
Step 2 :
Join squares A to B centered so A sits above B with a slight overlap. Continue joining B to C, C to D, etc. Use pins to check the overall tree silhouette is even. Adjust overlaps so outer points are aligned to make a straight left and right profile for the tree.
Step 3 :
Info : For extra stability, use a second pass of running stitches across joins on the backside of the tree to anchor squares and prevent shifting over time. Use matching yarn to keep stitches hidden.
— Decorative Placement & Finishing Touches :
Step 1 :
Position bows centered vertically on the tree front: large bows are placed on Square B, C, D and E centers as seen in the image (one bow per tier except top). Pin bows and step back to check spacing before sewing.
Step 2 :
Sew bows on by stitching through the back surfaces of the bow center wrap and into the square center. Use small invisible stitches and secure with several passes. Weave ends into the square back.
Step 3 :
Attach jingle bells to the left and right edges of each tier by threading thin yarn loops through the eyelet holes of the edged square (or through designated eyelets made when edging). Tie small red bow loops above each bell for a finished look. Add 6-8 bells total distributed on alternating sides for balance.
Info :
If you want a quieter display, replace metal bells with crocheted small balls or felt balls sewn on instead.
Step 4 :
Sew the star to the top of Square A using a long tail and small neat stitches. Hide the tail through the back and secure tightly so the star will not flop forward.
Info :
Weave in all remaining loose ends and trim. Light steam block the whole assembled tree again if necessary to smooth joins. Attach hanging hardware to the back (a loop of ribbon or a small d-ring) for wall display, or leave the trunk sewn and use it as a freestanding tabletop decoration if desired.
— Final Notes & Variations :
Info :
Change up colors to match your home decor — try icy blues and silvers, or country red and cream. To make a larger tree, add more squares or increase rounds on outer borders to expand width. Consider adding a backing of lightweight felt to the back of the assembled tree to make it sturdier for hanging.
Care :
Hand wash gently in cool water, reshape while damp and lay flat to dry. Metallic yarn trims may shed; spot clean gold areas and dab with a damp cloth.
This Granny Square Christmas Tree combines classic crochet techniques with festive embellishments to make a charming seasonal display! Each square and bow comes together to create a layered, heirloom-style decoration full of texture and color. Whether gifted or displayed at home, this project adds handmade warmth and holiday cheer to any room. 🎀🎄✨