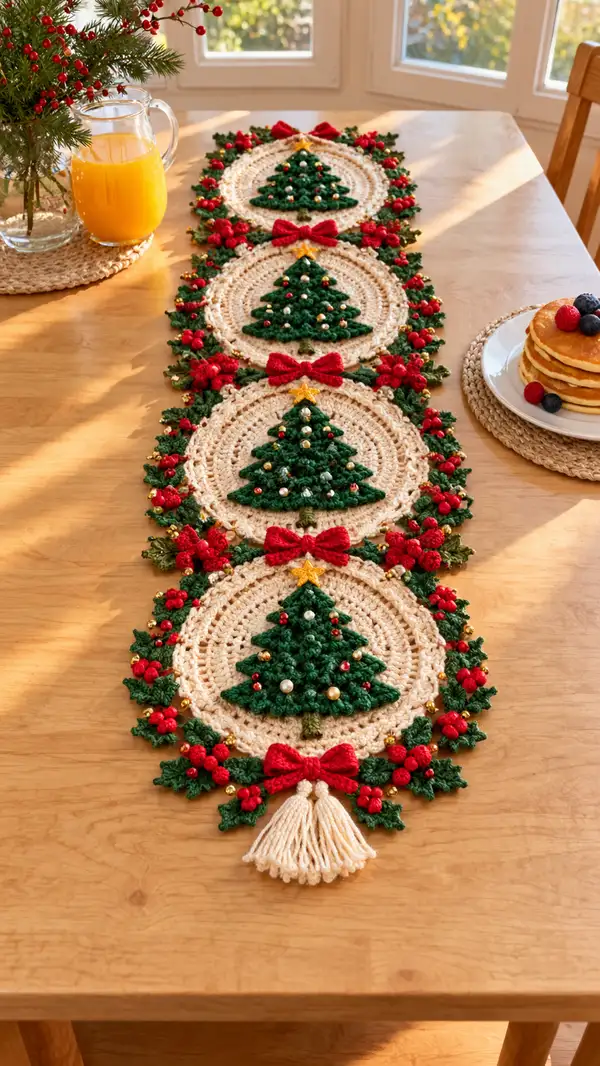
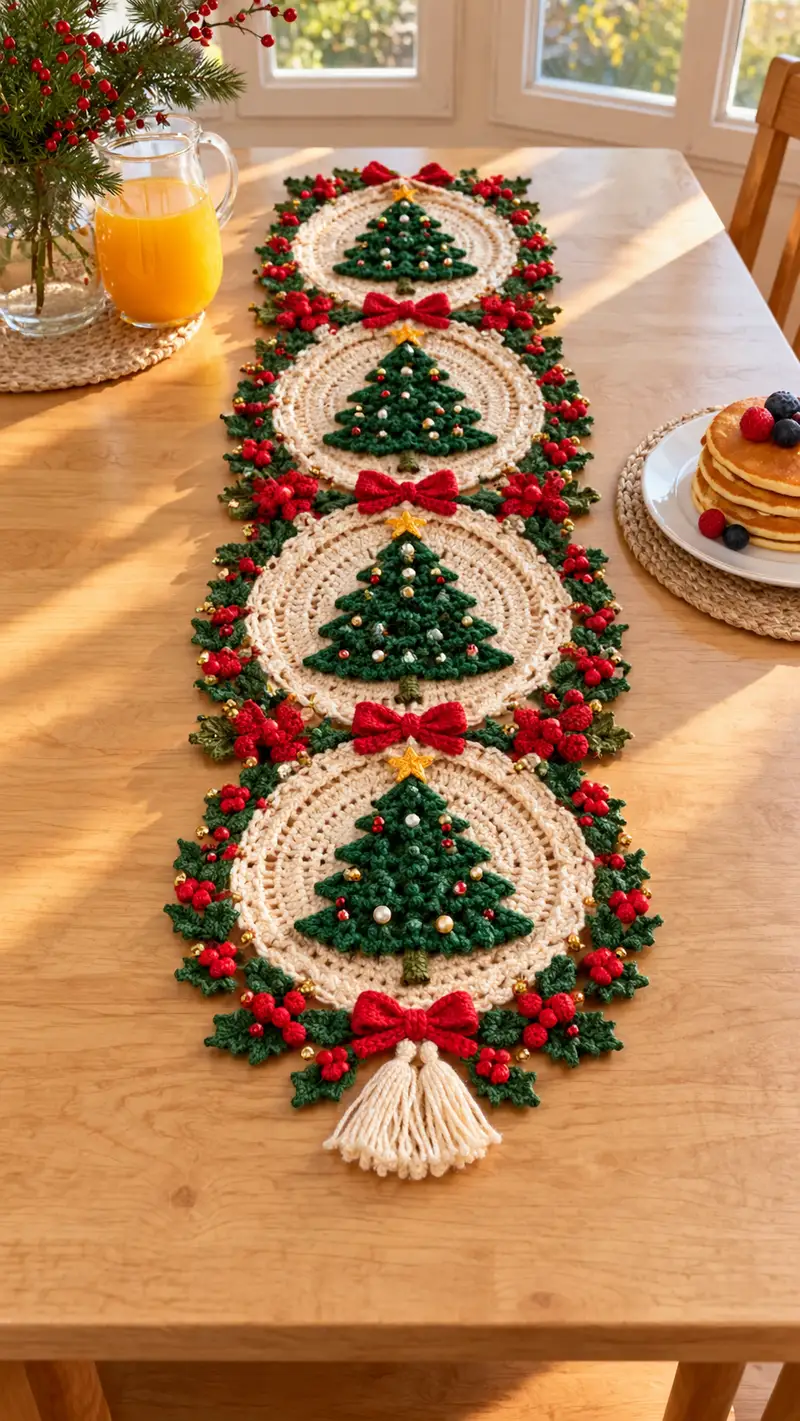
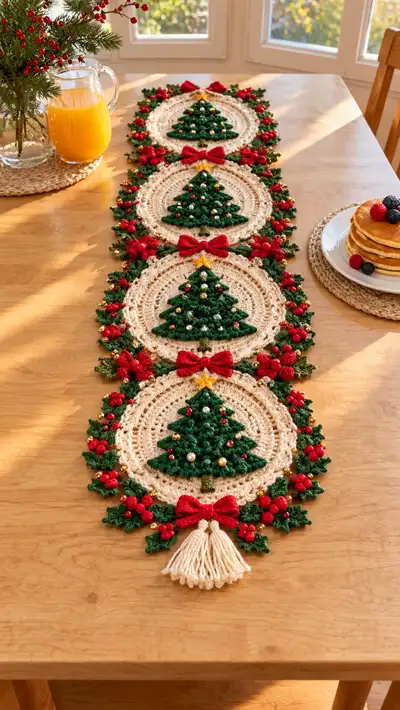
A festive crocheted table runner featuring repeating cream medallions with dimensional green Christmas tree appliques, red bows, holly clusters and a tasseled finish. Each circular motif is richly textured with layered stitches and bead accents for classic holiday charm. Designed to sit lengthwise on a dining table, this runner brings handcrafted warmth and seasonal color to holiday settings.
Progress Tracker
0% Complete
— Cream Medallion (Make 4; central base) :
Round 1 :
6 sc in magic ring (6)
Round 3 :
(1 sc, 1 inc) x 6 (18)
Round 4 :
(2 sc, 1 inc) x 6 (24)
Round 5 :
(3 sc, 1 inc) x 6 (30)
Round 6 :
(4 sc, 1 inc) x 6 (36)
Info :
Change to cream (if not already). Keep tension even; this medallion forms the base for the applique so keep it flat. Use a stitch marker at round starts.
Round 7 :
(5 sc, 1 inc) x 6 (42)
Round 8 :
(6 sc, 1 inc) x 6 (48)
Round 9 :
(7 sc, 1 inc) x 6 (54)
Round 10 :
(8 sc, 1 inc) x 6 (60)
Round 11 :
1 sc in each st (60)
Info :
From now on we will build textured rings to support the applique. If you prefer a wider medallion, work an extra increase round in the same pattern before continuing.
Round 12 :
*ch 1, sk 1 st, 2 dc in next st* repeat around to create scallop guide (60)
Round 13 :
1 sc in each st (60)
Round 14 :
(2 sc, 1 inc) x 20 (80)
Info :
Round 14 increases to create a broader frame for the tree. Confirm your stitch count before moving on; 80 sts total expected.
Round 15 :
1 sc in each st around (80)
Round 16 :
Working in BLO: 1 sc in each st BLO (80)
Round 17 :
1 sc in each st (80)
Round 18 :
To form decorative rope: *ch2, sk 2 sts, sc in next st* repeat (approx 27 ch2 spaces) fasten off and weave ends (80)
Info :
Block medallion flat before adding tree applique. This ensures that the base stays round when you sew on 3D elements.
— Tree Applique (Make 4; worked in dark green) :
Round 1 :
6 sc in magic ring (6)
Round 3 :
(1 sc, 1 inc) x 6 (18)
Round 4 :
1 sc in each st (18)
Round 5 :
Change to puff cluster texture: *ch1, make puff (yarn over, insert, yarn over, pull up loop 5 times, yo and pull through all loops), ch1, sl st next st* repeat across for 18 puff points (18)
Info :
The tree will be built in tiered rows (lower, middle, upper). Puff clusters create the dimensional foliage. Keep puffs consistent by pulling loops to the same height.
Round 6 :
Attach at bottom center of medallion: ch 1, sl st to position. Row 1 (base tier): ch 2, 12 dc across the lower arc into front loops of medallion forming the first triangle base. Turn (12)
Round 7 :
Row 2: ch 2, (dc in next 2 sts, dec) repeat across to reduce to 9 dc (9)
Round 8 :
Row 3: ch 2, (dc in next 1 st, dec) x 3 to make 6 dc (6)
Round 9 :
Row 4: ch2, dec x 3 to shape apex (3)
Info :
Work tiers leaving small tails for sewing or work directly onto medallion by slip-stitching at the base. If you prefer a flatter tree, omit puff cluster rounds and use simple dc shells for tiers.
Round 10 :
Edge foliage with picot trim: sc across, *ch3, sl st in 3rd ch from hook (picot), sc next 2 sts* repeat along edges to create leafy points (approx 30 picots)
Round 11 :
Optional deep texture: work *puff, sc next st* around the triangular surface to create random bobbles (approx 24 puffs)
Round 12 :
Fasten off leaving long tail to sew. Flatten tree tiers slightly, arrange on medallion centered between rounds 12-15 of medallion. Sew tree securely with whip stitch through lower arc and along sides.
Info :
Place tree base so its bottom tier sits approximately 10-12 sts above medallion edge to center it in the round. Use pins to secure exact placement before sewing.
— Tree Trunk (Make 4) :
Round 1 :
With brown yarn, ch 4, join to form short tube: sc in each ch around for two rounds (4)
Round 2 :
1 sc in each st (4)
Round 3 :
1 sc in each st (4)
Info :
Stuff lightly or leave flat. Sew trunk to bottom center of tree underside so it peeks below the lowest tier. Secure tightly with yarn tail.
— Tree Star (Make 4) :
Round 1 :
With gold yarn, ch 2, work 5 sc into the second ch from hook (5)
Round 2 :
*ch 2, 2 dc into same st, sl st to next st* repeat 5 times to create 5 points, fasten off (star with 5 points)
Info :
Sew star to the apex of each tree using small invisible stitches and secure with extra knot on the back. Add a tiny gold bead at center for sparkle if desired.
— Bead Embellishments (Per Tree) :
Info :
Sew beads onto puffs and across the tree surface: use small metallic gold rounds, pearl beads and red seed beads for variety. Plan approximately 6-8 beads per tree depending on size.
Round 1 :
Thread bead on beading needle; push through from back of tree to front, then back again nearby. Tie off securely on wrong side with a small knot and weave tail into backing.
Info :
Use doubled thread or a short length of strong beading thread. Make at least two backstitches per bead if runner will be handled frequently.
— Red Bow (Make 3; between medallions) :
Round 1 :
With red yarn ch 12, sc in 2nd ch from hook across (11)
Round 2 :
Ch1, turn, sc across (11)
Round 3 :
Repeat Round 2 (11)
Round 4 :
Fold rectangle in half lengthwise and whip stitch edges to create a long tube. Turn right side out and flatten to form bow loops.
Round 5 :
Wrap a short length of red yarn tightly around the center several times to cinch bow. Secure underside with knot and weave ends.
Info :
Sew bow between medallions at the junction of two cream circles, aligning center with medallion edges. Make three bows for a four-medallion runner (top, middle, bottom junctions).
— Holly Leaf Cluster (Make many; decorate edges) :
Round 1 :
With green yarn, ch 6. Row 1: sc in 2nd ch from hook, hdc next, dc next, tr next, hdc in last (5 shaped stitches)
Round 2 :
Flip and work along opposite side: hdc, dc, tr, dc, hdc to form a pointed leaf (10 total stitches per leaf)
Round 3 :
Fasten off leaving tail for sewing. Make clusters of 3-5 leaves sewn together to form plentiful holly clusters — position clusters symmetrically along both sides of runner.
Info :
Make approximately 24-30 leaves for a four-medallion runner: 6 clusters with 4 leaves each gives a lush border. Vary orientation for a natural look.
— Red Berry Bobble (Make many) :
Round 1 :
With red yarn, make 5 sc in magic ring (5)
Round 2 :
Sl st into each st around to close and fasten off leaving a long tail for sewing (5)
Info :
Make approximately 18-24 small berries per runner. Sew berries in clusters of 3 near holly leaves and around medallion edges. For larger berry clusters, place two or three close together.
— Border Bead Clusters and Gold Accents :
Info :
Using small gold beads and round pearls, stitch accents sporadically into the holly clusters and around the medallion border. Space beads to balance the composition and to echo ornaments on trees.
Round 1 :
Sew gold beads into leaf junctions using doubled beading thread. Tie securely on the back and hide knots in adjacent stitches.
Info :
Place a larger pearl bead at top and lower sides of each tree medallion as shown in photo — these are focal ornaments and should be sewn very securely.
— Joining Medallions and Edge Construction :
Info :
Lay medallions in desired order on a flat surface. Pin bows at junctions, then pin holly clusters along outer edges. Decide whether you want all medallions tightly joined or with slight gaps for decorative leaves; the pictured example is fully joined edge-to-edge with holly overlay.
Round 1 :
Position two medallions together with right sides facing up overlapping approximately 8-10 sts at the edges. Whip stitch through both outer rounds along overlap to join (use matching cream yarn). Repeat to join all medallions end-to-end (stitch length varies by overlap).
Round 2 :
After joining medallions, crochet around entire runner edge to unify: attach cream yarn at one side seam and work 1 sc in each visible st for one round (total approximately 320-360 sc depending on overlap)
Round 3 :
Edge scallop: *ch3, sk 2 sts, 5 dc in next st, sk 2 sts, ch3, sl st in next st* repeat around to create decorative scallops between holly cluster positions (scallops approx 20-24)
Info :
When adding leaves and berries to the edge, sew them onto the cream edge round before working the final scallop round so they appear integrated.
— Additional Filler Leaves and Sprigs :
Round 1 :
Make small sprigs by chaining 8; sc back along chain, at second-to-last chain work a picot, finish and fasten off. Attach these between holly clusters for fullness (make 12-16 sprigs).
Info :
Arrange sprigs so they face alternately left and right. Sew them down with small stitches through base only so tips stay slightly free for texture.
— Lower Decorative Bow with Tassel (End of Runner) :
Round 1 :
Make a larger red bow as earlier but ch 18 to form longer loops; sc across (17) for a fuller bow.
Round 2 :
Fold and cinch center, secure and sew to end medallion center - approximately centered across final medallion's bottom edge.
Round 3 :
Make tassel: wind cream yarn around a 6-inch cardboard 30 times, tie firmly at top with a short piece of yarn, cut bottom loops to form tassel fringe (approx 30 strands). Optional: make a small core of fiberfill for fuller tassel.
Round 4 :
Sew tassel loop to underside center of last medallion under the bow. Trim tassel evenly and comb lightly.
Info :
Attach tassel so it hangs freely but is sewn through the medallion for security. Reinforce with several stitches and tie a small knot through the tassel loop on the back.
— Finishing Touches and Secure Weaving :
Round 1 :
Weave in all tails on wrong side with yarn needle. Use invisible weave method: thread tail through several stitches and bring out a few rounds away before trimming close.
Round 2 :
Spritz lightly with water and pin medallions flat on blocking board, easing holly leaves and bows into position. Allow to dry completely to set layout.
Round 3 :
Final secure: test beads and bows by tugging gently; if any show movement, add extra stitches beneath or a small dot of fabric glue hidden on underside for extra hold.
Info :
Store runner flat or rolled around a tube to preserve shape. Avoid heavy folding which can flatten puffs and bows.
This festive runner brings old-fashioned holiday charm to any table — four layered medallions adorned with dimensional trees, holly clusters, and bright red bows make it a standout seasonal centerpiece. Each stitch contributes to a warm, handcrafted atmosphere and the added beads catch the light beautifully. Finishing the tassel is such a satisfying final flourish, and it looks stunning draped down the end of a dining table. 🧶🎁✨