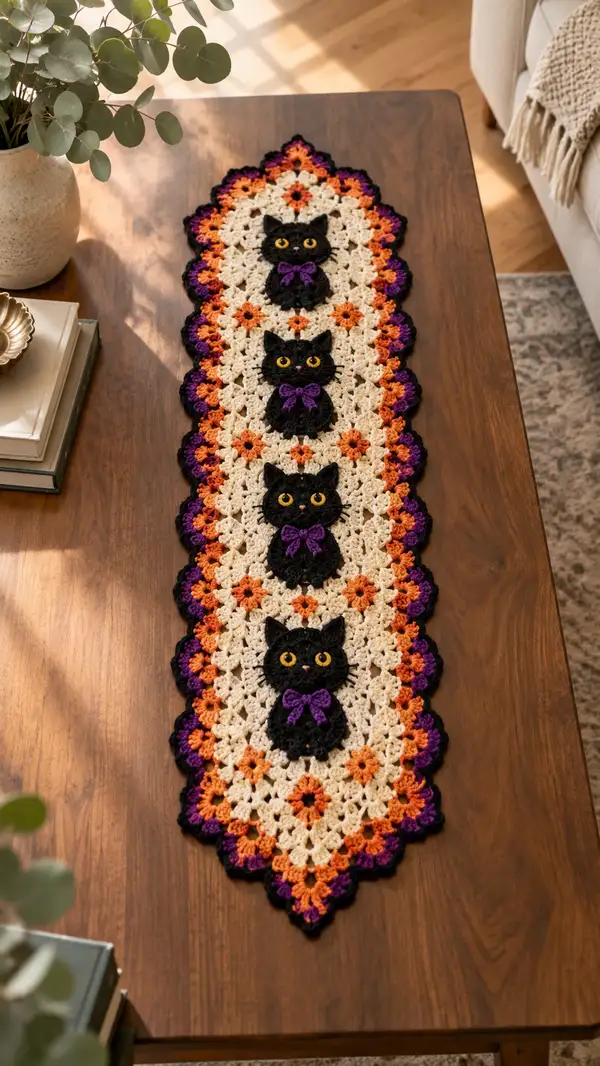
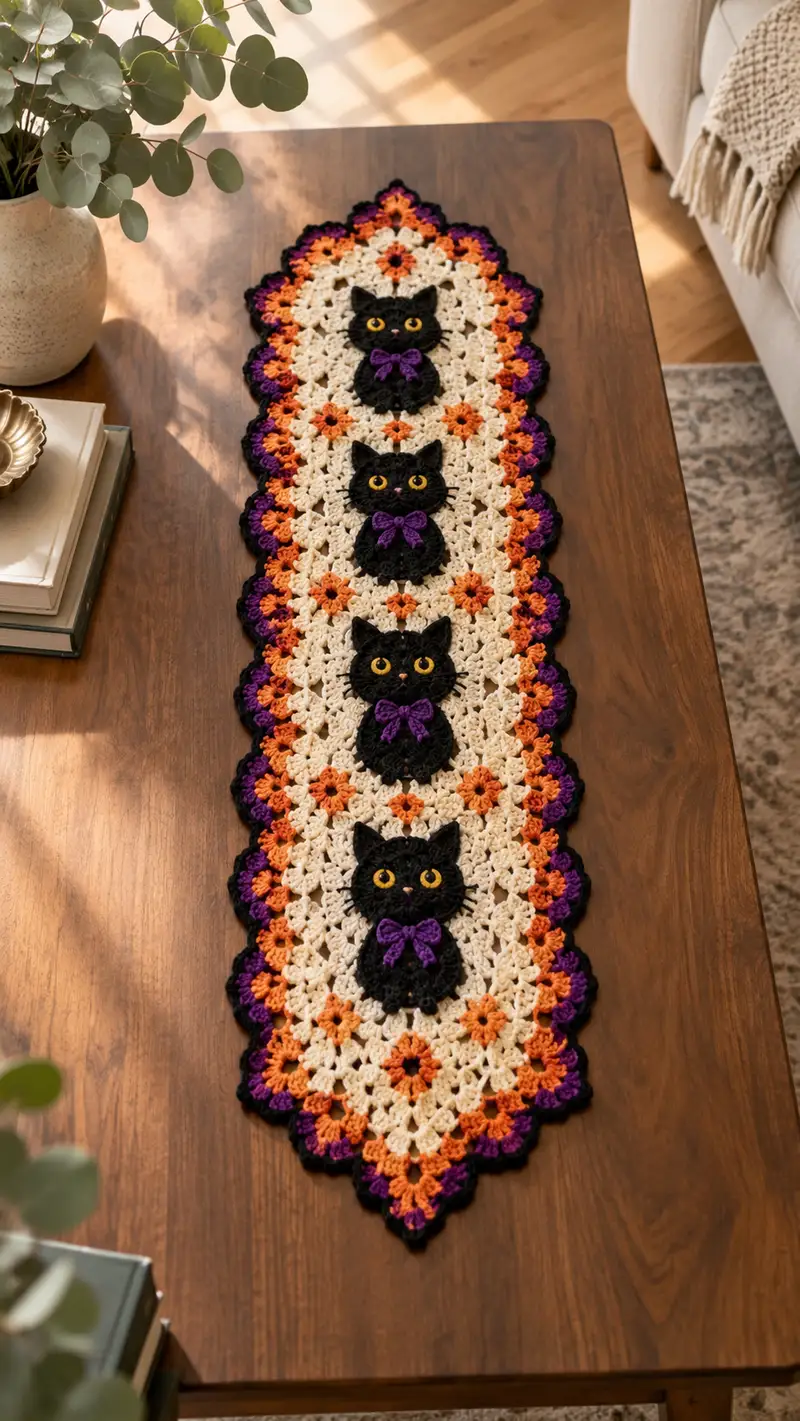
Create a festive Halloween table runner featuring four charming black cat appliques set into a lacy cream granny background with orange and purple scalloped edging. The runner has clear motif repeats, decorative purple bows, and bright yellow embroidered eyes that give each cat a playful expression. This pattern combines classic granny-cluster work with small applique construction — perfect for seasonal decor or a handmade gift.
Progress Tracker
0% Complete
— Materials & Gauge :
Info :
Gauge is not strict for a decorative runner, but 14 granny clusters (cluster = 3 dc group) across equals approximately 6 inches with a 4.0mm hook and worsted yarn. Adjust hook size to match desired drape. Work tightly for appliques so they sit flat on the background.
— Granny-Cluser Motif (Make motif panels to join into runner) :
Round 1 :
With cream yarn ch4, join with sl st to form a ring. Ch3 (counts as dc), work (2 dc, ch2) x8 into ring, join with sl st to top of ch3. (8 clusters)
Round 2 :
Sl st into next ch2 sp, ch3, (2 dc, ch2, 3 dc) in same ch2 sp, *skip to next ch2 sp and (3 dc, ch2, 3 dc)* rep around; join with sl st to top of ch3. (8 corner clusters)
Round 3 :
Change to a round expansion that adds side clusters. In each corner ch2 sp work (3 dc, ch2, 3 dc), in side ch sp work (3 dc) across chain spaces to form a larger oval motif. Join with sl st. (Count: 8 corner cluster sets + 16 side clusters depending on motif length)
Info :
Each motif is constructed as a rectangular/oval granny expansion. Work evenly and keep tension consistent; motifs will be joined side-by-side to produce the runner length.
Round 4 :
Work one round of 3-dc clusters into each previous cluster space to widen motif: corners remain (3 dc, ch2, 3 dc), sides fill with (3 dc) across each side ch-sp. Join. (This round maintains cluster layout; count increases by side cluster insertions)
Round 5 :
Continue in cream, repeat Round 4 to reach a motif that is approximately 5" tall by 5" wide. Aim for 5 full cluster rounds in cream for the central field before introducing orange accent points. (Final expanded cluster count depends on how many side clusters added; check visual balance.)
Info :
Make 6 identical central motifs for a runner length of four cat placements plus two tapered end motifs (you will join motifs as you go). If you prefer a longer runner, make additional motifs and add to length before edging.
Round 6 :
Switch to orange for small flower accents: Mark the corner ch2 spaces where a tiny 3-dc flower will be placed later. For now, ch1 and sc evenly around the outermost round to create a scaffold for colored flowers. (Sc count = total sts around, for most motifs ~100 sc depending on expansion)
Round 7 :
With orange, in every designated small ch2 corner work a mini flower: sl st to ch2 sp, *(ch2, 3 dc) in ch2 sp, sl st in next ch-sp* rep at all four corners to place four small orange flower centers in the motif corners. Fasten off and weave ends. (4 mini flowers per motif)
Info :
Check spacing by laying motifs flat and arranging them lengthwise; you should see how orange flower centers will align where cat appliques will sit between motifs.
Round 8 :
Make all motifs and join: Arrange motifs in a vertical sequence (end-to-end) using whip stitch or join-as-you-go (preferred method). To join motifs, align edges, use cream yarn and whip stitch through corresponding outer loops every 3-4 clusters to create a flexible seam. Repeat until motifs are joined into a full runner strip. (Joined length should equal number of motifs x motif width)
Info :
Join motifs with the right side facing you so the seams sit on the underside. If you prefer a visible join, use a contrasting color slip stitch join along the seam for decorative lines.
— Runner Central Field Extension Rounds (worked around joined motifs) :
Round 9 :
With cream, attach yarn to outermost cluster space at long side, ch1, sc evenly around entire runner edge to create a uniform base for layered scallops. (Sc count = measure and count stitches; typical runner will have ~300-360 sc around depending on motif count)
Round 10 :
1 sc in each st around (same count as previous round) to stabilize edge. Join with sl st. (Same count)
Info :
If you plan to place cat appliques, mark their center positions on the runner now using pins or removable markers. Space four cats evenly along the central axis, leaving approximately two motif-rows between each cat for balance.
Round 11 :
With cream, work 1 round of shell scaffolding: *skip 2 sc, (2 dc, ch2, 2 dc) in next st (shell), skip 2 sc, sl st* rep around to create shell positions. (Shelled count will be ~1 shell per 6-8 stitches depending on runner width)
Round 12 :
Alternate shell round in cream: 1 sc between shells to anchor. (Anchors match previous shell count)
Info :
Start planning the scalloped edge color changes now: the runner pictured uses a layered scallop in purple layered with orange and finished in black. We'll work the scallop in three layers so pick up the first color (purple) for the next round.
Round 13 :
Change to purple. In each shell space from Round 11 work a purple petal: sl st into shell center, ch1, (hdc, dc, hdc) all in same shell center to make a petal. Rep around. (Petal count = shell count from Round 11)
Round 14 :
With purple, 1 sc in each st and petal top to even the edge. (Same overall stitch count)
Info :
After you complete the purple layer, change to orange for the second scallop layer. Working in layers creates the deep multi-color scalloped trim seen in the photo.
Round 15 :
Change to orange. In each purple petal top work *(sl st, ch2, 3 dc, ch2, sl st)* to form an orange scallop shell. Join and fasten off or change color to black for final edging. (Orange scallop count = purple petal count)
Round 16 :
Switch to black. Work 1 round of small single crochet shells to define outer edge: *sl st into center of orange scallop, (5 sc) in next ch2 sp, sl st* rep around for crisp finish. Fasten off and weave ends. (Outer scallop count = orange scallop count)
Info :
Block the runner gently to smooth joins and even scallops. Pin scallops so they form neat points and spray lightly with water or steam to set the shape.
— Cat Applique Overview (Make 4 identical cat motifs) :
Info :
Each cat applique is made in flat rounds: a round head, small round body, two small ears, embroidered eyes (or felt/safety eye options), three embroidered whiskers each side, and a small purple bow. Work cat components with black for head/body, purple for bow, golden yellow for eye centers, and small white highlights if desired. Use a 3.5mm hook for tighter fabric.
— Cat Head (Make 4) :
Round 1 :
With black yarn and a 3.5mm hook, mr, 6 sc in magic ring. (6)
Round 2 :
Inc x6 — 2 sc in each st around. (12)
Round 3 :
(1 sc, inc) x6. (18)
Round 4 :
(2 sc, inc) x6. (24)
Round 5 :
(3 sc, inc) x6. (30)
Round 6 :
(4 sc, inc) x6. (36)
Round 7 :
(5 sc, inc) x6. (42)
Round 8 :
(6 sc, inc) x6. (48)
Round 9-14 :
1 sc in each st (48)
Info :
Place eyes between rounds 11 and 12 approximately 8-10 stitches apart depending on desired look. For embroidered eyes use yellow yarn and embroider later; for safety eyes leave openings and insert after securing. Mark eye placement with pins first.
Round 15 :
(6 sc, dec) x6. (42)
Round 16 :
(5 sc, dec) x6. (36)
Round 17 :
(4 sc, dec) x6. (30)
Info :
At this point the head should be slightly domed but mostly flat since it's an applique. Do not stuff. Fasten off leaving long tail for sewing to body panel. Weave the tail through the last round and pull to flatten slightly if desired.
Round 18 :
(3 sc, dec) x6. (24)
Round 19 :
(2 sc, dec) x6. (18)
Round 20 :
(1 sc, dec) x6. (12)
Info :
Finish off and leave a 12" tail for sewing. The small shape at rounds 18-21 forms a gently tapered top that will sit cleanly on the cat body base if needed. For a flat-faced look you may omit rounds 18-21 and fasten off at round 17.
— Cat Ears (Make 8 — 2 per cat) :
Round 1 :
With black, ch4, sl st to form a small ring, ch1, 6 sc into ring. (6)
Round 2 :
(1 sc, inc) x2, inc (work 3 inc evenly) to shape a small triangle ear. (9)
Round 3 :
(sc around working decreases at base row to create triangular ear): sc in next 3 sts, dec, sc in next 2 sts. (8)
Round 4 :
Fold base and sl st across bottom to flatten ear; fasten off leaving long tail for sewing. (Ear shape finished)
Info :
Sew ears to top edge of head applique (attach at the top-most round between stitches approximately 6-7 stitches apart depending on head size) so they sit slightly forward. Use small, neat whip stitches and hide ends on back.
— Cat Body (Small flat circular chest, Make 4) :
Round 1 :
With black, mr, 6 sc in ring. (6)
Round 3 :
(1 sc, inc) x6. (18)
Round 4 :
(2 sc, inc) x6. (24)
Round 5-8 :
1 sc in each st (24)
Info :
The body should be slightly smaller than the head and remain flat. Do not stuff. When attaching, the body will overlap slightly with the bottom of the head to form a cute silhouette.
Round 9 :
Work 1 round BLO sc to create a ridge across the chest for bow placement. 1 sc in each st BLO. (24)
Round 10 :
Fasten off and leave tail for sewing. Attach body directly below the head so top of body aligns with round 16-18 of head to create a cohesive cat shape.
— Bow (Make 4) :
Round 1 :
With purple, ch6, sc in second ch from hook and across (5 sc). Turn and ch1. (5)
Round 2 :
Sc across (5). Ch1. (5)
Round 3 :
Fold the rectangle in the center and wrap black or purple yarn tightly around the middle 3 times to cinch into a bow shape. Fasten off and leave tail for sewing. (Bow made)
Info :
Sew small bows to the chest ridge (Round 9 of body) centered on each cat. Secure with multiple tiny stitches and hide tails on reverse.
— Eyes & Face Embroidery :
Round 1 :
Decide between safety eyes or embroidered eyes: For a decorative runner, embroidered eyes using yarn give a secure flat result. Mark eye centers between rounds 11-12 of head and about 8 stitches apart.
Round 2 :
Using golden yellow yarn and an embroidery needle, stitch a small circle (approx 6 mm diameter) by using satin stitch filling. Repeat for the second eye. (Two golden eye centers)
Round 3 :
With black yarn embroider a thin vertical slit at the center of each yellow circle for pupils or use a small satin-stitch vertical pupil. (Pupil detail)
Round 4 :
Optional: Add a tiny white French knot at the upper left of each eye for a highlight. (1 tiny knot each)
Info :
For a bolder look you can use 8 mm golden safety eyes inserted before sewing the head down; if you do, ensure the safety backs are placed and secured on the reverse before assembly.
Round 5 :
Embroider a small triangular nose with dark rose or pink yarn between the eyes about 4-6 stitches below eye line. Sew three short whiskers on each side using back-stitch with black thread/yarn. (Nose + 3 whiskers each side)
— Assembly of Cat Appliques :
Info :
Place head and body where marked on runner. Use pins to ensure even positioning; the top cat should be centered in the top-most central motif and the remaining cats spaced evenly through the runner centerline. Leave approximately two motif spaces between cats for balanced negative space.
Round 1 :
Sew body onto runner first using whip stitch through the back loops only of the body round and corresponding cream stitches on the runner to make an invisible seam. Use the long tail left from the body. (Attach body)
Round 2 :
Sew head over top of body seam so head slightly overlaps body by 2-3 stitches; stitch around the head edge with neat small whip stitches. Attach ears and hide ends on the underside. (Attach head)
Round 3 :
Sew bow centered on chest ridge. Embroider eyes and whiskers if not already completed. Secure all tails and weave under appliques to hide them. (Finishing details)
Info :
Sewing tip: run your tapestry needle through the runner base at multiple shallow entry points so the applique stitches are secure but do not distort the underlying clusters. Pull tension evenly as you sew to avoid puckering.
— Final Border Touches & Blocking :
Round 1 :
Inspect edges for any visible loose ends; weave them into the nearest stitch with a tapestry needle. Ensure scallops are symmetrical and even.
Round 2 :
Lightly wet-block the entire runner: pin scallop points to blocking mat so points are even and parallel. Use cool steam or spray water and allow to dry fully. (Block to set shape)
Info :
Blocking is essential for even scallops and to flatten appliques. After blocking, do a final pass to secure any loose bow edges or tiny embroidery threads.
This Halloween Black Cat Table Runner is a delightful combination of vintage granny-cluster charm and playful appliques that bring personality to your tabletop. With layered scalloped edges and four sweet black cat faces, it's a joyful project to make and display. The step-by-step instructions guide you through motif construction, applique assembly, and finishing touches so your runner looks polished and festive. 🧶🎃 Whether you're decorating for a spooky season or just love whimsical home accents, this pattern is a wonderful way to add handmade charm.✨