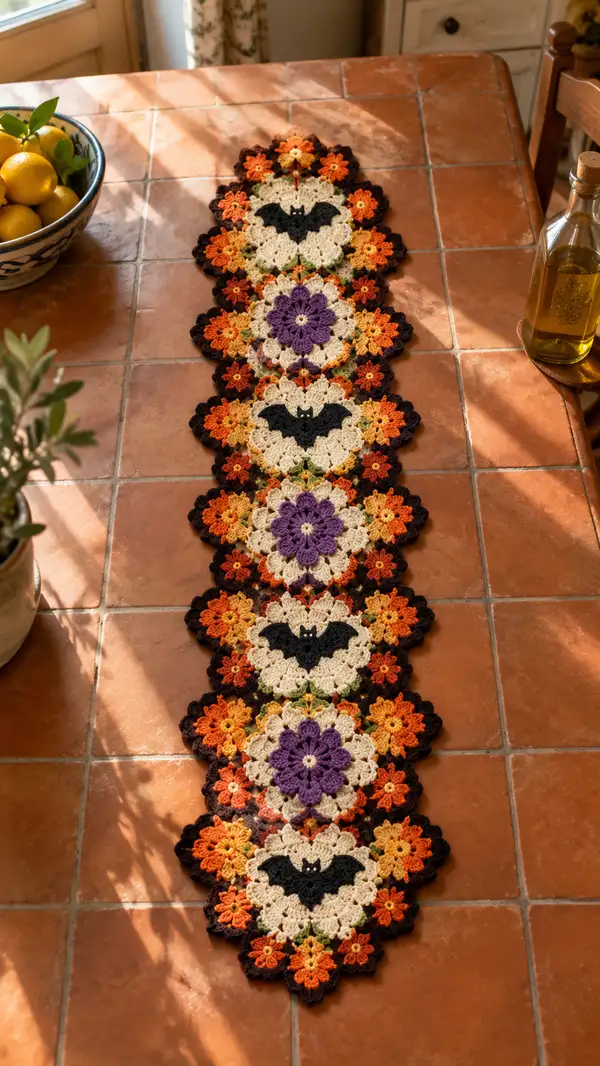
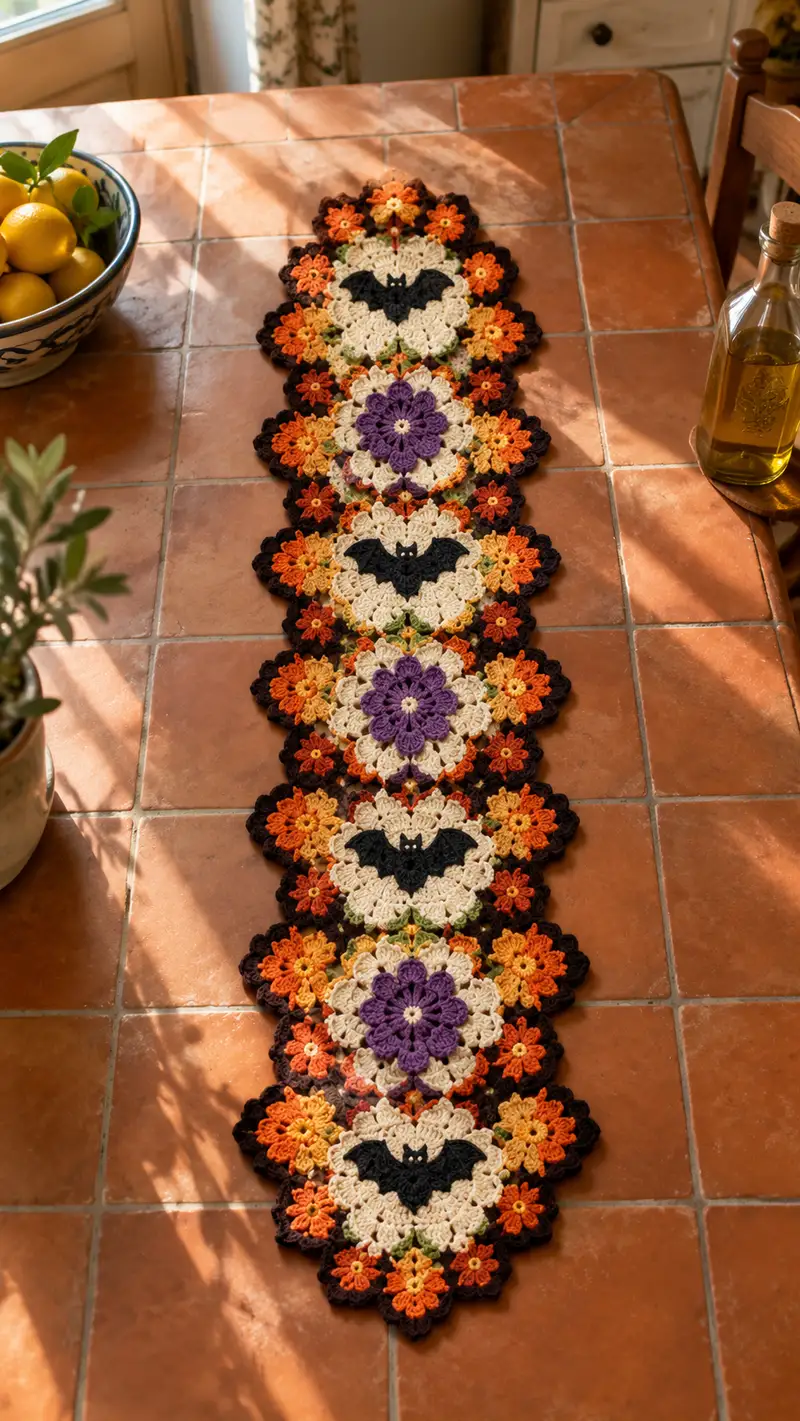
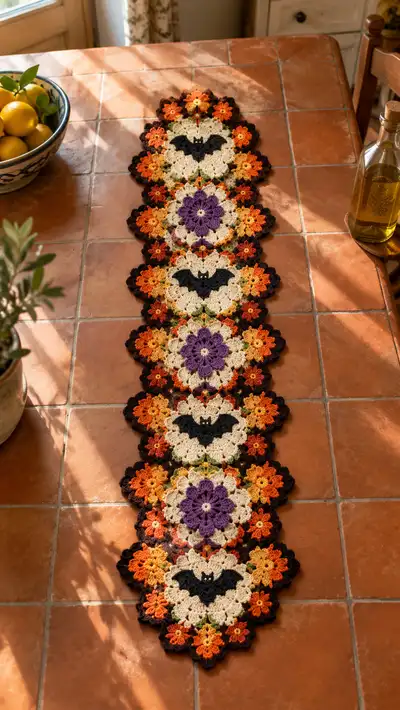
A festive Halloween table runner composed of linked floral medallions and playful bat appliques. Rich autumn tones—cream centers, vibrant oranges, mustard yellows, purple flower centers and deep brown edging—give vintage warmth to holiday tables. The runner is made of repeating round motifs joined with small star-flower connectors and finished with a scalloped border. Suitable for joining-as-you-go construction and surface applique bats for a charming seasonal accent.
Progress Tracker
0% Complete
— Overview :
Info :
This pattern builds a linked table runner out of repeating large floral medallions, smaller 8-point connector flowers and black bat appliques. The pattern is written with US crochet terms. The pattern describes each motif in full; make as many repeats as you like. The sample runner pictured has six large medallions alternating bat medallions and purple-centered medallions linked by clusters of small flowers. Gauge is not critical but maintain consistent tension for clean joins.
— Abbreviations & construction notes :
Info :
Work motifs in rounds. Count stitches at the end of each round. Use stitch markers to mark round starts. When joining-as-you-go (JAYG) instructions appear, align motifs and slip-stitch into ch-spaces as described. For color changes, finish the last yarn over of the stitch with the new color so that the new color begins the next stitch.
— Large Medallion (Make 6) :
Round 1 :
With cream yarn. Make a magic ring, ch3 (counts as dc), 11 dc in ring. Pull tight and join with sl st to top of ch3 (12)
Round 2 :
Ch3, dc in same st, 2 dc in each st around. Join with sl st to top of ch3 (24)
Round 3 :
Ch3, (1 dc, 2 dc in next st) x 12. Join (36)
Round 4 :
Ch3, (2 dc, 2 dc in next st) x 12. Join (48)
Info :
These first four rounds create a sturdy, slightly domed disc. Keep tension even; do not over-tighten the magic ring so the center can flatten when blocked.
Round 5 :
Ch1, sc in same st, *ch5, sk 3 sts, sc in next st* around to make 12 ch5 loops. Join with sl st to first sc (12 ch5 loops)
Round 6 :
In each ch5 loop: (sc, hdc, 3 dc, hdc, sc) – shell made in each loop. Join (12 shells)
Round 7 :
Ch3, sl st to center of next shell, ch3, *(dc, ch2, dc) into center of next shell, sl st to center of next shell* repeat around producing 12 small petal arches. Join (12 arches)
Info :
Round 6–7 build the petal texture. If you prefer larger petals, increase ch5 to ch6 and add one more dc to each petal in round 6.
Round 8 :
Change to alternating orange shades (or main orange). Into each petal arch: sl st into arch, ch1, 7 dc cluster across the arch working loosely so petals cup slightly. Join (12 petals of 7 dc each)
Round 9 :
Ch1, sc in same st, *ch3, sk 3 dc of petal, sc in next st between petals* repeat around to create 12 ch3 picot spaces. Join (12 ch3 spaces)
Round 10 :
In each ch3 space: (sc, hdc, 5 dc, hdc, sc) using lighter orange or two-tone to give depth. Join (12 shells)
Info :
Alternate petal colors are what create the layered flower impression. Carry unused yarn inside petals or fasten off and weave tails in. If carrying, twist yarns at color change to avoid long floats.
Round 11 :
With small amount green, add tiny leaf clusters between shells: *sl st to point between shells, ch3, (sc, ch1, sc) into ch3, sl st into next base* repeat 12 times. Join (12 leaf points)
Round 12 :
Return to cream. Working in back loops only along the outer base of petals: 1 sc in each st BLO around to create a defined transition (count will equal perimeter stitches approx 72–84 depending on tension) Keep the same number of stitches as your round start by spacing evenly.
Info :
Use BLO here to make a ridge that separates petals and the next round of connecting motifs; this makes joins cleaner and helps motifs nest neatly.
Round 13 :
Ch2 (counts as hdc), *(hdc, ch2, hdc) into each picot base (12 times)* to form twelve raised points around the medallion. Join (24 hdc points with ch2 spaces)
Round 14 :
Ch1, sc around working 2 sc into each ch2 space and 1 sc into each hdc—this evens the round; expected stitch count approximately 72 (adjust by spacing to match your gauge) Join.
Info :
Stop here if you are planning bat applique directly on this cream medallion—bat placement is best centered on the cream disc. For medallions that will have a purple center, proceed to the alternate central rounds below.
— Alternate Center Medallion (Purple center) (Make 3) :
Round 1 :
With purple yarn. Make a magic ring, ch3 (counts as dc), 11 dc in ring. Join (12)
Round 2 :
Ch3, 2 dc in each st around. Join (24)
Round 3 :
Ch1, sc in same st, *ch4, sc in next st* around to create 12 small ch4 loops. Join (12 loops)
Round 4 :
In each ch4 loop: (sc, 3 dc, sc) to form small petals. Join (12 petals)
Round 5 :
Change to cream yarn. Work a round of 1 sc in each stitch around the purple petals to create a flat base (approx 48 sc). Join
Round 6 :
Proceed to rounds 5–14 of the Large Medallion pattern above starting with the cream shell building step (i.e., start at the ch5 loops described in main medallion Round 5) to complete the layered outer petals and join points. This makes the purple-centered medallion have identical outer shaping.
Info :
Alternate medallions should match outer rounds exactly so that they join seamlessly. Block these purple centers flat before joining.
— Small 8-Point Connector Flower (Make many, approx 12 per runner) :
Round 1 :
With orange (bright). Make magic ring, ch3 (counts as dc), 11 dc in ring, join (12)
Round 2 :
Ch1, sc in same st, *ch3, sc in next st* around to form 12 ch3 spaces. Join (12 ch3)
Round 3 :
In each ch3 space: (sc, 5 dc, sc) — 12 petite petals. Join (12 petals)
Round 4 :
Ch1, sc around working through the back loops of petal bases to create a tidy ring, expected stitch count approx 72 sc. Join
Round 5 :
With mustard yellow, add a small picot center for contrast: sl st to center, ch4, sl st into first ch to make tiny loop; fasten off and weave tail to back.
Info :
These small 8-point flowers are used as connectors between large medallions. Make the number needed for your runner length and keep them uniformly blocked so joins are even.
— Mini 6-Petal Accent (Make many) :
Round 1 :
With orange-sienna. Magic ring, ch2 (counts as hdc), 11 hdc in ring, join (12)
Round 2 :
Ch1, *sc in next st, ch3* around to make 12 ch3 loops. Join (12)
Round 3 :
In every second ch3 loop (skipping 1 between), work (sc, 3 dc, sc) to create 6 larger petals. Join (6 petals)
Round 4 :
Ch1, sc around through base stitches, then fasten off and weave tail. These tiny accents fit into gaps between larger flowers.
Info :
Make at least two mini accents per join area to fill negative space—these are great to vary in shade for a hand-dyed look.
— Bat Applique (Make 3) :
Info :
Bat appliques are worked flat in black yarn and sewn to the cream medallion centres. They are worked in rows with increases/decreases to form wings and body. Use a 3.5mm hook for crisp shaping.
Round 1 (Row 1) :
With black yarn. Ch9. Row 1: sc in 2nd ch from hook and across (8 sc). Turn (8)
Row 2 :
Ch1, sc in each st across (8). Turn
Row 3 :
Ch1, sc2tog, sc x4, sc2tog (6). Turn
Row 4 :
Ch1, sc, (inc) into next st, sc x2, (inc), sc (8). Turn
Row 5 :
Ch1, sc across (8). Turn
Row 6 :
Work two small wing scallops: ch3, skip 1, sl st; repeat to create tiny points on each wing edge across rows 5–6 edges. Fasten off leaving long tail for sewing. Use tail to shape wing tips by pulling slightly and tacking in place.
Info :
After blocking, use small stitches to sew the bat center to the cream medallion so bat sits flat. Embroider two tiny white eye dots with yarn or embroidery thread to give personality.
— Bat Option: Worked as Solid Motif :
Round 1 :
Alternative: Work small rounded bat motif in a 6-round medallion style (mr, 6 sc; inc to 12; create wing lobes with ch-loops). This option is for those preferring applique with a circular center.
Info :
Either bat construction will be sewn to the cream medallion centers. Ensure bats are proportionate—about 60–70% the diameter of the cream center for balanced look.
— Join-As-You-Go (JAYG) Strategy for Runner Assembly :
Info :
You will assemble large medallions in a linear strip with connector flowers and mini accents filling the gaps. Lay out motifs first in the order you want: (Medallion A with bat) - (connector cluster) - (Medallion B purple center) - (connector cluster) - repeat. Use JAYG on the final round of each medallion to connect to previously blocked motifs via sl st or sc into ch-spaces specified below.
Round 15 :
When your medallion reaches Round 14 (outer sc ring) prepare to join: ch1, sc in same st, *[sc 2 together with connector flower sc] (join to connector by inserting hook through connector sc and medallion sc, yarn over, complete sl st) work sc in next base st* Repeat at the specified intervals to attach up to 4 connection points per medallion side depending on layout. Continue around and finish off. (Join count varies with motif placement)
Info :
Place the medallions adjacent and align the petals so connector flowers sit in the gaps. For a linear runner, attach medallions side-to-side with two connector motifs between each pair of medallions. Work slowly and pin motifs before final joining.
— Detailed JAYG Example (Joining one medallion to a previously made medallion) :
Step A :
Place Medallion 2 on top of Medallion 1 so that outer petal points match and connector small flower will occupy the gap.
Step B :
With medallion on your hook, on final round slip-stitch into the ch-space of the already positioned connector flower: sl st into connector ch-space, ch1, sc in next medallion base, sl st back into next connector ch-space. Repeat for all join points.
Info :
If you prefer sewing rather than JAYG, use an invisible ladder stitch and whipstitch to secure motifs through the back loops only; hide joining tails inside petals for neatness.
— Outer Scalloped Border (After all motifs joined) :
Round 1 :
With dark brown. Work 1 sc evenly around entire outer edge of assembled runner through both loops where possible. When you reach petal tips, work *ch3, 3 dc, ch3, sl st into same base* to create a rounded scallop. Continue around to create even scallops. Expected stitch count depends on runner length but aim for 6–8 scallops per medallion edge.
Round 2 :
Ch1, sc around working into each stitch and into the top of each scallop work (sc, picot, sc) to define. Fasten off and weave ends.
Info :
The deep brown border unifies the runner visually. If you prefer a lighter edge, use cream instead for a vintage look. Block the entire runner after border is attached to set scallops and joins flat.
— Optional Finishing & Embellishment Rounds :
Round 1 :
Optional: Add a thin lace round in cream around the scallops: attach cream, ch4, sl st into tip of each scallop, ch4 repeat. This creates a delicate bridge and softens the silhouette.
Round 2 :
Optional: Add surface crochet vines in green across gaps: using surface slip stitch, draw a stem line connecting medallion join points and add tiny leaves with (sl st, ch3, sl st) at intervals.
Info :
These optional rounds are entirely decorative. Keep them subtle to avoid overwhelming the floral motif.
— Blocking & Final Finishing :
Info :
Pin each medallion to a blocking mat to shape petals and scallops. Use a modest steam press (test yarn first) or spray with water and let dry fully. After blocking, attach bats to cream centers with small whip stitches around the silhouette using black yarn. Embroider two white French knots for eyes on each bat for charm.
Final Steps :
Weave in all ends, trim tails close to the fabric, and check all joins for stability. If the runner will be used frequently, reinforce joins with small whip stitches hidden under petals.
Info :
This pattern uses modular repetition; if you want a longer runner, add additional medallion-and-connector repeats. For a table centerpiece, make 3 medallions; for the length pictured, make 6 medallions joined end-to-end.
— Optional Tassel Fringe (Make 12) :
Round 1 :
Make small tassels in deep brown and orange: cut 12 strands of yarn 12cm long, fold at midpoint and loop through edge stitches at scallop points, secure with a knot and trim ends even. Repeat at every other scallop for a balanced fringe.
Info :
Tassels add a playful finish. Secure firmly; if runner will be laundered, consider skipping fringes or sewing them in place with extra stitches.
This Halloween table runner blends autumn florals and playful bats into a warm, handcrafted statement for your seasonal table. Each medallion is a little floral universe that links together to form a charming, vintage-styled runner you can be proud of. The modular construction makes it easy to adapt the length and colors—perfect for gifting or seasonal decorating. Enjoy every stitch and happy hooking! 🎃🧶