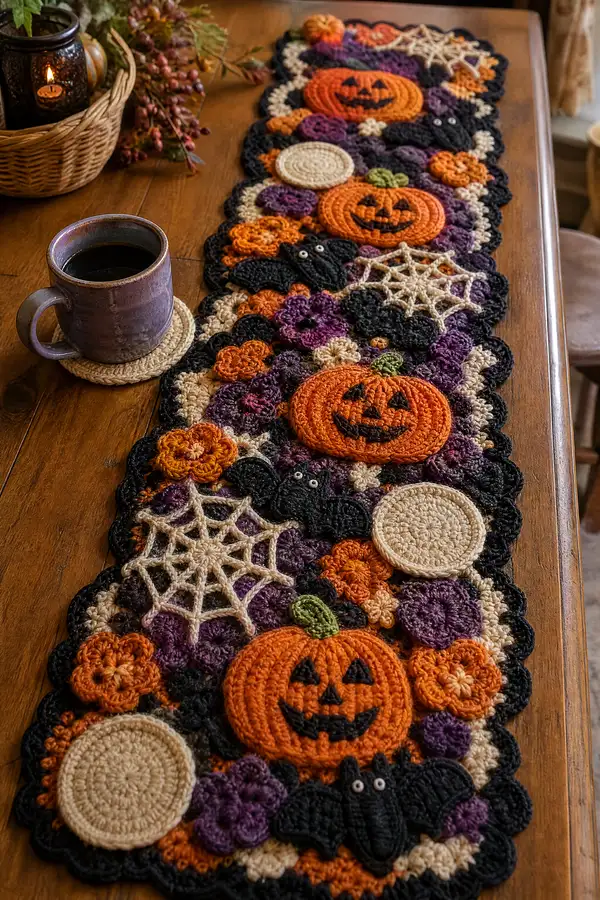
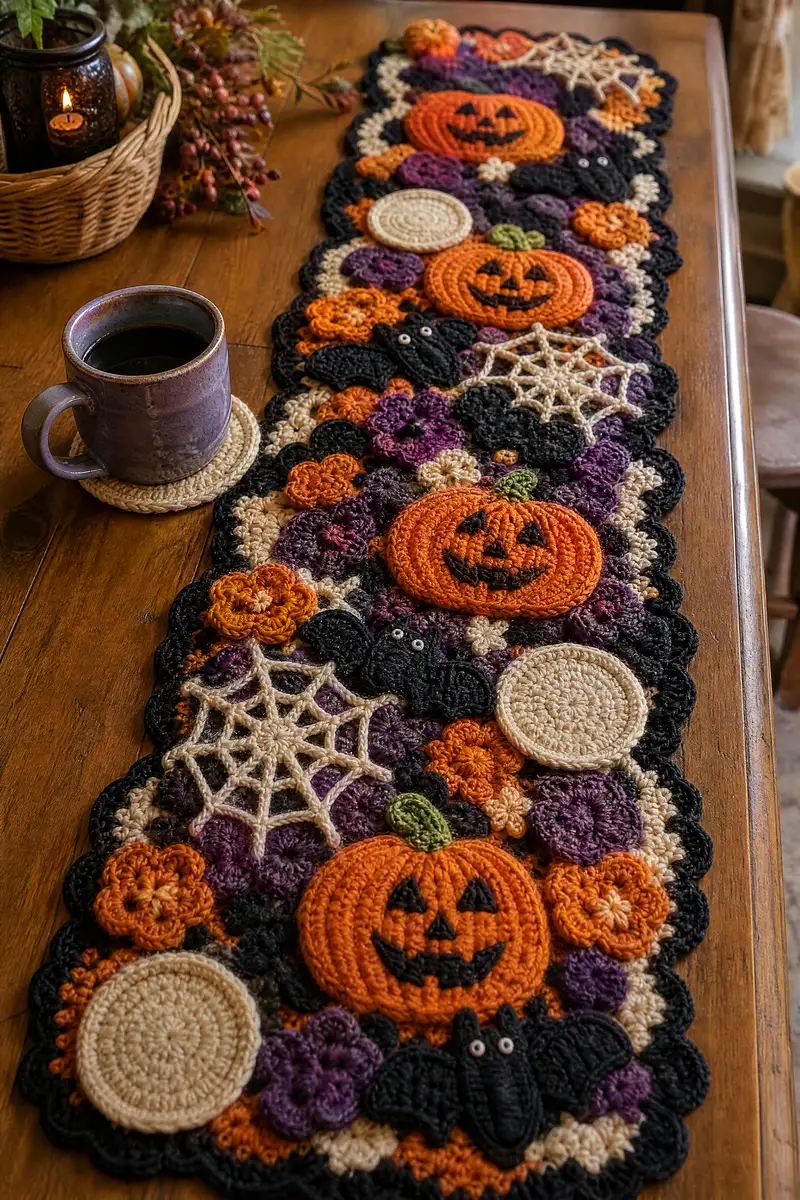
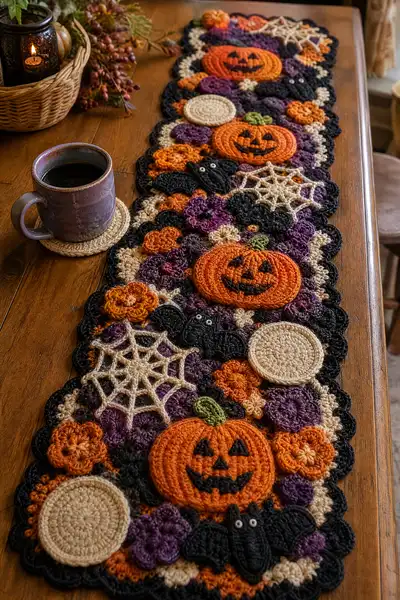
Create a festive Halloween table runner filled with layered pumpkins, bats, spiderwebs and clusters of tiny flowers. This richly textured runner uses autumnal colors—orange, black, purple, cream and moss green—and join-as-you-go motifs for a striking centerpiece. The pattern includes pumpkin discs with ribbed surface, applique bats and spiderwebs, plus a scalloped border to finish. Perfect for seasonal decorating or gift-making, this runner stitches up into a lush, dimensional tableau.
Progress Tracker
0% Complete
— Pumpkin Disc (make 3 large pumpkins, 2 small pumpkins optional) :
Round 1 :
6 sc in magic ring (6)
Round 3 :
(1 sc, 1 inc) x 6 (18)
Round 4 :
(2 sc, 1 inc) x 6 (24)
Round 5 :
(3 sc, 1 inc) x 6 (30)
Round 6 :
(4 sc, 1 inc) x 6 (36)
Round 7 :
(5 sc, 1 inc) x 6 (42)
Round 8 :
(6 sc, 1 inc) x 6 (48)
Info :
These rounds produce a flat disc base. Work tightly so pumpkin sits as a firm applique. Make three large discs for the main runner positions; optionally make two smaller pumpkins by reducing rounds 7-8.
Round 9 :
1 sc in each st around (48)
Round 10 :
1 sc in each st around (48)
Round 11 :
Change to a slightly larger hook if desired. 1 sc in each st around (48)
Info :
We will create ribs next using front post stitches to simulate pumpkin grooves. Keep stitch count constant; ribs are surface texture only.
Round 12 :
(3 sc, fpdc around next st) x 12 (48)
Round 13 :
1 sc in each st around, working fpdc posts from previous round as normal stitches (48)
Round 14 :
(4 sc, fpdc around next st) x 10 + (2 sc, fpdc around next st) x 1 to adjust (48)
Round 15 :
1 sc in each st around (48)
Info :
For deeper ribs, replace fpdc with fpdc2 (work 2 fpdc around same post) every 4th rib to create pronounced ridges. Keep an even number of ribs for symmetry; plan 10–12 ribs.
Round 16 :
(1 sc, bpdc around next post) x 24 (48)
Round 17 :
1 sc in each st around (48)
Round 18 :
(3 sc, dec) x 8 (40)
Info :
Optional: If you prefer fully flat pumpkins leave rounds 18-22 off and fasten off here. For slight doming, continue decreases but do not close; leave a small opening to sew onto runner so pumpkin retains slight dome.
Round 19 :
(4 sc, dec) x 8 (32)
Round 20 :
(3 sc, dec) x 8 (24)
Round 21 :
(2 sc, dec) x 6 + (6 sc) to shape (18)
Round 22 :
1 sc in each st around (18) - optional small decrease to close center slightly, then fasten off leaving long tail for sewing
Info :
Stuffing: If you want a slightly raised pumpkin, add a small amount of stuffing before the final decreases. Stuff lightly so the disc remains sewable flat to the runner.
— Pumpkin Face Embroidery (for each pumpkin) :
Info :
Use black yarn and tapestry needle for surface slip-stitch or simple satin stitch. Place face centered on pumpkin disc; pin before embroidering. Eyes are triangular and mouth is curved jack-o-lantern smile.
Step 1 :
Thread black yarn; bring needle up at top-center where eye will begin. For triangular eye, make 3 short satin stitches forming a filled triangle roughly 8–12 stitches wide depending on pumpkin size.
Step 2 :
Repeat across for second eye, spacing them 12–16 stitches apart. For nose make a single small triangle between and slightly lower than eyes.
Step 3 :
For mouth, mark two outer corner points and a center lower point. Using back-and-forth satin stitches, fill in a wide smile and then add vertical short stitches for tooth breaks if desired.
Info :
Keep embroidery stitches tight and small. If you prefer, surface slst around carved features to create a crisp edge rather than fill with satin stitch.
— Bat Applique (make 2-3) :
Round 1 :
6 sc in magic ring (6)
Round 3 :
(1 sc, inc) x 6 (18)
Info :
This forms the bat head; we’ll add ears and body wings in separate rounds. Use black yarn and small hook if you want tight stitches for small details.
Round 4 :
1 sc in each st around (18)
Round 5 :
BLO 1 sc in each st around to create a ridge for attachment (18)
Round 6 :
Work to create ears: ch2, 3 dc in next st, sl st back into base to form ear; skip 2 sts, repeat ear on opposite side, then 1 sc in remaining sts to finish head shape (18)
Info :
Pin tiny white beads or stitch small white French knots for bat eyes. Attach beads with secure knots and a drop of fabric glue if using non-safety beads.
Round 7 :
Attach wing motif: from wing base, ch1, (sc, hdc, dc, hdc, sc) in each wing segment creating scalloped wing edge. Repeat symmetrically for both wings. Work 8 sts per wing edge (approx. 16 extra stitches total) but maintain shape rather than exact count.
Round 8 :
1 sc around entire bat outline to tidy edges and prepare for joining (approx. 40 sc including wings)
Info :
Flatten wings and pin into shape before sc edging to maintain wing curve. Work lightly stuffed head if you want slight dimension but keep mostly flat for applique.
— Spiderweb Motif (make 2-3 webs) :
Round 1 :
Ch 5, join with sl st to form ring, ch3 (counts as 1 dc)
Round 2 :
Work 12 dc into ring, join with sl st to top of ch3 (12)
Info :
We will create spokes then join them with chain arches to make the web. Use cream color for high contrast. Keep tension loose on chain arches for airy look.
Round 3 :
Ch3, *sl st into next st, ch4* repeat around to create 12 spokes. End with sl st into base (12 ch arches)
Round 4 :
Round to work web arcs: attach yarn to base of first spoke, *ch5, sl st in mid-spoke about 2 chains down, ch5, sl st to next spoke base*, repeat creating outer chain loops (work carefully to stretch evenly)
Round 5 :
Using sl st, work additional inner chain loops between the spokes to create concentric arc rows until you have 3 concentric rows of chain arches. Fasten off and weave ends.
Info :
Blocking helps webs become flat. Pin to layout and lightly steam or spray to set shape before joining onto runner background.
— Small Round Discs / Coasters (make 4-6 filler discs) :
Round 1 :
6 sc in magic ring (6)
Round 3 :
(1 sc, inc) x 6 (18)
Round 4 :
(2 sc, inc) x 6 (24)
Round 5 :
(3 sc, inc) x 6 (30)
Round 6 :
1 sc in each st around (30) - fasten off leaving long tail for sewing onto runner
Info :
Use cream/beige for these rounds to contrast pumpkins; they provide neutral filler shapes and can be stacked behind other motifs for depth.
— 3D Flower Motifs (make 20–30 in assorted sizes) :
Round 1 :
6 sc in magic ring (6)
Round 2 :
Ch2, (2 dc, ch2, sl st) into same st to form petal; skip one st, repeat around for 3–6 petals depending on size (adjust count) (6 petals typical)
Round 3 :
For larger flower add second petal row: *sl st into next petal base, ch2, (3 dc, ch2, sl st)* repeat around (6 petals)
Info :
Create multiple flower sizes by altering number of petals and using puff or bobble stitches for full texture. Use oranges, purples and creams for variety.
Round 4 :
Finish with sc around the petal bases to tidy and fasten off leaving long tail for secure sewing (approx. 12–18 sc depending on petal count)
— Cluster Granny Motif Background (make 18–28 clusters) :
Round 1 :
Ch4, join to form ring, ch3 (counts as dc), 11 dc in ring, join (12) - this is the cluster centre
Round 2 :
*Ch3 (counts as dc), 2 dc in same st, ch1, skip next st, 3 dc in next st, ch1* around to make scallops (work 6 scallops)
Round 3 :
Attach contrasting color, sl st to gap, work (sc, ch3, sc) in gap to create small picot-like connector points across the motif. Fasten off leaving long tail for jays joining.
Info :
These irregular clusters fill negative space. Use purple and black alternation to create depth. Keep edges raw until joining stage for flexibility.
— Join-As-You-Go Runner Base (layout and assembly rounds) :
Info :
Lay out your motifs on a work surface following the photo-like composition: three large pumpkins evenly spaced along the runner, spiderwebs near each pumpkin end, bats interspersed, clusters and flowers filling gaps.
Round J1 :
With black yarn, work 1 sc around the outermost edge of a chosen motif; when you reach a connecting point to an adjacent motif, sc into that motif's edge stitch to join; continue around to join one adjacent motif every 6–10 sc depending on fit.
Round J2 :
Work 1 sc around the joined pair, spacing joins evenly. Use sl st joins where two motifs meet at a small point, and sc where edges overlap to create a sturdy seam.
Info :
Pin motifs before joining. Adjust positions so pumpkins are not all aligned perfectly straight — a slightly staggered layout reads more organic and visually interesting.
Round J3 :
As you add each motif, use a combination of sc joins and whip stitch from the WS to secure. When two or more motifs meet at a point, sew them together with mattress stitch for invisibility.
Round J4 :
Fill gaps by sewing small discs and flowers into available hollows using long tails and whip stitch. Tuck edges under to create seamless transitions.
Info :
For slightly raised motifs like pumpkins, place them on top of background clusters and sew through the back center of pumpkin into underlying clusters to lock them in place while keeping the top dimensional.
— Scalloped Border and Final Edge :
Round B1 :
With black yarn, work 1 sc around entire runner edge to even out any gaps (approx. count will vary). Place 2 sc in corners and at points where motifs jut out for even tension.
Round B2 :
Scallop round: *skip 2 sc, 5 dc in next sc, skip 2 sc, sl st* repeat around to create uniform scallops. Adjust spacing where shapes are tight by using 4 dc instead of 5 if needed.
Round B3 :
Picot finish: sl st into center of each 5-dc shell, ch3, sl st into top of shell to create small picot points for a lace-like finish. Fasten off and weave ends.
Info :
Blocking the assembled runner flat will help scallops sit evenly. Use plenty of pins and a wet-block or lightly steam with care to set shape.
— Optional Accent Stitches and Surface Details :
Round S1 :
Surface slst around selected pumpkin ribs in a contrasting darker orange to emphasize grooves. Work slow and evenly spaced sl sts.
Round S2 :
Embroider tiny stems: using moss green, whip stitch or surface hdc at pumpkin top center to create a short curved stem. Add a tiny leaf using 6 sc in MR and 3 dc petal if desired.
Info :
Surface stitches are a quick way to add contrast without creating bulk. Use two strands if you want bold lines or single strand for delicate details.
— Finishing Touches :
Info :
Weave all tails on the WS through at least 6–8 stitches to hide and secure. Trim excess yarn close to work but not through the knot to avoid slippage.
Step :
Optionally add small clear beads to spiderweb centers for dew drops; secure with sewn knot and tiny dab of fabric glue on the knot for permanence.
Info :
Press carefully with low heat through a damp cloth if necessary to remove slight bulges and make runner lay flat on table. Allow to dry completely before use.
Finishing this Halloween runner is such a joy—you’ll love seeing the pumpkins, bats and spiderwebs come alive as you add each applique. The layered clusters create depth and shadow that feel truly handmade and cozy. Hang it or lay it on a warm wood table to make your holiday decor pop. 🎃🍁🖤