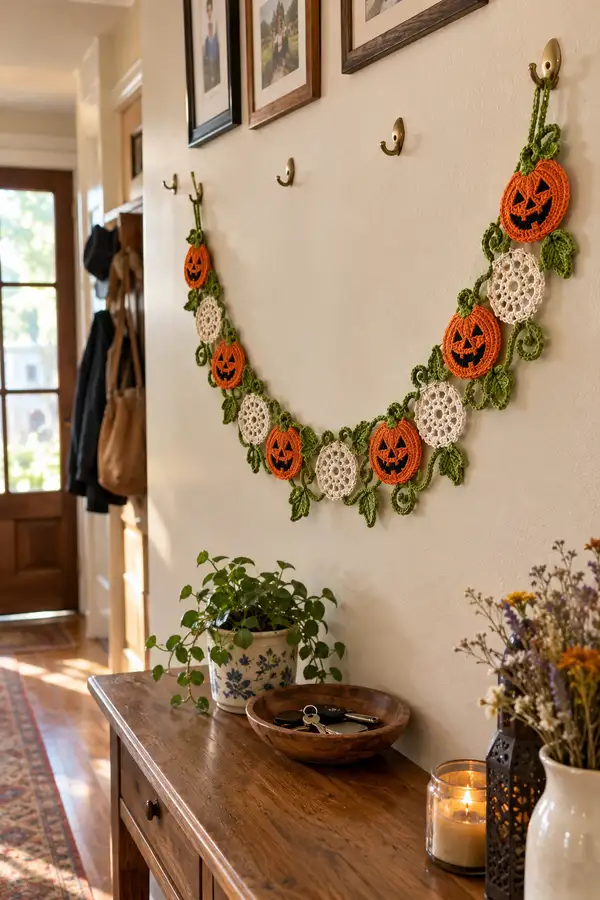
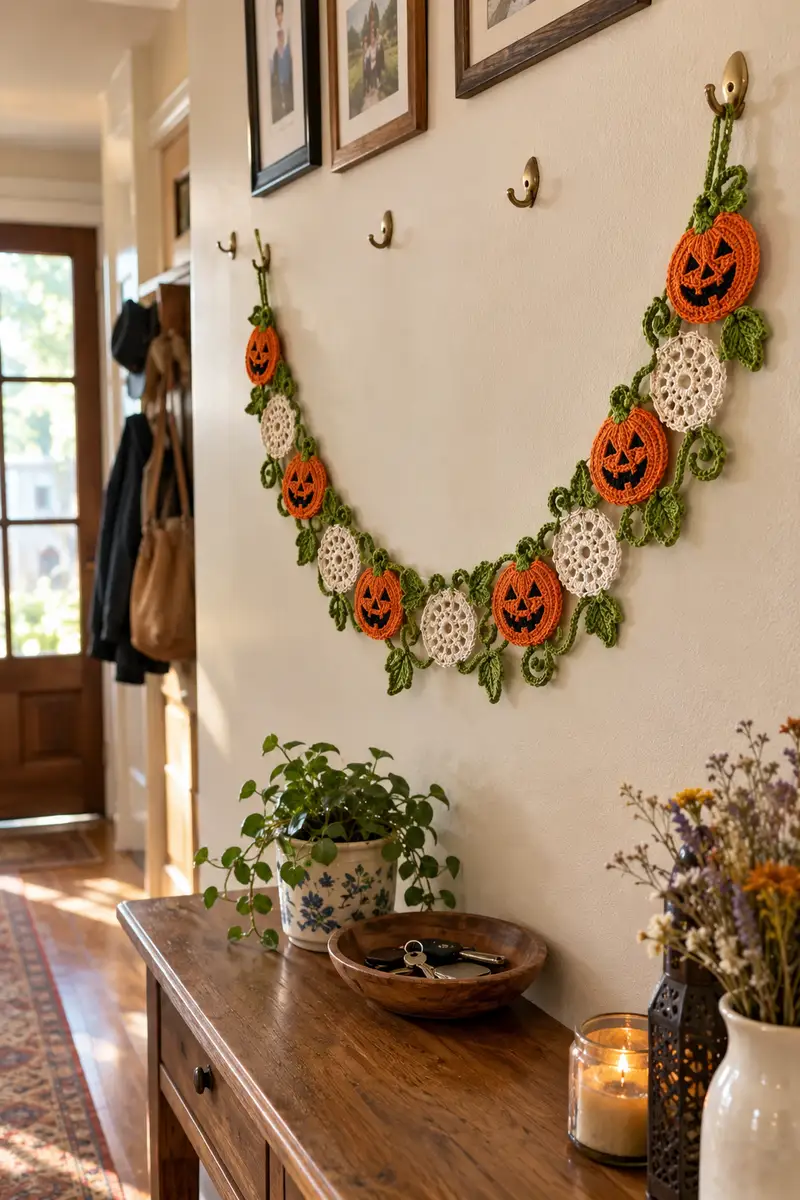
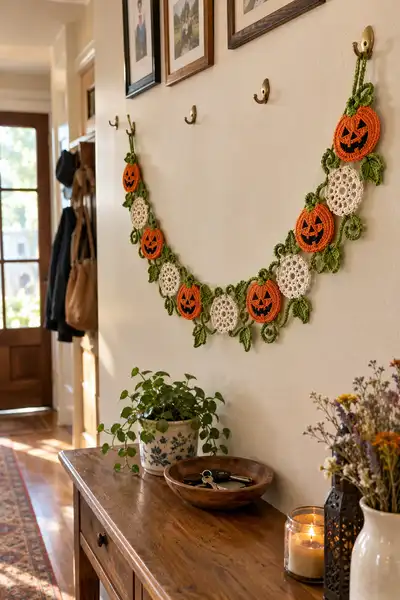
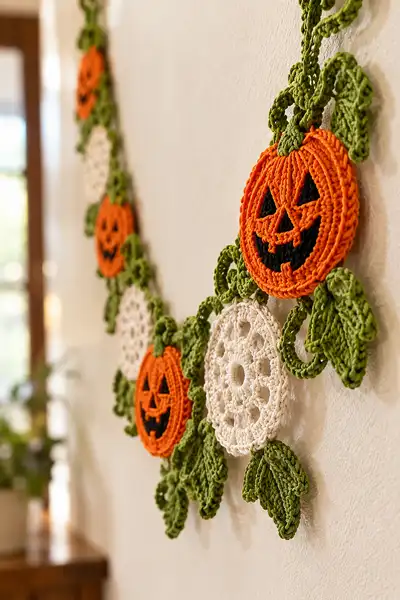
Make a charming Jack-o-Lantern Faces garland for autumn and Halloween decor. This pattern creates round pumpkin medallions with carved faces, lacy cream doilies, leafy green vines and curly tendrils. The garland hangs beautifully across a wall, entryway, or mantel using sturdy cotton yarn and simple join-as-you-go assembly. Clear, step-by-step rounds and tips are included for stitch placement, color changes, and secure joins.
Progress Tracker
0% Complete
— Pumpkin Motif :
Round 1 :
6 sc in magic ring (6)
Round 3 :
(1 sc, inc) x 6 (18)
Round 4 :
(2 sc, inc) x 6 (24)
Round 5 :
(3 sc, inc) x 6 (30)
Round 6 :
(4 sc, inc) x 6 (36)
Round 7 :
(5 sc, inc) x 6 (42)
Round 8 :
(6 sc, inc) x 6 (48)
Info :
Rounds 1-8 form a flat, even circle. Work tension evenly; use a stitch marker to mark the first st of each round. Use pumpkin orange yarn. If using mercerized cotton, slip lightly to keep fabric flat.
Round 9-12 :
1 sc in each st around (48)
Info :
These even rounds build the face plane. Work 4 rows to give the motif body. If you prefer a thicker pumpkin, add additional even rounds in multiples of 1 to reach desired thickness.
Round 13 :
1 sc BLO in each st around (48)
Round 14 :
1 sc in each st around (48)
Info :
Working Round 13 in BLO creates a subtle ridge that reads like a pumpkin groove. Keep the same stitch count to maintain a flat medallion.
Round 15 :
(6 sc, dec) x 6 (42)
Round 16 :
(5 sc, dec) x 6 (36)
Info :
Slight decreases at Rounds 15–16 create a shallow cupping to suggest a plump pumpkin. Do not over-decrease; the medallion should remain fairly flat.
Round 17 :
1 sc in each st around (36)
Round 18 :
1 sc BLO in each st around (36)
Round 19 :
1 sc in each st around (36)
Info :
At this point your pumpkin medallion measures approximately 9-10 cm (3.5-4") depending on yarn/hook. If you'd like slightly larger pumpkins, work 1-2 additional increase rounds earlier to reach 54 sts and follow similar shaping.
Round 20 :
Surface round: join black yarn at st opposite top and work 1 sl st, *ch 2, sl st in same st* across to create base guide for face embroidery (36 sl st positions)
Info :
We will create the face applique using small black crocheted pieces or embroidery. The surface sl st round provides a guideline for centering eyes and mouth; pick a point 1/3 down from the top as the central reference.
Face - Left Eye :
With black yarn and 3.0mm hook: ch 4, sl st in 2nd ch from hook, sc in next ch, sl st in last ch; sl st to desired position on pumpkin and secure. Fasten off, leaving tail for sewing. (Small triangle approx 3-4 sts wide)
Face - Right Eye :
Repeat Left Eye mirrored, place approx 8-10 stitches apart from left eye depending on desired expression.
Face - Nose :
With black yarn: ch 3, sl st in 2nd ch from hook, sc in last ch, sl st to pumpkin and sew; position centered between eyes.
Face - Mouth :
With black yarn and tapestry needle, use a combination of satin stitch and small crocheted half circles: embroider a curved smile about 12-14 sts wide. Optionally crochet a small scallop: ch 6, join with sl st to form arc, sc 5 across arc then sew in place overlapping surface round.
Info :
When embroidering the face, work on blocked and flattened motif for consistent placement. Use small running stitches and keep tension gentle to avoid puckering the orange fabric. Weave in ends on the reverse side.
Round 21 (Stem Base) :
Join leaf green at top center: ch 2, work 6 sc into same st to form short nub (6). Fasten off, leaving tail for attaching a leaf/curly tendril.
Info :
Make 6 pumpkin motifs total (or desired number). Block each motif flat on a mat using light steam or wet-block method for best flatness and consistent size before assembly.
— Doily Medallion :
Round 1 :
ch 6, join with sl st to form ring, ch 3 (counts as dc)
Round 2 :
Into ring: (dc, ch 2) x 12, join with sl st to top of first ch-3 (12 dc, 12 ch-2 sps)
Round 3 :
sl st to first ch-2 sp, *(ch 3, 2 dc, ch 3, 2 dc) in next ch-2 sp, sl st in next ch-2 sp* repeat around (creates small petal clusters) (12 petals)
Info :
Use cream yarn for a lacy, open medallion. Use a smaller hook if needed to keep lace crisp. Block doilies flat after finishing for a neat round shape.
Round 4 :
ch 1, sc in same sp, *ch 5, sc in center of next petal (between clusters)* repeat around (12 ch-5 loops)
Round 5 :
Into each ch-5 loop: (sc, hdc, 3 dc, hdc, sc) forming a shell (12 shells)
Round 6 :
sl st to space between shells, *ch 4, sc between next pair of shells* repeat around (12 ch-4 loops)
Round 7 :
Into each ch-4 loop: (sc, ch 2, 2 dc, ch 2, sc) to create lacy arcs (12)
Info :
This doily is decorative and should remain fairly flat. If your doily cups, block it flat with pins and steam or wet block. You can add or subtract rounds to change the diameter—each extra shell round increases the size about 2-3 cm.
Round 8 :
ch 1, sc in each st and into each arc around to neaten edges. If desired add picot edge: *sc, ch 3, sl st in 3rd ch, skip 1* repeat for subtle scallop.
Round 9 :
Fasten off and weave in ends. Final diameter should be slightly smaller than pumpkin medallion so pumpkins stand out.
Info :
Make matching number of doilies equal to pumpkin motifs or alternate as in the photo (pumpkin, doily, pumpkin, doily). Blocking will ensure all rounds align when joined to vine.
— Leaf Motif (Make many) :
Round 1 :
ch 10, sc in 2nd ch from hook, hdc in next, dc in next 2, tr in next 2, dc in next, hdc in next, sc in last (leaf spine created asymmetrically) (9 sts)
Round 2 :
Turn work and work back along opposite side: sc in last, hdc, dc, tr, dc, hdc, sc; sl st to first sc to close leaf tip.
Round 3 :
Edge round: *ch 2, picot (ch 3, sl st in 3rd ch), sc into next st* around to create textured scalloped edge. Fasten off and weave tail to reverse. (8-10 picots)
Info :
Work leaves in leaf-green yarn. Vary sizes by starting with ch 8 for small leaves or ch 12 for large leaves. Make at least 12-14 leaves to decorate connectors between motifs as pictured.
Round 4 :
Optional vein: With FLO, sc down center of leaf: join yarn at base, ch 1, sc in center stitch across leaf length to tip, fasten off. This gives a raised vein when blocked.
Info :
Sew leaves to motif edges after blocking. Use a few stitches through base only so leaves can curve naturally away from medallion.
— Curly Tendril (Make many) :
Round 1 :
Join leaf green: ch 30 (or ch 20 for short tendril), starting in 2nd ch from hook: work 2 sc in each ch to end forming a spiral curl (approx 58 sc for ch30)
Round 2 :
Work sl st spiral on outer edge to tighten curl: into first sc, *sl st in next 2 sc* repeat across curl. Fasten off and weave in ends.
Info :
Tendrils are decorative connectors between pumpkins and doilies; make varied lengths to create natural-looking vines. Light starch can help hold a curl if desired.
— Vine & Join Chain :
Round 1 :
With leaf green, ch 120 to form main garland chain (or ch desired length; each 10 ch ≈ 10 cm)
Round 2 :
Row: Starting in 2nd ch from hook, 1 sc in each ch across to make sturdy chain (119 sc)
Info :
The garland base can be a braided cord or a sc chain strip. The sc strip is sturdy and flat to attach motifs. Make length to fit your wall; photo shows about 1.2–1.5 m of span to create gentle swag.
Round 3 :
At each motif placement point, make a ch-6 loop for attaching medallions: *work 8 sc, ch 6, skip next 6 sc, continue* repeat until you have 6 loop positions (or more depending on motif spacing)
Round 4 :
Work edge round: sl st around entire sc chain to neaten and secure loops, spacing evenly for motif placement.
Round 5 :
To secure leaves and tendrils along vine: make small connector clusters at intervals—join yarn, *(ch 3, sl st back in same st) x 3* then sl st 5 sts along and repeat. Fasten off.
Info :
Plan motif spacing before attaching: the photographed garland alternates pumpkin and doily spaced roughly 12-14 cm apart. Mark positions with pins or contrasting yarn before final attaching.
Round 6 :
Optional decorative picot edging: With cream or green, sl st into edge st and *sc, ch 3, sl st in 3rd ch* across entire vine to soften edges.
Round 7 :
Fasten off ends and weave tails neatly along the underside to keep the top tidy for hanging.
— Hanging Loop & End Finishes :
Round 1 :
At both ends of vine, form a sturdy hanging loop: join leaf green at tip, ch 40, sl st back into base to form loop. Reinforce by working 2 rows of sc along the ch-40 loop (approx 80 sc) and sl st to base. Fasten off.
Round 2 :
Wrap base of loop with a small 'stem' cluster: join green yarn and work 6 sc in same stitch, finish with 3 ch and sl st to form decorative knot. Fasten off and weave ends securely.
Info :
Double-check that both hanging loops are equal length so the garland hangs level. Reinforce the loop by sewing a few extra passes of yarn through base and vine body for durability.
— Assembly & Join-as-you-go :
Info :
Layout all motifs on a blocking mat and pin to shape before joining. Decide order: photo shows pumpkin, doily, pumpkin, doily, pumpkin, doily, pumpkin, etc. Leave approx 12 cm between motif centers for visual balance.
Step 1 :
Place first pumpkin over a prepared ch-6 loop on vine. With matching orange yarn and tapestry needle, sew around the back loop of the pumpkin where it meets the vine chain using small whip stitches through the sc strip and the pumpkin's last round. Use 10-12 stitches to anchor each motif (more if heavy yarn).
Step 2 :
Attach a doily to the next loop by placing doily center over the ch-6 loop and working small stitches through the doily outer shell and vine loop. Use cream yarn for a tidy join; aim for 12 evenly spaced attachment points around the loop.
Info :
When sewing motifs use a tapestry needle and not too bulky yarn to avoid visible bulky seams. Keep stitches small and consistent. For a near-invisible join, use matching yarn held doubled and catch only a few plies of both layers.
Step 3 :
Between motifs, sew leaves and curled tendrils at join points. Sew leaf bases onto vine and tuck the tendril loop under a few stitches to anchor. Arrange leaves to overlap slightly and create a natural vine effect.
Step 4 :
Optional reinforcement: for high-traffic areas or heavier yarn, run a second line of stitches through vine chain and motif back using a matching thread for strength.
Info :
Keep assembly symmetrical by counting stitches from motif centers to ensure even spacing across the garland. Pin motifs in place and photograph layout before sewing if you want to make adjustments.
Step 5 :
Weave in all ends on the reverse. Trim tails close to work. Block assembled garland lightly if needed to shape leaves and flatten doilies; avoid heavy steam that might distort black applique stitches.
Final Touch :
Hang garland on hooks or nails, adjust swag and leaf arrangement for best visual flow. Add a small dab of craft glue at hanging loops if you expect outdoor display or a lot of handling.
Info :
To create a longer garland, add repeat motif sets in sequence (pumpkin+doily) and extend vine length accordingly. You can also reduce motif count to make a shorter piece for a small space.
This cheerful Jack-o-Lantern garland blends playful carved faces with delicate lacy medallions and leafy vines to create autumnal charm. Each motif comes together in a satisfying rhythm—crochet a few at a time and assemble like a craft puzzle. Hang it across a mantel, window, or entryway to welcome fall with handmade warmth. 🎃🍁✨