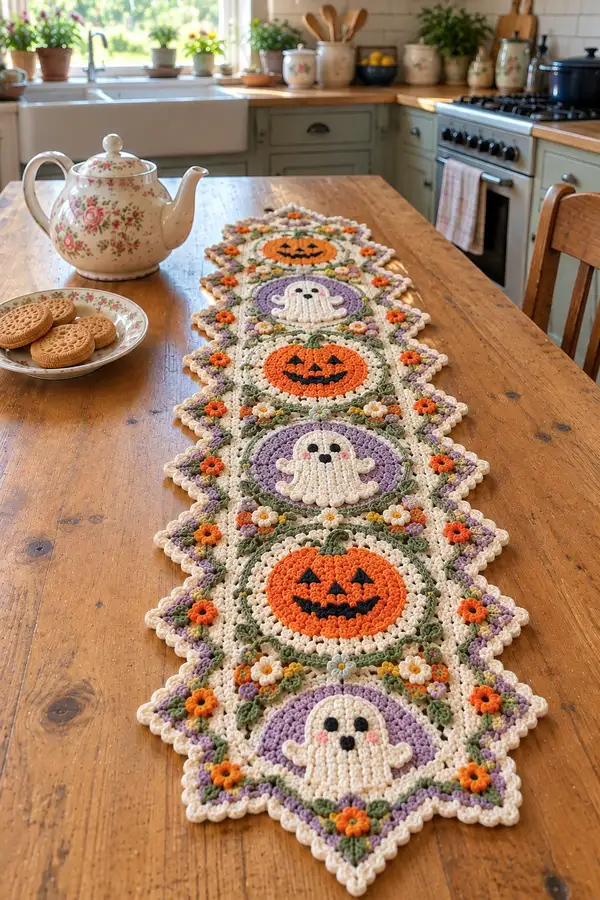
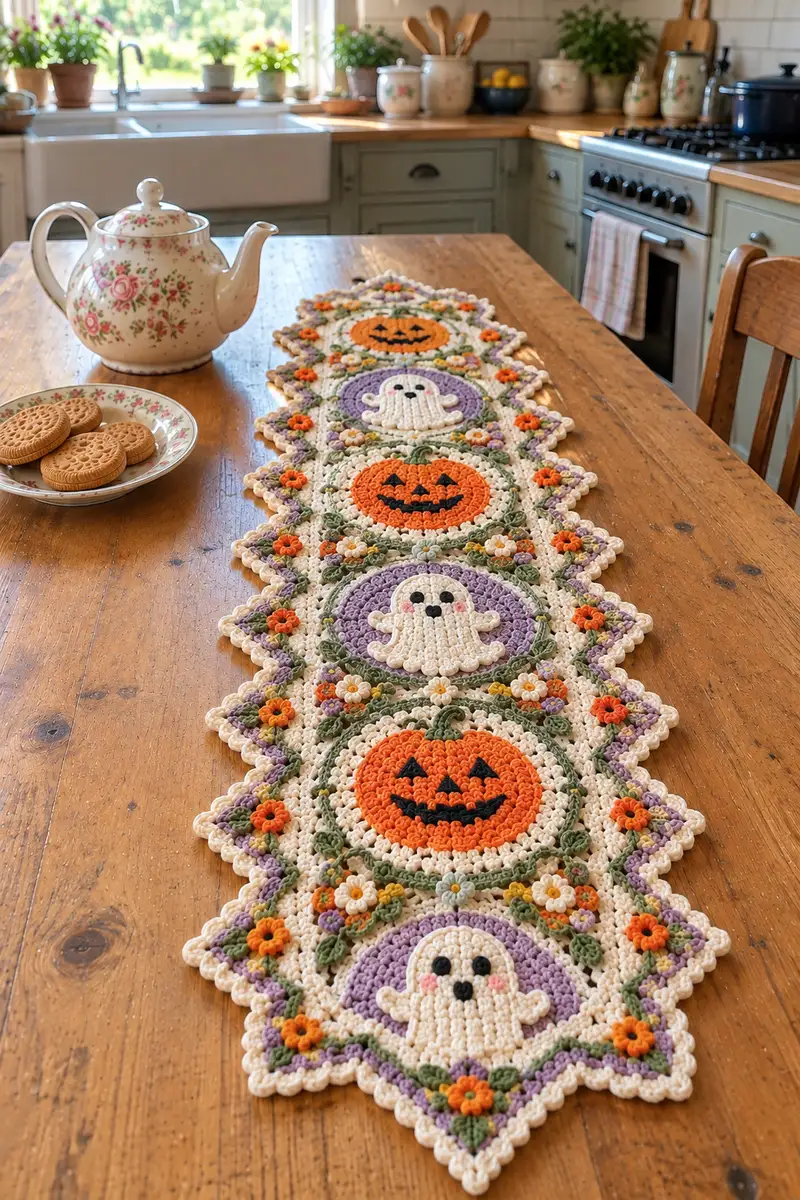
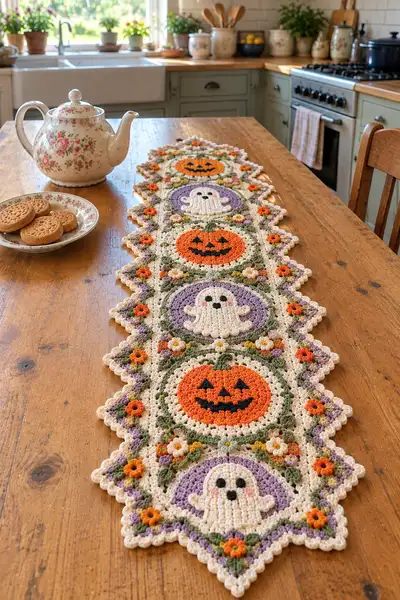
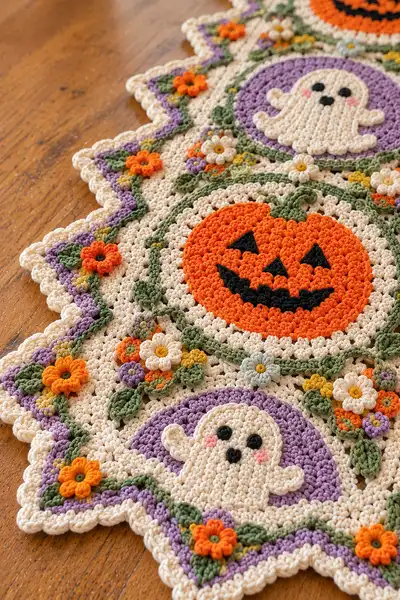
A whimsical, vintage-inspired Halloween table runner featuring alternating jack-o-lantern and ghost medallions framed with scalloped edges, vines, and tiny floral clusters. Worked in warm orange, soft cream, muted green and lavender with poppy florals and textured bobble details, this runner makes a charming centerpiece for autumn gatherings. The pattern includes full round-by-round instructions for motifs, embellishments, joining and a decorative scalloped border.
Progress Tracker
0% Complete
— Notes & Gauge :
Info :
Gauge is not critical for table runner width but affects motif size. Using 4.0mm hook and worsted yarn each circular medallion measures approx 10.5cm (4.1") across. Make a sample motif to check size. Maintain consistent hook for all motifs for even joining. Work in continuous rounds unless instructed to join and turn.
— Pumpkin Circle Motif (make 3 or as many as desired) :
Round 1 :
6 sc in magic ring (6)
Round 3 :
(1 sc, inc) x 6 (18)
Round 4 :
(2 sc, inc) x 6 (24)
Round 5 :
(3 sc, inc) x 6 (30)
Round 6 :
1 sc in each st (30)
Info :
Change to pumpkin orange yarn now if you started with a neutral center. This first orange section builds the pumpkin round. Carry or fasten off previous color neatly.
Round 7 :
(4 sc, inc) x 6 (36)
Round 8 :
1 sc in each st (36)
Round 9 :
(5 sc, inc) x 6 (42)
Round 10 :
1 sc in each st (42)
Info :
These rounds create a slightly domed pumpkin. If you prefer a flatter pumpkin, omit Round 9 (leave at 36 sts) and proceed. Check motif size against other pieces.
Round 11 :
(6 sc, inc) x 6 (48)
Round 12 :
1 sc in each st (48)
Round 13 :
1 sc in each st BLO (48)
Info :
Working BLO on this round creates a raised ridge that frames the next color change and gives a recessed look to the pumpkin face area.
Round 14 :
Change to cream/off-white; 1 sc in each st around (48)
Round 15 :
Change back to orange; 1 sc in each st (48)
Info :
Rounds 14-15 make a thin neutral ring around our pumpkin. If you'd like a wider halo, add an extra round in cream before rejoining orange.
Round 16 :
Start shaping the pumpkin by working 48 sts but introducing gentle bobble texture: *sc 3, bobble in next st* around (48)
Info :
Bobble stitch (US): Yarn over, insert hook, pull up loop, yarn over, pull through two loops twice to create a 3-loop bobble; complete by pulling through all loops. Alternative: 3tr cluster for taller texture.
Round 17 :
1 sc in each st (48)
Round 18 :
Even round: 1 sc in each st (48)
Round 19 :
(6 sc, dec) x 6 (42)
Round 20 :
(5 sc, dec) x 6 (36)
Info :
Begin to gently ease the outer orange into the green frame area; stuffing is not required for flat runner medallions — keep work flat and relaxed. If the center puckers, block lightly after finishing.
Round 21 :
(4 sc, dec) x 6 (30)
Round 22 :
(3 sc, dec) x 6 (24)
Info :
At this point, prepare to embroider the jack-o-lantern face. Use black yarn with a blunt embroidery needle. Pin the motif flat for even stitching.
Face Embroidery :
Using stranded black yarn or embroidery thread, embroider two triangular eyes, triangular nose and a jagged smile to desired size. Work satin stitch or surface crochet over the orange, anchoring at the back. Secure ends and weave in.
Round 23 :
Change to green for vine frame. Work sc around: 1 sc in each st (24)
Round 24 :
(2 sc, inc) x 6 (30)
Round 25 :
1 sc in each st (30)
Round 26 :
(3 sc, inc) x 6 (36)
Round 27 :
1 sc in each st (36)
Round 28 :
Sl st to create raised vine: *ch 5, sl st in next 3rd st to make loop, sc in next 2 sts* around to create vine loops (36 loops)
Info :
These vine loops will be used to anchor small flowers and leaves. Use a contrasting green and work tightly so loops remain defined. Fasten off and weave ends.
— Ghost Circle Motif (make 3 or alternate with pumpkins) :
Round 1 :
6 sc in magic ring (6)
Round 3 :
(1 sc, inc) x 6 (18)
Round 4 :
(2 sc, inc) x 6 (24)
Round 5 :
(3 sc, inc) x 6 (30)
Round 6 :
1 sc in each st (30)
Info :
Change to lavender for halo background on Round 7. This gives the pale purple circle surrounding the ghost shape, as seen in the photos.
Round 7 :
Change to lavender: (4 sc, inc) x 6 (36)
Round 8 :
1 sc in each st (36)
Round 9 :
(5 sc, inc) x 6 (42)
Round 10 :
1 sc in each st (42)
Round 11 :
Change to cream: 1 sc in each st (42)
Info :
We will now create a raised ghost applique worked in rows/semi-circular rounds to give the rippled 'skirt' effect. Work stitches slightly raised using front loop or post stitches to create ridges.
Ghost Applique Round 1 :
Attach cream yarn at lower edge of cream round. Ch 1, work 12 sc across a lower arc space to define ghost body base (12)
Ghost Applique Round 2 :
Turn work and hdc 1 in each st across, ch 1 at ends to keep edges rounded (12)
Ghost Applique Round 3 :
Begin scalloped ghost skirt: *sc 1, 3dc cluster in next st, sc 1* across (12 clusters; 24 sts equivalent)
Ghost Applique Round 4 :
Work two rounds of back loop only slip stitches around to give heavy ribbing: 1 sc BLO in each foundation st (approx 24)
Round 12 :
Secure and weave tail; attach small arms by working 6 sc in a small oval (make 2) and sew to sides of ghost body at appropriate height
Info :
Facial features: use small black yarn pom or embroider two eyes and an O-shaped mouth with satin stitch. Add tiny blush spots with pale pink yarn or blush powder applied lightly and sealed with textile medium if desired.
Round 13 :
Work round joining ghost applique into surrounding circle: sc around attaching through both layers where needed to ensure the ghost sits slightly raised (42)
Round 14 :
Change to green for vine frame: 1 sc in each st (42)
Round 15 :
(2 sc, inc) x 12 (54)
Round 16 :
1 sc in each st (54)
Round 17 :
Work raised vine loops: *ch 5, sl st in 3rd ch back into same spot, sc 2* around to create small leaf anchor points (54)
Info :
Fasten off and weave ends. These vine loops will be embellished with tiny flowers and leaves similar to the pumpkin motifs to create a cohesive runner.
— Small 3D Flower (make 24-30, assorted colors) :
Round 1 :
6 sc in magic ring (6)
Round 2 :
Ch 1, work 6 petals: *[sc in next st, (ch 3, 3 dc in same st, ch 3, sl st in same st)* repeat across] — creates 6 small loop petals
Round 3 :
Secure center with small knot and stitch down the center with different colored yarn to create a dot (6)
Info :
Alternate petal construction: make tiny puff petals by working 3 puff cluster in the same st and slip stitching between petals for a more textured look. Use 3.5mm hook for firmer flowers.
— Layered Daisy (make 12) :
Round 1 :
6 sc in magic ring (6)
Round 2 :
*ch 2, 5 dc in next st, sl st in same st* x 6 — creates petals (36 petals equivalent)
Round 3 :
Fasten off and sew a small contrasting center (apricot or yellow) using satin stitch; tuck and secure center yarn through back and weave in (6)
Info :
Make some daisies with two layers: work a second smaller round of petals in a contrasting color and sew on top of the first for a fuller flower.
— Leaves (make 18-24) :
Round 1 :
Ch 8, sc in 2nd ch from hook, hdc, dc, tr, hdc, sc in last ch, continue working along opposite side of foundation chain: hdc, dc, hdc, sc (approx 14 sts)
Round 2 :
Sl st around edge to neaten, then work a row of surface slip stitches down the center to create a vein. Fasten off (14)
Info :
Use deep green and make leaves slightly varied in size for a natural look. Sew leaves onto vine loops using tiny invisible stitches through the vine and leaf base.
— Vine Embellishment (work around each medallion) :
Round 1 :
Attach green yarn in vine loop. Work slip stitch spirals around vine loops: *ch 3, sc in base of loop, ch 3, sl st in next vine anchor* repeat to lengthen vine segments
Round 2 :
Sew flowers and leaves to vine anchors using small whip stitches so flowers sit slightly on top of vines (placement as photograph: 3 small clusters between medallions)
Info :
Pin all floral and leaf placements before stitching. Alternate colors: bright orange, soft yellow, lavender and cream for petals, and yellow or apricot centers.
— Joining Medallions to Form Runner (modular join for desired length) :
Info :
Make motifs in desired order: e.g., Pumpkin - Ghost - Pumpkin - Ghost - Pumpkin (as pictured). Block each motif flat before joining for consistent shape. Use whip stitch or slip-stitch join depending on desired seam visibility.
Joining Round 1 :
Place two motifs right sides together aligning vine rings and outer cream rounds. Using cream yarn, whip stitch through both layers along the small outer ring spaced evenly. Aim to join across approx 12-14 sts to create secure seam.
Joining Round 2 :
On the wrong side, work a single round of sc through the seam to tidy the join (approx 36 sc across the join, depending on motif size)
Info :
Make sure floral clusters on each motif interleave neatly; if flowers cross seams, sew them after joining to hide bases. Continue joining motifs until runner reaches desired length.
— Outer Scallop Border (work after all motifs joined) :
Round 1 :
With cream yarn, attach at any outer stitch, ch 1, sc evenly around full runner edge including points, placing 1 sc per visible stitch (estimate 600 sc around full runner; exact count will vary by number of motifs)
Round 2 :
*ch 3, sk 2 sts, sc in next st* repeat around to create small loops (approx 200 loops)
Round 3 :
Working into looped spaces create scallops: (5 dc, sl st in base of loop) around each loop to form scallop shell (approx 200 shells)
Info :
To create the small pointed scallop effect shown in the runner photo, work a decorative scallop row of sc, hdc and dc combinations between shells: *sc, hdc, 3 dc, hdc, sc* into each shell center.
Round 4 :
Change to lavender for accent: work 1 sc in each top dc of scallops to create a lavender ridge around the edge (approx 200)
Round 5 :
Change to green: Work raised round of surface slip-stitch (or front post hdc) as vine line along scallop inner edge to echo medallion vines (approx 200)
Round 6 :
With cream yarn, finish outermost edge with small picot edging: *sc 3, picot (ch 3, sl st in 3rd ch), sc 3* around to make pronounced tiny bobble rim (approx 200 picots)
Info :
Blocking: Wet block the entire runner on a large surface, pinning scallops and points to shape. Allow to dry fully to set scallops and flatten motifs evenly; this significantly improves final appearance.
— Decorative Raised Details (final texture rounds) :
Round 1 :
With green, embroider small raised stem lines between medallions using surface slip stitch or chain stitch worked tightly. Secure ends.
Round 2 :
Add small French knot centers (or small stitched dots) to flower centers in yellow/apricot; tie off securely and seal knots with a tiny dab of fabric glue if desired.
Info :
Use contrasting thread to add tiny highlights on pumpkin ridges: a few white surface slip stitches along one side to simulate shine. Keep all embellishments flat so the runner lays well under dishes.
— Finishing Touches :
Info :
Weave in all tails using a tapestry needle and hide ends inside motif rounds. Check joins for loose stitches and add extra slip stitches where needed. Press lightly with a steam iron using a pressing cloth if necessary to flatten and set the runner.
Final Size :
Using the pictured configuration of 5 medallions, the finished runner measures approximately 120-130cm (47-51") in length and 22-26cm (8.5-10") in width depending on scallop depth and blocking.
Completing this Halloween table runner is a joy — each medallion and tiny flower layers up into a charming, textured centerpiece that’s both festive and elegant. The mix of pumpkins and friendly ghosts framed by little floral vines creates a warm, vintage feel perfect for autumn gatherings. Enjoy the process of assembling the pieces and watching the runner come to life as you add each floral cluster and scallop edge. 🧡🌿🎃