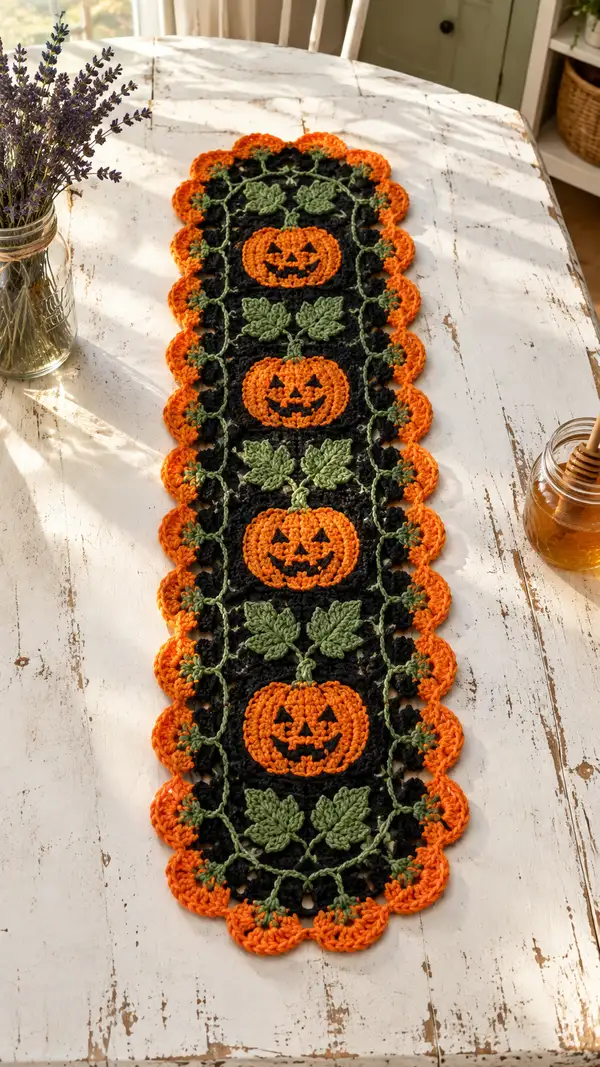
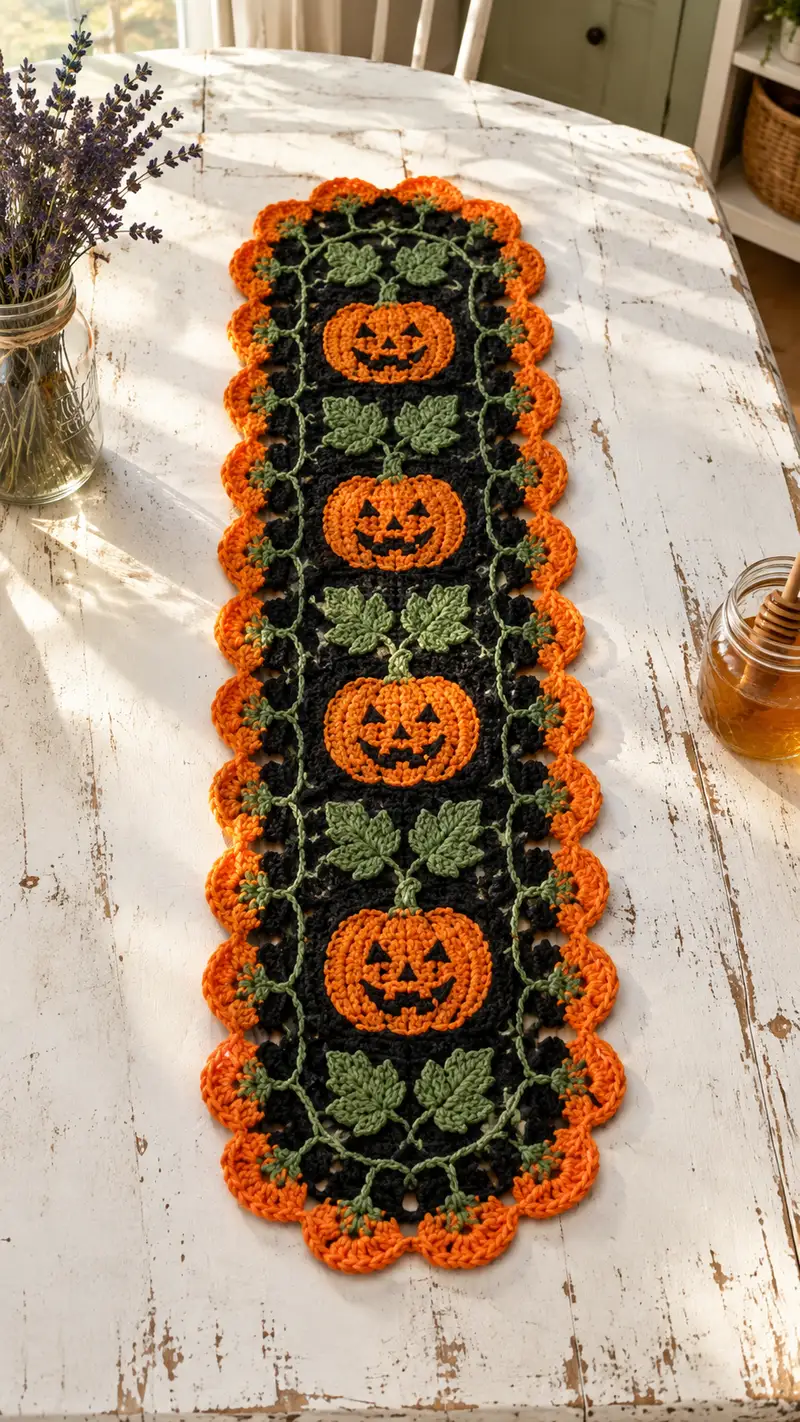
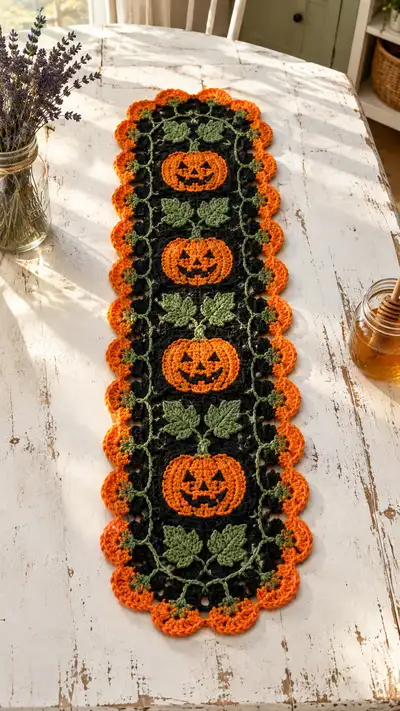
This festive table runner features a row of carved pumpkin medallions linked by leafy vine motifs on a dramatic black mesh background. Pumpkin centers in bright orange, green vinework, and scalloped orange edging create a charming Halloween accent. The pattern uses modular motifs joined with chain-lace rows for a lightweight, decorative runner perfect for holiday tables or a mantle. Detailed instructions include motif construction, embroidery face placement, joining, and a scalloped border for a polished finish.
Progress Tracker
0% Complete
— Project Overview :
Info :
This table runner is worked in modular motifs: Pumpkin Medallion (orange center with embroidered face), Leaf Cluster motif (green), Rectangular Black Mesh background squares and connecting chain-lace rows, then a scalloped Orange Border. The pictured runner contains 4 pumpkin medallions joined lengthwise with connecting vine/leaf rows. You can repeat the central motif sequence to lengthen or shorten the runner. Gauge is flexible for a decorative piece; maintain consistent tension and hook size for even joining.
— Pumpkin Medallion (Make 4 or desired number) :
Round 1 :
6 sc in magic ring with Pumpkin Orange (6)
Round 2 :
Inc in each st around (12)
Round 3 :
(1 sc, inc) x 6 (18)
Round 4 :
(2 sc, inc) x 6 (24)
Round 5 :
(3 sc, inc) x 6 (30)
Round 6 :
(4 sc, inc) x 6 (36)
Info :
Maintain even tension; these rounds create a tight orange disc for the pumpkin. If your disc cups, use a slightly larger hook for the following rounds to flatten. Place a stitch marker at the start of each round.
Round 7 :
(5 sc, inc) x 6 (42)
Round 8 :
(6 sc, inc) x 6 (48)
Round 9 :
1 sc in each st (48)
Round 10 :
1 sc in each st (48)
Info :
Rounds 9-10 establish a flat pumpkin face area. Mark the midpoints for face placement: find opposite stitch groups to center eyes and mouth later. The carved face will be embroidered with Black yarn after the pumpkin medallion is complete.
Round 11 :
(7 sc, inc) x 6 (54)
Round 12 :
1 sc in each st (54)
Round 13 :
Change to BLO: 1 sc in each st BLO (54)
Info :
Working BLO on Round 13 creates a subtle ridge suggesting pumpkin ribs. Keep tension slightly firm to emphasize texture. If you prefer a smoother pumpkin, skip BLO and work 1 sc in each st.
Round 14 :
(8 sc, inc) x 6 (60)
Round 15 :
1 sc in each st (60)
Round 16 :
(5 sc, inc, 5 sc, dec) x 6 (60)
Info :
Round 16 shapes the medallion subtly by grouping increases and decreases; math keeps total at 60. The pattern creates slight ribs/indentations. Keep stitch count accurate by counting each group at the end of the round.
Round 17 :
(9 sc, inc) x 6 (66)
Round 18 :
1 sc in each st (66)
Round 19 :
(3 sc, dec) x 11, 3 sc (54)
Info :
Begin reduction to round the pumpkin edge so it will sit nicely within the surrounding black mesh. Start planning where the green stem will attach—this will be crocheted later and secured to the top center of each pumpkin medallion.
Round 20 :
(2 sc, dec) x 13, 1 sc (41)
Round 21 :
(1 sc, dec) x 13, 2 sc (28)
Round 22 :
Dec around where possible to reach 14 sts total, then sl st to first to close (14)
Info :
Fasten off leaving a long tail for sewing the medallion onto the black mesh square or for join-as-you-go placement. We will not stuff this motif—keep it flat. Block medallion lightly to round edges before embroidering the face.
Round 23 :
Surface detail: Using Black yarn and a tapestry needle, embroider triangular eyes and a jagged mouth on the flat orange area. Place eyes approximately 8-10 sts apart across Round 10 space. Use backstitch or satin stitch for filled shapes. Secure and weave ends behind the medallion.
Info :
Pin the medallion flat and mark the centerline before embroidering. Make a small practice face on scrap yarn to determine scale. If you prefer crocheted facial pieces, create small black triangles with 4-6 sts and sew into place.
— Leaf Cluster Motif (Make 6 per pumpkin gap) :
Round 1 :
With Leaf Green, ch 4, join with sl st to form small ring, ch 1 (counts as initial)
Round 2 :
Work 8 sc into ring (8)
Round 3 :
(ch 2, turn) make 1 sc in next 4 sts to create a short stem foundation—do not break yarn
Round 4 :
Leaf shaping row: *sc in next st, (ch 3, dc, tr, dc, ch 3) in next st, sc in next st* rep across to end forming 4 small pointed lobes (approx 8 lobes total)
Info :
This leaf uses chained arches and taller stitches to create raised lobes. Block each leaf flat to open the lobes for a crisp shape before joining. Keep leaves gently stiff by weaving in ends neatly.
Round 5 :
Flip leaf and work 1 sc along edge to tidy and reinforce (approx 20 sc around, count and adjust to maintain neat shape)
Round 6 :
Fasten off leaving tail for sewing to vine sections. Make pairs of leaves to mirror each side of pumpkin medallion—3 pairs per pumpkin vertical gap.
Info :
Always make a pair for symmetry. If you want larger leaves, add an extra dc or tr in each lobe and adjust edge sc count accordingly.
— Black Mesh Background Square (Make as many modules as pumpkins plus end caps) :
Round 1 :
With Black yarn ch 5, join to form ring, ch 1 (counts)
Round 2 :
Work 12 sc into ring (12)
Round 3 :
(1 sc, inc) x 6 (18)
Round 4 :
(2 sc, inc) x 6 (24)
Round 5 :
(3 sc, inc) x 6 (30)
Round 6 :
1 sc in each st (30)
Info :
This forms a small circular base to begin square shaping. The visible runner uses a rectangular mesh, but building a slightly rounded square base helps the medallion sit nicely; we'll work outward to rectangular proportions.
Round 7 :
Change to pattern: *ch 3, sk 2, sc in next* rep around to create chain spaces for lacy look (maintain approx 30 sc placements)
Round 8 :
1 sc in each sc and work 2 dc clusters into each ch-3 space (count: 30 sc + 30 clusters)
Round 9 :
Begin rectangular shaping: on two opposite sides work (sc, ch 4, sc) in each cluster space to create elongation; continue around so two long edges gain extended chains (total stitch placements adjust to 36 sc equivalent)
Round 10 :
1 sc in each sc and 1 sc in each ch-4 space; place 2 ch-4 extensions on long sides to achieve rectangle approx 12 by 8 cm when blocked (stitch count variable by tension)
Info :
Block each background square flat to rectangular proportions before joining. Aim for approximately the same finished size for every module so joining edges match neatly. If your modules are smaller, the final runner will be proportionally shorter.
Round 11 :
Work a decorative popcorn/cluster row: *ch1, (3 dc cluster) in next sc, ch1, sk next sc* around to create textured black nodes (count approximately 30 clusters)
Round 12 :
1 sc in each st, closing small gaps and preparing surface for pumpkin medallion placement (maintain approx 36 sc spaces)
Round 13 :
Info: Pin pumpkin medallion to center of this black rectangle and sew through both layers with long tail left from medallion using mattress or whip stitch. Secure tightly but avoid puckering.
Round 14 :
After sewing, single crochet around the medallion on the black background to secure: *sc into black square, sc into orange medallion edge alternately* (maintain consistent spacing to avoid gathers)
Info :
Repeat Black Mesh module to create the number of pumpkin positions desired. The pictured runner uses four pumpkin modules separated by leaf vine link panels; adapt motif count for runner length.
— Vine Link Panel (Join as-you-go to connect medallions vertically, make 3 per runner gap) :
Round 1 :
With Leaf Green, ch 40 (or desired length equal to distance between medallion centers), sl st into edge sc on pumpkin medallion at top center to create connecting vine. Turn chain into a lacy vine: ch 2, *sc into chain 5, ch 3* rep to end, sl st into next medallion center spot (this creates looping vine)
Round 2 :
Working back along vine, create leaf attachment points: *sc, ch 2, work a small leaf base (as per Leaf Cluster Round 3) at every 8th chain to form evenly spaced leaves* (approx 4 leaf bases each vine)
Info :
As-you-go joining keeps the runner flat and eliminates many sewing seams. Pin vine in position and pick up edge stitches into the black background to anchor vine with matching green thread where required.
Round 3 :
Finish vine by slip stitching to center point of lower medallion and secure; fasten off and weave tails to the back.
Round 4 :
Optional reinforcement: run a row of slip stitches in black behind vine junction points to hide join tails and strengthen connections (work narrowly to avoid changing drape)
Info :
Make vine length uniform between each medallion pair. If joining more than two medallions vertically, repeat vines between each medallion pair. Keep leaf groups symmetric along vine centerline.
— End Caps and Extra Mesh Rows (to balance runner ends) :
Round 1 :
Make a half-module for each end by following Black Mesh Background Rounds 1-7 but stop once rectangle length equals half the medallion width. This creates flatter rounded end caps to echo full modules.
Round 2 :
Work decorative cluster rows and edge sc as in rounds 11-12 to finish texture consistent with central modules. Sew into place aligning vine stems to end caps.
Info :
Blocking end caps before assembly ensures clean scalloped scallop placement later. Lay out all modules and end caps in final configuration and measure perimeter before proceeding to the border.
— Scalloped Edge Border (Work around entire runner) :
Info :
Before beginning border, pin entire runner flat and steam or wet block modules so perimeter is even. Work border in Pumpkin Orange to create the vivid scalloped edge seen in the photo.
Round 1 :
Attach Orange yarn at a corner or central edge point with sl st, ch 1, work 1 sc in each outermost stitch around the entire runner edge to create a clean base (approx stitch count variable; maintain consistent spacing)
Round 2 :
*ch 3, skip 2, (5 dc shell) in next st, ch 3, sk 2, sc in next st* repeat around to create scalloped shells at regular intervals (shell frequency depends on perimeter length; aim for even distribution so shells align with medallion centers visually)
Round 3 :
Work 1 sc into the center stitch between shells to tidy joins and reduce gaps. If scallops look too small, add an extra dc to each shell on this round and keep center sc counts aligned.
Round 4 :
Embellish scallops: in each 5-dc shell, work front-post dc around center dc to create raised ridge (optional for more texture). Fasten off at round end and weave in ends neatly.
Info :
For a two-tone scallop, on the final pass switch to a slightly darker orange or amber for slip stitching along shell edges to create a highlighted rim. Pin shells while wet-blocking for uniform shape.
— Finishing Details and Decorative Embroidery :
Round 1 :
Using Black yarn and a fine yarn needle, refine the pumpkin faces: embroider triangular eyes, small nose, and serrated mouth with satin stitch for filled shapes. Place eyes between Rounds 9-10 of the pumpkin medallion, approximately 8 stitches apart, and mouth centered on rounds 10-12 area.
Info :
Work on one medallion at a time. Use pins to mark eye positions before committing to long embroidery stitches. Cut short strands when filling tightly to avoid bulky knots behind motifs.
Round 2 :
Add a small green stem on the pumpkin top: with Leaf Green, attach at top center and ch 4, 3 sc back along chain, sl st to join to base; create a tiny dtr leaf base if desired for more height. Secure and weave all tails to the back.
Info :
Optionally tack vine segments at a few points with black or green to secure larger motifs to table traffic. Keep tacking stitches small and hidden on the back.
— Assembly Sequence and Join-as-you-go Tips :
Info :
Layout sequence: begin with central pumpkin medallions and black mesh modules assembled in full length. Join medallions to black squares individually, then connect squares with vine link panels. Do final scalloped edging after all motifs are joined and runner is pinned flat.
Round 1 :
Join-as-you-go: to join a finished medallion to a black module, place medallion on module center, match outer rounds and use whip stitch from medallion tail, going through both layers every 2-3 stitches to avoid puckering. After three medallions are secure, join them with vine panels before adding end caps and border.
Info :
Block each module after individual finishing then assemble on blocking board so the border rounds will sit evenly. Use matching color yarn to invisibly tack seams then reinforce with small catch stitches on the back for durability.
— Optional Variation: Filled Raised Pumpkins (If you want padded look) :
Info :
To make a slightly puffed pumpkin, stop medallion decreasing two rounds earlier, add a small disc back in orange to create a sandwich and add a thin layer of batting between, then close with mattress stitch. This increases thickness and requires slightly larger background windows to sit flush.
Round 1 :
If padding, stitch medallion front to medallion back around outermost round leaving a 2-inch opening; insert flat fiberfill (use sparingly) and finish closing. Distribute stuffing thinly to preserve lace drape.
Info :
Padded medallions are heavier—add extra reinforcement stitches to vine joins and border to avoid sagging. Consider lining the runner underside with thin felt for table protection if padding is used.
— Care and Blocking Instructions :
Info :
Wet block each motif gently: pin to desired shape and allow to dry fully. Spot wash in cool water; reshape and lay flat to dry. Avoid hot water or tumble drying which can distort yarn and embroidery. Use a light steam press on a low setting over a cloth if needed to flatten edges for display.
Round 1 :
Final trimming: weave all ends to the back, trim tails, and secure any loose embroidery threads with a small knot behind motif posts. Inspect back for protruding knots that could scratch table surfaces and cover with felt circles if desired.
Info :
Display tip: place a thin non-slip mat beneath the runner to prevent shifting on lacquered or painted surfaces, especially if the runner is slightly padded or heavily textured.
This Halloween Runner brings charm and personality to your seasonal décor—each carved pumpkin and curling leaf is a tiny handcrafted celebration of autumn. The modular design makes it adaptable: add more pumpkins for a long banquet table or use a single medallion as a centerpiece doily. I hope this project sparks joy with every stitch and fills your home with festive warmth. 🎃🧶