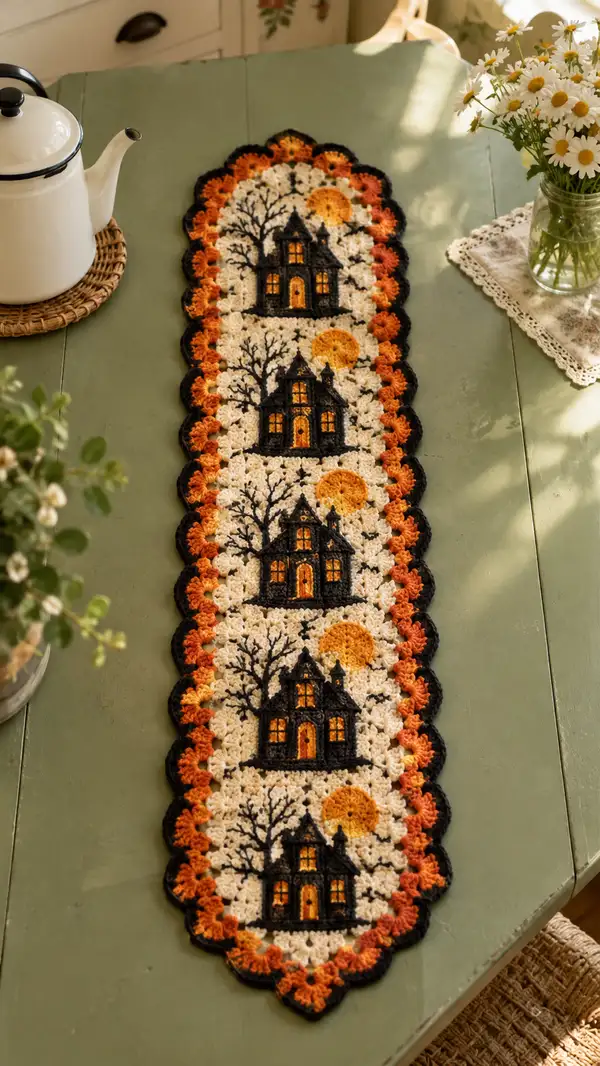
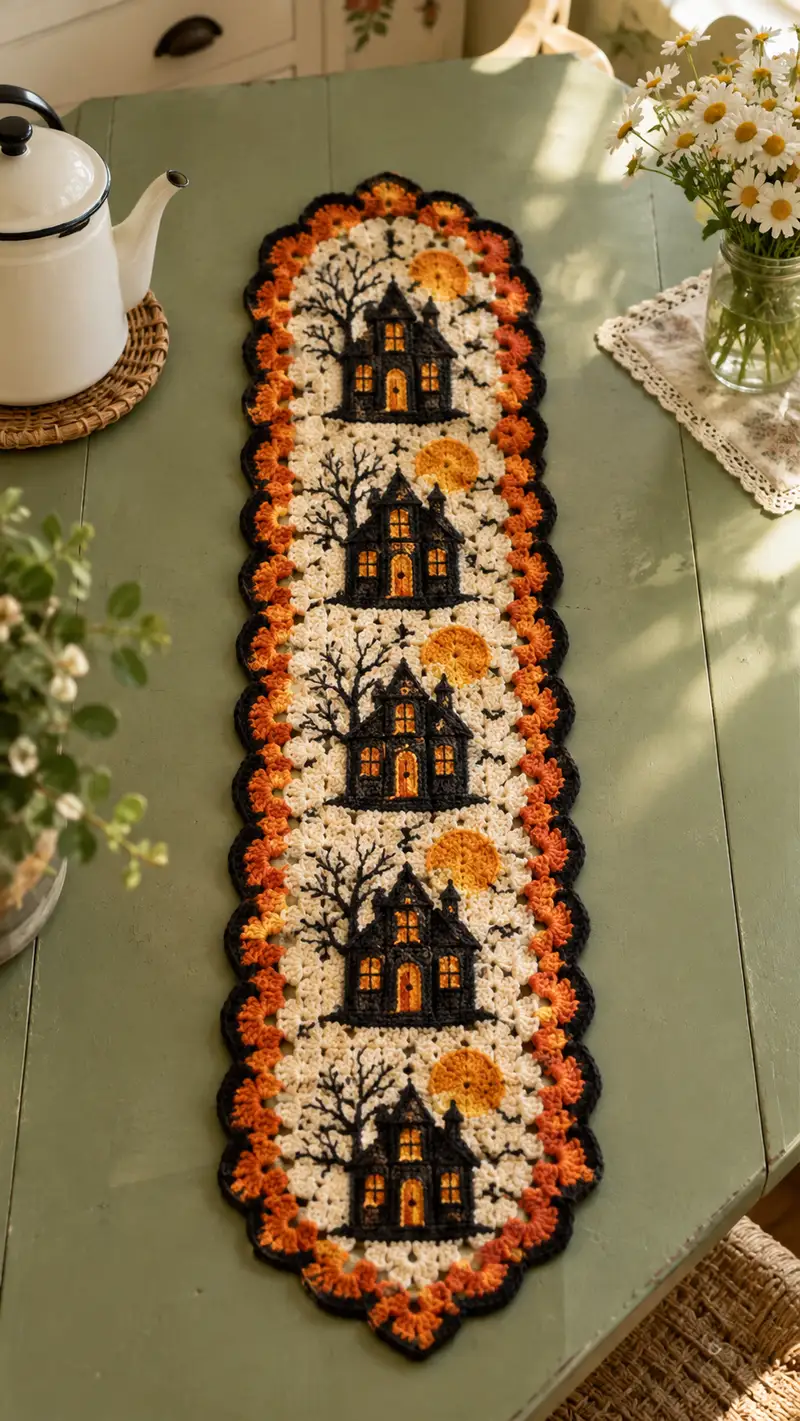
Create a spooky, vintage-inspired Halloween table runner featuring repeating haunted-house appliques, warm glowing moon motifs, and a scalloped autumn border. This long runner stitches together four detailed motif panels on a soft cream granny background with orange gradient scallops and a crisp black outline. Perfect for seasonal décor, the pattern includes applique shaping, surface embroidery for bare trees and window details, and step-by-step joining and border instructions.
Progress Tracker
0% Complete
— Materials & Gauge :
Info :
Gauge is not critical for motif-to-motif alignment but aim for roughly 4 sc = 1 inch in dense fabric. Each finished motif panel measures approximately 7.75" wide x 7.75" tall when worked with worsted yarn and a 4.0mm hook. The full runner shown is 4 motif panels joined end-to-end for an overall finished length of ~34-36 inches. Adjust number of panels to desired length.
— Panel: Granny Background Base (Make 4) :
Round 1 :
Make a magic ring, ch3 (counts as dc), work 11 dc into ring; join with sl st to top of ch3 (12 dc) — This begins a 12-segment circle which we will shape into a square-based panel
Round 2 :
Ch3, dc in same st, *ch2, 2 dc in next st; rep from * around, ending ch2, join with sl st to top of ch3. (12 clusters of 2 dc with ch2 spaces) — (12 ch2 corners)
Round 3 :
Change to cream if not already. Work into ch2 corners: *(2 dc, ch2, 2 dc) in ch2 sp, dc in each dc from previous round across to next corner; rep from * around; join (panel beginning to square) — counts will vary but aim for 12 corner clusters
Round 4 :
Ch3, *work (2 dc, ch2, 2 dc) into each corner ch2 space, dc across previous round's dc stitches (aim for 6-8 dc between corners), rep to end, join. Square grows; maintain flatness by adjusting dc counts between corners if needed
Info :
Keep tension consistent. These first four rounds form a gentle block that will be the base for the house applique. Block this panel flat before continuing for accurate applique placement.
Round 5 :
Switch to pattern of shell clusters for texture: Ch1, sc in same st, *skip next 2 sts, (3 dc) in next st (shell made), skip next 2 sts, sc in next st; rep across each side and around corners by placing shells so the square remains flat; join (this creates a cream lacy field while maintaining structure)
Round 6 :
Repeat Round 5 to build body of panel; if fabric opens too much, make shells slightly closer by skipping only 1 between in the next round to tighten. Join. After this round; panel should measure ~3.75" across per side.
Round 7 :
Ch1, 1 sc in each st and in ch2 corners (work 2 sc in corner ch space). Work evenly to create a clean square edge (this round will create a solid surface ready for appliques). Join. (This is a dense round—stitch count approx 48-56 sc depending on previous shell spacing)
Info :
Measure and mark center point and horizontal midline of panel using stitch markers. These reference points determine where to place house base and moon. Center the house footprint approx 1.5" above panel bottom edge to leave room for ground and tree embroidery.
Round 8 :
Ch3, dc in each sc around to create a subtle ridge for applique anchor; in corners work (2 dc, ch2, 2 dc). Join. This ridge helps the applique sit cleanly and gives a small lip for attaching the house base.
Round 9 :
Ch1, sc evenly around working 1 sc in top of each dc; join. Fasten off and weave ends. Make 4 identical panels.
Info :
Blocking panels now will make applique placement and joining far easier. Pin each panel square and steam/block until fully dry. Recount edges after blocking; you will use these counts for precise placement of the house base and moon applique.
— House Applique (Make 4) :
Info :
The house is worked flat in black yarn as a worked-applique. You will make a small rectangular base, then build pointed roof, tower and roof finials. Work rows turning at the end of each row. Use 3.5mm hook for tighter applique edges.
Row/Round 1 :
Ch16 with black yarn, sc in 2nd ch from hook and across (15 sc) — foundation for house base width
Row 2 :
Ch1, turn, sc across (15 sc)
Row 3 :
Repeat Row 2 for a total of 4 rows (this forms a dense base wall). (15 sc)
Info :
Mark the central stitch at row ends; this is where the door and window central axis will align when you place the house on the panel.
Row 4 :
Ch1, turn, sc across first 5 sts, ch3 (counts as space for door opening), skip next 3 sts, sc across to end (this leaves an opening area — we will later embroider a door and place window stitches)
Row 5 :
Ch1, turn, sc across including working around the ch3 opening to create a neat doorway frame (sc behind and in front loops as needed), sc to end. (15 st equivalent)
Row 6 :
Decrease for roof base: ch1, turn, sc2tog over first 2 sts, sc across until last 2 sts, sc2tog (13 st width) — place markers to center
Row 7 :
Ch1, turn, sc across (13)
Row 8 :
Decrease again for roof slope: ch1, turn, sc2tog, sc across to last 2 sts, sc2tog (11)
Row 9 :
Ch1, turn, sc across (11)
Row 10 :
Form peak: ch1, turn, sc2tog across until 3 sts remain, sc2tog over last three so top becomes small triangle; fasten off leaving tail to sew roof peak smoothly on top of house roof area.
Info :
Work small triangular tower separately: ch6, sc across (5), work 4 rows creating a narrow rectangle. At the top, decrease to form a pitched roof tip. Sew tower centered a little to the left or right of main peak for an asymmetrical haunted-house silhouette.
Row 11 :
Using a separate small piece for the porch or tower finial, ch5, sc across for 3 rows; decrease one side to create small spire. Fasten off with a tail for sewing.
Info :
Sew house pieces together by overlapping roof triangle over wall rectangle. Use mattress stitch / whip stitch with black yarn and yarn needle to create invisible joins. Keep edges flat and neat so applique lies smoothly on panel.
Row 12 :
Embroider window crossbars using golden yellow in thin stranded yarn: mark window positions (two side windows, one above door), stitch small rectangular window outlines using sl st or backstitch. Place bright yellow fill inside with satin stitch or duplicate stitch to simulate glowing windows.
Row 13 :
Using deep brown or dark gold, embroider the door interior on the ch3 opening: chain of stitches down the center and tack edges to create a centered door. Add a tiny round stitch for doorknob.
Info :
Keep applique smaller than panel center so a cream border remains visible. Final house applique should measure approx 3.25" wide and 3.25" tall (excluding tower). If your house is slightly larger, adjust panel placement upward to keep bottom ground area visible.
— Moon Applique (Make 4) :
Round 1 :
Make a magic ring with golden yellow, ch1, work 6 sc into ring (6)
Round 2 :
Inc in each st around (12) — (6 inc)
Round 3 :
(1 sc, inc) x 6 (18)
Round 4 :
(2 sc, inc) x 6 (24)
Info :
Optional: work one round in a darker orange to create shading on lower hemisphere. Change color by fastening off golden yellow and joining deep orange in last sl st of round 4, or carry color and crochet over tail.
Round 5 :
(3 sc, inc) x 6 (30)
Round 6 :
Ch1, sc in each st around (30); if you prefer a slightly cupped moon, work final round in BLO to create a concave edge. Fasten off leaving long tail for sewing.
Info :
Sew the moon to panel at approx right upper quadrant, slightly overlapping the cream field but not touching the edge. Use mattress stitch and pin first to verify placement relative to house and tree silhouettes.
— Tree & Branch Surface Embroidery (Make 4) :
Info :
Using black yarn and tapestry/embroidery needle, surface-crochet or backstitch bare tree branches onto the cream panel to the left of the house. Start at base and work upwards with branching forks. Keep trunk ~8-12 sts wide across the bottom and taper as you go.
Round 1 :
Anchor black yarn at bottom left of house base (approx 6 sts from bottom corner), bring yarn up on panel surface and work a tight backstitch to form main trunk 8-10 stitches high.
Round 2 :
From trunk top, branch out with thinner lines using backstitch or surface slip-stitch: create 3-5 main branches, each subdividing once or twice. Keep branch thickness to 1-2 strands for a delicate silhouette.
Round 3 :
Add small twig details around windows and roof line to integrate house into tree composition. Secure and weave ends on wrong side.
Info :
Practice your branch shapes on scrap before embroidering panels. Use very fine yarn or split a strand for the most delicate silhouette. Keep embroidery flat; avoid pulling yarn too tight which puckers the panel.
— Panel Final Tidying (Each Panel) :
Round 1 :
Place house applique centered horizontally and approx 1.5" up from panel bottom; baste in place with large running stitch to check alignment before final sewing
Round 2 :
Sew house edges down neatly using whip stitch through only the back loop of the panel edge and edge of applique to create an invisible seam (use black yarn). Make sure all edges sit flat and windows are not folded
Round 3 :
Sew moon applique in place with matching yellow/golden yarn using whip stitch around and tack center for a secure join. Weave ends on wrong side and trim.
Info :
After applique, steam-block lightly on a low setting to allow appliques and embroidery to settle. Flatten panel and ensure edges stay square for neat joining.
— Joining Motifs End-to-End (4 Panels) :
Info :
Panels join along their top/bottom sides to create a narrow runner. Join using whip stitch or invisible mattress stitch for a flat seam. Optionally, join with one round of slip-stitch seam in black to create a shallow dividing line between panels.
Round 1 :
With wrong sides together, align two panels; insert pins at 8 even points. Using black yarn, work mattress stitch across seam: pick up one horizontal bar from panel A, then panel B alternately until panels are joined. Repeat to join all panels end-to-end. Fasten off and weave ends.
Round 2 :
Optional decorative join: With cream yarn, work a round of sc across the join on the right side to create an invisible ridge; work 1 sc into each ch2 corner and across joining stitches to hide seam.
Info :
Check that house rows align from panel to panel so the repeated houses create a pleasing continuous column. If panels shift, carefully unpick seam and realign before final sewing.
— Border Preparation Rounds :
Round 1 :
With runner laid flat and right side up, join orange gradient color at a bottom corner with sl st. Ch1, sc evenly around the full runner edge, working 2 sc in each corner ch2 space (approx total sc across edges ~220-260 depending on join width). Join with sl st; do not fasten off from last corner if continuing to scallop.
Round 2 :
Change to next orange shade if using gradient: *ch3 (counts as dc), skip 1 sc, (3 dc) in next st, skip 1 sc, sl st into next st* around to create repeated puff-like scallop segments; in corners work (3 dc) in same corner space for rounded corner scallop. Join. This round creates the first layer of soft scallops.
Info :
For an even scallop repeat, ensure number of sc from Round 1 is divisible by the scallop repeat multiple (usually multiples of 4). If it does not divide evenly, add or subtract a few sc along a less visible edge to accommodate repeats.
Round 3 :
Switch to darker pumpkin orange: *sl st to center dc of a scallop group, ch3, (dc, tr, dc) in same center st to make a layered puff; sl st to next center; rep around. Join. This adds dimensionality to the scallops and builds color depth.
Round 4 :
Repeat Round 3 with deepest orange at outer scallop tips to create gradient. Join and weave in ends for the gradient layers so color shifts are smooth. Fasten off deep orange after final pass but reserve black for outer edge.
Info :
If using only one orange color, work Rounds 2-4 in the same shade and skip color-change steps. The look will be simpler but still very effective.
— Final Black Outline & Picot Edge :
Round 1 :
Join black yarn at a scallop low point with sl st. Ch1, sc in each st around, working 3 sc into the center top of each scallop to anchor the outline (approx total sc ~260-300 depending on scallop count). Join with sl st.
Round 2 :
Picot edge: *ch3, sl st in 3rd ch from hook (picot made), sc in next 3 sts; rep across scallops, working picot at scallop peak to accent. Work 2 sc in corner spaces to maintain shape and join neatly. Join. Fasten off and weave ends.
Info :
Blocking the full runner after the black edge will open scallops and set the shape. Use gentle steam, pin scallops to consistent spacing, and allow to cool/dry thoroughly before removing pins.
— Optional Decorative Accent Rows (Add-on) :
Round 1 :
For an extra decorative inner border between panels and scallops: join cream or light orange, ch1, sc around runner inside the scalloped edge, working 1 sc in each gap between scallops to create a subtle framed look. Join and weave ends.
Round 2 :
Optional cable-look ridge: With black yarn, work 1 round FLO sc around just inside the picot edge to create a shadow line that makes the scallops pop. Join and fasten off.
Info :
These accent rows are optional but give a more finished, layered appearance. Try them on a sample strip before adding to the full runner to confirm proportions.
— Finishing Touches :
Round 1 :
Weave all tails on the wrong side with a yarn needle. Reinforce applique edges by stitching small bartack stitches every 1/4" around curved edges. Trim excess yarn ends close to fabric after weaving.
Round 2 :
Final blocking: pin runner flat on blocking board, shape scallops evenly, steam or wet-block, and let dry. This sets the shape for a neat finished runner.
Info :
Store runner flat and avoid high heat; hand wash gently if needed. Spot treat embroidery and appliques carefully; use mild detergent and air dry flat.
— Sizing & Customization Notes :
Info :
To lengthen your runner, simply make additional panels and join them end-to-end. For a wider runner, add a mirrored column of panels on the left and repeat a wide scallop border around the entire piece. Changing yarn weight will scale the panel size; swatch one panel to calculate final dimension before committing to a specific number of panels.
Completing this table runner will fill your home with seasonal charm and handmade warmth. Each carefully stitched panel and dramatic silhouette adds vintage-inspired personality to your autumn decor. The modular design means you can easily make it longer or wider for any table — and each scallop and applique rewards the time you spend with delightful detail. 🧶✨ Display it at fall gatherings or gift it to someone who adores handmade home accents. Happy stitching and may your table be cozy and bewitching! 🎃