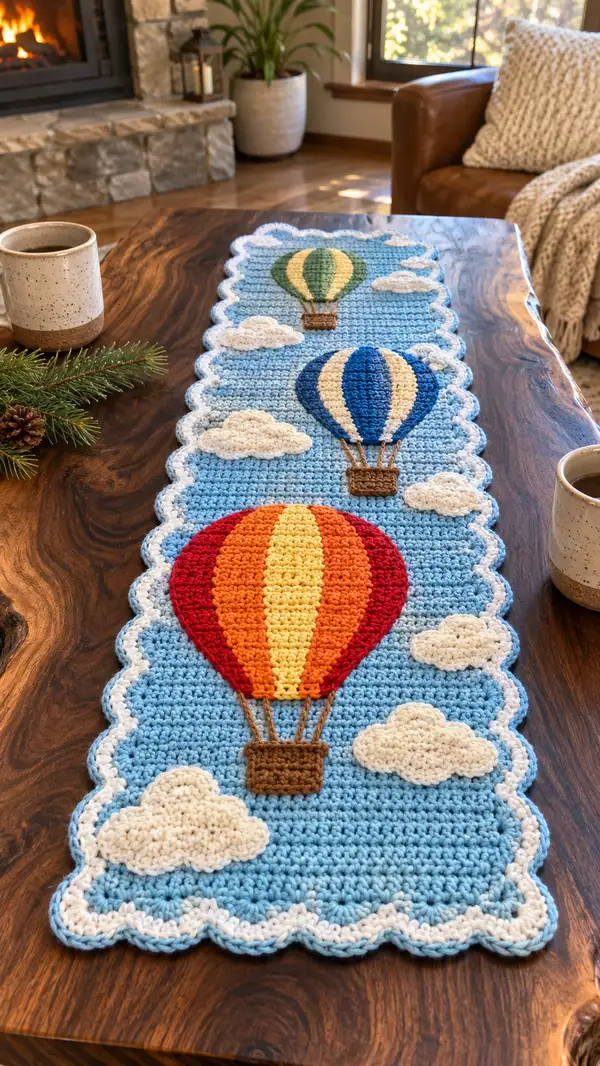
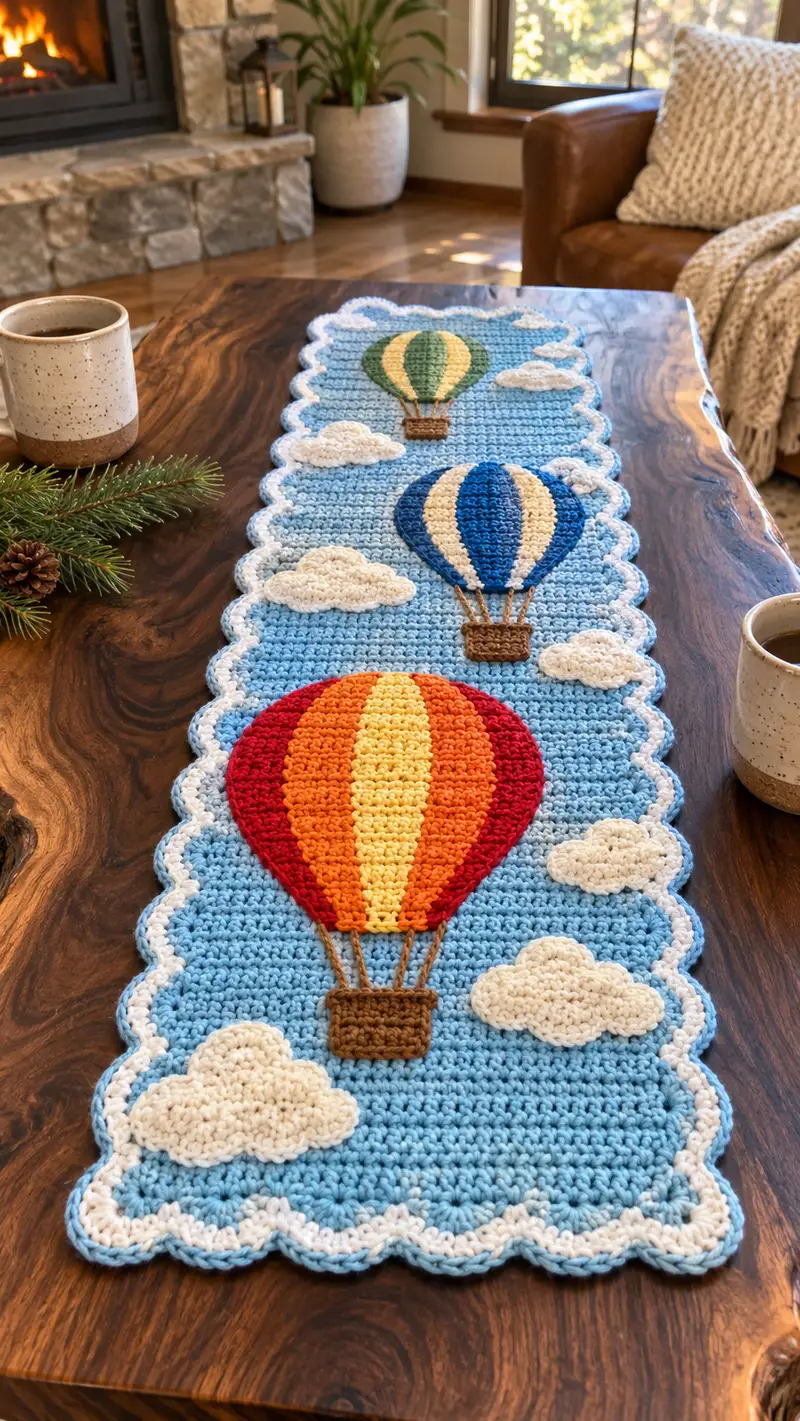
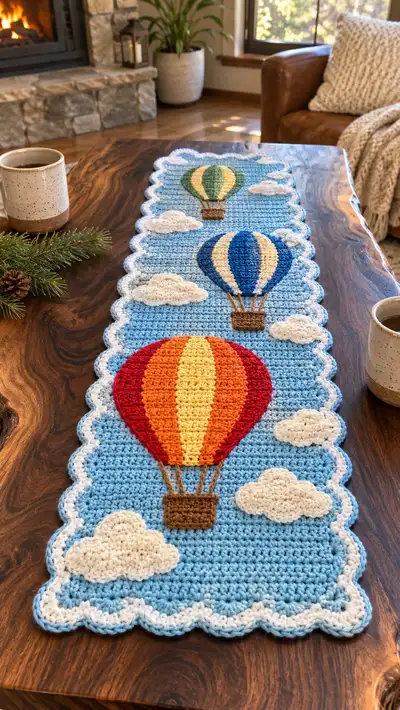
Bring a breezy sky to your table with this colorful Hot Air Balloon Sky Crochet Table Runner Pattern. The runner features three delightful hot air balloon appliques in bold, sunset and cool tones, fluffy white cloud appliques, and a soft scalloped white border over a serene sky-blue background. Designed to layer beautifully on a wooden table, this runner adds a handmade, cozy touch to living and dining spaces. Clear step-by-step instructions guide you through every applique and assembly detail.
Progress Tracker
0% Complete
— Background Panel :
Materials & Gauge :
With 5.0mm hook and worsted weight yarn, gauge is not critical for this runner but should be consistent. Aim for approximately 12 hdc = 4" and 10 rows = 4" to help estimate final size. The sample runner measures roughly 12" wide x 36" long.
Info :
Choose a bright sky blue for the background. This section is worked flat in rows using half-double crochet (hdc) for a cozy, slightly ribbed texture. Count across carefully — the runner body is ch 47 for a working width of 45 hdc (this width suits the appliques placement).
Row 1 :
Ch 47. Hdc in 3rd ch from hook and in each ch across — total 45 hdc (45)
Row 2 :
Ch 2, turn. Hdc in each st across (45)
Row 3 :
Ch 2, turn. Hdc in each st across (45)
Row 4-9 :
Ch 2, turn. Hdc in each st across (45)
Info :
Work even in hdc maintaining consistent tension. Use a stitch marker at the first stitch of each row to quickly identify row starts. Decide which edge will be the top (for balloon placement) and mark center stitches to align appliques later.
Row 10-19 :
Ch 2, turn. Hdc in each st across (45)
Info :
At rows 16-18 mark the vertical positions where the large, medium and small balloons will be centered. Approximate placements on the sample: large balloon center around Row 8 (from bottom), middle balloon center near Row 26, small balloon center near Row 44. These are adjustable—pin appliques before sewing.
Row 20-29 :
Ch 2, turn. Hdc in each st across (45)
Row 30-39 :
Ch 2, turn. Hdc in each st across (45)
Info :
If you prefer a slightly wider runner, increase starting chain by multiples of 2 and adjust applique placement accordingly. Keep the same number of rows if you wish the same vertical scale.
Row 40-49 :
Ch 2, turn. Hdc in each st across (45)
Row 50-59 :
Ch 2, turn. Hdc in each st across (45)
Info :
Before completing all background rows, lightly block the panel flat to even out rows. Pin the panel to a rectangular shape matching final measurements and let dry if needed. Do not add the scallop border until appliques are attached and panel is flat.
Row 60-70 :
Ch 2, turn. Hdc in each st across (45). Fasten off and weave in yarn tail neatly on WS.
Info :
Final background panel should be rectangular with 45 stitches across and 70 rows. If your row count is shorter or longer, place balloon appliques proportionally by spacing them evenly with the same central alignment.
— Large Bottom Balloon Applique (Make 1) :
Overview :
This large balloon is constructed as a flat oval worked in the round from a foundation chain. It has 5 vertical color panels (red, orange, yellow, orange, red) worked in stripes by changing color at the beginning of specified rounds. The oval increases at the ends create the rounded top and bottom of the balloon.
Foundation :
With red, ch 18. Do not join. Work around the chain to create an oval.
Round 1 :
Starting in 2nd ch from hook, sc across the chain (ch-2 to last ch) — work 1 sc in each of the next 16 ch, then 3 sc in last ch, now working along opposite side of chain sc in each ch for 16, then 3 sc in final first chain — total 38 sc (38)
Round 2 :
(1 sc, 1 inc) x 6 around the curved clusters, then 1 sc in remaining sts — overall pattern yields 44 sc (44)
Round 3 :
(2 sc, 1 inc) x 6 in curve zones, then sc across remaining sts — 50 sc (50)
Round 4 :
(3 sc, 1 inc) x 6 then sc across — 56 sc (56)
Info :
Change to orange at the end of Round 4. Carry the red tail to the WS and weave in later, or fasten off leaving a long tail to stitch applique down.
Round 5 :
1 sc in each st around (56)
Round 6 :
1 sc in each st around (56)
Round 7 :
(3 sc, 1 inc) x 6 (adds 6) — 62 sc (62)
Round 8 :
1 sc in each st around (62)
Info :
Change to yellow at the end of Round 8 for center stripe. Because this applique is worked in rounds, color panels will be vertical when applied if you alternate color at the start of rounds. For a crisp panel edge, carry yarn loosely on WS and cut when changing major stripes every 2 rounds.
Round 9 :
1 sc in each st around (62)
Round 10 :
(3 sc, 1 dec) x 6 (decreases 6) — 56 sc (56)
Round 11 :
(2 sc, 1 dec) x 6 — 50 sc (50)
Round 12 :
(1 sc, 1 dec) x 6 — 44 sc (44)
Round 13 :
1 sc in each st around (44)
Round 14 :
1 sc in each st around (44)
Info :
Change color back to orange at the end of Round 14. For the shaped panel appearance, carry color strands on WS and secure at stripe boundaries later with sewing for a clean look.
Round 15 :
1 sc in each st around (44)
Round 16 :
(1 sc, 1 dec) x 6 — 38 sc (38)
Round 17 :
1 sc in each st around (38) Fasten off leaving long tail for sewing
Info :
Weave in small tails from color changes to the WS, or leave long tails to stitch panels to background and hide yarn ends when sewing. The oval should measure approximately 7-8" tall by 6-7" wide on the sample.
— Middle Blue Balloon Applique (Make 1) :
Overview :
Medium size balloon with alternating blue/cream panels worked similarly to the large balloon but smaller footprint.
Foundation :
With royal blue, ch 14. Work around chain into an oval.
Round 1 :
Sc across 12 ch, 3 sc in last ch, sc across opposite side 12 ch, 3 sc in final ch — total 30 sc (30)
Round 2 :
(1 sc, 1 inc) x 6 — 36 sc (36)
Round 3 :
(2 sc, 1 inc) x 6 — 42 sc (42)
Round 4 :
1 sc around (42)
Info :
Change to cream/off-white at the end of Round 4 to create a light panel between blues. Work stripes: royal blue rounds create blue panels, cream rounds make light contrast panels.
Round 5 :
1 sc in each st around (42)
Round 6 :
(2 sc, 1 dec) x 6 — 36 sc (36)
Round 7 :
(1 sc, 1 dec) x 6 — 30 sc (30)
Round 8 :
1 sc in each st around (30) Fasten off leaving tail for sewing
Info :
When changing colors, carry the unused yarn on the WS for one round to reduce ends; or cut and weave in neatly. The medium balloon should be approximately 5-6" tall.
— Small Top Balloon Applique (Make 1) :
Overview :
Small two-color balloon in green tones. Compact oval shape to fit near the top of the runner.
Foundation :
With soft green, ch 12.
Round 1 :
Sc across 10 ch, 3 sc in last ch, sc across opposite side 10 ch, 3 sc in final ch — total 26 sc (26)
Round 2 :
(1 sc, 1 inc) x 6 — 32 sc (32)
Round 3 :
1 sc in each st around (32)
Round 4 :
(1 sc, 1 dec) x 6 — 26 sc (26)
Round 5 :
1 sc in each st around (26) Fasten off leaving tail for sewing
Info :
Small balloon measures roughly 4-5" tall; it sits at the top of the runner for a pleasing vertical composition.
— Balloon Baskets (Make 3) :
Overview :
Flat rectangular baskets are worked in rounds to create a small but sturdy motif for each balloon. Each basket attaches beneath the respective balloon and receives embroidered ropes.
Basket Foundation :
With medium brown, ch 8. Turn to work rows expanding into a small rectangle.
Row 1 :
Sc in 2nd ch from hook and across to end (7 sc). Ch 1, turn (7)
Row 2 :
Sc in each st across (7). Ch 1, turn (7)
Row 3 :
Sc in each st across (7). Ch 1, turn (7)
Info :
We will turn this rectangle into a small textured basket by working in the round along the rectangle edge to frame it. Keep edges neat and block lightly if needed.
Round 4 :
Rotate work, sc evenly around the rectangle edge: 3 sc across each short end, and 1 sc in each long-edge st — approximately 20 sc total around (20)
Round 5 :
1 sc in each st around (20)
Round 6 :
1 sc in each st around (20). Fasten off leaving long tail for sewing
Info :
Sew baskets centered beneath each balloon using long tail. Optionally embroider a darker brown criss-cross across the basket body for woven texture using a tapestry needle.
— Ropes/Lines (Surface Stitch Embroidery) :
Overview :
Use medium brown yarn to stitch four ropes from each basket up to the lower center of the balloon. These are surface-stitched onto the background once baskets and balloons are attached. Keep them slightly tapered — closer together at the basket, slightly spaced at the balloon.
Info :
Thread a length of brown yarn on a tapestry needle. Bring needle up through background at basket top, then take large surface loops up to the balloon and back down. Stitch each rope separately, spacing them evenly across the basket width. Knot and weave ends on the WS under the basket applique.
— Clouds (Make 6) :
Overview :
Soft cloud appliques are small ovals with adorable scalloped puffiness. They are worked as tiny ovals and sewn flat to the background for dimension.
Cloud Foundation :
With cream yarn, ch 8 for a small cloud.
Round 1 :
Sc across 6 ch, 3 sc in last ch, sc across opposite side 6 ch, 3 sc in final ch — total 18 sc (18)
Round 2 :
(1 sc, 1 inc) x 6 — 24 sc (24)
Round 3 :
1 sc in each st around (24)
Round 4 :
1 sc in next st, *dc, ch1, dc in next st* to create puffed lobes across the top and sides — arrange 3 lobes along top edge and 2 small lobes along sides (work across approximately 6-8 sts). Fasten off leaving tail for sewing.
Info :
Clouds can be varied in size by starting with ch 6 (smaller) or ch 10 (larger). Pin clouds around balloons as shown in photo and stitch through both cloud and background for a secure, flat attachment that still keeps a slight 3D effect.
— Assembly & Placement :
Info :
Before sewing appliques down, place the background panel RS up. Center the large balloon near the lower third of the runner, the medium balloon near the middle, and the small balloon toward the top third. Use pins to audition placement — maintain about 6-8 rows of background between each balloon to match the sample spacing.
Step 1 :
Pin the large balloon onto the background centered horizontally. Ensure the basket will sit roughly 3-4 rows below the balloon bottom edge. Sew the balloon to the panel using a matching yarn tail and whip stitch along the outermost round; hide tails through multiple stitches on WS.
Step 2 :
Repeat for the medium and small balloons. Sew baskets 2-3 rows below each balloon and embroider ropes from baskets to balloons using surface stitches. For a tidy look, stitch through the balloon outer round and tie knots on WS under the basket.
Step 3 :
Pin clouds in place around balloons and stitch them with matching cream yarn. Arrange clouds to balance the visual weight— one large cloud near the top left, smaller clouds scattered between balloons and to the right edge as seen in the photo.
Info :
When sewing, bring the needle in on the WS, travel under a few stitches, come up through WS of applique, and use small whip stitches on RS to attach. This keeps RL of the fabric clean and hides knots inside layers.
— Scalloped Border :
Info :
We will add a white scalloped shell border to frame the runner. Attach cream/off-white yarn to any corner with sl st. Work an even sc round first to build a base, then work scallops on top of that base round.
Round 1 (Border Base) :
With cream yarn, join with sl st at one corner. Ch 1, sc evenly around the outer edge of the background panel, placing 3 sc in each corner to allow for turning. Work 1 sc into each row end along the sides (count approximately 140 sc for perimeter depending on your row tension). Join with sl st to first sc. Fasten off and weave ends.
Info :
Count the total sc around to plan scallops. Scallops are worked on top of Round 1; choose a multiple that fits evenly across the long edges so scallops don't cut awkwardly at corners.
Round 2 (Scallop Row) :
Rejoin cream yarn at any long edge: *Skip 2 sc, 5 dc in next sc (shell), skip 2 sc, sl st in next sc*; rep along edge. At corners adjust spacing by working 3 dc shells into corner sc to create a smooth curve. On short ends continue pattern evenly. Fasten off and weave in ends.
Round 3 (Optional Contrast Edge) :
For a crisp white outline similar to the photo, join white yarn and work 1 sc around each shell edge, placing 1 sc between shells where sl st sits. Join and fasten off. Weave ends and lightly steam or pin-block scallops to open shells evenly.
Info :
If your scallops are uneven, remove and re-space shells by counting base sc between shells to ensure even distribution. Blocking after scallop rounds gives a professional finished look.
— Finishing Details :
Trim & Tidy :
Weave in all ends through at least 5-6 sts on the WS. Trim any extra yarn tails close to fabric. If you carried color threads along the WS for panels, tidy those by knotting and weaving into the edge of the applique or by sewing with matching thread for permanence.
Final Blocking :
Pin the runner to final dimensions on a blocking mat. Lightly mist with water and let dry completely. This will flatten the background stitches and open the scallop shells for a consistent border.
Care Instructions :
Hand wash gently in cool water, reshape and air dry. Machine wash on delicate in a mesh bag if you prefer, but avoid hot dryers to preserve shape and sewn appliques.
Info :
Optional customization ideas: change the balloon panel colors, add embroidered banners beneath baskets, or create matching placemats by scaling down the background and using a single balloon applique.
This Hot Air Balloon Sky Table Runner is such a joyful project to finish—colorful panels and fluffy clouds come together to create a charming focal piece for any dining table. Each applique adds personality while the scalloped border frames everything with a handmade polish. I hope this project fills your home with handmade coziness and becomes a seasonal favorite. 🧶🌤️