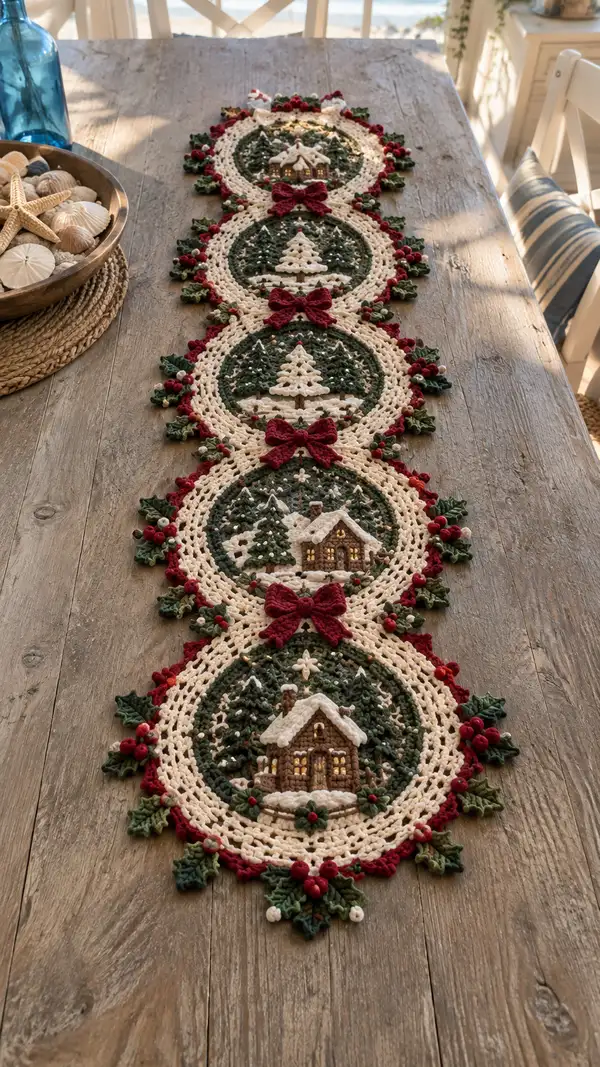
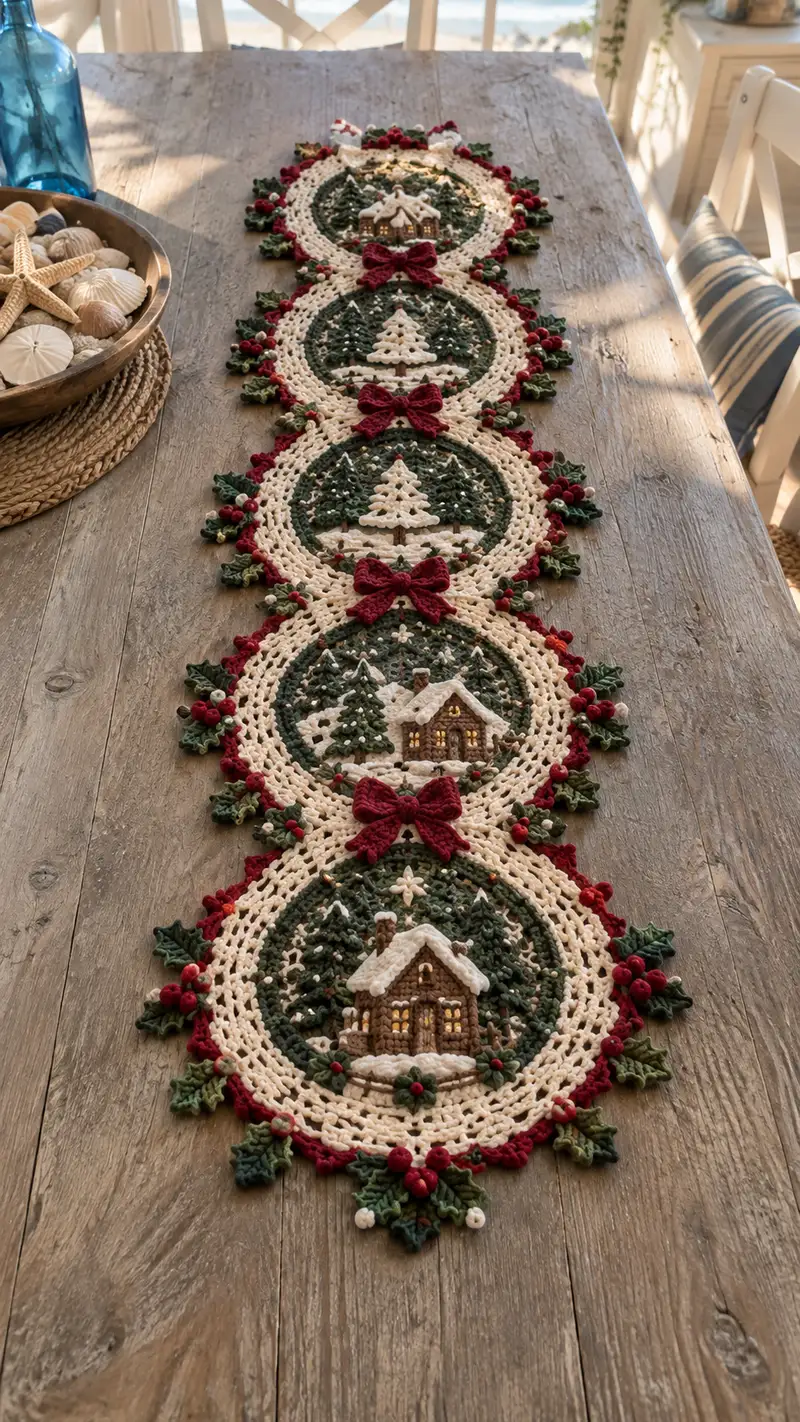
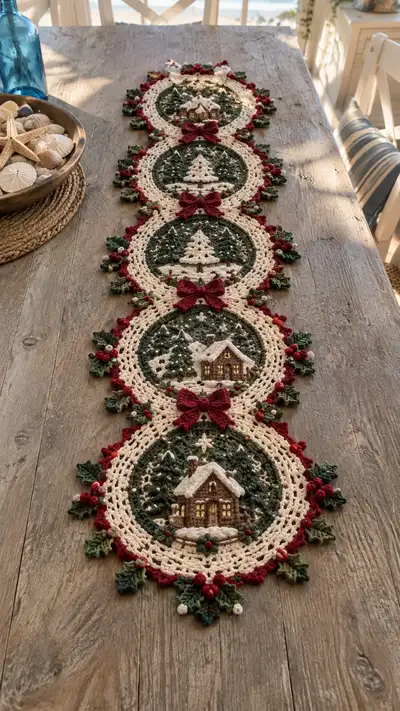
A long, elegant holiday table runner featuring four linked circular winter scenes worked in ivory and forest green with burgundy bows and holly accents. Each medallion showcases a raised cabin or layered tree applique, textured snowbanks and lots of dimensional berries and leaves. This pattern includes full instructions for motifs, appliques, bows, leaves, and a decorative scalloped border so you can recreate the same heirloom look.
Progress Tracker
0% Complete
— Main Circular Motif (Make 4) :
Round 1 :
6 sc in magic ring (6)
Round 3 :
(1 sc, inc) x 6 (18)
Round 4 :
(2 sc, inc) x 6 (24)
Round 5 :
(3 sc, inc) x 6 (30)
Round 6 :
(4 sc, inc) x 6 (36)
Round 7 :
(5 sc, inc) x 6 (42)
Round 8 :
(6 sc, inc) x 6 (48)
Info :
Work these rounds in Forest Green yarn for the inner disk. Place a stitch marker in the first stitch of each round to track rounds easily. The inner disk forms the backdrop for the appliques; maintain consistent tension so the disk lays flat.
Round 9 :
(7 sc, inc) x 6 (54)
Round 10 :
(8 sc, inc) x 6 (60)
Round 11-14 :
1 sc in each st (60)
Info :
Rounds 11-14 build height for the forest background; keep stitches tidy. If you prefer a denser texture behind appliques, switch to a 3.0mm hook for these rounds only and resume 3.5mm for the rest.
Round 15 :
(9 sc, inc) x 6 (66)
Round 16 :
(10 sc, inc) x 6 (72)
Round 17 :
(11 sc, inc) x 6 (78)
Round 18 :
(12 sc, inc) x 6 (84)
Info :
At the end of Round 18 you will have a nice working diameter for the inner decorated area. This is a good point to lay the piece flat and check for cupping or ripple. If it cups, block slightly; if it ruffles, take out a few increases in the previous round.
Round 19 :
1 sc in each st (84)
Round 20 :
1 sc in each st BLO (84)
Info :
Working the round in BLO creates a subtle ridge to visually separate the inner disk from the subsequent lace ring. Use this ridge as a visual anchor when placing the cabin or tree appliques.
Round 21 :
(8 sc, sk 1, dc in next st) x 12 (84)
Round 22 :
(3 ch, sl st to form small mesh, sk 2) x around (84)
Round 23 :
(1 dc in each mesh) x around (84)
Info :
Rounds 21-23 create an open decorative mesh that will allow snowflake details and small holly berries to be anchored between the inner disk and ivory ring. Keep your dc tension even; these stitches are visible from the front.
Round 24 :
Change to Ivory yarn. *Ch3, sk 1 mesh, 1 dc in next mesh* rep around (84)
Round 25 :
1 sc in each st (84)
Round 26 :
(4 sc, inc) x 14 (98)
Info :
Round 26 increases the ring to allow for the outer scallop and appliques. Check counts as you go; with 98 stitches you have an even base for dividing scallops and bow placements.
Round 27 :
1 sc in each st (98)
Round 28 :
(5 sc, inc) x 14 (112)
Round 29 :
*(Sc, ch3, picot, ch3, sc) in next st, sk 6* rep around to create scalloped edge; adjust last repeat to fit (approx 16 scallops)
Round 30 :
Work 1 sl st down left side of each scallop and 1 sl st up right side to firm picot edge; fasten off and weave ends
Info :
The scalloped picot edging gives the runner a vintage lacy look. Block the motif lightly to open the scallops evenly before appliques are sewn on. Make four identical motifs following these rounds.
— Cabin Applique (Make 2 cabins for alternating motifs) :
Info :
Work cabin on Brown yarn for walls and White for snow highlights. This applique is worked flat, in short rounds/rows, then sewn to the inner disk. Use a 3.0mm hook for a neat fabric.
Round 1 :
Ch6, sc in 2nd ch from hook and across, turn (5 sc) (foundation row)
Round 2 :
Ch1, 1 sc in each st across, place marker at end (5)
Round 3 :
Ch1, inc, 3 sc, inc (7)
Round 4 :
Ch1, 1 sc across (7)
Round 5 :
Ch1, (1 sc, inc) x 3 (10)
Round 6 :
Work in rows across 10 sts for 4 rows to form the wall height (10)
Round 7 :
Begin roof: change to White, ch1, dec across centre 4 sts to create roof peak shaping; work 3 rows finishing with a 1-st peak
Round 8 :
Add door: on brown row embroider a vertical rectangle using surface slip stitch or duplicate stitch approx 2-3 stitches wide in center bottom
Info :
Keep cabin applique small — about 2.5-3cm wide depending on tension. Lightly stuff the roof ridge with a tiny amount of fiberfill before seaming to give a raised snowy roofline. Sew the cabin onto the inner disk centered at the lower third of the inner circle.
Round 9 :
Edge cabin with sc around entire applique in brown to create a neat border (count varies by shaping; aim for 26-30 sc)
Round 10 :
Work small white snowbank: ch6, sc across, fasten off, gather slightly and tack to base of cabin (approx 6 sc)
Round 11 :
Highlight: using ivory thread, embroider 2-3 French knots as window lights and a tiny cross-stitch for chimney smoke
Info :
Sew cabin to motif onto the forest green disk before working final outer rounds. Pin carefully, then edge-tack with matching yarn using small invisible stitches to keep cabin upright.
— Pine Tree Applique (Make 2 trees per scene or one large tree variant) :
Info :
These layered trees are worked in Forest Green using short rows and clusters to form triangular tree shapes. You can make a single tall tree for a motif or stack two small trees. Use 3.0mm hook for crisp points.
Round 1 :
Ch6, sc in 2nd ch from hook and across (5)
Round 2 :
Ch1, (inc, 1 sc) x2, inc (8)
Round 3 :
Ch1, 1 sc across (8)
Round 4 :
Make tree branches: *Ch3, turn, (dc, tr, dc) in same st as base to form a cluster* repeat across 3 clusters to create 3 tiers
Round 5 :
Fasten off leaving long tail for sewing. Make a trunk by working 3 sc in brown yarn and sewing at base of tree.
Info :
For variety, stack two sizes of trees slightly staggered when sewing on to create depth. Add a tiny star by embroidering a 6-point star in ivory yarn at the tree top if desired.
— Snowbank & Path Accents :
Round 1 :
Ch8, sc in 2nd ch and across (6)
Round 2 :
Ch1, 1 sc across, sc2tog at center to create a curved bank (5)
Round 3 :
Ch1, 1 sc across, finish and gather slightly to form mound; attach below cabin and tree as desired
Info :
Use a small amount of filling under the snowbank piece to create a soft raised effect; tack in place with a few secure stitches so it doesn't shift after washing.
— Bow (Make 3 per runner spacing between motifs) :
Info :
Work bows in Burgundy with a slightly smaller hook (3.0mm) for neat, firm loops. Each finished bow will be roughly 6-7cm across depending on yarn and tension.
Round 1 :
Ch18, sc in 2nd ch from hook and across (17)
Round 2 :
Ch1, turn, sc across (17)
Round 3 :
Repeat Round 2 for 6 rows to give depth (17)
Round 4 :
Fold piece lengthwise and sew edges together across short side to form a tube; turn and press flat to create looped bow shape
Round 5 :
Wrap a small length of yarn around the center of the loops to cinch into a bow; secure with a few stitches and weave tail to the back
Info :
You can create a neater central knot by wrapping with a doubled strand of yarn and stitching through the underside to anchor. Pin bow onto scalloped edge between motifs and secure with small whipstitches.
— Holly Leaf (Make 12-16 leaves) :
Info :
Holly leaves are small layered motifs worked in Moss and Light Green. Make 12 leaves for a single-runner layout (3 clusters of 4 leaves) or add extras as you like. Use a 3.0mm hook for crisp points.
Round 1 :
Ch6, sc in 2nd ch from hook, hdc, dc, hdc, sc (5 stitches along chain)
Round 2 :
Working around foundation chain, sl st, sc, hdc in side to create pointed lobes, repeat to form 3 points then fasten off (approx 8-10 sts)
Round 3 :
With contrasting lighter green, surface crochet small veins by threading tapestry needle and creating 2-3 chain veins from base to tip
Info :
Sew leaves in small clusters of 3-4 around the scalloped edge, alternating direction so the leaves frame the circle naturally. Slight damp blocking can help leaves lay flat.
— Berry (Make many tiny berries — approx 24-30) :
Round 1 :
With Red yarn, make magic ring and work 6 sc in mr (6)
Round 2 :
Round 2: inc in each st (12) or for denser berry work 1 sc in each st (6) and fasten off leaving long tail
Info :
Make berries in two sizes — some worked to 12 sts for larger berries and many at 6 sts for the tiny clusters. Sew clusters of three berries to the motif edge between holly leaves.
— Snowflake Stars and Tiny Accent Stitches :
Round 1 :
With White yarn, attach in center of inner disk and ch4, sl st in 1st ch to make mini star; repeat spaced evenly (6-8 stars)
Info :
Embroidered snowflake details add sparkle. Use long floating stitches and single French knots to simulate snow and star highlights across the inner green disk.
— Assembly of Appliques (per motif) :
Info :
Pin cabin or tree centrally inside the forest green circle at approximately 1/3 down from the top, leaving room for other small accents. Sew using small whipstitches on the back of appliques so stitches are invisible from the front.
Round 1 :
Position cabin or tree and tack with 3-4 small stitches at top, bottom and sides to hold shape; then sew all around using matching thread
Round 2 :
Sew snowbank to base and tack small berries and leaves around lower edge; ensure berries are clustered in threes with leaves radiating outward
Info :
Secure every applique with at least 6 small stitches and reinforce high-stress points (roof tips, trunk base) with an extra stitch to prevent catch during handling or laundering.
— Joining Motifs into Runner (3 joins for 4 motifs) :
Info :
Lay motifs face up in the desired order. Join motifs using a whip stitch or mattress stitch through the back loops of adjacent scallop edges for an invisible seam. You will join motif A to B, B to C, and C to D placing bows in between joins to hide seam lines.
Round 1 :
With Ivory yarn and tapestry needle, align scallops and sew through back loops only, stitching every 6-8 sts across join until motifs lay flat and secure
Round 2 :
After joining, work an optional single crochet reinforcing row across the join on the back side to flatten seams (work through both motif edges simultaneously, sc in each st across)
Info :
Place a burgundy bow over each join on the front and tack at the center back to conceal joining stitches. Add a small cluster of holly leaves and berries near each bow to integrate decoration.
— Final Outer Edge and Finishing Rounds :
Round 1 :
Working along the full length of joined motifs, pick up stitches along outer scallop edge and work 1 sc in each visible scallop base to create a continuous edge (count will vary; aim to maintain evenly spaced sc)
Round 2 :
(Ch3, sl st in base of same st, sc in next 3) rep around entire runner to create small loops along outer edge for additional holly placement
Round 3 :
Attach holly leaf clusters and berries into small loops around outside every 4th scallop for balanced decoration; fasten off and weave all ends
Info :
Block entire runner gently after assembly: pin flat with scallops even and steam lightly or wet block to set shape. Weave in ends on the wrong side and check that appliques are tightly sewn so they survive tabletop use.
Round 4 :
Optional: Using metallic or gold thread, tack a few tiny highlight stitches at scallop points to catch the light
Info :
Final trimming: make sure no long tails remain. If you intend to use the runner on a frequently used table, consider adding small felt pads under heavy applique areas to protect both table and crochet.
This runner is a labor of love that turns a dining table into an inviting holiday scene — each motif is a miniature winter world. As you sew on tiny houses, trees, bows and holly, the project rewards patience with layered texture and nostalgic charm. Hang on to the memories each stitch makes and enjoy the cozy centerpiece you created. 🧶❤️❄️