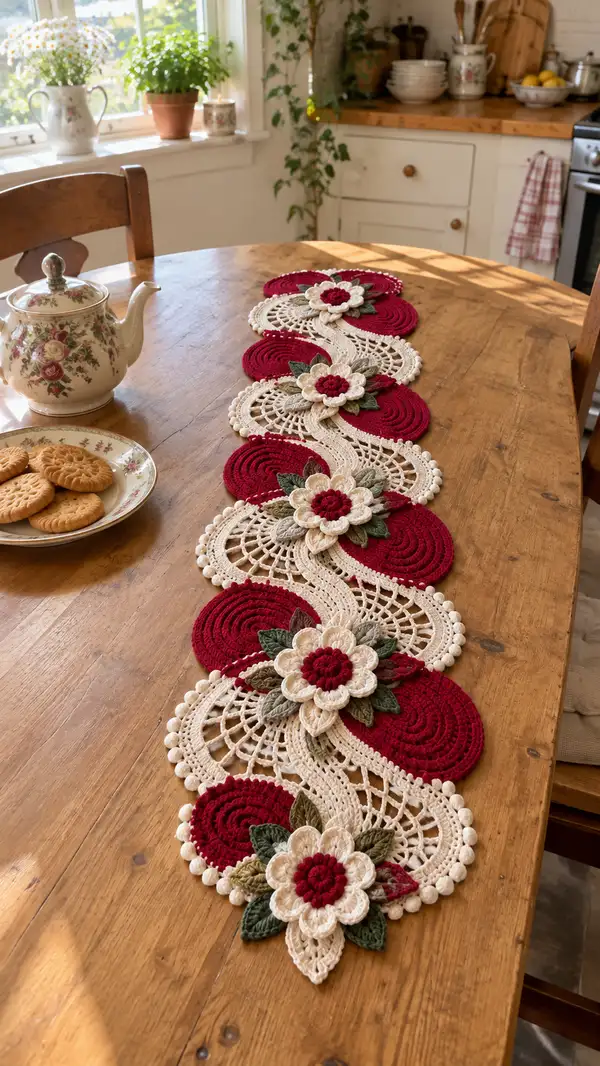
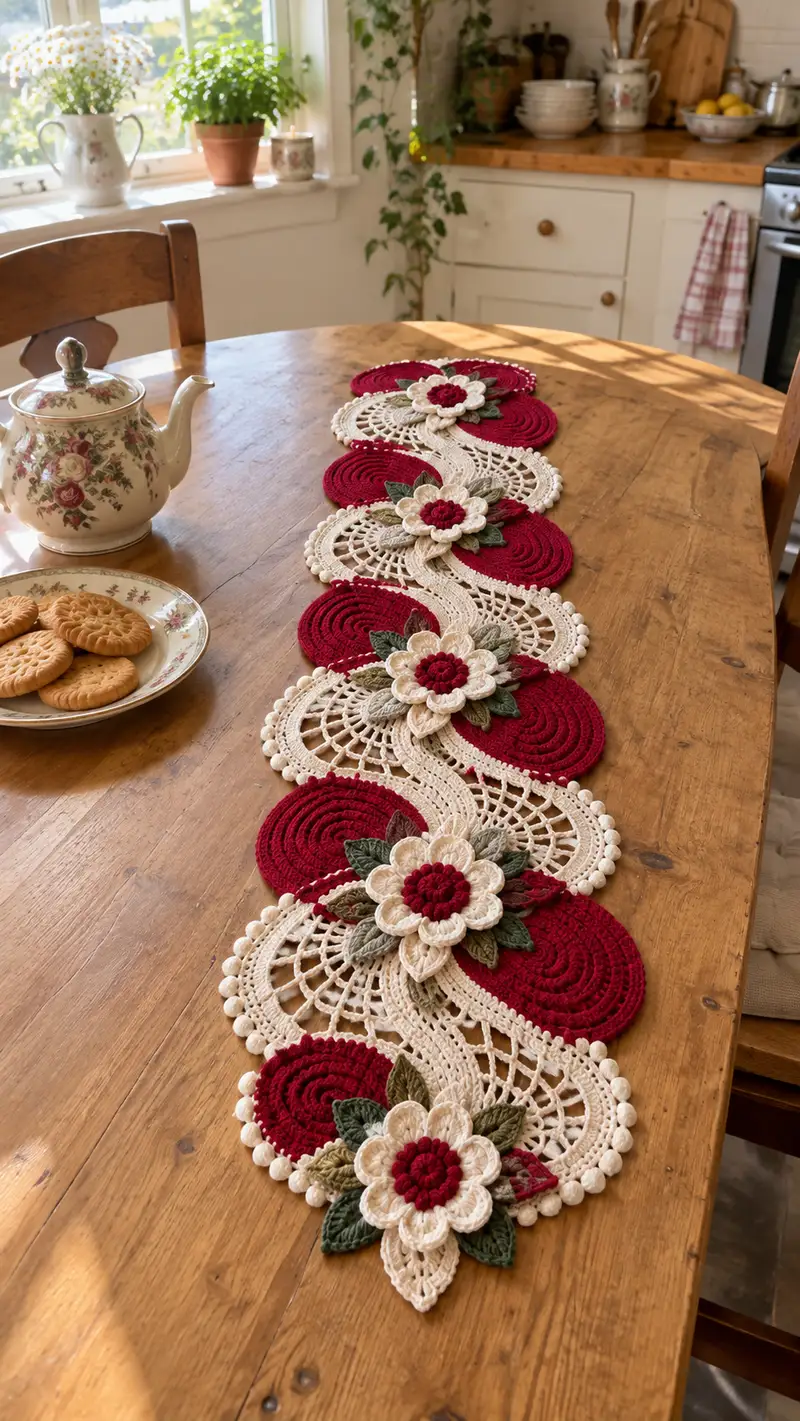
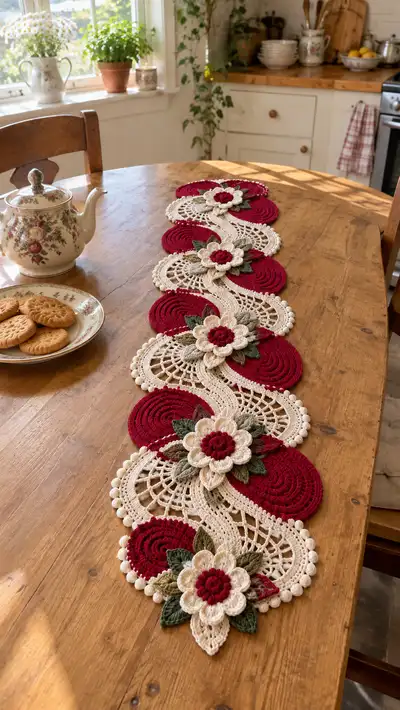
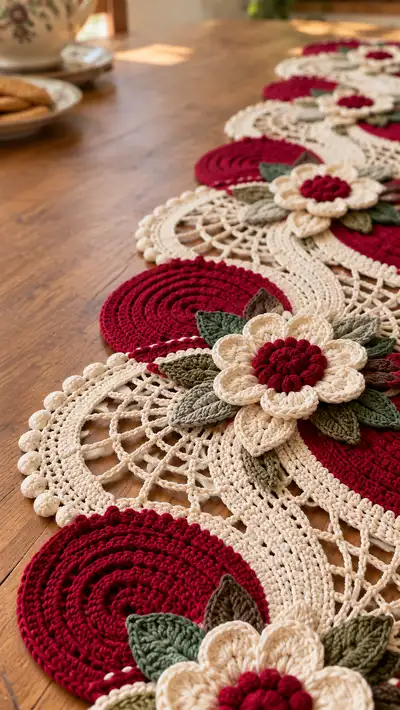
An elegant lacy table runner made from alternating solid round motifs and openwork lace discs, finished with layered floral appliques and leafy details. This runner features deep crimson circles, warm cream lacework and muted green leaves for a vintage-inspired centerpiece. Perfect for dining tables or sideboards, it blends bold color with delicate crochet texture.
Progress Tracker
0% Complete
— Notes and Gauge :
Info :
Gauge is not critical for the decorative runner but affects finished size. With worsted cotton and 3.5mm hook, 12 rounds of the solid disc = approximately 8.5-9cm diameter. Make a sample disc and lace fan to confirm scale and adjust hook size as needed.
Info :
All motifs are worked flat in joined rounds unless stated. Use stitch markers or a tiny scrap of contrasting yarn to mark round starts. Work tightly for crisp lace and to minimize gaps when placed on a tabletop.
— Solid Crimson Round Motif (Make 6 per runner repeat) :
Round 1 :
6 sc in magic ring (6)
Round 3 :
(1 sc, inc) x 6 (18)
Round 4 :
(2 sc, inc) x 6 (24)
Round 5 :
(3 sc, inc) x 6 (30)
Round 6 :
(4 sc, inc) x 6 (36)
Round 7 :
(5 sc, inc) x 6 (42)
Info :
Check that the disc lies flat. If a slight cupping occurs, add an extra round of increases evenly spaced (example: (6 sc, inc) x 6). If ruffling occurs, skip an increase round and continue even rounds.
Round 8 :
(6 sc, inc) x 6 (48)
Round 9 :
1 sc in each st around (48)
Round 10 :
1 sc in each st around (48)
Round 11 :
1 sc in each st around (48)
Round 12 :
1 sc in each st around (48)
Round 13 :
1 sc in each st around (48)
Info :
These even rounds create a dense, padded look to the red circle. If you prefer a slightly smaller disc, stop at Round 11. Fasten off and weave ends if making disc as a finished motif. Make 6 of these for each runner repeat (you can adjust the number to lengthen the runner).
— Cream Lace Fan / Semicircle Motif (Make 6 per runner repeat) :
Round 1 :
6 sc in magic ring (6)
Round 3 :
(1 sc, inc) x 6 (18)
Round 4 :
(2 sc, inc) x 6 (24)
Round 5 :
(3 sc, inc) x 6 (30)
Round 6 :
(4 sc, inc) x 6 (36)
Info :
We will convert this circle into a fan style by creating openwork spokes and then working a decorative scallop edge. From Round 7 we begin the lace pattern. Keep tension slightly looser for an open, drapey lace.
Round 7 :
(1 sc, ch 3, sk 2) x around to create 12 ch-spokes; join with sl st to first sc (36)
Round 8 :
Working into spaces: *sl st into ch-3 sp, ch 3, (dc, ch 1) x 3, dc; sl st into next sc* repeat 12 times to create fan lobes (36 large fans)
Round 9 :
Into each fan lobe: ch 2, (3 dc, ch 2, 3 dc) to form shell; sl st to base between fans (12 shells, stitch count variable across shells)
Round 10 :
Ch 1; sc around working 2 sc in the center of each shell and 1 sc in small gaps to create a round edge (approx 48 sc)
Round 11 :
Ch 5, *sk 1 sc, sc in next sc, ch 5* around to form open-chain arches; join (approx 12 arches)
Round 12 :
In each arch: sc, ch 3, (2 dc, ch 3, 2 dc), ch 3, sc to form a decorative fan (12 fans)
Round 13 :
Ch 1; sc around working 3 sc in top of each fan and 1 sc in arches between (approx 60 sc)
Info :
At this stage you have a full circular lace piece. To produce the semicircle shape that matches the photo we will work to one side only: fold the circle along its center and identify a straight row of sc stitches to mark the midpoint. From the next round we will flatten to a semicircular fan by working half rounds and finishing a straight edge.
Round 14 :
Work only across half of the circle: sc across the next 30 sc (this becomes the straight back of the semicircle), ch 3, turn (30)
Round 15 :
(1 sc in each of the 30 sts) across; at end ch 3 and turn (30)
Round 16 :
(2 sc, 1 inc) x 10 across to shape the straight edge slightly (40)
Round 17 :
Work a decorative picot and bobble trim along the curved outer edge: sc in each outer st, *bobble in next st, picot, sc in next 2 sts* repeat across curved edge (bobble counts vary by fan)
Round 18 :
Ch 1; sc around entire semicircle to tidy edge and create a stable seam for joining (approx 60 sc)
Info :
Block each semicircle flat and pin the straight edge flat to shape. Blocking is essential for the openwork to sit correctly and to match the S-shaped connecting band later.
— Central S-Shaped Connecting Band (Make 1 long band for entire runner) :
Info :
This narrow S-band joins alternating discs and fans. It is worked as a long strip with open mesh repeats and curved shaping to create the flowing S. Work the band long enough to connect all motifs in sequence. Below is a 36-round sequence that forms one panel of effect — repeat the central 12-round lace repeat to extend length as needed.
Round 1 :
Ch 51, sc in 2nd ch from hook and across (50)
Round 2 :
Ch 3 (counts as dc), turn, dc in each of next 49 sts (50)
Round 3 :
Ch 1, turn, sc in each st across (50)
Round 4 :
Ch 4, turn, *sk 1, dc in next, ch 1* repeat across to create small mesh (approx 25 dc, 24 ch-1)
Round 5 :
Ch 1, turn, sc in each st and in each ch-1 space across (50)
Round 6 :
Ch 3, turn, dc in first 3, fpdc around each of next 4 to create a raised ridge, dc across to end (50)
Round 7 :
Ch 1, turn, sc in each st across (50)
Round 8 :
Ch 5, turn, *sk next 4 sc, sl st in next sc* repeat across to create long chain arches (approx 10 arches)
Round 9 :
Into each arch work: sc, ch 3, (2 dc, ch 3, 2 dc), ch 3, sc (10 raised fans)
Round 10 :
Ch 1, sc across connecting the fans with 1 sc in each intermediate st and 3 sc in fan tops (approx 50 sc)
Round 11 :
Ch 2, turn, (hdc in next 3, sk 1, 3 hdc in next) across to create a gentle wave shaping (approx 50 hdc)
Round 12 :
Ch 1, sc in each st across; fasten off at panel end. Repeat Rounds 1-12 to extend strip length. When shaping the S-curve, add an extra 2-3 chain arches at the curve points or decrease a small section of stitches (sk 2) to create gentle inward curves where motifs nestle.
Info :
Make the band long enough so the pattern of alternating red circles and cream fans nests naturally. You can work two mirrored S-bands and join them, or one long strip depending on table length and preferred method of joining.
— Decorative Bobble Border (Edge along cream fans) :
Round 1 :
Attach cream yarn at the outermost curved edge of semicircle; ch 1, sc evenly across curve (approx 60 sc)
Round 2 :
*Sk next st, bobble in next st, sk next st, sc in next 2 sts* repeat across to add bobble texture (bobble clusters spaced evenly)
Round 3 :
Ch 1, sc across to tidy. Fasten off and weave ends. Block again if necessary to shape bobbles equally.
Info :
Bobble stitch: yarn over, insert, pull up loop, repeat 4 more times in same st (or as many as pattern states), yarn over and pull through all loops on hook, ch 1 to secure. This yields a small rounded bobble - adjust loops per bobble to taste.
— Flower Center (Make 6 per runner repeat) :
Round 1 :
With crimson: mr, ch 1, 8 sc in mr (8)
Round 2 :
2 sc in each st around (16)
Round 3 :
(1 sc, 1 inc) x 8 (24)
Round 4 :
Switch to a small cluster puff/bobble method: *puff in next st, sl st in next st* around to create a textured ring (12 puffs; stitch count variable)
Info :
This small textured center will sit beneath layered petals. Make 6 centers and block them slightly so they sit flush on the lace and solid disc junctions. Fasten off leaving a long tail for sewing the petal layer on top.
— Flower Petal Layer 1 (Small Petals, Make 6 flowers each with 8 small petals) :
Round 1 :
With cream: ch 2, 6 sc in second ch from hook, sl st to first sc to form a small ring (6)
Round 2 :
*(ch 3, 2 dc, ch 3, sl st) in next st* repeat 6 times to make six small petals; join and fasten off leaving long tail (6 petals)
Info :
Sew this small petal ring around the red textured center using your long tail; space petals evenly so they sit directly on top of the center puff ring. Use matching cream thread for invisible joins.
— Flower Petal Layer 2 (Larger Petals, Make 6 flowers each with 8 larger petals) :
Round 1 :
With cream: mr, ch 1, 8 sc in mr (8)
Round 2 :
*ch 4, (3 dc, ch 2, 3 dc) in next st, sl st to base* repeat 8 times to make large scalloped petals (8 large petals)
Round 3 :
Join and fasten off, leaving long tail for sewing. Layer this petal ring beneath the small petal ring so large petals peek from behind. Sew through the center into the crimson ring for secure attachment.
Info :
When assembling petals, slightly stagger the petals of each layer so they do not sit directly on top of each other — this gives the flower a fuller, more natural look. Use a small dab of glue in the center if desired before final sewing.
— Leaves (Make 18-24 assorted leaves per runner repeat) :
Round 1 :
With olive green: ch 8; row foundation: sc in 2nd ch from hook, hdc, dc, tr, dc, hdc, sc along chain to create pointed leaf base; sl st to base to form single leaf. Fasten off. (7 sts across leaf)
Round 2 :
For a thicker sculpted leaf: pick up yarn at base, work sc along one side of ch foundation to tip, work 3 sc in tip, sc back down other side of chain; sl st to base, fasten off. (approx 16 sc)
Round 3 :
Optional raised vein: with darker green, embroider a single ridge vein using surface slip stitches or a few fpdc down center. Make leaves in two sizes: small (ch 6 foundation) and medium (ch 10). Make a mix of 18-24 total.
Info :
Block leaves slightly using steam or light misting to shape. When sewing to flower clusters, position leaves beneath petals so they fan out naturally. Use different greens to create depth and vintage patina as seen in the photos.
— Assembly and Edging Rounds :
Round 1 :
Layout: Arrange red discs and cream fans in alternating order along the S-band. Position the band between discs and fans so the straight edges meet the band in the center of each motif. The photograph shows an S serpentine so that each fan nests beside a disc; replicate this by staggering each motif by approximately half motif-width.
Round 2 :
Joining method: Use a whip stitch or sl st join using cream yarn along the straight edges of fans and the inner edges of discs to attach them to the band. Join from back to front so the front shows neat single crochet joins. Work joins with matching yarn for a seamless look.
Round 3 :
Edge finishing: Once motifs are joined, add a final border along the runner edges. With cream yarn, join at one end and work sc around entire runner edge, placing 2 sc in concave spaces and 1 sc along straighter edges to create a uniform border (stitch count varies with number of motifs).
Round 4 :
Bobble border repeat: *sk 2 sc, bobble in next sc, sc in next sc* around to create a decorative bead edge matching the cream fans. Space bobbles evenly at outer edges and corners. Fasten off and weave ends neatly to the back of the runner.
Info :
After joining, press the runner flat and block gently to open lacework and align bobbles. Pin flower clusters in position atop motif joins and tack in place before final sewing so you can tweak placement for balance.
— Flower and Leaf Attachment Steps :
Round 1 :
Positioning: Place each flower over the seam where a red disc meets a cream fan; the center puff (crimson) should sit directly over the seam to hide the join and bring both motifs visually together. Space flowers evenly along the runner—one flower per disc/fan cluster.
Round 2 :
Sewing: Using long tail from the petal layers, sew the petal layers and center to the runner by stitching through the center ring, then through each petal base. Make small stitches into both underlying motifs (disc and fan) to anchor securely. Tie off behind and weave ends through several stitches.
Round 3 :
Attach Leaves: Arrange 3-5 leaves per flower cluster in a fan shape. Tuck leaf bases under the lower petal layer and stitch with small invisible whip stitches; reinforce in a couple of places so leaves do not flop free.
Info :
For durability, add a few discreet back stitches into the runner fabric and through flower centers. If the runner will be used often, consider using a few small invisibly-placed hand-sewn stitches of cotton thread for extra strength in high-stress points.
— Final Blocking and Care :
Info :
Block the entire runner on a flat surface using rust-proof pins and a light spray of water or steam. Shape the bobbles and lace openings evenly. Allow to dry completely before removing pins. Hand wash in cool water with mild detergent and lay flat to dry. Avoid tumble drying to preserve shape.
Info :
Tip: If you want a stiffer table runner, use a starch spray on the cream sections (test on a scrap first). A lightweight interfacing or felt backing can be sewn on the underside for extra protection on a dining table, but the underside should be tidy and free of long threads.
Finishing this runner is so satisfying — watching the lacy curves meet the bold crimson discs and then topping each join with layered flowers brings the whole piece to life! The texture and color contrast make it a true centerpiece for special meals or everyday charm. Enjoy pinning, blocking, and stitching until everything sits just right. 🧶🌿 Share a photo when you’re finished — I’d love to see your version! ✨