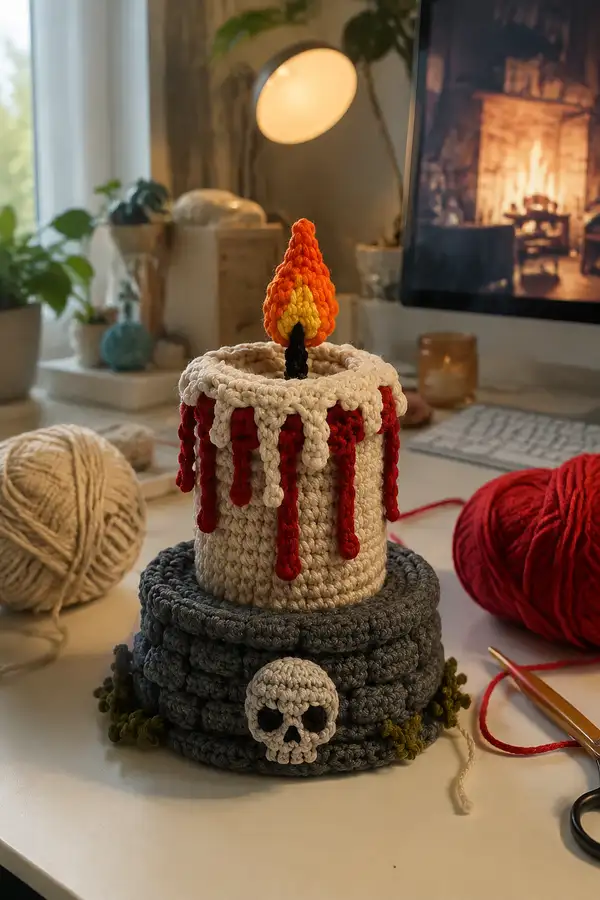
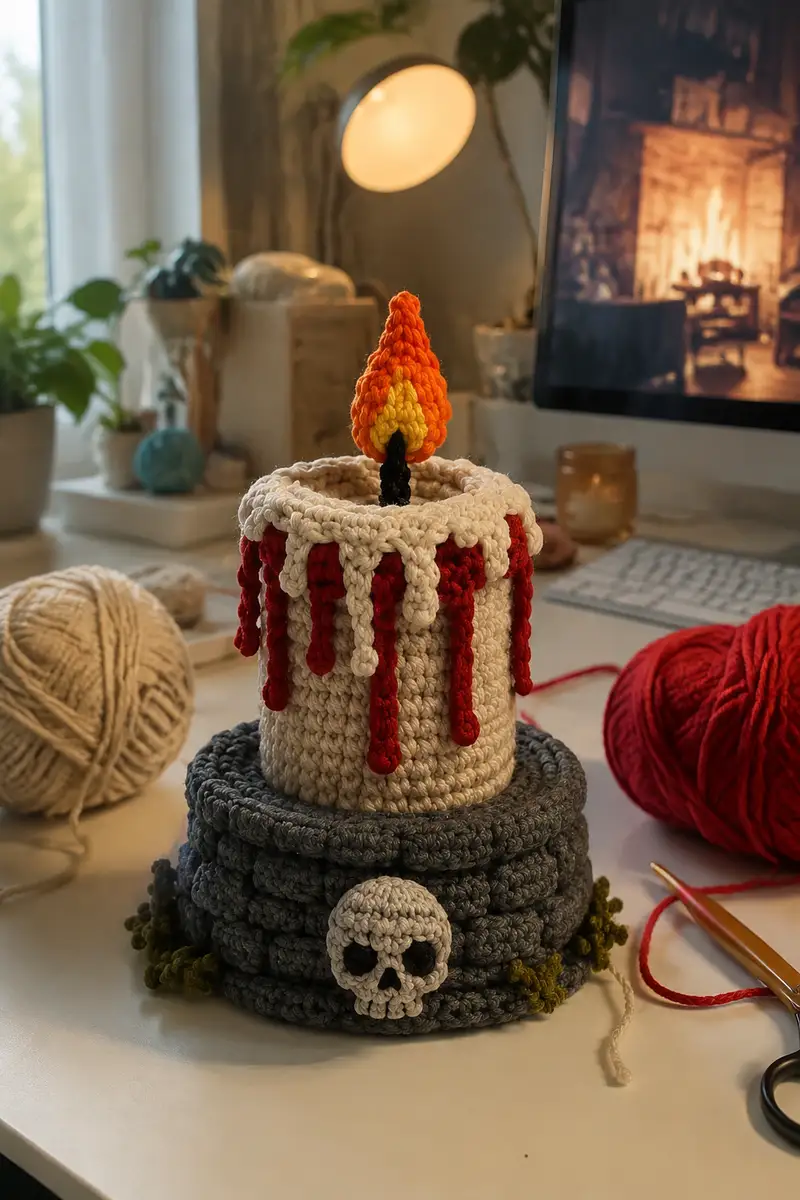
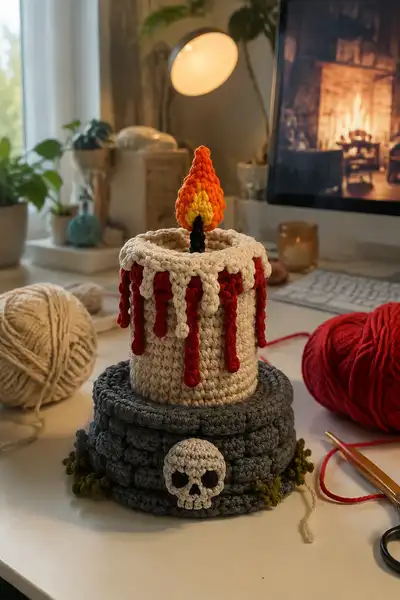
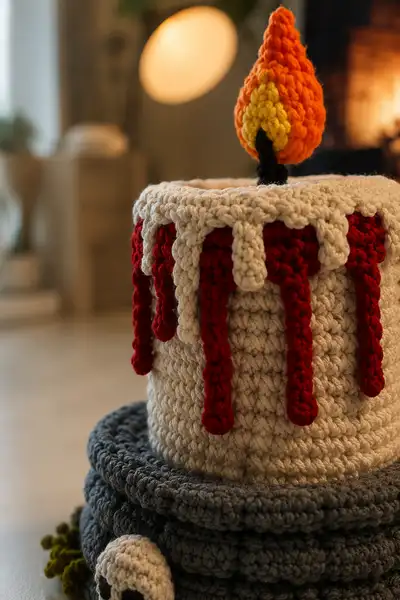
Create a spooky, chunky macabre candle with dripping 'blood', a flickering flame, and a tombstone-style stacked base with skull and moss details. This plush décor piece uses bulky yarn and large stitches for a quick, tactile Halloween centerpiece. The pattern includes the candle body, scalloped rim, multiple dripping cords, a layered flame, a sturdy wick, a two-tiered stone base, a skull applique and moss accents — everything you see in the photos.
Progress Tracker
0% Complete
— Flame (Top, treated as 'Head') :
Round 1 :
6 sc in magic ring (6)
Round 3 :
(1 sc, inc) x 6 (18)
Round 4 :
(2 sc, inc) x 6 (24)
Round 5 :
(3 sc, inc) x 6 (30)
Info :
You are working the small yellow flame center first. Use yellow yarn; this will be inset later. Keep tension tight so center is compact
Round 6 :
1 sc in each st (30)
Round 7 :
(4 sc, inc) x 6 (36)
Round 8 :
1 sc in each st (36)
Info :
Fasten off yellow leaving a long tail for sewing. Set the yellow center aside. Next we will build orange shell around it to give depth
Round 9 :
Join pumpkin-orange in any st. Ch1, 1 sc in same st and around for 36 sc (36)
Round 10 :
(5 sc, inc) x 6 (42)
Round 11 :
1 sc in each st (42)
Round 12 :
(6 sc, inc) x 6 (48)
Info :
If you want a taller, narrower flame, omit Round 12 increase — the example flame is tapered and elongated so we used Round 12 to fan the orange slightly before tapering
Round 13 :
1 sc in each st (48)
Round 14 :
(7 sc, inc) x 6 (54)
Round 15 :
1 sc in each st (54)
Info :
Now change to darker orange for outer flame layer. Join with a sl st and continue working around. Carry tails inside and weave ends later for a seamless look
Round 16 :
Join darker orange, ch1, 1 sc in same st and each st around (54)
Round 17 :
(8 sc, inc) x 6 (60)
Round 18 :
1 sc in each st (60)
Round 19 :
(9 sc, inc) x 6 (66)
Info :
Begin decreasing to taper the flame to a point. Turn the piece slightly as you work so the tapered point forms at the top rather than bagging out
Round 20 :
(9 sc, dec) x 6 (60)
Round 21 :
1 sc in each st (60)
Round 22 :
(8 sc, dec) x 6 (54)
Round 23 :
1 sc in each st (54)
Round 24 :
(7 sc, dec) x 6 (48)
Round 25 :
1 sc in each st (48)
Info :
Stuff flame lightly but firmly starting now. Push stuffing up into the narrowing top so the flame keeps its pointed shape. If using optional wire, insert it carefully centred in the lower rounds of the flame now and fold ends so sharp tips are not exposed
Round 26 :
(6 sc, dec) x 6 (42)
Round 27 :
(5 sc, dec) x 6 (36)
Round 28 :
(4 sc, dec) x 6 (30)
Round 29 :
(3 sc, dec) x 6 (24)
Round 30 :
(2 sc, dec) x 6 (18)
Round 31 :
(1 sc, dec) x 6 (12)
Info :
Fasten off, leaving a long tail. Use the long tail from the inner yellow center to sew the yellow shape into the small hollow at the front of the flame—stitch the yellow oval inside the orange shell to imitate the flame's inner glow. Weave and hide all tails.
— Wick :
Round 1 :
With black yarn, ch2, 6 sc in 2nd ch from hook (6)
Round 2-6 :
1 sc in each st (6)
Info :
Make length about 6 rounds tall (as above) for a short chunky wick. If you prefer a taller wick, add 1-4 rounds. Stuff just a little to keep a cylinder shape. Fasten off leaving long tail to sew into the top center of the candle.
— Candle Body (Main Cylinder, treated as 'Body') :
Round 1 :
6 sc in magic ring (6)
Round 3 :
(1 sc, inc) x 6 (18)
Round 4 :
(2 sc, inc) x 6 (24)
Round 5 :
(3 sc, inc) x 6 (30)
Round 6 :
(4 sc, inc) x 6 (36)
Round 7 :
(5 sc, inc) x 6 (42)
Round 8 :
(6 sc, inc) x 6 (48)
Round 9-12 :
1 sc in each st (48)
Info :
The pictured candle is chunky and tall: 48 sts around gives a comfortable diameter. Work even rounds now to build the straight-sided cylinder. Use a stitch marker to mark your beginning of round.
Round 13-20 :
1 sc in each st (48)
Round 21 :
(6 sc, dec) x 6 (42)
Round 22 :
(5 sc, dec) x 6 (36)
Info :
If you want the candle taller like the photo, stop decreasing at Round 20 and make the scalloped rim separately; the pictured candle has a mostly straight wall with a scalloped lip rather than deeply decreased neck. We will form a shallow inward round to accommodate the rim so the candle looks slightly hollowed at top.
Round 23 :
1 sc in each st (36)
Round 24 :
(4 sc, dec) x 6 (30)
Round 25 :
1 sc in each st (30)
Round 26 :
(3 sc, dec) x 6 (24)
Round 27 :
1 sc in each st (24)
Info :
We will not close this completely — leave the top opening wide enough to attach the scalloped rim later. Stuff the body firmly from the bottom up but leave room at the top for the rim attachment. Stuff to a medium-firm feel so the candle stands upright without collapsing.
Round 28 :
1 sc in each st (24)
Round 29 :
1 sc in each st BLO (24)
Round 30 :
1 sc in each st (24)
Info :
To make the internal top rim slightly recessed (as in photo), work Round 29 in BLO so the top row folds slightly outward and creates a lip for the scalloped top to rest on. Do not fasten off yet — we will join the scalloped rim next.
— Scalloped Top Rim :
Info :
Scallops are worked around the top of the candle to create the melted wax edge. Join cream yarn to the last round on the top edge with a sl st and work shells around. Work scallops evenly spaced — the example uses 12 scallops around a 24-st opening (1 scallop = 1 shell covering 2 sts).
Round 1 :
Join cream, *skip 1 st, (5 dc in next st, sl st in next st)* repeat around to make 12 shells; adjust to fit 24 sts (12 shells) (24)
Round 2 :
Work 1 sc in back loop of each shell edge to tidy and flatten scallops (24)
Info :
The scallops will sit slightly over the cylinder edge and form the drip attachment points. Fasten off and weave ends through the interior. If you prefer a chunkier scallop use 6 dc shells and reduce number of shells to 10 for even placement.
— Drip Cords (Make 8 or adjust) :
Info :
These red drips are made as short tubes with a bulb end. Each drip is worked in continuous rounds after making a short chain base; the bulb is created with increases at the end of the tube. Space 7-8 drips evenly around the candle's rim where scallops hang.
Drip - Step A (Foundation) :
Ch6, sl st to first ch to form a ring (or ch5 and join if you prefer). Work 6 sc into the ring (6)
Drip - Round 1-4 :
1 sc in each st (6) — forms the slender tube (length equal to about 4-6 rounds depending on desired drip length)
Drip - Round 5 (Bulb Start) :
(1 sc, inc) x 3 (9)
Drip - Round 6 :
(2 sc, inc) x 3 (12)
Drip - Round 7 :
(3 sc, inc) x 3 (15)
Drip - Round 8 :
1 sc in each st (15)
Drip - Round 9 :
(3 sc, dec) x 3 (12)
Drip - Round 10 :
(2 sc, dec) x 3 (9)
Drip - Round 11 :
(1 sc, dec) x 3 (6)
Drip - Round 12 :
6 dec (3)
Info :
Fasten off leaving long tail for sewing. Make 7-8 drips and position them alternating with scallops around the rim. For varied drips, make some longer by adding extra tube rounds at the start (Rounds 1-4).
— Bottom Base - Top Plate (small disk under candle) :
Round 1 :
6 sc in magic ring (6)
Round 3 :
(1 sc, inc) x 6 (18)
Round 4 :
(2 sc, inc) x 6 (24)
Round 5 :
(3 sc, inc) x 6 (30)
Round 6-8 :
1 sc in each st (30)
Info :
This top plate sits directly beneath the candle and forms the uppermost stone ring. Work even rounds for thickness and puffiness. If you want a raised lip, add two extra rounds in BLO to form a raised edge.
— Stone Ring Tier (Middle Decorative Layer) :
Round 1 :
Start with charcoal gray. 6 sc in magic ring (6)
Round 3 :
(1 sc, inc) x 6 (18)
Round 4 :
(2 sc, inc) x 6 (24)
Round 5 :
(3 sc, inc) x 6 (30)
Round 6 :
(4 sc, inc) x 6 (36)
Round 7 :
(5 sc, inc) x 6 (42)
Round 8 :
(6 sc, inc) x 6 (48)
Round 9-12 :
1 sc in each st (48)
Info :
We will create the textured 'stone bricks' using popcorn/bobble-like clusters in the next rounds. Use your stitch marker to keep track of sections and make repeating groups that line up into rings.
Round 13 :
*Make bobble: (hdc, dc, hdc) all in same st, sl st in next st; rep from * around to create 24 bobbles plus sl st spaces (48)
Round 14 :
1 sc in each st and each bobble top (48)
Round 15 :
Repeat Round 13 to build a second row of stone texture (48)
Round 16-18 :
1 sc in each st (48)
Info :
If you want a more stacked brick look, offset the bobble rows by starting the second bobble row one stitch later so clusters do not line up perfectly. This mimics mortar and brick irregularity. Fasten off and set aside the ring if you prefer to assemble later.
— Bottom Plate (Largest Disk) :
Round 1 :
6 sc in magic ring (6)
Round 3 :
(1 sc, inc) x 6 (18)
Round 4 :
(2 sc, inc) x 6 (24)
Round 5 :
(3 sc, inc) x 6 (30)
Round 6 :
(4 sc, inc) x 6 (36)
Round 7 :
(5 sc, inc) x 6 (42)
Round 8 :
(6 sc, inc) x 6 (48)
Round 9 :
(7 sc, inc) x 6 (54)
Round 10 :
(8 sc, inc) x 6 (60)
Round 11-14 :
1 sc in each st (60)
Round 15 :
1 sc in each st BLO (60)
Round 16-18 :
1 sc in each st (60)
Info :
This large disk supports the whole candle. Work several rounds flat to get a sturdy base. Round 15 worked in BLO creates a subtle ridge that imitates a base rim. If you'd like extra stability, insert a round cardboard circle inside the base before sewing the top tiers on.
— Skull Applique :
Round 1 :
With white/ivory, 6 sc in magic ring (6)
Round 3 :
(1 sc, inc) x 6 (18)
Round 4 :
(2 sc, inc) x 6 (24)
Round 5 :
1 sc in each st (24)
Round 6 :
(3 sc, dec) x 6 (18)
Round 7 :
1 sc in each st (18)
Info :
Fasten off leaving a long tail. Flatten head slightly and we will add eye sockets, nose and jaw details with black yarn and an embroidery needle.
Eye Sockets :
Cut small felt circles or embroider two small ovals using black yarn. Place sockets symmetrically across the skull front about 4-6 stitches apart. Sew or embroider them in securely. For hollowed eyes, stitch a tight black yarn circle and leave interior free of stuffing to maintain hollowness.
Nose and Jaw :
Stitch a small upside-down heart nose and a narrow vertical stitch or small triangular nose gap. For jaw teeth impression, stitch short vertical bars along the lower edge to suggest teeth sockets.
Info :
Sew skull to front of stone tier between two bobble clusters. Use many small stitches to anchor securely so it doesn’t move when the piece is handled.
— Moss Clusters :
Cluster Step 1 :
With moss green, ch8, sl st back along chain to create a looped curly tendril; fasten off leaving tail
Cluster Step 2 :
Make 4-6 of these and sew in small groups around the base just beside bobble bricks to imitate moss growth (make at least 6 groups)
Info :
Sew moss clusters under and beside bobbles and skull for an organic appearance. Use different lengths (chains of 6-12) for variation. You can also use loop stitch directly along the edge if you prefer a fluffy moss rather than cords.
— Assembly & Finishing (Detailed) :
Info :
Before attaching anything permanently, block pieces lightly and arrange them on a flat surface. Pin positions and test the look. The photos show the candle centered on the smaller top plate which sits on a textured stone ring which in turn sits on the large base. The skull is centered on the side of the middle ring and moss clusters abut it.
Step 1 :
Place top plate center on the large base and pin. Sew the top plate to the stone ring around the outside with whip stitch if you worked plates separately. Use strong, even stitches and weave through both layers to avoid wobble.
Step 2 :
Position the candle cylinder on the top plate center. Ensure it sits snugly; if loose, sew the candle to the plate by stitching through the bottom rounds of the candle and into the plate, distributing stitches every 6-8 sts to keep it upright and stable (12-16 sew points).
Step 3 :
Sew the wick into the candle top: insert the wick tail into the center top interior of the candle and sew in several passes into the top rounds so it sits rigidly centered. Knot and weave tail thoroughly into interior.
Step 4 :
Attach the flame: hold the flame so its narrow point is up and the yellow center faces forward. Sew the flame to the top of the wick by stitching the flame base to the top of the wick and a couple of top stitches of the candle interior. If you used wire in the flame, be sure it does not protrude — bend and secure within stuffing.
Step 5 :
Sew the red drip cords to the underside of scallops: tuck the first tube round under a shell and anchor with small whip stitches through the scallop and the top tube rounds. Space drips evenly (7-8 drips) and vary lengths for a realistic dripping wax look. For a fuller dripping effect, stitch the tube around the front of the scallop and add a few securing stitches down the tube to keep it vertical.
Step 6 :
Sew the skull applique to front of middle stone ring aligning to center bobble cluster. Use several small stitches at top, bottom and sides to prevent rotation. Sew moss clusters in small groups adjacent to skull and into bobble gaps to achieve the photo composition.
Step 7 :
Weave in all tails by threading through multiple rounds and trimming close. If pieces seem floppy, add more interior stuffing or a fabric circle insert under the base for rigidity. Optionally secure some accent stitches with a tiny dot of fabric glue if needed for display-only pieces.
Info :
Once assembly is complete, fluff the base and shape any scallops or drips to final position. Gently tamp stuffing where necessary using a blunt tool or the end of your hook to move fiberfill inside narrow openings.
Working this macabre candle brings spooky charm and tactile satisfaction — the chunky stitches, bobble bricks and dripping cords all come together into a delightfully eerie centerpiece. I loved stitching the flame layers and arranging each drip until it looked just right. The skull and moss add a playful, slightly creepy accent that completes the scene. 🕯️🖤 Display it with other Halloween décor or gift it to a friend who loves creepy-cute crafts. Happy stitching! 🎃