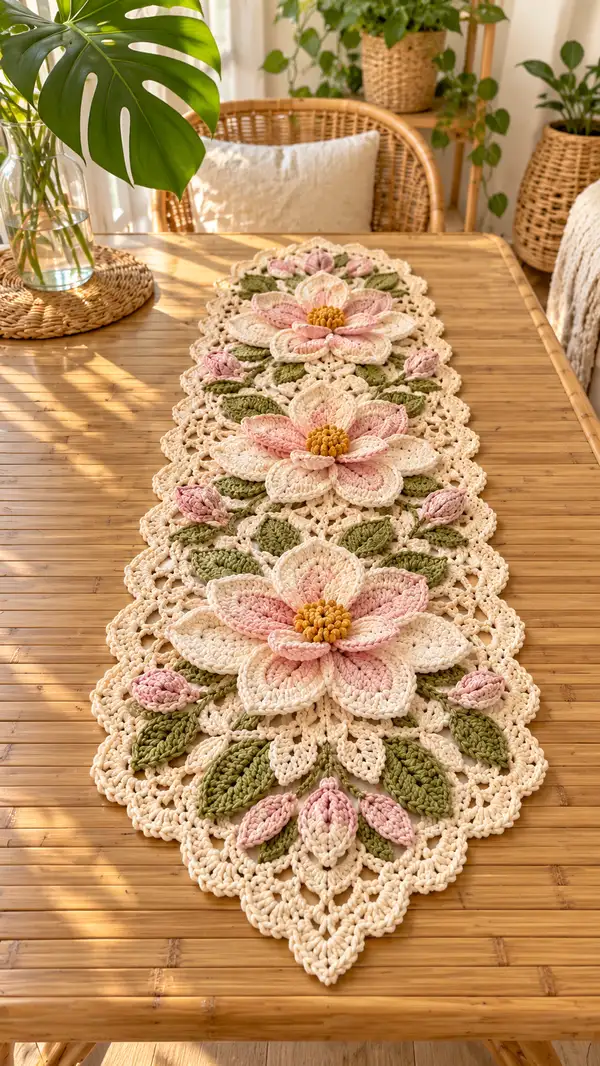
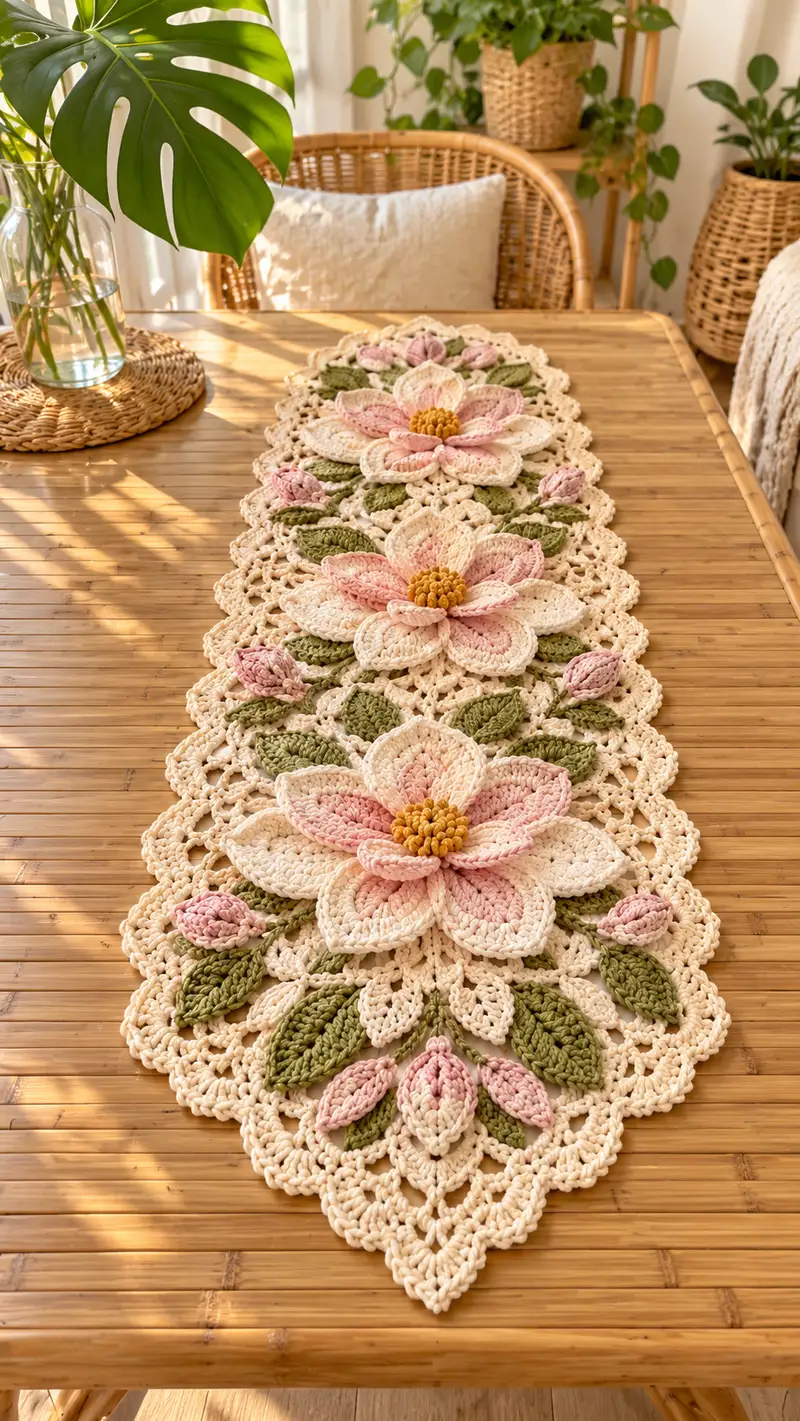
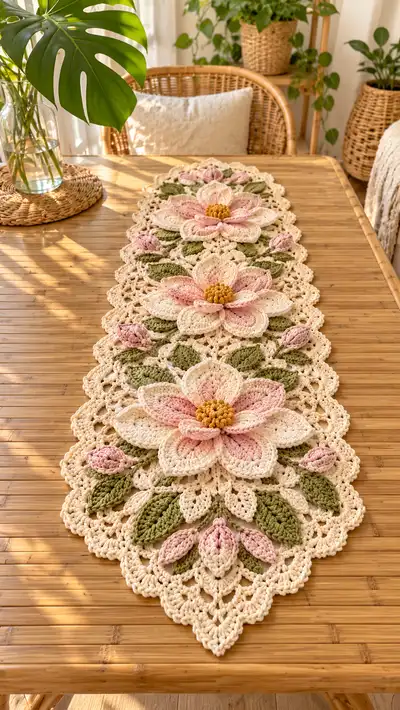
Create an elegant Magnolia Bloom table runner featuring layered 3D flowers, sculpted leaves and delicate lace motifs. This pattern uses cream, blush and sage tones with mustard centers to produce a soft vintage look. Designed to lie flat on a table, the runner is made from joined floral motifs with a scalloped lace edge. Detailed shaping and stitch techniques give each blossom dimensional petal texture and a rich handcrafted finish.
Progress Tracker
0% Complete
— Notes :
Info :
This pattern is written using US crochet terms. Work tightly enough for definition but loosely enough that the lace joins lie flat. Use stitch markers liberally and block all motifs before final assembly. Petals are worked mainly in rows and then shaped and sewn onto discs.
— Flower Center (make 3) :
Round 1 :
6 sc in magic ring (6)
Round 3 :
(1 sc, inc) x 6 (18)
Round 4 :
(2 sc, inc) x 6 (24)
Round 5 :
1 sc in each st (24)
Info :
Switch to mustard yellow yarn for textured bobbles. The little cluster cluster gives the magnolia a raised center; work small bobble clusters close together.
Round 6 :
*ch1, bobble: (yarn over, insert hook, yarn over, pull through 2 loops) x 3 around next st, yarn over and pull through all loops to close bobble, sl st next st; rep from * around to create 12 tiny bobbles (24 including sl st spaces) (approx 12 bobbles)
Round 7 :
Work sc between bobbles to secure them: (sc in ch1 space, sc in next sl st) around (24)
Round 8 :
*(sc, ch1, sc) in space behind each bobble to form a small ridge, sl st to next base st; rep around (24)
Info :
Make these centers slightly domed by working the bobbles on the outside edge of a shallow cup. Do not over-stuff—tiny amounts of fiberfill can be tucked under the bobbles if you prefer a fuller center.
Round 9 :
Fasten off leaving a long tail for sewing to the petal base disc; weave tail through back loops and pull to gather if needed. Finish off and secure.
— Flower Base Disc (make 3) :
Round 1 :
6 sc in magic ring (6)
Round 3 :
(1 sc, inc) x 6 (18)
Round 4 :
(2 sc, inc) x 6 (24)
Round 5 :
(3 sc, inc) x 6 (30)
Round 6 :
1 sc in each st (30)
Round 7 :
(4 sc, inc) x 6 (36)
Round 8 :
1 sc in each st (36)
Round 9 :
(5 sc, inc) x 6 (42)
Round 10 :
1 sc in each st (42)
Info :
This disc will receive the petals. Block it flat to ensure a neat base. If you prefer a slightly smaller flower, stop after Round 8 (36 sts) and adjust petal attachment spacing accordingly.
Round 11 :
(6 sc, inc) x 6 (48)
Round 12 :
1 sc in each st (48)
Round 13 :
Fasten off leaving long tail for sewing petals. Bring the disc to blocking for even shape if desired.
— Inner Petals (make 12 per flower) :
Round 1 :
Using blush color, ch 12, sc in 2nd ch from hook and across, turn (11)
Round 2 :
Ch1, sc in next 3, hdc in next 3, dc in next 3, hdc in final 2, turn (11)
Round 3 :
Ch1, sc in first 2, (hdc, dc, tr) in middle 3 sts to create a peak, hdc in next 3, sc in last 3, finish (11)
Round 4 :
Ch1, sc across in back loops only to create a subtle ridge along the petal base (11)
Round 5 :
Turn, sc dec at each side base once to shape the taper: sc2tog at first 2 sts and last 2 sts (9)
Round 6 :
Work a reverse single crochet (crab stitch) along the petal edge for a neat finish if desired; fasten off leaving long tail for sewing.
Info :
Make a total of 12 inner petals for each flower. Slightly block or steam into shape, and lightly stuff a small bit of fiberfill near the base if you want petals that sit upward.
— Middle Petals (make 10 per flower) :
Round 1 :
Using palest cream, ch 16, sc in 2nd ch from hook and across, turn (15)
Round 2 :
Ch1, sc in next 4, hdc in next 5, dc in next 3, hdc in next 2, sc in final 1 (15)
Round 3 :
Ch1, sc across in BLO to create a defined seam on base (15)
Round 4 :
Ch1, (sc2tog at both ends) to slightly taper sides - sc2tog at first 2 sts and last 2 sts (13)
Round 5 :
Optional: work first and last 3 sts in FLO for subtle curl at edges. Fasten off leaving long tail for sewing (13)
Info :
Middle petals are larger and will sit under the inner petals; stagger their placement when sewing so overlap is smooth and organic.
— Outer Petals (make 8 per flower) :
Round 1 :
Using cream with a blush fade (you can hold two strands, one cream and one blush semi-twisted), ch 20, sc in 2nd ch from hook and across, turn (19)
Round 2 :
Ch1, sc in next 5, hdc in next 7, dc in next 5, hdc in last 2, sc in final (19)
Round 3 :
Ch1, sc across in BLO to create base ridge and structure (19)
Round 4 :
Ch1, (sc, sc2tog) at either end to lightly taper sides if needed, maintain center fullness (17)
Round 5 :
Work slip stitch through base center to create a slightly cupped petal; fasten off leaving long tail for sewing (17)
Info :
Outer petals are gently cupped; you may shape them with a light steam from an iron or wet-blocking to hold the curve. Work with the cream as dominant color so the very edge reads soft cream.
— Petal Attachment (per flower) :
Round 1 :
Pin the base disc on your blocking mat. Place 12 inner petals evenly around the disc, spacing them 4 stitches apart for a 48-42 st disc; if using 48 st disc place petals every 4 stitches (48/12=4 spacing). Sew each petal at base through the back loops of the disc to maintain a clean front.
Round 2 :
After inner petals are sewn, pin the 10 middle petals in between inner petals to create staggered layers. Sew through disc and also tack to adjacent inner petal base for stability.
Round 3 :
Pin outer petals in remaining gaps (8 outer petals) so that petals form a radial blossom. Use mattress stitch or whip stitch, anchoring each petal with 3-4 secure passes and pulling thread tight enough to sit without puckering.
Info :
Place your mustard center over the sewn petal bases and sew tightly through the center disc tail to secure the bobbles directly over the petal seams. This hides the joins and gives a neat finish.
— Small Buds (make 6 per runner) :
Round 1 :
With blush, ch6, join with sl st to form ring, ch1 (6)
Round 2 :
6 sc in ring (6)
Round 3 :
(sc, inc) x 3 (9)
Round 4 :
ch1, sc around in BLO to create slightly conical bud (9)
Round 5 :
Fasten off leaving long tail for sewing. Pin bud slightly angled toward center when attaching to lace background.
Info :
Sew buds between leaves and lace openwork; cluster them in threes in each floral section for natural grouping as seen on the runner.
— Leaves (make 18-24 depending on spacing) :
Round 1 :
Using sage green, ch 12, sc in 2nd ch from hook and across (11)
Round 2 :
Ch1, sc in first 2, hdc in next 3, dc in next 3, hdc in next 2, sc in last 1 (11)
Round 3 :
Ch1, sc dec at beginning and end to taper: sc2tog first 2 and last 2 (9)
Round 4 :
Ch1, work 3 sc in center stitch to create rounded tip, turn and sc across opposite side for a symmetrical leaf (9)
Round 5 :
Work 1 sc in each st BLO to create fold line in middle for better sculpting; fasten off leaving long tail for sewing (9)
Info :
Sew leaves under petal layers and also into the lace motif; place leaves alternating direction to create an organic look. You can block the leaf edges slightly for a crisp look.
— Lace Motif Unit (make 7 units to join into runner base) :
Round 1 :
Using cream, mr, ch3 (counts as dc), 11 dc in mr, join with sl st to top ch3 (12) (counts as ring of 12)
Round 2 :
Ch4 (counts as tr), tr in same st, ch1, *2 tr in next st, ch1; rep around, join (12 groups of 2 tr and ch1)
Round 3 :
Sl st into first ch1 space, ch3, dc 3 in same ch1 space, ch2, *dc4 in next ch1 space, ch2; rep around (12 shell spaces)
Round 4 :
Sl st to center of a 4-dc shell, ch1, sc in same st, ch3, *skip to next shell center, sc, ch3; rep around (12 ch3 spaces)
Round 5 :
In each ch3 space: (sc, hdc, dc, hdc, sc) to form small petal-lace units (12 petals)
Round 6 :
Ch5, sl st into tip of each small petal giving an open scallop, rep around to form elongated lace points; join with sl st (12 points)
Info :
Make 7 identical lace units. These will be joined centrally and at points to accommodate the 3 large blossoms and filler leaves. Block each piece well for accurate joins.
Round 7 :
Working in the outer scallops: ch1, sc around each scallop edge to tidy (approx 48 sc). Fasten off leaving long tail for joining.
— Joining Lace Units into Runner Base :
Round 1 :
Arrange 7 lace units in a line: 3 central units for the blossom centers with 2 connecting units between them and 1 each for the tapered ends. Use pins on blocking mat to align the scallop points so the runner tapers to a point at each end as seen.
Round 2 :
Begin joining at the center seam: use yarn tail and whip stitch or crochet sl st join in matching cream to join 2 corresponding scallop points together through both loops. Join every 2nd scallop point along adjoining edges to create open lace joins and slight flexibility.
Round 3 :
When you reach the junction where a flower will sit, leave a circular opening equal to your flower base disc diameter (use pins to measure). Do not over-join; the flower will be sewn on top and tacked into the base to hide these openings.
Info :
Joining by crochet sl st gives a tidy edge that reads like continuous lace; for a stronger join consider single crochet through both layers on seams where the runner will be handled often (ends and outer edges).
Round 4 :
Continue joining units until runner layout matches photo: symmetrical elongated shape with central trio of flowers and tapered ends. Securely weave in tails after joining each seam to prevent slipping.
— Attaching Flowers to Base :
Round 1 :
Position each completed flower over the prepared opening on the lace base. The flower base disc should sit atop the lace so petals flow over the lace, hiding the seam below. Pin through the petal bases into the lace and the base disc.
Round 2 :
Sew the flower base disc to the lace background using the long tail from the base disc. Use ladder stitch around the disc perimeter, catching both disc stitches and lace scallop loops: 1 stitch every 2-3 sts to create a secure but nearly invisible attachment (48-48 stitches evenly spaced).
Round 3 :
Tack a few stitches from petal bases to the lace under them to anchor petals and prevent shifting. Use small, hidden stitches through the back loops of petal bases and lace sc ridges.
Info :
Place leaves and buds into the surrounding lace: secure leaves under outer petals and sew buds between leaves for a natural cluster effect. Trim and weave in all ends neatly on the underside.
— Edge Scallop and Final Border :
Round 1 :
With cream, around entire runner edge, work 1 sc in each outermost st to even the edge and create a working base (approx 200-260 sc depending on joins).
Round 2 :
*Ch5, skip 2 sts, sl st in next st; rep around to create uniform scallop chain spaces. Join (approx 40-50 scallops)
Round 3 :
In each ch5 space: (sc, hdc, 3 dc, hdc, sc). This creates a plump scallop shell. Repeat around and join with sl st.
Round 4 :
Work a picot trim along the edge of each scallop point if you want extra detail: (sc, ch3, sl st into ch3 loop) at the apex of each scallop.
Info :
The scalloped border is important to give a finished, neat edge and to echo the shapes in the lace motif. Block the entire runner after completing the border to open up lace and set petals slightly upward.
Round 5 :
Fasten off and weave all ends long enough to anchor into underside of work, trim close after weaving through several stitches for security.
— Final Shaping, Blocking & Finishing :
Round 1 :
Lay the runner flat on blocking board, pin petals and lace such that petals are gently lifted while the lace remains flat. Use steam or spray-block method recommended for cotton yarns; do not apply direct iron heat to acrylics.
Round 2 :
Allow to dry fully (24 hours recommended). Remove pins and check seams; if any petals lift too far from lace, add small tacking stitch to underside at 2-3 points per petal.
Info :
For heavier table use, consider sewing a thin backing of cotton fabric to the underside of the runner, attached only near the flower base discs, to help protect the lace and reduce snagging while preserving the 3D look.
Round 3 :
Your runner is complete. Lightly steam again to relax any remaining wrinkles and lay flat while cooling. Enjoy your Magnolia Bloom table runner!
This Magnolia Bloom runner is a beautiful blend of texture and botanical elegance — a truly special centerpiece to brighten any table. Each layered petal and scalloped lace detail adds handcrafted charm and a vintage feel. I hope making it brings you the same calm, satisfying joy I felt while designing it. 🧶🌸 Treat yourself or someone you love to this delicate floral statement piece. ✨