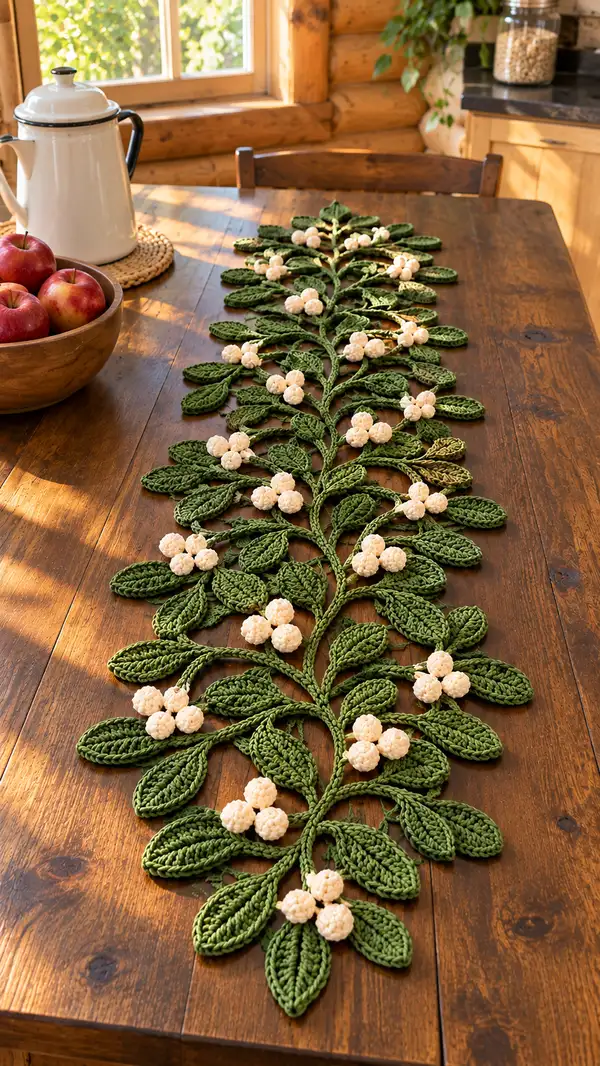
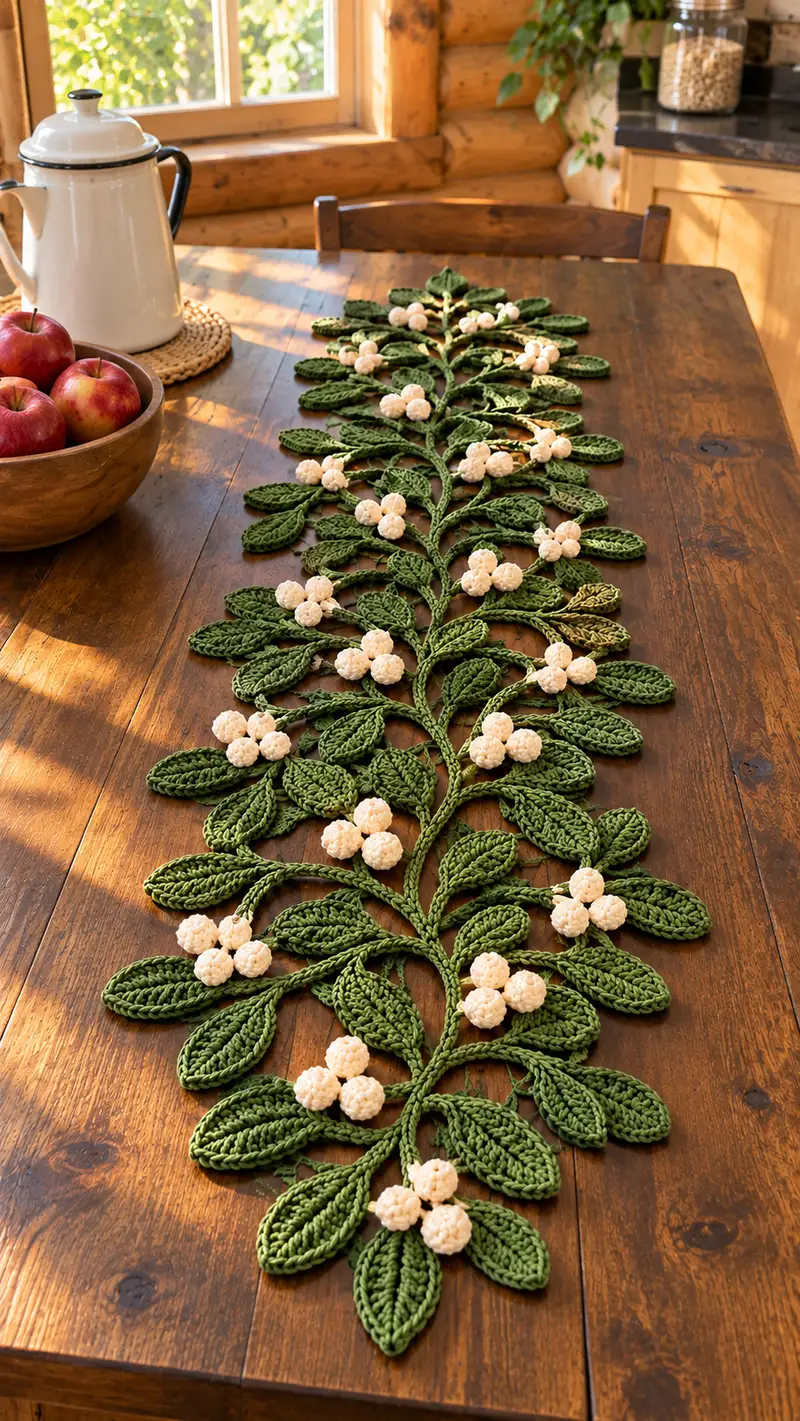
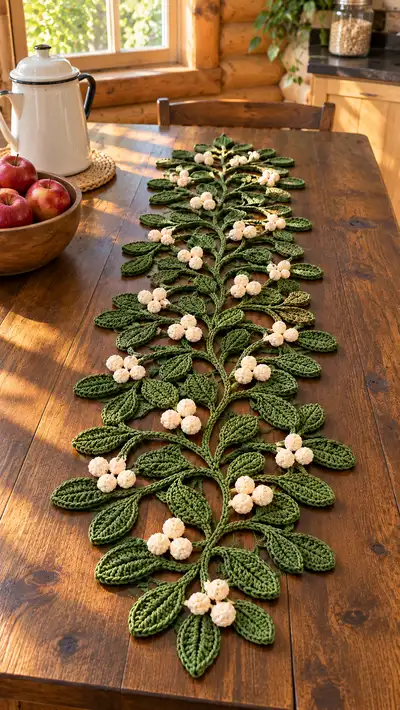
A long, elegant table runner inspired by mistletoe vines with sculpted green leaves and clustered white berries. This runner is crocheted in separate vine, leaf, and berry motifs that are joined to create a flowing, organic centerpiece. The textured leaves and puffy berry clusters give a realistic, seasonal feel—perfect for holiday and winter decor.
Progress Tracker
0% Complete
— Notes & Gauge :
Info :
This table runner is modular. The pattern describes one long central vine, repeat branch sections, individual leaves and berry clusters. You can lengthen or shorten by adding or removing branch repeats. Gauge for leaf texture: 10 sc x 10 rows = approx 2.5 in (6 cm) with 4.5mm hook in worsted cotton; variations in yarn/hook will change final dimensions.
Info :
Work with a tight-enough tension so stuffing does not peek through berry clusters and leaf stitches are firm for crisp texture. Block leaves lightly to flatten before assembly.
— Main Stem / Central Vine :
Round 1 :
Ch 120 (or desired runner length chain foundation). This long chain is the foundation for the central vine. For shorter runner, ch 80–100; for longer, ch 140–160.
Round 2 :
Sc in 2nd ch from hook and across until 1 ch remains, sc in last ch; turn to work along underside of foundation chain, sc in each foundation ch across. Working in continuous round will create a flat cord. Total sts = (120 x2) = 240.
Info :
Place a stitch marker at the center of the long cord (st number 120). This center marker will help orient symmetrical branch placement. If you prefer a braided appearance, make 2 or 3 stems and braid after assembly instead of a single chained cord.
Round 3 :
1 sc in each st around (240). This round builds cord thickness for stability.
Round 4 :
Work 1 sc in BLO in each st around (240). The BLO creates a slight ridge on the top of the vine, giving a natural raised center for leaf attachment.
Info :
Mark points along the vine where branches will be attached. Typical spacing: mark at every 18th stitch on alternating sides to form staggered branch pairs down the vine. For a runner shown, plan for about 12-16 branch groups depending on length.
Round 5 :
1 sc in each st around (240). Fasten off leaving long tail for sewing if you will join multiple stems into one runner; otherwise, keep attached to yarn for branch creation.
Info :
If you want a rounder vine, repeat rounds 3–5 one or two more times before adding branches. For a flatter vine, proceed to branch attachment after round 5.
— Branch Base (Make multiple) :
Round 1 :
Attach yarn at a marked stitch on the vine with a sl st, ch 2 (counts as first hdc), and work 8 hdc along one side to form a short branch cord (8 sts). Turn to work back along opposite side of the ch 2 foundation: hdc 8 back towards vine; sl st into vine stitch to secure. Branch length = ch 9 equivalent, 16 hdc cord.
Info :
Make branches alternating sides. Each branch base here provides 4 small attachment points for leaves (2 on each side) and one berry cluster zone near the tip. The base construction makes a slightly raised braided-looking branch.
Round 2 :
Ch 10, sl st into vine 6 stitches ahead to create an arcing connective stem, giving a natural swoop to the branch. This forms a small side-stem. Fasten off and weave ends. Repeat as needed for each side-branch.
Info :
Vary branch chord lengths (ch 8–14) to create a natural irregular look. For branches that will hold more leaves and berries, increase to ch 12–14 before returning along underside.
— Leaf Pattern (Work many; make 30–40 leaves total) :
Info :
Leaves are worked flat as elongated ovals using a foundation chain and working around the chain to create an oval. Each leaf is approximately 3.5–4 inches long and 1.25–1.5 inches wide in worsted cotton. Make leaves in two sizes: standard (pattern below) and small (reduce by ch 4 and omit final edgings). The numbers below are for a standard leaf.
Round 1 :
Ch 18. Sc in 2nd ch from hook and across to end (17 sc). 3 sc in last ch, now work across the underside of foundation chain with sc in each ch (17 sc). 2 sc in last ch (the first ch) to close the oval. Total sts = 17 + 3 + 17 + 2 = 39 (39).
Round 2 :
Ch 1, turn, sc in BLO in same st and in next 3 sts, (sc2tog, sc in next 4 sts) three times, sc2tog, sc in remaining sts so that you shape the leaf base. After completing the round, total sts remain 39 (39). The BLO on round 2 establishes a slightly raised edge and keeps the first ridge defined.
Round 3 :
Ch 1, sc in each st around (39). Maintain a neat, even tension to keep the oval symmetrical.
Round 4 :
Ch 1, (sc in next 6, inc) x 4, sc in remaining sts evenly to maintain total of 43 sts. Calculation: 39 + 4 inc = 43 (43). This round widens the leaf slightly around the midsection.
Info :
If you need a slightly narrower leaf, in Round 4 do (sc in next 7, inc) x 3 instead to add 3 sts for total 42; adjust subsequent rounds consistently.
Round 5 :
Ch 1, sc in each st around (43). Maintain shaping by keeping tension steady (43).
Round 6 :
Ch 1, (sc in next 5, dec) x 6 (43 - 6 = 37). Calculation: 43 sts - 6 dec = 37 (37). This begins tapering the leaf toward the tip.
Round 7 :
Ch 1, sc in each st around (37). This evens out the surface and lets the shape relax (37).
Round 8 :
Ch 1, (sc in next 4, dec) x 6 = 31. Calculation: 37 - 6 = 31 (31). Continue forming a pointed tip.
Round 9 :
Ch 1, sc in each st around (31). Keep stitch count even for a smooth taper (31).
Round 10 :
Ch 1, (sc in next 3, dec) x 6 = 25. Calculation: 31 - 6 = 25 (25). The leaf is now noticeably tapered.
Round 11 :
Ch 1, sc in each st around (25). Be careful to keep the same orientation; this creates the tip peak (25).
Round 12 :
Ch 1, (sc in next 2, dec) x 6 = 19. Calculation: 25 - 6 = 19 (19). This finishes the tip shaping while keeping base width intact.
Round 13 :
Ch 1, sc in each st around (19). At this point the leaf is small at the tip; flip to the base side to begin the mirrored taper back toward the stem.
Round 14 :
Ch 1, (1 sc, inc) x 6 = 25. Calculation: 19 + 6 = 25 (25). This starts widening again symmetrically for the lower half of the leaf.
Round 15 :
Ch 1, sc in each st around (25). Keep stitches even (25).
Round 16 :
Ch 1, (2 sc, inc) x 6 = 31. Calculation: 25 + 6 = 31 (31).
Round 17 :
Ch 1, sc in each st around (31). The lower half begins to mirror the upper half (31).
Round 18 :
Ch 1, (3 sc, inc) x 6 = 37. Calculation: 31 + 6 = 37 (37).
Round 19 :
Ch 1, sc in each st around (37). Toward the base we will create a defined stem attachment area shortly (37).
Round 20 :
Ch 1, (4 sc, inc) x 6 = 43. Calculation: 37 + 6 = 43 (43). This restores the original width near the base to mirror the opposite end.
Round 21 :
Ch 1, sc in next 18 sts, dec, sc in next 10 sts, dec, sc in remaining sts. Calculation should return to 41 or 43 depending on where dec performed; final count approx (41) to create a slight tapering before stem. Use visible shape to guide the final 2 decreases if necessary.
Info :
At the base of the leaf, work a short stem tail: ch 6 from the last st, sl st back into the base st to create a narrow connecting tail to sew into a branch. Fasten off and leave a 10 in tail for sewing into vine. For smaller leaves, reduce ch foundation by 4 and omit rounds 12–16 proportionally.
Round 22 :
Optional: With contrast color, work 1 round in FLO of sc around leaf to create a raised central vein. Sl st to join and fasten off. This adds definition visually on the RS.
Info :
Make approximately 30 standard leaves and 8–12 small leaves for accents, depending on runner length. Block each leaf flat and pin to shape while damp; let dry fully for crisp edges.
— Small Accent Leaf (Make 8–12) :
Round 1 :
Ch 14. Sc in 2nd ch from hook across (13), 3 sc in last ch, sc back across foundation (13), 2 sc in last ch. Total = 13 + 3 + 13 + 2 = 31 (31).
Round 2 :
Ch 1, sc in each st around (31).
Round 3 :
Ch 1, (sc in next 3, inc) x 5 = 36. Calculation: 31 + 5 = 36 (36).
Round 4 :
Ch 1, sc in each st around (36). Round 5: (sc in next 3, dec) x 5 = 31. Round 6: sc in each st around and finish with a ch 4 stem tail to sew. Fasten off and leave long tail. Small leaves need little to no blocking.
Info :
Small leaves are used near berry clusters and to fill gaps between large leaves for a natural, layered look.
— Berry Cluster (Make 24–36 small berries; assemble into clusters of 3–5) :
Info :
Berries are small, tightly crocheted bobbles worked as mini popcorns or 6-dc clusters in cream/white yarn. Work them with a smaller hook (4.0mm) for a tighter texture. Each berry is about 0.6–0.9 in diameter.
Round 1 :
Make a magic ring, ch 1, 6 sc into ring. Pull ring closed. (6)
Round 2 :
Ch 2 (counts as first dc for pop), work 5 dc into same st, pull loop up slightly, remove hook and insert into first dc to form a tight pop—OR work a 6-dc popcorn: (6 dc all in same st), leave last loop on hook for each dc, then pull yarn through all to close popcorn. Sl st to next st and fasten off. The popcorn is the berry. (1 popcorn/berry)
Info :
Make 3–5 berries per cluster. For a 3-berry cluster, make three popcorns leaving long tails for sewing. For a fuller cluster, make 4–5 popcorns. Berries need minimal stuffing; the popcorn method creates density without fiberfill.
Round 3 :
Optional: For very plump berries, after forming popcorn, make 6 sc around the base of the popcorn into the last join area before fastening off to enclose and add stability. Fasten off leaving long tails for sewing. (approx 6)
— Branch Repeat & Placement Guide :
Info :
Each branch group: 1 main branch base (as worked earlier), attach 2–3 large leaves, 1–2 small leaves, and 1 berry cluster of 3 berries (or occasionally 4). Place branch groups along vine every ~18–20 vine stitches alternating sides so the runner looks natural and balanced.
Round 1 :
At each marked vine point, sew branch base sl st tail to vine with mattress or whip stitch. Use the long tail from the branch base to run a neat seam through the vine cord core and back into the branch base to lock it into place. Repeat for all branch bases.
Info :
When sewing leaves, use their stem tail (ch 6 tail) and weave it through the branch base area, catching a few vine stitches for stability. Arrange leaves in slightly staggered layers, with the leaf tips pointing outward and overlapping slightly.
Round 2 :
Sew small leaves near berry cluster points so they frame the berries. Use tiny whip stitches or hidden ladder stitch so that no knots show on RS. After sewing leaves, tack the bases with 2–3 stitches so they sit flat against the branch curve.
Info :
For a fuller look, stagger overlapping large leaves: sew one large leaf at branch base, then sew a second offset 6–8 mm forward, and a third smaller leaf near the cluster to create layering. Pin before sewing to preview placement.
— Attaching Berry Clusters :
Round 1 :
Group 3 popcorn berries together: position them in a tight triangle directly on the branch arc. Using the long tails from each berry, thread them onto yarn needle and sew through the branch cord and secure into the small leaves surrounding them. Make sure the berries sit slightly raised above the leaf surface.
Round 2 :
For each berry in the cluster, pass the needle through the core of the popcorn and down into the branch base and out again, repeating at least 2 passes per berry to secure. Tie off inside one berry base and weave tail into the berry body. Trim close.
Info :
Alternate cluster arrangements: clusters of 3 are classic; clusters of 4 or 5 create a festive bolder look. Place clusters more densely in the central portion of runner for visual weight and taper clusters toward the ends for an organic flow.
— Joining Branch Sections to Create Full Runner :
Round 1 :
If working multiple vine cords, place them side-by-side and join using whip stitch at the ends with long tails left from vine finish. Overlap the last 10–12 vine sts and sew them together through all layers to create a continuous long runner without visible bulk.
Info :
Use surface slip stitch or a very small running stitch to connect adjacent branch overlaps so the runner holds as one flat piece. Test how the runner lays on your table and add tacking stitches underneath where necessary to keep motif edges flat.
Round 2 :
After all branches are sewn in position, optionally weave a thin piece of florist wire through the underside of the vine, sewing it into place every 4–6 inches for moderate poseability and shape retention. Cover wire ends securely so they do not poke through.
Info :
When inserting wire, do not force wire into yarn loosely; leave small yarn loops covering it. The wire helps the runner hold gentle curves down the table without buckling at joins.
— Final Edging & Veining Detail :
Round 1 :
With Dark Green, embroider a central vein on each leaf by running a yarn needle with double strand of yarn in a straight stitch from base to tip along the center. Use small spaced stitches to create raised texture. Alternatively, crochet a surface slip-stitch line: attach yarn at leaf base, sl st in FLO along center toward tip, fasten off.
Round 2 :
Trim stray fibers, weave in all ends. Using cream yarn, add small single crochet picot clusters where needed as extra accents between berries. Picot: ch 3, sl st in 3rd ch to form a small knob; secure with a few stitches.
Info :
Take photos of the runner while laying flat; adjust leaf positions and re-tack as desired for best visual flow. Adding a few small filler leaves near ends helps visually finish the runner so it does not appear abruptly cut off.
— Blocking & Finishing :
Round 1 :
Lightly steam or wet-block each leaf/branch before final assembly. Pin leaves to measured shape on blocking mat or towel to ensure consistent length and width. Allow to dry fully to retain shape. Do not over-steam cotton fiber; test on a scrap first.
Round 2 :
After assembly, lay runner flat on table, pin edges at gentle curves and allow to rest for 24 hours so sewn joins relax. If runner is to be used under hot dishes, avoid direct heat as cotton may scorch with excessive steaming later.
Info :
For storage, roll gently around a tube or lay flat to prevent crushing berry clusters. Hand-wash only in cool water with mild soap; reshape while damp and dry flat to maintain integrity.
— Sizing & Customization Tips :
Info :
To make a shorter runner or table centerpiece, use half the vine chain length and scale down leaf counts proportionally. Substitute DK weight yarn and a 4.0mm hook to create a more delicate-looking vine with slightly smaller leaves and berries. Swap cream berries for red yarn for a holly-look variation.
Round 1 :
To make a garland instead of a flat runner, attach small loops at both ends: ch 30 and join to create a hanging loop; secure with extra tacking stitches. Add intermittent ribbon ties to hang on mantels or doorways.
Info :
As you make motifs, keep a small box or tray with leaf and berry groups arranged in the order you plan to attach them; this speeds assembly and ensures even distribution of clusters along the vine.
This mistletoe-inspired runner transforms any table into a festive centerpiece with handcrafted charm and texture. The layered leaves and plump berry clusters create a beautiful seasonal focal point you can be proud of. Each stitch brings the runner to life—perfect for holiday gatherings and cozy dinners. 🧶🌿 Add it to your home or gift one to a loved one for lasting handmade joy. ✨