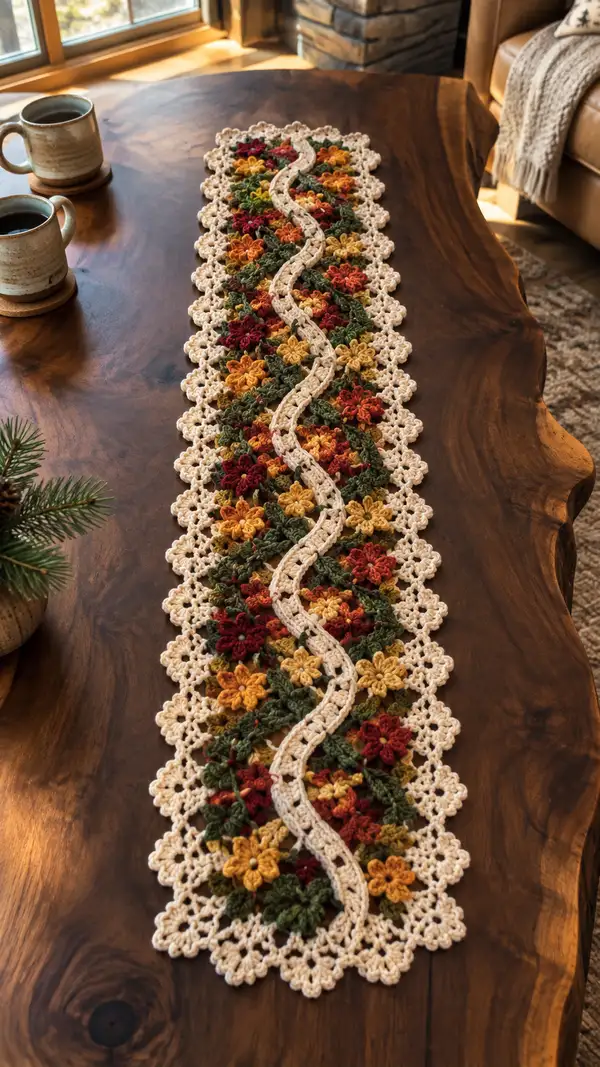
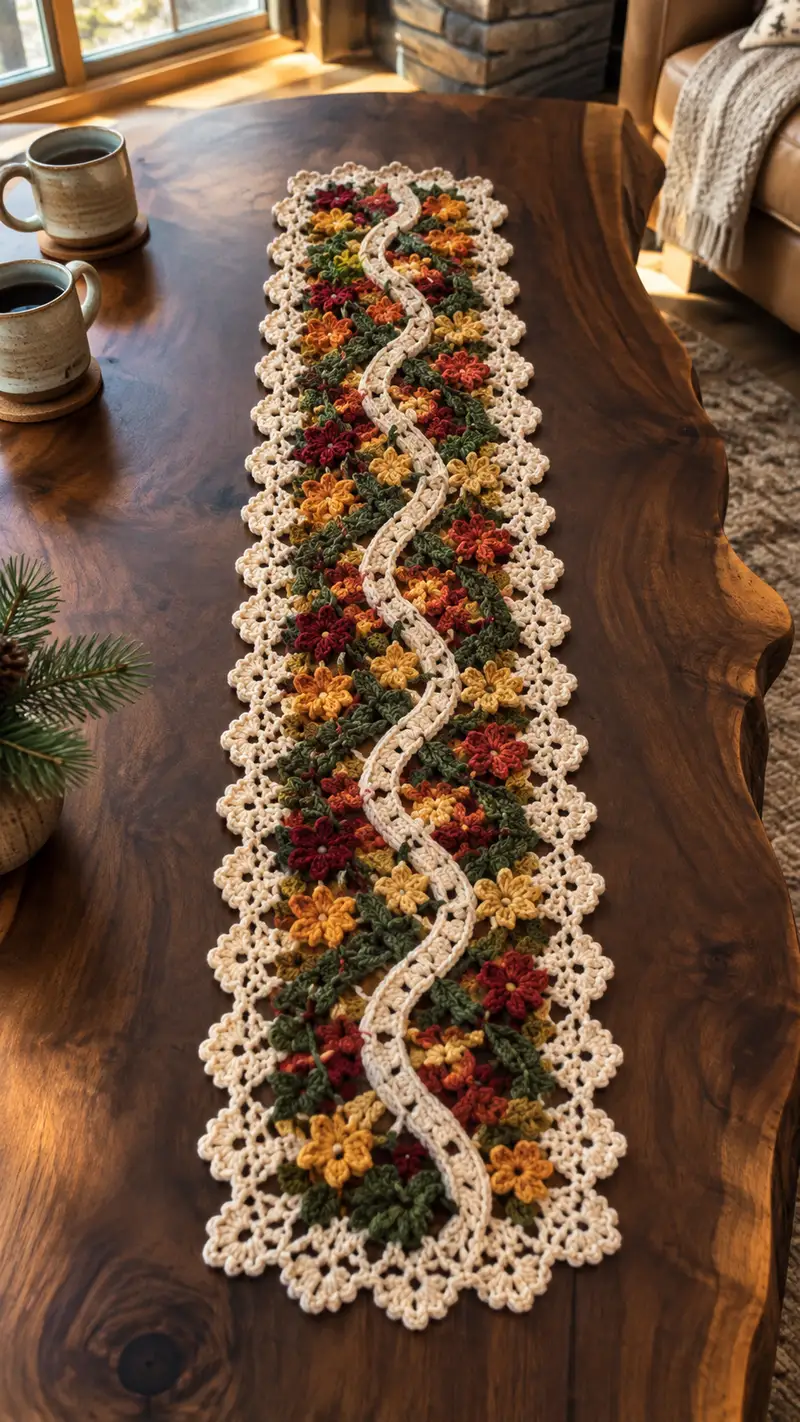
A long, elegant floral table runner knitted in crochet motifs with warm mustard, burgundy, olive and cream tones. Composed of repeat floral modules framed by a lacy cream border and a sinuous central braid, this runner brings autumnal charm to any wood table. The design uses small flower motifs, leaf rounds, and a delicate scalloped edge for a handcrafted farmhouse look.
Progress Tracker
0% Complete
— Pattern Notes :
Info :
Finished size shown: approximately 12" (30 cm) wide and 52" (132 cm) long. You can lengthen or shorten by adding or removing motif rows. Tension/gauge is flexible for a runner; aim for crisp petals and defined stitches. Use 4.0mm hook unless you prefer a denser fabric then try 3.5mm. Work in US crochet terms.
Info :
Puff stitch (used for petals): yarn over, insert hook into indicated stitch, yarn over, pull up a loop (repeat 4 or 5 times depending on puff height), yarn over and pull through all loops on hook, ch1 to close puff. Secure puff stitches by working a sc or sl st into next designated stitch as directed.
— Small Floral Motif (Make many) :
Round 1 :
6 sc in magic ring (6)
Round 3 :
(1 sc, inc) x 6 (18)
Info :
Change to flower petal color now. Fasten off center color if you are changing to a contrasting petal color, leaving a 6" tail to weave in later.
Round 4 :
*ch 3, skip next st, sc in next st; rep from * around to form 6 ch-3 loops, join with sl st to first sc base (18 base loops counted)
Round 5 :
Work petals into each ch-3 loop: *(yarn over, insert hook into ch-3 loop, pull up loop) repeat 5 times, yarn over and pull through all 5 loops, ch1 to close puff, sl st into base sc between loops; rep from * around (6 puff petals)
Info :
Make petals consistently tall by pulling loops to same height before finishing puff. Leave petal cluster color tail for weaving if desired.
Round 6 :
Join leaf/green color into any base sc. (ch1, sc in same st, ch4, sc in next st) x 6 - this creates 6 ch-4 spaces between petals; end with sl st to join (12 sc overall plus ch spaces)
Round 7 :
Into each ch-4 space: (sc, hdc, 3 dc, hdc, sc) - work clusters to form small leaf arches. Fasten off leaf color and weave tails (6 leaf arches)
Round 8 :
With background olive, join into any sc and work 1 sc in each sc and 3 sc across each leaf cluster to create an even round. You should have 30 sc around (30)
Round 9 :
(2 sc, inc) x 10 (40)
Info :
Round 9 expands motif into a small square base to allow joining. If your count differs slightly, adjust by adding extra sc evenly spaced to reach a smooth edge.
Round 10 :
1 sc in each st (40)
Round 11 :
*sc in next 5 sts, ch 3, skip 2 sts; rep from * around to form corner spaces, join (this produces 8 corner/chain spaces for joining later)
Info :
Fasten off, leaving a long tail (approx 18"/45cm) for joining. Make as many small floral motifs as needed to create runner length. The runner photo uses 14 motifs across lengthwise placement interlocked with join motifs; your count may vary depending on spacing.
— Connector Leaf Square (Make between floral motifs) :
Round 1 :
Ch 4, sl st to form ring, ch 1, 8 sc into ring (8)
Round 3 :
(1 sc, inc) x 8 (24)
Round 4 :
Change to olive. 1 sc in each st (24)
Round 5 :
*ch 3, sk 1, sc in next 3 sts; rep from * around to form 6 small chain spaces for leaf shaping
Round 6 :
In each ch-3 space: (sc, hdc, 3 dc, hdc, sc) to make small leaf fans, join and fasten off (24 fans total around)
Info :
These connector squares bridge the gaps between flower motifs and help stabilize the lattice. Make enough to fit between every pair of flowers lengthwise and between the rows of motifs across the runner.
— Lattice Joining Row (Join motifs into a panel) :
Info :
Join motifs in rows using join-as-you-go method or by sewing with whipstitch. For join-as-you-go, align motifs and connector squares so that ch-3 corner spaces meet; join with sl st through both motifs' spaces as you work a final round.
Round 1 :
With cream for join round, pick one floral motif as base and join yarn in any corner sc. *ch 1, sc in next 3 sts, ch 3, join into corresponding ch-3 space of adjacent motif with sl st, continue sc in next 3 sts; rep across adjacent edges to secure motifs together. Work entire outer edge of each motif this way to create a continuous panel.
Info :
When joining along straight edges, make sl st through corner ch-3 spaces of both motifs. For staggered joins, use connector leaf squares and align petals for a balanced look. Take time to pin panels flat before joining to prevent ruffling or skew.
Round 2 :
After joining adjacent motifs into a row, work a sc round around the outside of the entire row: 1 sc in each sc and 3 sc across fan clusters to even the edge. This produces a consistent edge count for the border round (total edge stitches depend on number of motifs; adjust evenly).
Info :
Work across entire panel lengthwise until you have a runner panel of desired length. The runner in the photo uses four repeat motif rows with seven motifs each lengthwise; adjust as needed for your table size.
— Lacy Cream Border (Edge scallop) :
Info :
This border frames the runner with a repeating scallop of cream. Work around entire rectangular panel after motifs are joined and the central braid has been attached (or attach braid after border if preferred). The following scallop repeat is worked into the sc round previously made.
Round 1 :
Join cream at any outer sc. *ch 3, sk next sc, sl st in next sc; rep from * across to make small picot chain spaces; end to align at a corner. (This creates small chains along entire edge)
Round 2 :
Into each ch-3 picot: (sc, hdc, 5 dc, hdc, sc) to form a scallop shell; join with sl st between shells. Repeat around entire perimeter, working 3 sc in corner shells to turn the corner smoothly. You should have an even number of shells along each side.
Info :
Count shells on each side and add or remove shells at corners to make both long sides symmetrical. When working shells across corners, treat 3 stitches as a corner cluster to keep the scallop continuous.
Round 3 :
For decorative edging: *sl st into top of shell, ch3, 3 sc into space between shells, ch3, sl st into next shell top; rep around to add lacy openwork. Fasten off and weave ends neatly.
Info :
Blocking will open the scallops and even the edge; pin each scallop evenly spaced and steam or wet-block to shape.
— Center Serpentine Braid (Make 1 long piece) :
Info :
The center braid is worked as a long sinuous strip, then basted and sewn along the center of the assembled runner. Work the braid slightly narrower than the runner width center so it nests into the motifs.
Round 1 :
With cream, ch 6, sl st to form short chain. Row 1 (foundation): sc into 2nd ch from hook and next 4 chs (5 sc)
Row 2 :
Ch 1, turn: sc in each st across (5 sc)
Info :
We will create a gentle wave by alternating increases and decreases and offsetting when seaming to runner. Make a long strip by repeating the following 10-row wave sequence many times until braid reaches runner length.
Row 3 :
Ch 1, turn: (sc, inc in next st, sc, sc) (6 sts total)
Row 4 :
Ch 1, turn: sc in each st (6 sc)
Info :
Changing hook to 3.5mm for braid is optional for a denser cord. Carry a consistent tension so the braid sits flat and will sew evenly.
Row 5 :
Ch 1, turn: (sc, sc, dec over next 2 sts) (5 sc)
Row 6 :
Ch 1, turn: sc in each st (5 sc)
Row 7 :
Ch 1, turn: (sc, inc, sc, sc) (6 sc)
Row 8 :
Ch 1, turn: sc in each st (6 sc)
Row 9 :
Ch 1, turn: (sc, sc, dec) (5 sc)
Row 10 :
Ch1, turn: sc in each st (5 sc) - repeat Rows 3-10 continuously for the entire braid length. For a runner of 52" aim for approximately 120-140 repeats depending on wave frequency; this braid is worked long and then shaped gently in an S when sewing.
Info :
To produce a thicker raised braid, work a second identical strip and whip-stitch both together along long edges before shaping into an S curve; this will create a raised cord. If single layer is preferred, block flat and then baste in place.
— Decorative Raised Ridge (Optional) :
Round 1 :
With cream, join to one edge of braid and work crab stitch (reverse sc) along long edge to create texture. Work across both long edges if a raised ridge is desired.
Info :
The crab stitch is worked left to right (reverse sc) and gives a decorative rope-like finish. It also helps prevent the braid from stretching during attachment.
— Final Assembly & Attachment :
Info :
Block all motifs and braid flat. Lay runner panel on blocking board and pin to shape, making edges square and motifs flat. Lay braid in an S curve down the center and pin loosely to visualize placement before sewing.
Step :
Baste the braid to the runner using loose running stitches with matching cream yarn so that the braid is held in place temporarily. Make sure the S curve flows naturally and centers on the runner panel.
Step :
Sew braid permanently with whip stitch or ladder stitch along both long edges. Use small, even stitches catching the underlying motif round and the braid edge. Keep tension moderate to avoid puckering.
Info :
When sewing, aim to catch only the top loops of the motif round, not deep into the motif, to preserve the 3D petals. For extra security, sew through both the braid and the motif panel twice in high-stress spots near the runner ends.
Step :
Once the braid is securely sewn, work the cream scalloped border around the outside edge of the entire runner to hide join tails and give a finished look. Block again after border to open shells and set final shape.
Info :
Weave in all ends on the wrong side of the runner. Trim any extra fibers and press lightly if needed. Consider attaching small felt pads under braided points to protect tabletop if runner will be used under hot items.
— Variation Notes & Size Adjustment :
Info :
To change runner width, add or remove motif columns; each motif with connector squares adds approximately 3-4" to width depending on chosen spacing. To lengthen, add rows of motifs and corresponding connector squares and border shells. Use same border repeat to keep proportions.
Info :
For a denser, more table-protecting runner, work all motifs and braid with 3.5mm hook and tighter tension. For a drapier, softer runner, use 4.5mm and softer yarn for a more flexible fabric.
This warm floral table runner pairs vintage lace with joyful autumn colors for a welcoming tabletop accent. Each motif comes together to create a cozy, handcrafted statement piece you will love displaying. The detailed instructions make it easy to customize size and color, so you can tailor it to your home or gift recipients. 🧶🍂✨