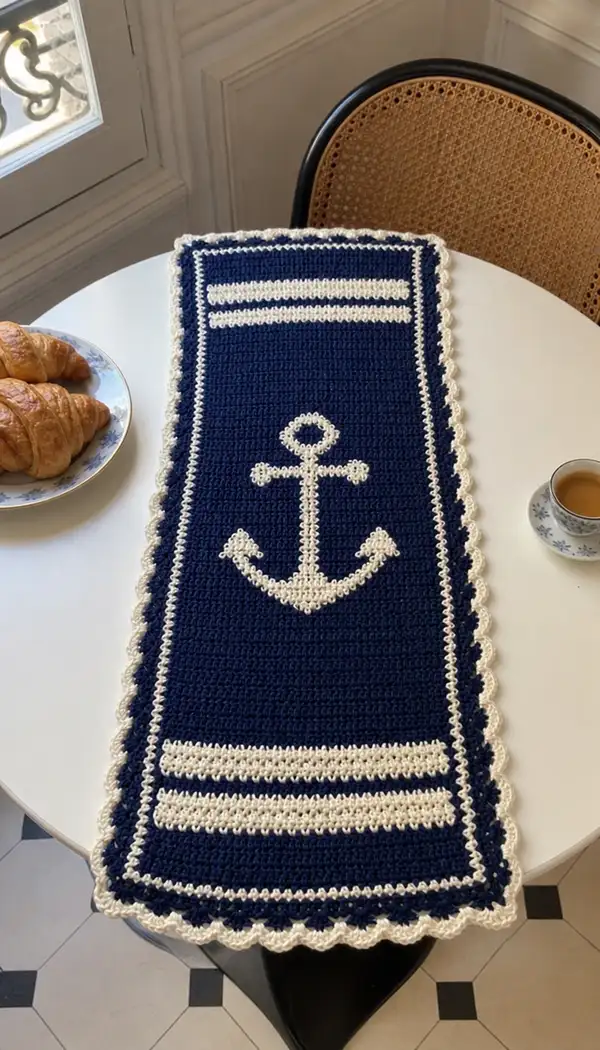
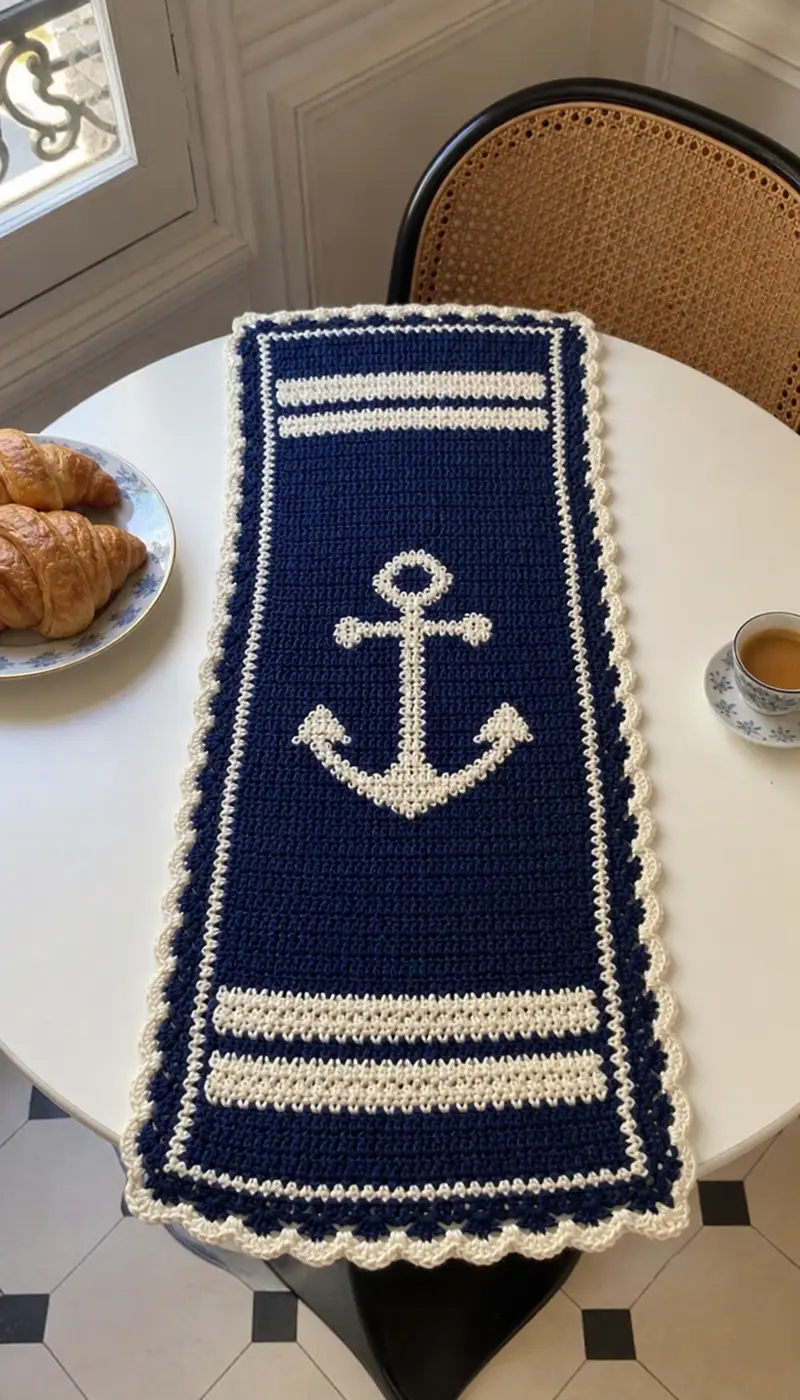
Create a classic nautical table runner featuring a deep navy background, crisp cream anchor motif, twin cream stripes and a scalloped edge. This rectangular runner uses single crochet rows for a dense fabric with a separate crocheted anchor applique9 sewn on for a clean graphic look. Finished result is elegant, coastal, and perfect for kitchen tables or entryway consoles.
Progress Tracker
0% Complete
— Materials & Gauge :
Info :
Gauge is not critical for this decorative table runner but for reference: 18 sc x 20 rows = 10cm x 10cm in worsted weight yarn using 4.0mm hook. The sample measures approximately 34cm wide x 92cm long (13.5in x 36in). If you change yarn weight or hook, adjust foundation chain to maintain proportions.
— Foundation Chain & Base Row :
Round 1 :
Ch 62. (This gives 61 sc across when working into 2nd ch from hook). Turn.
Round 2 :
Starting in 2nd ch from hook, 1 sc in each ch across (61). Turn. (61)
Info :
Check your foundation: you should have 61 stitches across. This width was chosen to create an even center for the anchor applique9 later. If you'd like a wider or narrower runner, add or subtract multiples of 2 chains keeping the proportions in mind.
— Border Setup Rows (Create inner cream line) :
Round 3 :
Ch 1, change to cream yarn, 1 sc in each st across (61). Turn. (61)
Round 4 :
Ch 1, 1 sc in each st BLO with cream (61) to create a subtle ridge for the inner border. Turn. (61)
Round 5 :
Ch 1, change to navy, 1 sc in each st across (61). Turn. (61)
Info :
These first five rows create a narrow cream inner line framed by a ridge. Use a color carry method to avoid many ends: when you change color, fasten off the unused color leaving a 15-20cm tail to weave in later OR carry it along the wrong side if you prefer to avoid ends; secure floats every 6-8 sts.
— Main Panel: Even Single Crochet Rows (Establish Background) :
Round 6-18 :
Ch 1, 1 sc in each st across (61). Turn. Repeat for 13 rows total (Rounds 6 through 18) to build a solid navy field at the top of the runner. (61)
Info :
Work evenly until you reach the area where the top pair of cream stripes will be placed. Keep tension consistent; place a stitch marker at the last stitch of every 10th row to check your row counts and keep the rectangle straight.
— Top Stripe Band (Pair of horizontal stripes) :
Round 19 :
Ch 1, change to cream, 1 sc in each st across (61). Turn. (61)
Round 20 :
Ch 1, 1 sc in each st across BLO with cream to create a crisp textured stripe (61). Turn. (61)
Round 21 :
Ch 1, change to navy, 1 sc in each st across (61). Turn. (61)
Info :
Repeat the same pair of cream rows at the other end of the panel later for visual balance. Carry the navy yarn up the wrong side when changing to cream to minimize ends, or fasten off and weave tails neatly to the wrong side.
— Main Body: Navy Field Before Anchor Placement :
Round 22-34 :
Ch 1, 1 sc in each st across (61). Turn. Work 13 even sc rows in navy to move to the center placement of the anchor applique9. (61)
Round 35 :
Ch 1, place a removable stitch marker in the central stitch (31st stitch) on this row to mark the horizontal center of the runner. 1 sc in each st across (61). Turn. (61)
Info :
Marking the center stitch now will make it straightforward to position the anchor applique9 later. If you notice any hip or bias in the fabric, you can add or remove a tiny tension adjustment in the central rows to correct for it.
— Main Body: Navy Field After Anchor Position Marker :
Round 36-46 :
Ch 1, 1 sc in each st across (61). Turn. Work 11 even sc rows to form the lower half of the anchor placement area. (61)
Info :
At the end of these rows you should have a clear rectangle area large enough to accept the applique9 anchor. Place the runner flat and measure from the top stripe band; the center marker should be vertically centered in the panel heightwise where you want the anchor to sit.
— Anchor Applique9: Materials & Approach :
Info :
The anchor will be crocheted separately in cream and applique9 sewn onto the navy panel. This method gives a clean outline and slight raised texture. Work the anchor in rounds and small rows to achieve the classic anchor silhouette: ring at the top, long shaft, crossbar and flukes at the bottom. We recommend using 3.5mm or 4.0mm hook for the applique9 so the fabric matches the density of the runner.
— Anchor Applique9 :
Round A1 :
With cream yarn, make a magic ring. Ch 1, 6 sc in magic ring. (6)
Round A2 :
Inc in each st around (12). (12)
Round A3 :
(1 sc, inc) x 6 (18). (18)
Round A4 :
(2 sc, inc) x 6 (24). (24)
Info :
These first 4 rounds form the small circular top ring of the anchor. You will later leave a small center hole to represent the anchor ring by either leaving the center unstuffed and sewing around it, or by forming a small closed loop during later shaping.
Round A5 :
1 sc in each st around (24). (24)
Round A6 :
Work 6 sc, fold to create a small opening and join with sl st to create the slight ring opening, then continue 6 sc, sl st join — OR simply 1 sc in each st around for a solid ring (24). (24)
Round A7 :
Fasten off the ring leaving a 30cm tail for sewing. We will now construct a vertical shaft and crossbar attached to the ring, worked flat from the ring center downwards as two rectangles joined in the center.
Round A8 :
Rejoin yarn at the center bottom of the ring on the RS. Ch 1, work 6 sc into the center space directly below ring to make the top of the shaft. Turn. (6)
Round A9 :
Ch 1, inc, 4 sc, inc (8). Turn. (8)
Round A10 :
Ch 1, 1 sc in each st across (8). Turn. (8)
Info :
These short rows create a sturdy central shaft. Keep the rows dense to ensure the anchor appears crisp on the navy background. Use a slightly smaller hook for the applique9 if you'd like an even neater edge.
Round A11 :
Ch 1, inc, 6 sc, inc (10). Turn. (10)
Round A12 :
Ch 1, 1 sc in each st across (10). Turn. (10)
Round A13 :
Ch 1, 1 sc in each st across (10). Turn. (10)
Round A14 :
Ch 1, dec, 6 sc, dec (8). Turn. (8)
Round A15 :
Ch 1, 1 sc in each st across (8). Turn. (8)
Round A16 :
Ch 1, dec, 4 sc, dec (6). Turn. (6)
Info :
At this stage the vertical shaft is formed as a narrow column; ensure both sides are symmetrical. Keep the RS facing you while working these short rows for easier shaping reference. You may lightly stuff the shaft with a tiny pinch of fiberfill if you want a slightly raised look, but for the flat applique9 leave it mostly unfilled.
Round A17 :
Ch 1, 1 sc in each st across (6). Turn. (6)
Round A18 :
Ch 1, work 3 sc, ch 6, sl st into row where the crossbar will occur (to create a thin crossbar), then continue 3 sc (6 + chain crossbar). Turn.
Round A19 :
Work across the chain crossbar with 1 sc in each chain on the next pass to build its thickness: 1 sc in each of 6 chains, rejoin to the shaft, continue sc across remaining stitches. (Approx 12-14 total depending on how you anchor).
Info :
The crossbar can be constructed as a chain thickened over several rows or as a separate small tube sewn across. Choose a method you prefer; here we create a chain then sc across it to make a flat bar that reads clearly on the navy background.
Round A20 :
Continue 2-3 sc rows over both the shaft and crossbar to ensure the bar is solid and balanced. Keep turning and working short rows until it measures visually similar to the photo proportionally (about 3-4 rows thick). (6-14 depending)
Round A21 :
Begin shaping the flukes: from the bottom center of the shaft, mark center stitch; ch 1 and work 10 sc to the right to begin right fluke base, sl st back into shaft area to join. Fasten off right fluke and mirror for the left fluke with fresh tail. Alternatively, continue working both flukes in one long pass by turning at the midline and building outward rows. (fluke bases approx 10 sts each)
Round A22 :
Right fluke: rejoin cream yarn at the right bottom corner. Ch 1, work 1 sc in each of 10 sts, inc at the outer edge to create a triangular tip, 1 sc back toward center, sl st into shaft. Fasten off. (12)
Round A23 :
Mirror left fluke exactly: join cream at left bottom corner and repeat shaping to match the right. Fasten off. (12)
Info :
Working the flukes separately allows you to mirror them precisely. Pin each fluke to the runner first to test scale. Trim and weave in all small tails securely after sewing.
Round A24 :
Stitch refinement: use cream yarn to go back around the ring and shaft outline with single crochet slip stitched into place to neaten edges: 1 sc evenly around outer ring and along both sides of the shaft and crossbar. Fasten off and leave long tail for sewing the applique9 to the runner.
Info :
You now have an anchor applique9 composed of a small ring, a defined shaft with a crossbar and two flukes. The exact stitch counts in the applique9 will vary slightly based on your shaping choices; the important part is that the finished applique9 measures roughly 21-25 stitches wide and 35-42 rows tall relative to the runner's stitch gauge. Measure against the runner and adjust if necessary.
— Positioning and Sewing the Anchor Applique9 :
Info :
Place the anchor with its center aligning with the runner's center stitch (stitch marker placed at Round 35 earlier). The top of the anchor ring should sit approximately 14-18 rows below the top stripe band depending on desired spacing. Pin the applique9 securely, tacking it with 3-4 small stitches (one at ring top, one at shaft midpoint, two at flukes) before completing the full sew to ensure perfect placement.
Round S1 :
Sew the anchor around the outer edge using the long tail and a yarn needle with small whip stitches or mattress stitch for an invisible join. Anchor is sewn through both layers - secure each major point (ring, crossbar ends, fluke tips) with extra stitches. Weave in ends to the WS. (sewing process)
Info :
If you'd prefer a flatter look you can instead use surface slip stitch embroidery in cream to create the anchor directly onto the navy field rather than using a sewn applique9. That method calls for careful tapestry-style colorwork row by row and carrying yarn across the wrong side.
— Lower Stripe Band (Repeat of Top Stripes) :
Round 47 :
From where you left off earlier on the main body (Round 46), continue 1 sc in each st across (61) for 3 rows if needed until you reach the bottom stripe placement. Turn. (61)
Round 48 :
Ch 1, change to cream, 1 sc in each st across (61). Turn. (61)
Round 49 :
Ch 1, 1 sc in each st across BLO with cream (61). Turn. (61)
Round 50 :
Ch 1, change to navy, 1 sc in each st across (61). Turn. (61)
Info :
If you prefer the stripes to be thicker or narrower, you can add or remove rows in pairs so the visual balance matches your table. Always keep the same number of cream rows at the top and bottom for symmetry.
— Inner Contrast Line & Prepare for Outer Scallop Edge :
Round 51 :
Ch 1, switch to cream, 1 sc in each st across (61). Turn. (61)
Round 52 :
Ch 1, 1 sc in each st BLO with cream (61) to form the inner raised line. Turn. (61)
Info :
Fasten off the cream yarn here if you prefer to pick it up later for the scalloped edge. Otherwise carry the cream along the wrong side for a cleaner transition. Before you begin the scalloped outer rounds, ensure the runner lies flat; if necessary lightly block to even the corners.
— Outer Scallop Edge: Setup Row :
Round 53 :
With navy, ch 1, sc in each st across, placing 3 sc in each corner stitch to ensure neat corners (61 + corner increases). At the end of the row, sl st to the first sc to create a continuous edging round. (61 + corner adjustments)
Round 54 :
Ch 1, with cream, sc evenly around the edge placing 3 sc in each corner st to keep corners square. You will be working along the side edges now rather than across rows; aim for one sc per row-end stitch. Join with sl st. (edge stitches roughly equal to length of runner around)
Info :
Working in the round around a rectangular piece requires that you put extra sc into corner stitches (3 sc per corner) to avoid warping. Keep your tension even and count your sc per side to ensure a balanced number of scallops later.
— Scallop Rounds (Decorative Outer Shell) :
Completing this nautical runner brings a little maritime elegance to any table — the navy field and crisp cream anchor are timeless. Each neat sc row and scalloped edge adds handcrafted charm, and the applique9 anchor gives it personality and dimension. I hope you enjoy stitching every stripe and scallop as much as I enjoyed designing the layout. 🧶⚓️ Display it proudly or gift it to someone who loves coastal style — it's sure to become a favorite accent piece. 🌊