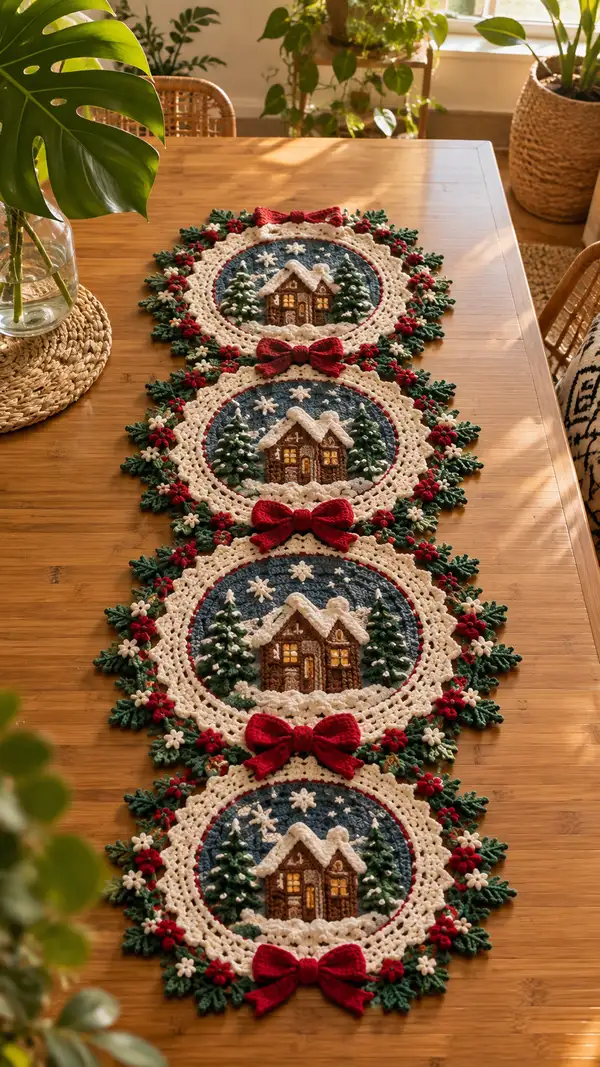
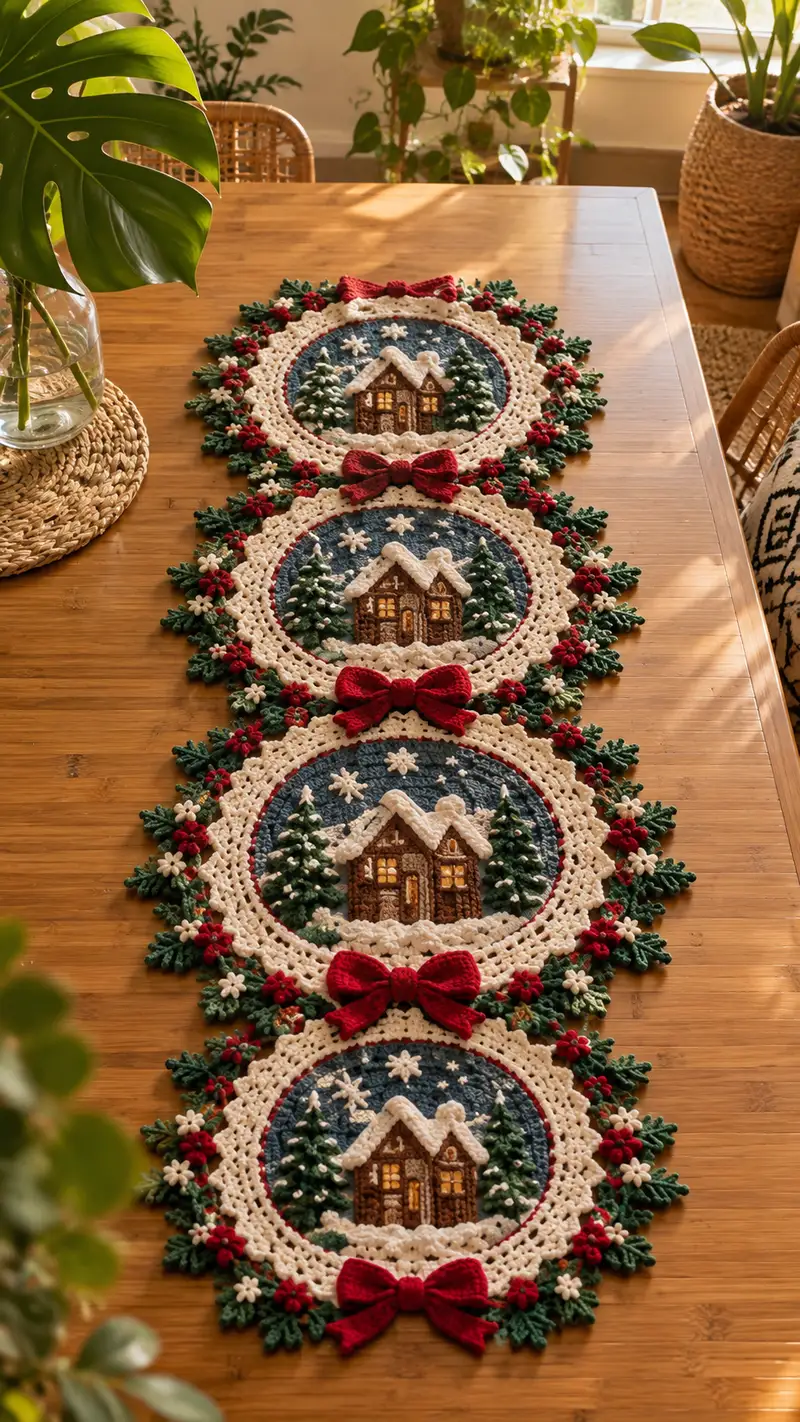
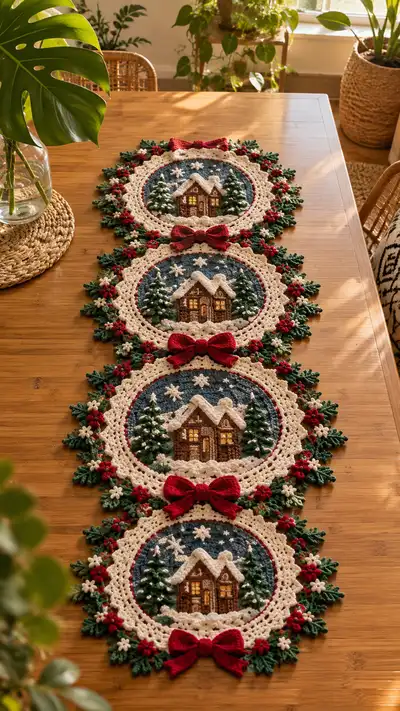
Create a festive, heirloom-quality table runner featuring four circular snowy cottage medallions linked by elegant bows and holly. Each round motif has a deep navy sky, a detailed 3D cottage applique with snowy roof, paired pine trees, cream lace frame, green foliage and red floral accents. The runner finishes with a scalloped outer border and three-dimensional bows between motifs for a classic holiday centerpiece. This pattern includes step-by-step construction, applique pieces, and joining instructions for a polished finished piece.
Progress Tracker
0% Complete
— Overview :
Info :
This runner is made from four identical circular medallions arranged in a linear row and linked by three-dimensional bows. Each medallion is worked in the round for the navy sky, then layered with separate appliques: snowy bank, cottage pieces, twin pine trees, small stars, and finally surrounded with cream lace and holly/flowers. Make one complete medallion and all embellishments, then replicate for four motifs. Join motifs with bows and add outer scalloped edge. Work with worsted yarn and recommended hook sizes to achieve stable, textured pieces.
— Navy Background Disc :
Round 1 :
6 sc in magic ring (6)
Round 3 :
(1 sc, inc) x 6 (18)
Round 4 :
(2 sc, inc) x 6 (24)
Round 5 :
(3 sc, inc) x 6 (30)
Round 6 :
(4 sc, inc) x 6 (36)
Round 7 :
(5 sc, inc) x 6 (42)
Round 8 :
(6 sc, inc) x 6 (48)
Round 9 :
(7 sc, inc) x 6 (54)
Round 10 :
(8 sc, inc) x 6 (60)
Round 11-14 :
1 sc in each st (60)
Info :
These rounds create the deep navy sky. Keep tension even — this disc will serve as the canvas for applique. If your disk measures larger/smaller, adjust rounds 9-14 to match desired diameter approximately 14-16 cm for each motif.
— Inner Red Accent Ring :
Info :
Join red yarn with a sl st into any stitch on Round 10 of navy disc. Work a narrow accented ring to frame the scene.
Round 1 :
Ch 1, 1 sc in same st, *ch1, skip 1 st, 1 sc in next* around to create delicate picot-like spacing (60)
Round 2 :
1 sc in each st and ch-1 space (60)
Info :
Fasten off red and weave ends behind disc. This thin red ring emphasizes the round frame — place it so it sits inside the cream lace to be added later.
— Snowbank Applique (Make 1 per medallion) :
Round 1 :
With cream yarn, 6 sc in magic ring (6)
Round 3 :
(1 sc, inc) x 6 (18)
Round 4 :
(2 sc, inc) x 6 (24)
Round 5 :
(3 sc, inc) x 6 (30)
Round 6 :
1 sc in each st (30)
Round 7 :
Working in FLO, *ch2, skip 1 st, sl st in next* around to create scalloped snow edge (30)
Round 8 :
1 sl st into every third stitch across the scallop points to flatten slightly and produce a decorative snow mound (30)
Round 9 :
Attach to lower front of navy disc using whip stitch across bottom 18-20 stitches so snow sits roughly across lower third of disc. Fasten off leaving tail for weaving (30)
Info :
Make the snowbank slightly domed: add a small amount of fiberfill between rounds 5-6 if you want a raised snow mound. Sew into place with even stitches and position the top of snow to just under the door of the cottage.
— Cottage Walls Applique :
Info :
The cottage is made from several small flat pieces: base wall rectangle, roof pieces (two slopes), door and window insets. Use light brown for wall and dark brown for roof accents. Work flat rows for the base wall.
Round 1 :
Using light brown, foundation chain 18, turn, sc in second ch from hook and across (17)
Round 2-6 :
Ch1, turn, 1 sc in each st (17) — repeat for 5 rows to create a rectangle approx 5 rows high
Round 7 :
Ch1, turn, (1 sc, dec) x 5, 1 sc (12) — begin tapering sides slightly to create house width
Round 8 :
Ch1, turn, 1 sc in each st (12)
Round 9 :
Ch1, turn, dec across to leave 6 sts (6)
Info :
Fasten off leaving long tail for sewing. Block the piece lightly — the rectangle will be appliqued centered above the snowbank. You can embroider log lines by running darker brown yarn in short horizontal stitches to suggest timber.
— Cottage Roof (Make 2 joined) :
Round 1 :
With dark brown, 6 sc in magic ring (6)
Round 3 :
(1 sc, inc) x 6 (18)
Round 4 :
(2 sc, inc) x 6 (24)
Round 5 :
1 sc in each st (24)
Round 6 :
Fold piece in half longways and join sides with sl sts to form peaked roof ridge, leaving lower edge open to sew onto walls (12)
Info :
Make two roof halves and join them across the top center with a row of sc to form a single peaked roof that fits over the base wall. Add small cream surface crochet to simulate snow on the roof ridge.
— Door and Window Insets :
Round 1 :
Door: Using dark brown, ch6, sc in 2nd ch from hook and across (5)
Round 2-4 :
Ch1, turn, 1 sc in each st (5) — make door 3 rows high, finish with a tiny sl st at arch top if you want curved door
Round 5 :
Make two windows: using gold yarn, mr, 6 sc for each window, fasten off leaving tails for sewing (6 each)
Info :
Sew door and windows onto the wall piece before attaching the roof. Windows should be centered at upper half of the wall; sew them with small whip stitches and add a tiny cross of brown embroidery to divide panes. Back windows with small piece of gold yarn or felt for the warm glow effect.
— Cottage Assembly :
Round 1 :
Position wall on top of snowbank about 5-6 stitches above the snow edge, pin in place and sew with yarn needle using long tail (Info: use mattress or whip stitch for flat invisible join)
Round 2 :
Position roof over wall so roof eaves overlap snow slightly, sew lower edge to top of wall with even stitches (Info: place small dots of cream yarn for snow on roof)
Info :
Use small, close stitches so the roof and wall edges are neat and secure. Lightly stuff a tiny amount into the roof peak before closing to keep the roof dimensional. Add stitched window glow behind window openings using mustard/gold yarn woven through from back.
— Pine Tree (Make 2 per medallion) :
Round 1 :
With forest green, 6 sc in magic ring (6)
Round 3 :
(1 sc, inc) x 6 (18)
Round 4 :
(2 sc, inc) x 6 (24)
Round 5 :
1 sc in each st (24)
Round 6 :
Switch to FLO, 1 sc in each st for textured branch ridges (24)
Round 7 :
Working in BLO, *sl st in next st, ch3, 3 dc in same st* around to create layered branch points (24 clusters)
Round 8 :
Make trunk: with brown, ch3, 3 sc in second ch from hook and next ch; fasten off and sew trunk to bottom of tree (2)
Round 9 :
Lightly embellish tree with small knots of cream yarn as snow: pull tiny loops and secure with knots across branches (Info: do not overdo—aim for natural speckling)
Info :
Position trees on either side of the cottage and sew securely, tucking trunk under the snowbank slightly so trees appear rooted in the snow. Use a dab of glue inside the stitch for extra hold if needed.
— Snowflake & Star Embellishments :
Round 1 :
With white, mr, ch1, 6 sc in ring, pull tight, sl st to close and fasten off — make 6 small stars per medallion for sky (6)
Round 2 :
For larger snowflake: mr, ch4, sl st into ring, repeat 6 times to make 6 arms. On each arm: ch3, sl st back into arm base to form tiny textured snow star
Info :
Sew stars into navy sky (rounds 11-14 area) with white yarn. Distribute evenly: one above house center and two each side. This small detail gives a snowy night effect.
— Cream Lace Frame :
Round 1 :
Join cream yarn to outer edge of navy disc on Round 14. Ch3 (counts as dc), *skip 1 st, dc in next st, ch1* around (60)
Round 2 :
Ch1, 1 sc in each st and ch-1 space around to fill and even the edge (60)
Round 3 :
*(3 dc, ch2, 3 dc) in same st, skip 3 sts, sc in next st* repeat around to create shell scallops (approx 12 shells)
Round 4 :
Ch1, 1 sc in each st across to secure shell bases (60)
Round 5 :
*(1 sc, ch3, 1 sc) in top of each shell to make open lacy loops* around (12 loops)
Round 6-8 :
1 sc in each st (60) — these rounds build the thickness of the lace frame to give a clear border for attaching holly
Info :
Adjust shell spacing to keep even. The lace is decorative and must sit flat. Block this frame flat before attaching holly and bows so edges align neatly with adjacent medallions.
— Holly Leaves (Make multiple clusters) :
Round 1 :
With forest green, ch6, sl st back along chain to create a small leaf stalk; repeat 6 times to create a single fuller leaf cluster (6 leaves per cluster)
Round 2 :
For each leaf: ch4, 1 sc in second ch from hook, 1 hdc in next, 1 dc in top ch, sl st back to base; repeat to make complete leaf shape across cluster
Round 3 :
Make 8-10 leaf clusters per medallion to frame outer scallops at even intervals
Info :
Sew leaf clusters between shell scallops so foliage peeks beyond the lace edge. Vary orientation for a natural look. Use small stitches to anchor each leaf at its base.
— Berry & Red Flower Clusters :
Round 1 :
With red, mr, 6 sc in ring, pull tight to form berry (6)
Round 2 :
Make small 5-petal flower: with red, ch5, sl st into first to make ring, *ch3, sl st* 5 times to form petals; fasten off (5 petals)
Round 3 :
Sew 3 berries clustered with 1 flower at intervals around medallion between leaf clusters (Info: alternate single berries and pairs for visual rhythm)
Info :
Position berry clusters to create a wreath-like effect. Secure each berry and flower with small whip stitches through lace and navy base, hiding tails neatly behind lace.
— Small White Flowers (Accent) :
Round 1 :
With white, ch5, sl st into first, *ch2, sl st* repeat 6 times to create tiny star flowers (6)
Round 2 :
Sew these in the gaps between berries and leaves to lighten and balance the color palette (Info: place 6-8 per medallion)
Info :
These small white flowers are delicate — use a thinner hook if you prefer smaller flowers. They break up the dark navy and repeat the snow motif visually around the frame.
— Red Bow (3D, Make 3 for joining positions) :
Round 1 :
With red, ch20, sc in 2nd ch from hook and across to form long strip (19)
Round 2-6 :
Ch1, turn, 1 sc in each st (19) — repeat for 5 rows to make stout bow loops
Round 7 :
Fold strip in half lengthwise and sew or sl st ends to form a loop; flatten center and pinch to form bow shape (Info: add a small bit of stuffing in each loop for fullness)
Round 8 :
With remaining red, make center knot: ch6, sc across (5), wrap around bow center and sew ends to secure (Info: leave long tails to sew bow to runner)
Round 9-12 :
Make bow tails: ch10, 1 sc across, fold and sew to bow back to complete bow tails (each tail 9 sc)
Round 13 :
Make three bows total — place between motifs (top edge between first/second and so on) and sew through lace frame on either side for a neat placement
Info :
Stuff bow loops lightly before final cinching for a plush look. Secure center knot tightly to maintain shape and hide stitch joins. You can also add a thin internal wire wrapped in yarn for more structure if desired.
— Joining Motifs & Runner Assembly :
Round 1 :
Lay first medallion flat. Place second medallion directly below with inner edges overlapping by approx 3-4 shells. Pin through shells at top and bottom to hold alignment
Round 2 :
Sew adjoining shells together using invisible ladder or whip stitch across 8-10 stitches to make a strong join between medallions (Info: use cream yarn to blend with lace)
Round 3 :
Repeat join for third and fourth medallions until you have four connected into a linear runner (Info: check alignment and lay flat to prevent twist)
Round 4 :
Sew one red bow between each join centered at seams using long tails from bow center to stitch to lace on both medallions; reinforce with hidden stitches into the navy backing for durability
Info :
When joining multiple motifs, keep the runner flat and blocked. Add small reinforcing stitches on the back of the seam to stabilize joins and prevent sagging at the seams when used as a table runner.
— Outer Scalloped Border & Final Edge :
Round 1 :
With cream, join to outermost point of lace shell and sc evenly around full runner edge to prepare for decorative scallops (count total edge stitches across four motifs and work sc evenly)
Round 2 :
*(3 dc, ch2, 3 dc) in designated outer points to create larger scallops at motif intersections and outer edges* repeat around entire runner
Round 3 :
1 sc between scallops to keep spacing even and neat (total stitches depend on overall runner perimeter)
Round 4 :
With green, work small leaf points from outer scallop bases: ch4, 1 sc in 2nd ch, hdc, dc, sl st to base — repeat every 3-4 sc for foliage fringe
Round 5 :
With red, make tiny berries and sew into gaps at outer edge between scallops for visual continuity with inner wreath clusters
Info :
Final blocking will flatten the scallops and align the runner. Spray lightly with water and pin to shape on blocking mat — allow to dry completely before trimming tails.
— Assembly & Finishing Touches :
Round 1 :
Weave in all ends on the back of the runner and secure with small backstitches where necessary. Trim any visible tails close to fabric after securing
Round 2 :
Check bows and holly clusters for symmetry: add tiny securing stitches on their back to prevent catching or shifting during use
Round 3 :
Optionally, add a few glass seed beads or tiny buttons to the centers of white flowers for extra sparkle — attach with strong thread and tiny stitches
Info :
Keep runner away from open flames and high-heat surfaces. For heavy use, consider sewing a thin felt backing to the underside of the runner to protect table finish and to help runner keep shape.
This Navy Snowy Cottage Runner brings nostalgic holiday charm to your table with layered texture and handcrafted detail. Each medallion is like a tiny framed winter tableau, finished with festive bows and holly for a truly special centerpiece. The modular construction lets you pace the project across several cozy evenings. 🧶🎄 Make one for your table or as a seasonal gift—every stitch is a memory in the making!