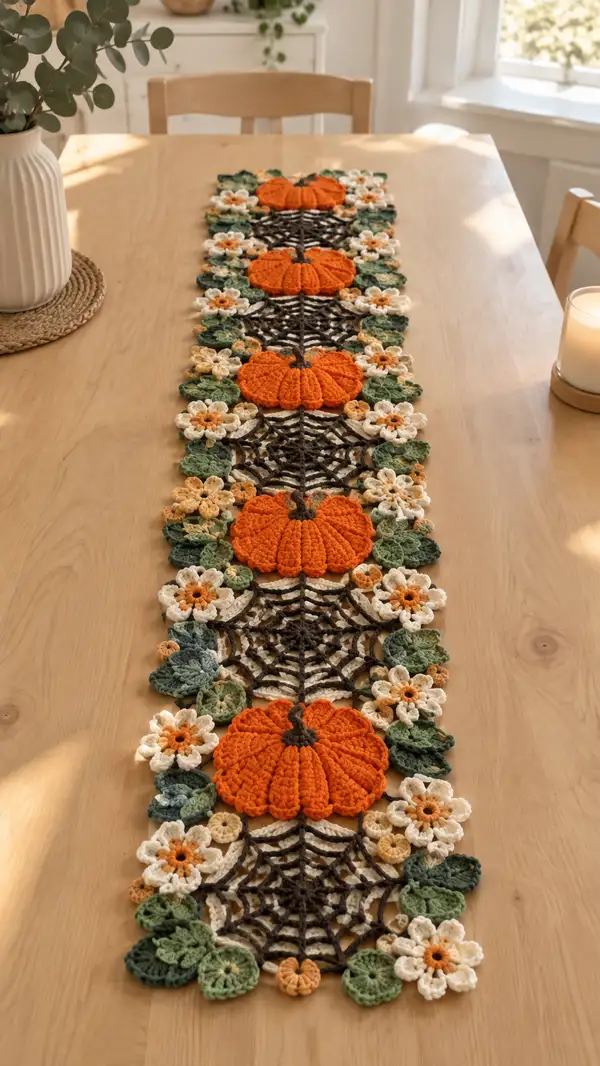
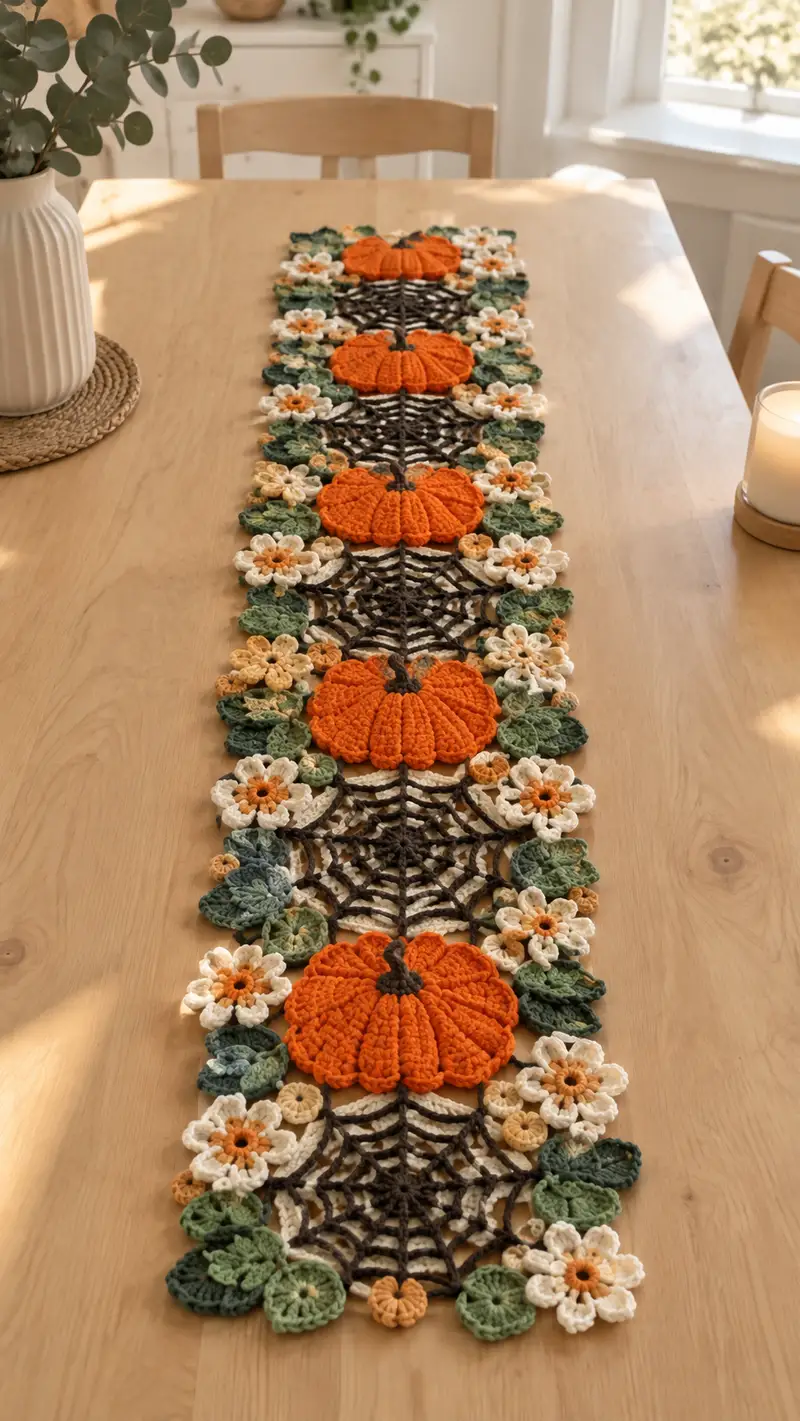
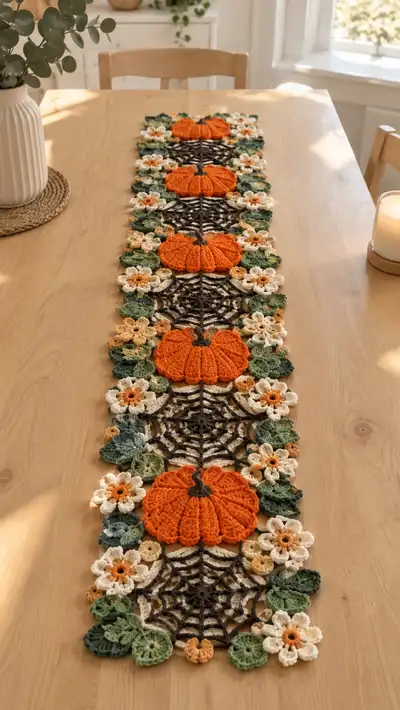
Create a cozy autumn table runner featuring plush 3D pumpkins, lacy spiderweb motifs, creamy layered flowers and leafy clusters. This long rectangular runner repeats a beautiful sequence of pumpkin + web + florals for an elegant seasonal centerpiece. Detailed motif instructions and assembly notes help you crochet and join every element for a stunning finished piece.
Progress Tracker
0% Complete
— Pumpkin (make 5 or as many as needed for runner) :
Round 1 :
6 sc in magic ring (6)
Round 3 :
(1 sc, inc) x6 (18)
Round 4 :
(2 sc, inc) x6 (24)
Round 5 :
(3 sc, inc) x6 (30)
Info :
These first rounds form a flat base for the pumpkin. Work loosely in the magic ring initial rounds so the disc lies flat; switch to slightly firmer tension for ribs.
Round 6 :
1 sc in each st (30)
Round 7 :
1 sc in each st (30)
Round 8 :
1 sc in each st (30)
Info :
Start counting for 8 ribs. The pumpkin is easiest when you plan 8 equal sections; mark every 3rd+st to identify segment boundaries (30 sts ÷ 8 ≈ 3 or 4 sts per segment). Place stitch markers at those boundaries now.
Round 9 :
*Fpdc around the post of the next sc to begin rib shaping, sc in next 3 sts* rep around to total repeat across 30 sts (30)
Round 10 :
*Fpdc in next 3 posts, sc in next st* rep around (30)
Round 11 :
*Fpdc x4, sc x1* rep around (30)
Info :
Front post double crochet rounds pull the fabric forward and create visible ribs. Work fpdc tightly but not overly so. If your fpdc pulls too much, ease tension slightly to keep rib definition without puckering.
Round 12 :
*Fpdc x5, sc x0* rep around to accent ribs (30)
Round 13 :
1 sc in each st (30)
Round 14 :
1 sc in each st (30)
Info :
We will add raised segments using puff stitches to exaggerate pumpkin lobes over the next rounds. Use the same stitch counts so the pumpkin stays circular while puff stitches add height.
Round 15 :
*(ch1, puff in next st, ch1, sk next 2 sts) repeat across to create eight puff clusters placed evenly; adjust spacing to place eight puffs around the pumpkin* (8 puff clusters)
Round 16 :
1 sc in each st (30)
Round 17 :
*(sc 3, dec) x6 to slightly decrease and create curvature toward top (24)
Info :
Begin light stuffing now. Insert small amounts of fiberfill into the pumpkin so the base remains slightly squat. Stuff each rib section gently between rounds to avoid lumps.
Round 18 :
(2 sc, 1 dec) x6 (18)
Round 19 :
(1 sc, 1 dec) x6 (12)
Info :
Continue stuffing firmly but not overly tight. The pumpkin should have a gentle dome. If using a dark brown for the stem, switch color before the next round.
Round 21 :
Fasten off leaving a long tail for sewing. Using the long tail, close the small opening with a yarn needle and weave the tail through the inside to cinch evenly. Weave tail inside and hide.
Round 22 :
Make pumpkin stem: Join dark brown in top center, ch2, 4 hdc in same st, ch1, turn work and hdc across to lengthen stem. Work 6 rows of hdc total then sl st to base and fasten off leaving tail for sewing.
Info :
Sew the stem to the top center of the pumpkin by threading the stem tail through the center and around the openings. Reinforce with several passes so the stem is secure and sits slightly angled.
Round 23 :
Optional surface embroidery: Using dark brown thread and yarn needle, couch a central line from stem to bottom and small curved lines along ribs to define segments; tie off ends securely.
— Spiderweb Motif (make repeating webs: 5 base webs for runner) :
Round 1 :
6 sc in magic ring (6)
Round 3 :
(1 sc, inc) x6 (18)
Round 4 :
(2 sc, inc) x6 (24)
Round 5 :
1 sc in each st (24)
Info :
We will convert the round fabric to a flat lacy web by building a star and then chaining spokes. Use dark brown for high contrast. Block this motif flat before joining for best lacy effect.
Round 6 :
*ch4, sl st into the next sc* rep around to make 6 chain loops (6 chain loops)
Round 7 :
In each ch4 loop work (sl st into loop, ch3, tr, ch3, sl st) to form a delicate spoke; after finishing all spokes you will have 6 spokes radiating from center
Round 8 :
Join yarn in one spoke, *ch5, sl st in next spoke base* rep around to create the first ring of webbing (6 loops)
Round 9 :
*sl st into chain loop, ch7, sl st into next spoke base* rep around to expand web (6 long loops)
Round 10 :
Working into the chain spaces, sc or hdc around each long loop to create a more visible web ring: (hdc, ch2, hdc) into each long loop, sl st to next base to form a ring. Repeat to create 3 concentric rings.
Info :
When forming the concentric rings, keep tension even so the web lays flat. If the web curls, block it to shape or adjust loop size (reduce chain counts) to flatten.
Round 11 :
For finishing ring, work sc around the outer ring space with evenly spaced sl sts into spokes to anchor web (24 sc around outer ring)
Round 12 :
Fasten off and weave in ends. Block flat and pin to shape while damp to keep an even, lacey shape for joining.
— Large Layered Flower (make 10) :
Round 1 :
6 sc in magic ring (6)
Round 3 :
(1 sc, inc) x6 (18)
Round 4 :
Switch to cream yarn. *Ch2, dc3 in same st, ch2, sl st in next st* rep around to form 6 petals (6 petals)
Info :
This creates the first petal round. Petal clusters of dc form a full, ruffled look. Keep stitches fluffy rather than tight so petals lay naturally.
Round 5 :
Round of sc between petals: *sl st into petal base, sc in next ch2 space, sl st* rep around to anchor petals (18)
Round 6 :
Second petal layer: *ch3, tr3, ch3, sl st into next sc between petals* rep around to create larger outer petals (6 large petals)
Round 7 :
Work a round of sc in each st to tidy the back of petals (24)
Info :
Add a small contrasting center: using amber yarn, create a 6-sc small disc in magic ring and sew into center of flower for warm center detail.
Round 8 :
Sew flower centers: Make small 6 sc disc as described, fasten off and sew into flower center with matching thread, pulling slightly to cup center.
Round 9 :
Optional edging round: sc around each petal edge working in BLO if you want a thinner edge and subtle texture (24)
Round 10 :
Fasten off and weave in ends. Block lightly if needed to shape petals.
— Small Flower (make 12) :
Round 1 :
6 sc in magic ring (6)
Round 2 :
ch2, (3 dc, ch2, sl st) into each st around to make 6 tiny petals (6)
Round 3 :
Join amber center: 6 sc in magic ring, sew to center of small flower, fasten off (6)
Info :
These small flowers are delicate fillers between leaves and the spiderweb. Work a tidy finish and trim threads closely for a neat assembly.
Round 4 :
Fasten off and weave ends.
— Leaf (make 30-40 assorted) :
Round 1 :
Ch6, sc in 2nd ch from hook, hdc, dc, tr, sl st in last ch to form pointed leaf shape (5 sts + tip)
Round 2 :
Turn work and on opposite side of foundation ch: sl st into next ch, dc, hdc, sc to base to mirror, fasten off (leaf complete)
Info :
Make leaves in three green shades and vary size by starting with ch5 for small leaves and ch7 for larger leaves. Use BLO on one side to create a slight cupped effect if desired.
Round 3 :
Optional vein detail: With a contrasting green, surface slip stitch a central line from base to tip on each leaf to create realistic veins; secure and weave ends.
— Tiny Rosette / Puff Bud (make many as accents) :
Round 1 :
5 sc in magic ring (5)
Round 2 :
*(ch1, puff in next st) x5 to create a tiny rosette, sl st to join* (5 tiny puffs)
Info :
Puff buds are quick fillers and look great clustered near leaves and between flowers. Work them in pale amber or cream for contrast.
Round 3 :
Fasten off leaving a long tail for sewing; stitch into your motif cluster as you assemble.
— Joining Modules & Border :
Info :
Layout plan: The runner alternates Pumpkin motif + Surround cluster + Spiderweb motif repeating down the center. Each pumpkin is flanked by two small flower clusters and leaf garlands. Arrange motifs on a flat surface before joining.
Round 1 :
Position pumpkin and spiderweb so edges overlap by 4-6 sts. Using brown yarn and a 3.0mm hook, join with sl st through adjacent outer sc loops: sl st through pumpkin edge, sl st into web outer ring, rep around to secure (join using continuous sl st pairings)
Round 2 :
Where flower clusters sit between a pumpkin and web, overlap petals slightly and use a whip stitch with cream yarn to attach petals to both motifs. Make 6-8 sewing stitches per petal cluster to secure.
Round 3 :
Attach leaves around edge: Tuck leaf bases under flower petals and whip stitch leaf base to the underside of two adjacent motifs so leaves appear to sprout from seams. Use small, neat stitches to hide securing yarn inside the layered petals.
Info :
Always pin each piece in place, check symmetry left to right, then hand sew. Pinning helps maintain spacing and ensures the runner remains straight when multiple repeats are joined.
Round 4 :
To create a continuous scalloped outer border: With cream yarn, pick up stitches evenly around the border edge (approx 1 sc per visible petal/edge point). Work *sc 3, ch3, sc 3* along each outer curve to form a delicate scallop edge; adjust ch count to fit spacing evenly (approx 24 scallops along each pumpkin-web pair)
Round 5 :
Work a final round of picot edging on cream scallops for a refined look: *sc, ch3, sl st into first ch to form picot* repeat across scallop ridge, fasten off and weave ends.
Round 6 :
Weave in all tails through several motifs so ends are not visible from the front. Trim and block the entire runner flat if necessary to even tension.
Info :
Blocking tip: Use a damp cloth and pin motifs flat on a blocking board to open spiderweb rings and flatten flower petals without crushing 3D pumpkins. Let dry fully before removing pins.
Round 7 :
Optional surface details: With a tapestry needle, couch a thin strand of darker yarn in curving lines on pumpkin ribs to emphasize segments. Add embroidered seed stitches to flower centers for more texture.
Round 8 :
Final finishing: Steam lightly if needed or press gently from the back through a cloth. Check all joins and reinforce any loose areas with additional small whip stitches.
Info :
If you plan to make the runner longer, repeat the module sequence Pumpkin + Cluster + Web as many times as needed before final border. Keep the join method consistent to maintain rhythm and spacing across the full length.
This autumn table runner brings seasonal charm to your home with rich textures and layered motifs. From plump 3D pumpkins to delicate spiderwebs and cream blossoms, every stitch builds a cozy centerpiece you can be proud of. The modular approach makes sizing flexible and the finishing instructions ensure a polished result. Enjoy making this warm, handmade accent and share your creation with loved ones! 🎃🍂🧶