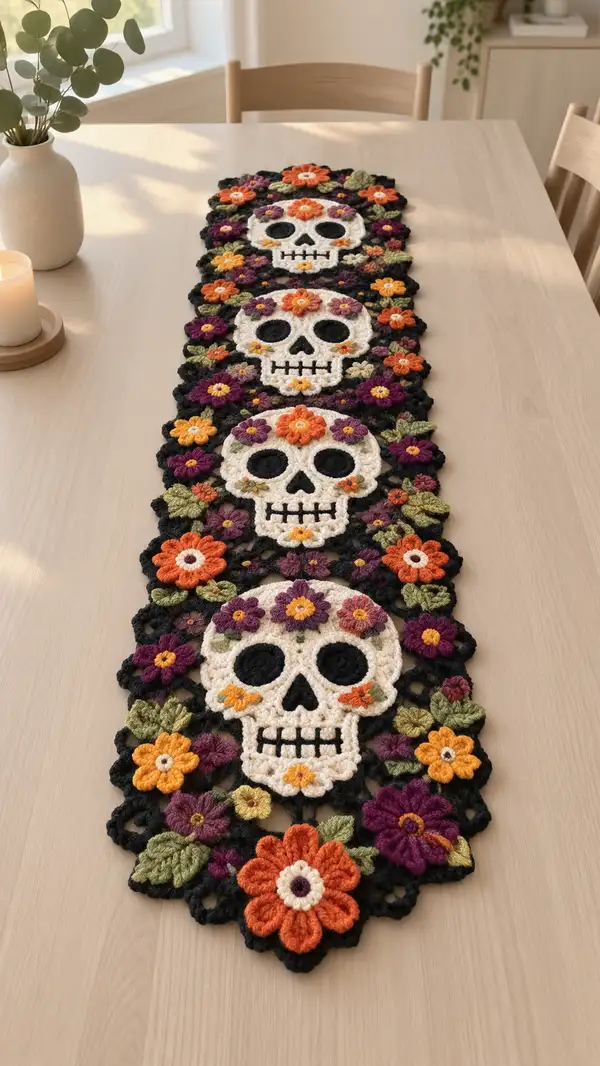
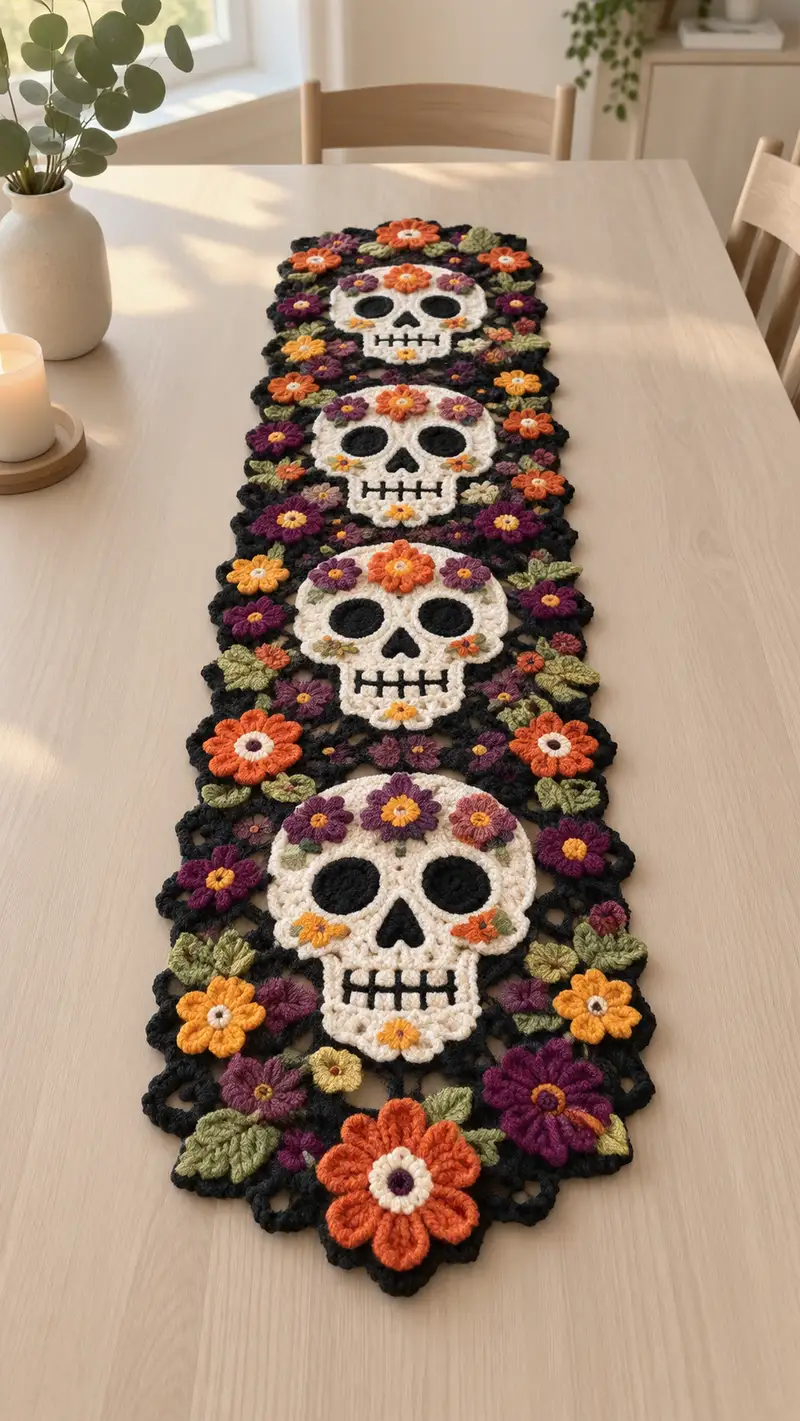
Create a striking Day-of-the-Dead inspired table runner featuring four linked sugar skull motifs with layered 3D flowers and leaves in rich orange, purple, olive and black. This pattern uses motif assembly and layered surface detail to give a dimensional, heirloom-quality centerpiece. The runner lies flat and can be made longer or shorter by adding or subtracting skull motifs and filler flowers.
Progress Tracker
0% Complete
— Skull Motif (Make 4) :
Round 1 :
6 sc in magic ring (6)
Round 3 :
(1 sc, 1 inc) x 6 (18)
Round 4 :
(2 sc, 1 inc) x 6 (24)
Round 5 :
(3 sc, 1 inc) x 6 (30)
Round 6 :
(4 sc, 1 inc) x 6 (36)
Info :
Work in continuous spiral for a smooth flat circle; mark first stitch of each round with a stitch marker to keep track. This is the top-center of the skull.
Round 7 :
(5 sc, 1 inc) x 6 (42)
Round 8 :
(6 sc, 1 inc) x 6 (48)
Round 9 :
1 sc in each st (48)
Info :
Change to off-white/cream now if you began with that color for skull. If you began on cream, continue; otherwise join cream with a sl st and work continuous rounds to avoid visible join lines.
Round 10 :
(7 sc, 1 inc) x 6 (54)
Round 11 :
1 sc in each st (54)
Round 12 :
(2 sc, 1 inc) x 18 (72)
Info :
At this stage the circle will be large enough to shape into an oval skull. We'll create slight oval shaping with directional increases and short rows to define forehead and jaw areas.
Round 13 :
Work 10 sc, (1 sc, 1 inc) x 6, 10 sc, 1 sc in each remaining st (78)
Round 14 :
1 sc in each st (78)
Round 15 :
Work 12 sc, (2 sc, 1 inc) x 6, 12 sc, 1 sc in remainder (84)
Round 16 :
1 sc in each st (84)
Info :
Start mapping facial features now: mark the horizontal center line and vertical center line. Eyes will sit roughly between rounds 12-14 of this motif when counting from the center. Use contrasting yarn (black) for eye sockets later; we will attach black rounds as appliques.
Round 17 :
(6 sc, 1 dec) x 7 (77)
Round 18 :
1 sc in each st (77)
Round 19 :
(5 sc, 1 dec) x 7 (70)
Round 20 :
1 sc in each st (70)
Info :
Begin gentle shaping of the lower skull (cheeks and jaw). Keep rounds loose enough to allow a slight three-dimensional texture; we will not stuff skulls since this is a flat runner motif.
Round 21 :
(4 sc, 1 dec) x 7 (63)
Round 22 :
1 sc in each st (63)
Round 23 :
(3 sc, 1 dec) x 7 (56)
Round 24 :
1 sc in each st (56)
Info :
Now work a short chin extension to create the lower jaw shape: add a small scalloped panel which will later be outlined and joined to jaw teeth detail.
Round 25 :
Ch 1, turn, work 6 sc across next 6 sts (6) — this forms lower jaw base; leave remaining sts unworked for two rounds to create a lower projection
Round 26 :
Work in continuous rounds again around whole motif: 1 sc in each st (including the 6 jaw sts) (56)
Round 27 :
1 sc in each st (56)
Round 28 :
(3 sc, 1 inc) x 8 (64)
Info :
Fasten off cream yarn leaving a tail for sewing and embroidery. Block skull flat to measured dimensions so it matches other skull motifs. We will add facial features as appliques and embroidery in following sections.
— Eye Socket Applique (Make 2 per skull) :
Round 1 :
6 sc in magic ring (6) — use black yarn
Round 3 :
(1 sc, 1 inc) x 6 (18)
Round 4 :
1 sc in each st (18)
Info :
Make two flat black circles for each skull and sew centered onto the cream skull where you marked eyes earlier. Leave a visible border to create deep sockets.
Round 5 :
Optional: (2 sc, 1 inc) x 6 (24) if you want a larger socket and deeper inset (24)
Info :
Sew black socket appliques securely through both layers with matching black yarn using small whip stitches. Hide tails under the socket by weaving into stitches on the wrong side.
— Nose Applique :
Round 1 :
5 sc in magic ring (5) — black yarn for triangular nose
Round 2 :
(1 sc, 1 inc) x 2, 1 sc (7)
Round 3 :
1 sc in each st (7)
Info :
Flatten slightly when sewing onto skull to form a stylized upside-down heart/triangle nose; sew with black yarn and anchor firmly.
— Teeth Embroidery :
Info :
Using black yarn and a yarn needle, embroider the teeth across the chin panel created earlier. Make a horizontal chain of evenly spaced vertical satin stitches for the teeth bar. Then add 6 short vertical stitches crossing the horizontal bar to form tooth divisions. Reference the photo for spacing — the teeth span roughly 12-14 visible stitches across the lower jaw.
Round 1 :
Position embroidery and secure ends behind skull.
Info :
Small flower appliques will be added to skull forehead and cheek areas; make these next to decorate each skull.
— Large Flower (Orange) (Make 6 total around runner, several sizes) :
Round 1 :
6 sc in magic ring (6)
Round 3 :
1 sc in each st (12)
Round 4 :
Ch 2, *work 5 dc in next st, sl st in next st* around to form petals — make 6 petals. Finish with sl st to first petal (36 dc total plus 12 sl st)
Info :
Use puff or cluster stitches for fuller, dimensional petals: instead of 5 dc you may work 5 puff stitches in each petal for extra texture. Fasten off and weave ends. Add a small cream center disc later.
— Medium Flower (Plum) (Make 10) :
Round 1 :
6 sc in magic ring (6)
Round 3 :
Ch 2, *work 4 dc in next st, sl st in next st* around (24 dc) creating 6 petals
Info :
Use a smaller hook (3.25mm) for firmer petals so flowers keep shape. Optionally add a yellow center disk with 6 sc in mr and a sl st join.
— Small Flower (Saffron/Yellow Centers and Tiny Accents) (Make many) :
Round 1 :
6 sc in magic ring (6)
Round 2 :
(1 sc, 1 inc) x 3 (9)
Round 3 :
Ch 2, *3 dc in next st, sl st in next st* around to make 3 tiny petals (9 dc total)
Info :
These mini flowers fill gaps between larger motifs. Make lots and cluster in groups of 2–4 when assembling runner for organic look.
— Leaf Motif (Make many) :
Round 1 :
Ch 7, 1 sc in 2nd ch from hook, 1 hdc in next ch, 3 dc in next ch (center ch), 1 hdc next ch, 1 sc next ch, sl st to base — this makes one leaf (7 worked)
Round 2 :
To make fuller leaf work BLO around center: ch 1, 1 sc in base, *ch 2, 3 dc in next base st* turn and mirror on other side (no additional stitch count)
Info :
Leaves are worked in olive green and sometimes in a lighter green for variation. Make both single and paired leaves; press lightly when blocking to get flat shaping.
— Background Lattice Motif (Join Motif - Black) :
Round 1 :
Ch 6, sl st to form loop, ch 3 (counts as first dc), work 11 dc into loop, sl st to top of ch-3 (12 dc — a 12-dc ring)
Round 2 :
Ch 4 (counts as dc+ch1), *dc in next st, ch 1* around, sl st to top of ch-4 (12 dc, 12 ch-1 sps)
Round 3 :
In each ch-1 sp work (sc, ch 3, sc) to create 12 loops around (36 sts effectively)
Info :
These small join motifs create the mesh that spaces and connects skulls and flowers. Make many and block each to uniform size so joins are consistent.
Round 4 :
Join motifs together by slip-stitching loops together: position motifs so skull motifs and flowers fit into open loops. Use black yarn for consistent negative space.
— Assembly & Joining Motifs :
Info :
Lay out motifs on blocking mat in final runner orientation: skulls centered down the runner with alternating large flowers and clusters filling outer edges. Pin everything before stitching.
Round 1 :
Start joining from one skull edge: with black yarn, align lattice loops and sl st through both loops (approximately 6–8 sl sts per skull edge depending on size) to secure each join
Round 2 :
Where flowers overlap skull edge, sew with matching flower yarn through both layers using ladder stitch to hide joins; add a few backstitches to secure centers.
Info :
Work slowly: tacking one little area at a time and checking both sides ensures the runner lays flat and motifs don't twist. Add leaves last between flowers for organic coverage.
— Outer Edge Decorative Border :
Round 1 :
With black yarn, join at one end, ch 1, sc evenly around runner edge working (3 sc in open points to round corners) — work evenly approx. 240 sc around full runner depending on final size
Round 2 :
*Ch 3, skip 2 sc, sl st in next sc* repeat to create scalloped chain-lace around edge (approx. 80 scallops)
Info :
Optional: make final round of picots on scallop tips: (sl st, ch 3, sl st) to create raised dots resembling beads. This gives a finished look and reinforces the border.
— Finishing Details & Embroidery :
Info :
Use a yarn needle and black yarn to reinforce all joins by catching two or three intermediate loops under the lattice to hide tails. Embroider additional small dots and flower centers using yellow yarn and small French-knot like wraps (1–2 wraps around needle pulled through) to give pop centers.
Round 1 :
For cheek flowers attach tiny saffron flower with a few stitches and add 1–2 leaf motifs sewn at slight angles to look natural.
Info :
Weave all loose ends into the back of motifs and trim close. For gifts, consider attaching a small fabric backing or light interfacing for shipping protection.
— Blocking & Care :
Info :
Pin the entire runner onto foam to exact dimensions and lightly steam or wet-block to open stitches. Allow to dry completely before removing pins. Hand wash gently and lay flat to dry; avoid tumble drying to preserve shape.
Assembly Instructions
- Lay out all skull motifs, flowers and leaves on a blocking mat in the final runner configuration. Arrange skulls evenly along center and balance flower clusters on sides before pinning.
- Pin each motif at 4–6 key points to hold position, then join adjacent lattice loops first using black yarn and slip stitches, matching loop counts so the runner stays flat.
- Sew larger flowers to skull forehead and outer edges using ladder stitch through front loops only, hiding the yarn tail under petals; add small stitches to secure centers.
- Attach leaves between flowers after main joins are complete. Tuck leaf stems under floral clusters and sew through both layers with small whipstitches to anchor securely.
- Reinforce teeth embroidery and any small motifs with additional stitches from the wrong side so the right side remains neat. Double-check that all appliques are flat and secure.
- Work the outer edge in black: sc evenly around the runner, then add the ch-3 scalloped round for a tidy, decorative finish. Weave in ends at this stage for a clean border.
Important Notes
- 💡Use stitch markers consistently at the beginning of each motif round to avoid counting errors and maintain proper shaping
- 💡Block every motif flat before assembly to ensure even joins and consistent spacing across the runner
- 💡When joining motifs, pin and test the layout first — it's far easier to re-pin than to resew
- 💡Work puff or cluster petals on a slightly smaller hook for more pronounced texture and a firmer petal edge
- 💡Weave ends neatly and avoid long floating tails across motif faces; tuck them under petals or behind the lattice
- 💡For a more durable runner, consider reinforcing joins with a second pass of slip-stitch or hidden whip-stitch on the wrong side
- 💡Keep a row counter or notebook to track rounds and motif counts, especially useful when making a longer or shorter runner
- 💡If you want a softer, less lacy runner, use thicker yarn and a larger hook but be prepared to re-balance motif sizes
Finishing this runner is so satisfying — every skull, flower and leaf becomes part of a vibrant, tactile story on your table. The combination of contrasty black lattice and jewel-toned florals gives the piece both drama and warmth. It’s a beautiful seasonal display or year-round centerpiece that invites compliments and conversation. 🧶💐
What is the finished size of this runner?
Using worsted weight yarn and the specified hooks, the finished runner with four skulls measures approximately 36–40 inches long by 10–12 inches wide. Adding or removing skull motifs will change the length proportionally.
Can I use different yarn weights for this pattern?
Yes. You may use DK or aran yarn, but adjust your hook accordingly. Thicker yarn will make larger motifs and a denser runner; thinner yarn requires smaller hooks and more motifs to reach the same length.
Do I need to sew motifs or can I slip-stitch join them?
Both methods are valid. Slip-stitch joins in black create a seamless lattice look; sewing with ladder or whip-stitch gives stronger structural joins. For heirloom durability, use both: slip-stitch for appearance, then reinforce with hidden sewing stitches on the wrong side.
How much yarn will I need overall?
Estimate roughly 1.0–1.2kg total worsted weight yarn across all colors for a four-skull runner: 250–300g black, 200–250g cream, and the rest in accents (orange, purple, green, yellow). Exact amounts depend on personal tension and optional extra flowers.
Can I machine wash this runner?
Hand washing and flat drying is recommended to keep motifs from stretching and to preserve the three-dimensional petals. If machine washing, use a delicates bag and the gentlest cycle, then reshape flat to dry immediately.
How do I make the motifs lay flat without curling?
Proper blocking is essential. Pin motifs flat to the exact dimensions and steam or wet-block them while pinned. Check tension on petals and leaves; if they curl, try a slightly larger or smaller hook to balance stitch density.
Is this safe for families with small children?
If you plan to use the runner around small children, avoid attaching small beads or buttons for flower centers and ensure all applique stitches are secure. Alternatively, embroider centers with yarn for no small parts.
Can I change the color scheme easily?
Absolutely. The modular nature of the motifs makes recoloring straightforward. Try autumn tones, pastel palettes for spring, or monochrome for a subtler runner.
Stay in the Loop!
Get notified when we release new free crochet patterns and join our crafting community!