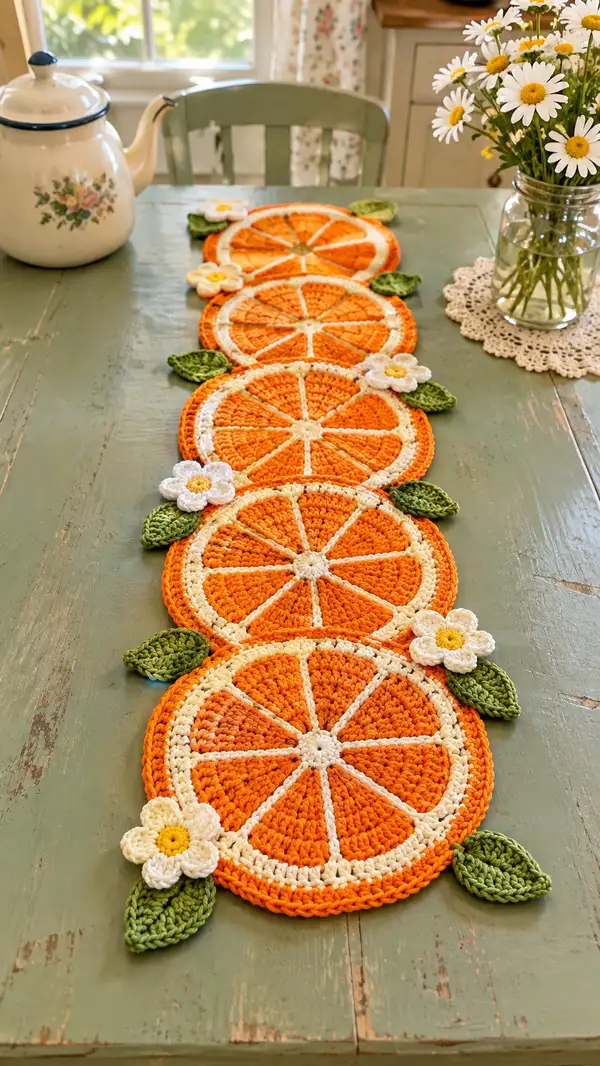
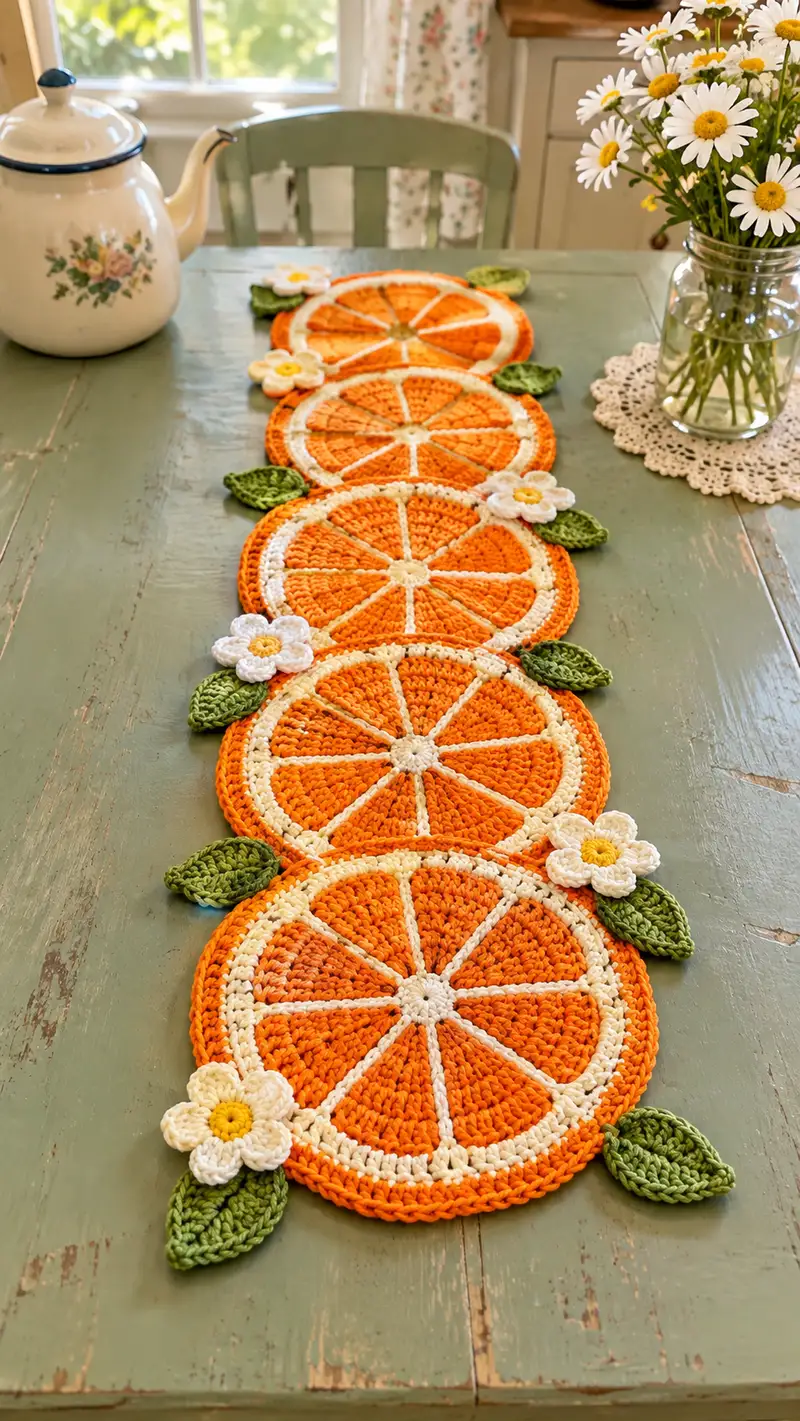
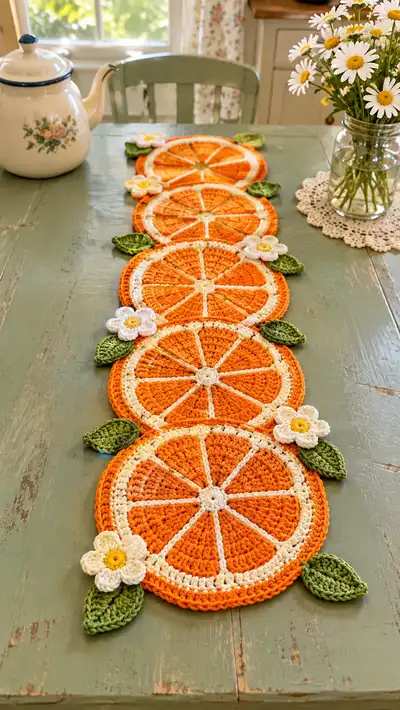
Bright, cheerful orange-slice motifs joined into a charming table runner with leafy accents and small white blossom appliques. Each citrus round shows a creamy rind, raised segment spokes, and a textured orange flesh for a realistic vintage-inspired look. Perfect for a sunny kitchen centerpiece or seasonal decor—arranged in a linear runner with leaves and flowers tucked between slices for a natural, handcrafted finish.
Progress Tracker
0% Complete
— Notes & Gauge :
Info :
Gauge is not critical for motifs but a consistent finished slice should measure approximately 6.25" to 7" (16-18 cm) across using 4.0mm hook and worsted cotton. Each completed motif uses approximately 35-45g orange, 10-15g cream, and small amounts of accent colors. Work tightly enough that the motifs stay flat and stitching for surface spokes remains visible.
Info :
Final runner length will depend on number of slices. The sample pictured uses five full orange-slices arranged end to end with slight overlaps, yielding a runner about 36-40" long. You can make fewer or more slices as desired.
— Orange Slice Motif (make 5 or desired number) :
Round 1 :
With Bright Orange, mr, 6 sc into ring (6)
Round 3 :
(1 sc, inc) x 6 (18)
Round 4 :
(2 sc, inc) x 6 (24)
Round 5 :
(3 sc, inc) x 6 (30)
Round 6 :
(4 sc, inc) x 6 (36)
Round 7 :
(5 sc, inc) x 6 (42)
Round 8 :
(6 sc, inc) x 6 (48)
Info :
Check diameter now — you should have a small but flat circle. Use a marker to note the first stitch of the round and count 48 stitches. These 48 outer stitches are used below to space the eight wedge spokes (every 6 stitches).
Round 9 :
1 hdc in each st around (48)
Round 10 :
1 hdc in each st around (48)
Round 11 :
1 hdc in each st around (48)
Info :
These even hdc rounds add slight height so the flesh of the orange feels full. If you prefer a flatter motif, work single crochet instead of hdc on these rounds and keep the tension slightly looser.
Round 12 :
Switch to Light Orange (optional for subtle shading). 1 hdc in each st around (48)
Round 13 :
1 hdc in each st around (48)
Round 14 :
1 hdc in each st around (48)
Info :
Placement :
We will create a narrow inner cream ring and then the radial spokes. At this stage count your outer round: you still have 48 sts which divides evenly into eight wedges (48 / 8 = 6). Mark every 6th stitch on the outermost round with a removable marker to guide spoke placement.
Round 15 :
Change to Cream. 1 sc in each st BLO around (48)
Round 16 :
1 sc in each st around (48)
Info :
The BLO round in cream creates a shallow ridge that reads as the thin inner rind. Work the next step to define the spokes using surface crochet for clean raised white lines.
Round 17 :
Surface Crochet Spokes — join Cream at center with a long tail for sewing/surface work. Using surface slip stitch (surface crochet), create eight evenly spaced spokes from the central area to the flesh edge: mark eight anchor points every 6 stitches on the outermost round; for each spoke, bring the yarn up at center, surface sl st outwards along the top of the rounds to the outer ring, making approximately 8 slip stitches to reach the rim. Fasten off and weave in tail. (This is surface work, not increasing stitches on the round.)
Info :
Surface slip-stitch technique: hold the motif with the right side facing you. Insert hook under the top loop(s) of the next stitch on the surface and pull up a loop of the working yarn, then sl st back into the same top loop; continue stepping outward stitch by stitch until you reach the outer ring. Maintain consistent tension so lines are smooth and slightly raised but not pulling the fabric.
Round 18 :
Change to Cream at outer ring: 1 sc in each st around (48)
Round 19 :
Change to Bright Orange. Join in any cream-round stitch, (6 sc, inc) x 6 (54)
Round 20 :
1 sc in each st around (54)
Round 21 :
(8 sc, inc) x 6 (60)
Round 22 :
1 sc in each st around (60)
Info :
Rounds 19-22 add a slightly larger orange border so the slice has a full rim and overlaps nicely with neighboring slices. Recount stitches after increases to ensure even spacing for scallop border in the next rounds.
Round 23 :
Change to Cream. 1 sc in each st around (60)
Round 24 :
In Cream, *sc in next 4 sts, picot (ch3, sl st in first ch), sc in next st* repeat across to create delicate scallop highlights (maintain 60 st rhythm — picots sit between groups)
Round 25 :
Change to Bright Orange. Work Reverse Single Crochet (crab stitch) around entire outer edge (60) for a firm, textured finish
Info :
Fasten off and weave in ends. Block motifs flat on a mat (light steam or wet blocking) to make edges even. Make as many identical motifs as you need (sample uses five slices). Number of rounds per motif: 1-25 above. Repeat for each slice.
— Radial Spoke Alternative Method (optional raised spokes) :
Info :
If you prefer fully crocheted raised spokes (rather than surface slip stitch), after Round 16 use a contrasting Cream and work 8 'spoke ribs' by creating short front-post lines: insert hook into the center stitch, ch1, sc in same stitch, then working in rows toward rim make 6-8 sc in FLO only down the round, anchoring each spoke at the rim with a sl st. This method requires planning and stitch markers for even spacing; the above surface slip-stitch is simpler and gives the same visual effect.
— Small Leaf Applique (make approx 10-12) :
Round 1 :
With Medium Leaf Green, ch8 (or 9 for slightly larger leaf), sc in 2nd ch from hook, hdc in next, dc in next 2, hdc in next, sc in next (this forms one side) — do NOT turn; continue along opposite side of chain working: sc, hdc, dc, dc, hdc, sc in the returning chain, sl st to first sc to join. (Count will vary with chain length; leaf should form a pointed oval.)
Round 2 :
Ch1, sc in same st, (sc, hdc, dc) across center to tip to add height: sc on the back edge mirroring the first side, finish with sl st in first sc. Tighten starting loop to close base. (Approx 12-16 sts total around leaf)
Round 3 :
Work 1 sc in each st around the leaf edge to neaten (maintains approx 12-16 sc around). Fasten off leaving long tail for sewing.
Info :
For a ribbed leaf look, after finishing the edge, use contrasting green to work 1 row of hdc in BLO only; this creates a raised center vein. Alternatively embroider a vein with cream or darker green yarn using a yarn needle.
Info :
Make sufficient leaves to tuck between the slices in the runner layout. Pin leaves to runner before sewing to check placement. Leaves made with slightly smaller hook (3.5mm) will lie flatter and look more delicate.
— Flower Applique (make 5-8 small flowers) :
Round 1 :
With Bright Yellow, mr, 6 sc into ring (6)
Round 2 :
Join White in any stitch, *ch2, (hdc, dc, hdc) into same stitch to form petal, sl st into next stitch* repeat total 5 times to create 5 petals (work petals into 5 of the 6 center stitches: skip one stitch between petals for spacing). Fasten off and weave in center ends.
Info :
Adjust petal size by changing ch length and the combination of hdc/dc; for plumper petals use ch3 and (dc, tr, dc) as the petal cluster. Block petals lightly to give them shape before sewing onto runner.
— Decorative Leaf (alternative larger leaf, make 6-8) :
Round 1 :
With Medium Leaf Green, ch10, sc in 2nd ch from hook, hdc, dc, dc, tr, dc, dc, hdc, sc across chain, NOW work back along opposite side with sc, hdc, dc, dc, tr, dc, dc, hdc, sc. Sl st to join. (Approximately 18-20 sts around leaf)
Round 2 :
Ch1, 1 sc in each st around to neaten (approx 18-20 sc). Fasten off leaving long tail for sewing.
Info :
These larger decorative leaves are good to place between motifs and under flowers for visual balance. Make sure to block them flat before attaching.
— Scalloped Joining & Edge Accent (Runner Edge and motif overlap) :
Round 1 :
Arrange motifs face up in the layout you want (sample uses five circles overlapped approx 1" - 1.25" so cream rings touch and slices look continuous). Pin motifs in place.
Info :
Join motifs using a whip stitch, mattress stitch, or slip-stitch crochet join. For an invisible seam, use a yarn needle and whip stitch through the cream rounds where they overlap; for a decorative seam, slip-stitch join through the outermost cream/orange rounds so a tight join forms.
Round 3 :
To slip-stitch join: place motifs right side up overlapping approx 6-8 outer stitches. With cream yarn and 4.0mm hook, insert hook through outer stitch of motif A then through corresponding outer stitch of motif B, sl st to join; continue along overlap area. Repeat for each adjacent motif joining along approx 6-12 stitches depending on desired overlap.
Round 4 :
After joining each pair, reinforce underside with matching yarn using a hidden whip stitch: weave through several rounds to secure join so motifs sit flat and do not pull apart.
Info :
When joining more than two motifs in a linear arrangement, see that alignment of spokes (white radial lines) looks consistent down the runner. Rotate or flip motifs slightly before stitching to ensure visual harmony.
Round 6 :
Edge Row — Once all motifs are joined, work one round of sc around the entire runner edge in Bright Orange to give a uniform outer border. Work into each stitch along the outermost row, and work evenly where motifs overlap to avoid bulky spots (count stitches and add 1 sc occasionally to keep edge flat).
Round 7 :
Decorative Outer Row — In Cream, *sc in next 3, picot (ch3 sl st in first ch)* repeat around the whole outer edge following the curve. Fasten off and weave in ends.
Round 8 :
Optional: Work Reverse Single Crochet (crab stitch) in Bright Orange along outermost edge for a final textured trim. This gives a stitched, raised border that resists curling.
Info :
Before finalizing the edge, pin on leaves and flowers to determine best placement. Flowers are typically placed where slices overlap and leaves tucked slightly under petals to create a natural cluster.
— Assembly & Placement :
Round 1 :
Layout — Place first completed slice at one end of your runner work surface. Place the next slice overlapping the previous by about 1"-1.25" or by one cream ring width so cream rims touch evenly. Continue until all slices are aligned in a pleasing linear path. Adjust tilts slightly for an organic feel.
Round 2 :
Sewing Leaves & Flowers — Using the long tails left on appliques, place a small flower (white petals, yellow center) near each overlap on the top edge where two slices meet. Position one or two small leaves underneath each flower. Sew in place using invisible stitches through the underside of the petals/leaf base into the cream rim of the slice, making sure the seam is secure.
Round 3 :
Secure Joins — On the underside of the runner, weave the connecting yarn across several rounds through both motifs (cream ring area) to prevent separation. Do not over-tighten the stitches; aim for a flat join with no puckering. Trim and weave in ends on the underside for a clean finish.
Round 4 :
Final Blocking — After assembly, pin the runner flat on a blocking board and steam lightly or wet block to even edges and set the shape. Allow to dry fully before placing on a table. This also helps the scalloped border relax into shape and look professional.
Round 5 :
Optional Embellishments — Add a few French knots in yellow to flower centers for texture, or embroider subtle veins on leaves with darker green to add dimension. Small beads may be added to flower centers if the runner is for decorative adult-only display (avoid beads for items used around children).
Info :
Care: Wash gently by hand in cool water with mild soap. Lay flat to dry. Cotton may soften and relax after first wash; re-block if necessary.
This citrus table runner brightens any table with a handmade, cottage-inspired look. Each orange slice motif stacks into a cheerful row, finished with leaves and tiny white blossoms for a natural touch. The modular design lets you create any length — from a short centerpiece runner to a long hall table accent. Enjoy the relaxing rhythm of repeating rounds, and savor the warm satisfaction of seeing all the little elements come together. 🧡🍊🌿