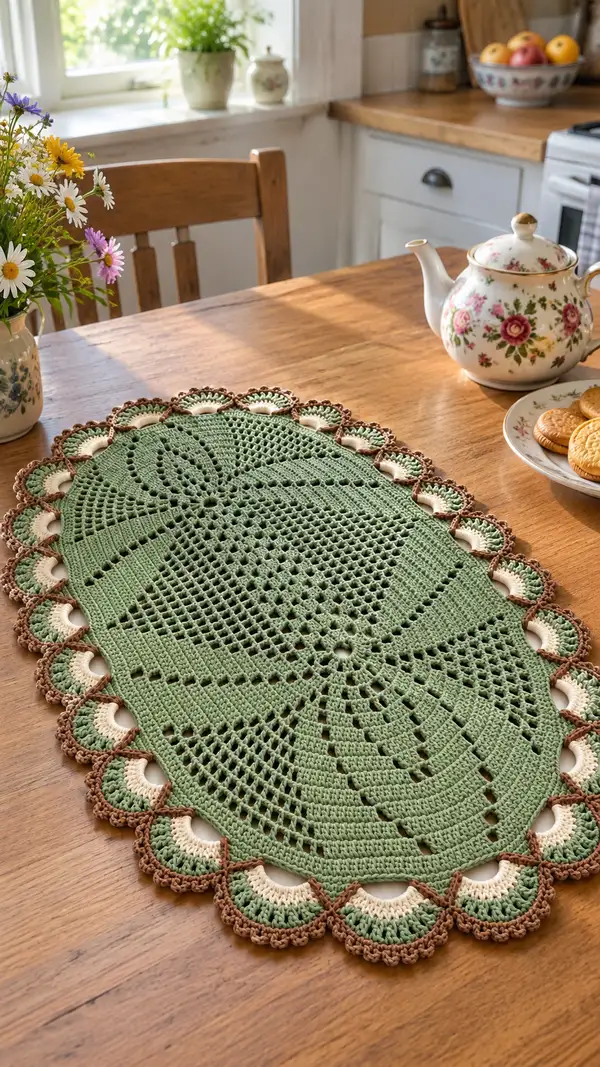
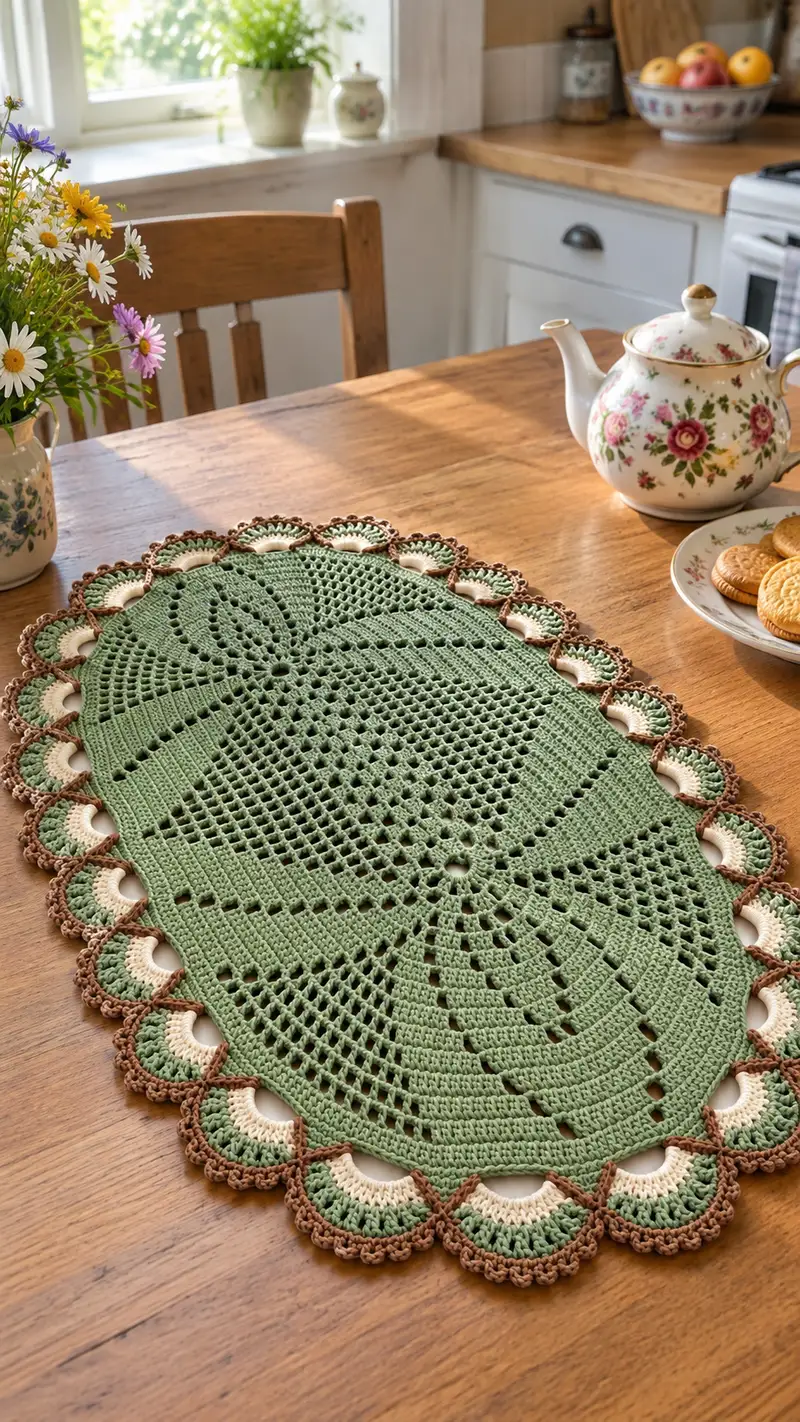
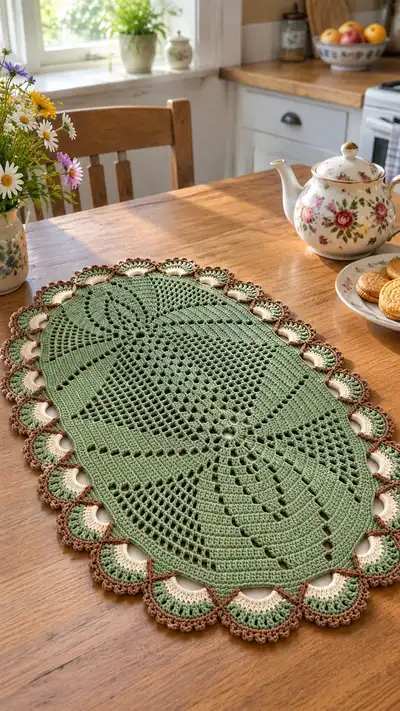
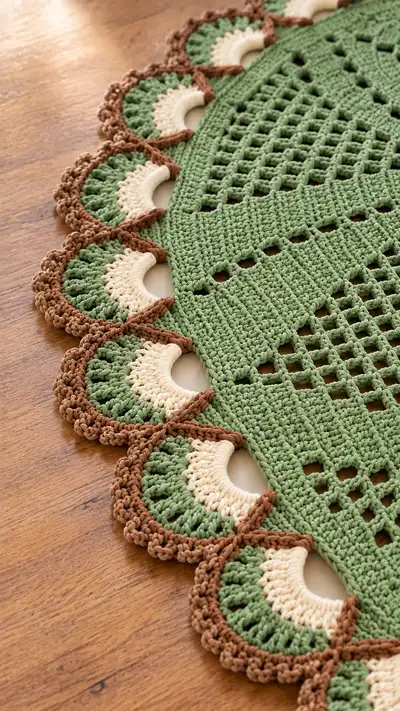
A vintage-inspired oval table runner featuring an openwork medallion center, radiating leaf motifs and a triple-color scalloped edging. Worked in sturdy cotton for a crisp, flat finish, it uses a combination of solid rounds and filet mesh to create elegant negative-space lines. The scalloped border with cream and brown shells adds a handcrafted, heirloom touch perfect for dining tables, sideboards or as a centerpiece accent.
Progress Tracker
0% Complete
— Materials & Gauge :
Info :
Gauge is not critical for this flat decorative runner but aim for a fabric where 10 sc = 4 cm with 4.5mm hook using worsted cotton. Finished runner in photos measures approximately 42 cm x 70 cm. Adjust hook size if you require a firmer or softer fabric.
— Abbreviations & Notes :
Info :
Work in continuous rounds for the center medallion until instructed otherwise. Use stitch markers to mark the start of each round and the four quadrant points every several rounds to maintain a symmetrical oval. When changing colors, fasten off and weave tails neatly or carry yarn behind stitches where comfortable.
— Center Medallion :
Round 1 :
6 sc in magic ring (6)
Round 3 :
(1 sc, 1 inc) x 6 (18)
Round 4 :
(2 sc, 1 inc) x 6 (24)
Round 5 :
(3 sc, 1 inc) x 6 (30)
Round 6 :
(4 sc, 1 inc) x 6 (36)
Info :
Place four temporary markers after Round 6 every 9 stitches to mark the four cardinal points; these will be adjusted as your oval develops. These markers help for later placement of increases that elongate the medallion.
Round 7 :
(5 sc, 1 inc) x 6 (42)
Round 8 :
(6 sc, 1 inc) x 6 (48)
Round 9 :
(7 sc, 1 inc) x 6 (54)
Info :
Remove temporary markers and reposition to divide the round into 8 equal segments (72/8 would apply later). For now, simply keep markers at four equal quadrants: front, back, left and right to guide elongation.
Round 10 :
(8 sc, 1 inc) x 6 (60)
Round 11 :
(9 sc, 1 inc) x 6 (66)
Round 12 :
(10 sc, 1 inc) x 6 (72)
Round 13-14 :
1 sc in each st (72)
Info :
These two even rounds solidify the circular center and prepare for the formation of the eight leaf rays. Keep tension even; if your fabric cups, go down one hook size for later rounds.
Round 15 :
*sc 9, ch 4, skip 2 sts, sc 9 in next 2 sts (forming a small eyelet for the ray base)* rep around tying each eyelet to subsequent groups so you have 8 eyelet spaces evenly spaced (72)
Round 16 :
Work into each ch-4 eyelet: (sc, hdc, 3 dc, hdc, sc) to form a shallow petal; sc between each petal in the solid rounds. Maintain 72 counts by working 9 sc-equivalents between petals (72)
Info :
Each petal is made by increasing height in that local cluster; counts are maintained by using a sequence of tall stitches and returning to single crochets between. Keep petal heights consistent by tension control.
Round 17 :
1 sc in each st around, working into the top of petal clusters as if they were single stitch equivalents so total remains 72 (72)
Round 18 :
*(sc 6, inc) x 1 to expand slightly between petals, sc 3 over petal top* repeat 8 times (80)
Round 19 :
1 sc in each st around (80)
Round 20 :
*(sc 9, ch 3, skip 2) to create shallow mesh lanes at diagonal points, sc 9 across petal regions* repeat 8 times keeping count to 80 (80)
Info :
Introduce small chain spaces to start the open filet mesh that will evolve into diamond panels. Keep markers at four primary points to guide oval shaping for later increases on ends.
Round 21 :
1 sc in each st (80)
Round 22 :
*(sc 10, inc) x 1 then across the petal area sc 4 to maintain shape* repeat 8 times (88)
Round 23 :
1 sc in each st around (88)
Round 24 :
*Begin filet mesh band: sc 6, (ch 3, skip 3, dc in next st) to build vertical bars, sc to next petal center* repeat around. Maintain 88 by treating ch-3 loops as one stitch equivalent when counting (88)
Info :
When working filet, remember that a ch-3 space counts visually as an opened bar — counts used here assume ch-3 + skip equal the same stitch footprint as a dc. If you prefer square mesh, substitute ch-3 for ch-4 as needed for your yarn thickness.
— Radiating Leaf Panels (elongating to oval) :
Round 25 :
Increase on four long-axis points to begin oval shape: starting at each quadrant marker work (sc 10, inc, sc 10) on front and back axes and even rounds on sides so total increases by 8 sts (96)
Round 26 :
1 sc in each st (96)
Round 27 :
*(sc 11, inc) x 2 at main axes to elongate the oval, sc across mesh on side axes* repeat across 4 quadrants adding 8 total stitches again (104)
Info :
Add increases symmetrically only at the front and back cardinal points every 2-3 rounds until your oval reaches the desired length. These controlled increases create the elongated leaf panels seen in the photo.
Round 28 :
1 sc in each st (104)
Round 29 :
Filet band: Work a round of dc and ch-3 mesh across the long runs to create visible diamond openings: (dc 5, ch 3, skip 3) across long axis, sc across shorter arcs to maintain count (104)
Round 30 :
1 sc in each st (104)
Round 31 :
Repeat increase row for long axis: work (sc 12, inc) twice at each long axis point and sc in between to add 8 stitches total (112)
Round 32 :
1 sc in each st (112)
Info :
Check your runner against your work surface: the center should be developing a long oval roughly proportional to the space in the photo. Stop adding axis increases once the oval is approximately the target length (photo runner approx 70cm long at this stage).
Round 33 :
Filet mesh band: On long arcs work (dc 6, ch 3, skip 3) to grow mesh, sc across arcs. Maintain 112 treating mesh loops as equivalents (112)
Round 34 :
1 sc in each st (112)
Round 35 :
Gradual even round to flatten: 1 sc in each st BLO for a slightly defined ridge (112)
Info :
Working BLO here creates a subtle ridge that frames the leaf motifs and helps the runner lie flat. This is an important shaping detail to mimic the photographed texture.
Round 36 :
1 sc in each st (112)
Round 37 :
Work a decorative starpoint: *sc 5, ch 5, skip 2, sc 5 across each mesh wedge* repeat around creating shallow open arcs - counts kept at 112 by balancing chains with scs (112)
Round 38 :
1 sc in each st (112)
Round 39 :
Increase subtly on long ends only: at each long-axis center work (sc 12, inc, sc 12) to add 4 sts each end (120)
Info :
These occasional increases on the long axis create the classic oval elongation while side arcs remain smoother; keep increases identical front and back for symmetry.
Round 40-42 :
1 sc in each st (120)
Round 43 :
Filet band widening: (dc 7, ch 3, skip 3) across long runs and sc across shorter arcs to maintain 120 (120)
Round 44 :
1 sc in each st (120)
Round 45 :
Work a decorative wedge rib: *(sc 14, (hdc, dc, tr) in next st for a raised wedge) repeat across each long quadrant* keeping count to 120 by balancing cluster counts (120)
Info :
Raised wedge clusters add the layered leaf effect visible in the design. Execute these clusters consistently so the ribs line up with the mesh openings.
— Oval Extension & Main Field :
Round 46 :
1 sc in each st (120)
Round 47 :
Begin large field: *(sc 16, ch 3, skip 3) to form broad mesh bands across long runs; sc to fill between mesh groups* repeat (120)
Round 48 :
1 sc in each st (120)
Round 49 :
*(sc 15, inc) across arcs to lightly expand the working field in one full rotation adding 8 sts (128)
Round 50 :
1 sc in each st (128)
Round 51-52 :
Repeat a pair of rounds: filet mesh row followed by solid sc round to create alternating texture (128)
Info :
Alternate mesh and solid rows until the flat oval measures close to desired width (photo runner approx 42 cm wide). This alternation creates the diamond pattern and solid bands seen across the center.
Round 53-60 :
Continue alternating: odd rounds filet (dc sequences and ch-3), even rounds 1 sc in each st. Monitor width and stop once you reach the intended size; these rounds assume expansion to 136 sts by Round 60 via occasional increases (approx 136)
Round 61 :
Work 1 sc in each st BLO to create a defined frame around the central field (136)
Info :
The back loop round here functions as a visual border before the outer scallops are formed; it gives a platform for later shells to sit against neatly.
— Preparing Shell Repeats (edge shaping) :
Round 62 :
Even round: 1 sc in each st (136)
Round 63 :
Mark shell anchor points: working around, place a marker every 8 sts (136/8 = 17 anchors approx). If you want more or fewer scallops, adjust spacing equally around the oval; in the photo there are around 18-20 scallops—choose 18 anchors for our counts: place markers every 7-8 sts so you will have 18 anchor positions.
Info :
For the photographed effect we will assume 18 shells. Recalculate anchors to 18: 136/18 = 7.55 so place anchors alternating 7 and 8 sts apart around the oval for even distribution. Use temporary stitch markers at each anchor point.
Round 64 :
1 sc in each st (136)
Round 65 :
At each anchor marker work: sc in anchor, ch 6, sl st back to anchor (creating a deep loop to be worked into for shell inner cream). Between anchors sc across to next anchor. Keep total 136 by treating the ch-6 loop as decorative and working scs only on base stitches (136)
Info :
This round creates deep arches along the edge which, once filled, become the cream semicircular shells seen in the photos. These will later be filled with several rounds worked into the ch-6 loop.
— Filling Shells (inner cream semicircles) :
Round 66 :
Change color to cream. Work into each ch-6 loop: join with sc, ch 2 (counts as first hdc), work (hdc 3, dc 4, hdc 3) across loop, join back to base with sl st. Each shell should be semi-oval and worked in same number of stitches so base count remains 136 by not adding new base stitches (136)
Round 67 :
1 sc in each base stitch between shells (136)
Info :
If your ch-6 loops vary slightly because of tension, work evenly into the loop space distributing the shell stitches so each cream shell looks uniform. Use the same number of stitches per shell throughout.
Round 68 :
Change to sage green. Around each cream shell work: sl st to side of cream shell, ch 2, (dc 6) evenly worked into the cream shell outer edge to create a green scalloping foundation, sl st back to base. Continue across all shells keeping base count (136)
Round 69 :
1 sc in each base stitch (136)
Round 70 :
Even round: 1 sc in each st BLO to stabilize scallop bases (136)
Info :
These two rounds build the layered shell effect: cream inner semicircle, green fan foundation, and then the outer brown edge applied to the very edge. Keep the green fans consistent by placing the DCs evenly across the curved cream edge; use stitch counts per shell if needed to keep shells identical.
— Brown Outer Scallop & Picot Trim :
Round 71 :
Change to coffee brown. Work around each green fan: join at fan base, ch 2, (dc 8) across fan arc, then ch 3, sl st into top of adjacent fan center to create a small bridge. Repeat for each of the 18 shells; base stitch count remains 136 as outer work is anchored to the fans (136)
Round 72 :
1 sc in each base stitch to tidy anchors (136)
Round 73 :
Outer picot trim: working in the top of each dc cluster across the brown arc do *(sc, ch 3, sl st in 3rd ch) then sc in next 3 dc* repeat across each shell to form scalloped picots. This is decorative and should not alter base count (136)
Info :
The small ch-3 picot loops give the scallop the delicate textured edge visible in the close-up. If picots look too large for your yarn, reduce to ch-2 or use a smaller hook for this round to keep the fine detail crisp.
Round 74 :
Slip stitch evenly around the entire outer edge into the bases of the brown arcs to close gaps and create a neat finish; total base stitches remain 136 (136)
Round 75 :
Fasten off yarn and weave in ends securely. If desired, do a final round of single crochet in sage green to blend any visible color joins by crocheting through the back loops across the outermost stitches (136)
Info :
Fasten off and weave in all tails. Wet-block the runner: pin to measurements on blocking mat and gently steam or wet-spray then shape shells and center petals so the runner lays flat. Allow to dry completely.
— Optional Decorative Rows (if you want to enlarge) :
Round 76 :
For extra length or width, repeat a 4-round motif: Round A: 1 sc in each st, Round B: filet mesh with ch-3, Round C: 1 sc in each st, Round D: gentle increase at long axis +8 sts. Repeat until desired size is reached; recalculate shell anchors once final base count determined.
Info :
This optional section allows you to scale the pattern proportionally. Every time you add bulk to the base you will need to redistribute the 18 shell anchors or add more shells while maintaining symmetry.
— Finishing & Blocking :
Info :
Trim all ends closely after securely weaving them in. Pin the runner to your blocking surface stretching gently so each scallop opens to a smooth semicircle. If using spray starch, apply lightly once blocked and allow to dry for a crisp finish. Avoid excessive heat on cotton; use steam carefully.
Info :
For maintenance, hand wash or machine-wash on gentle with cool water and reshape while damp. Re-block if needed to restore scallop definition.
You did it — a charming vintage-style oval runner ready to dress your table! The combination of solid rounds, airy mesh and layered scallops creates an heirloom feel that's both practical and decorative. Pin and block each scallop carefully and watch how the runner transforms into a crisply defined centerpiece. 🧶 Lay it beneath a teapot or centerpiece and enjoy the warm, handmade touch it brings to your home. 🌿